

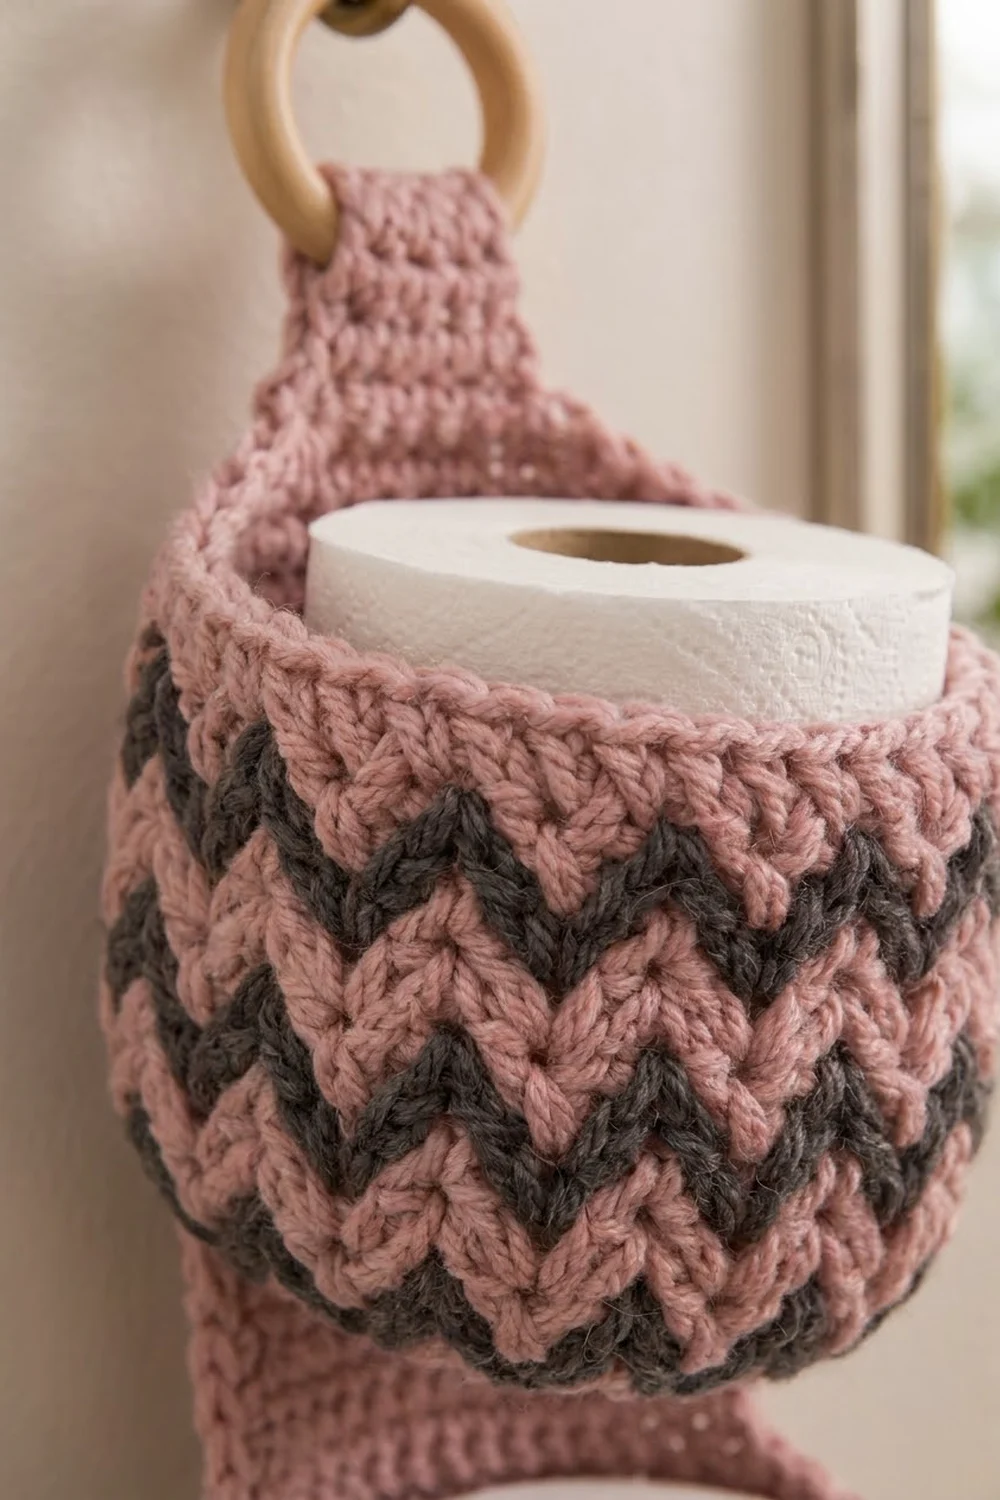
This hanging toilet paper holder keeps three spare rolls tidy and in sight. Three round pockets stack down a narrow pink back strip, and the top tab wraps around a wooden ring so the holder hangs from any towel hook or wall knob.
The colors are a soft dusty rose and a deep charcoal gray. Each pocket has a band of sharp charcoal zigzags worked in tapestry single crochet, with a solid pink base and rim. The dense fabric holds the pockets’ shape and makes the holder look a little like woven basketry.
This pattern uses US crochet terms. The finished holder is about 18.5 in (47.0 cm) long from the bottom edge to the top of the ring fold. Each pocket is about 4.75 in (12.1 cm) across and 4 in (10.2 cm) deep, and the back strip is 3.5 in (8.9 cm) wide after its border.
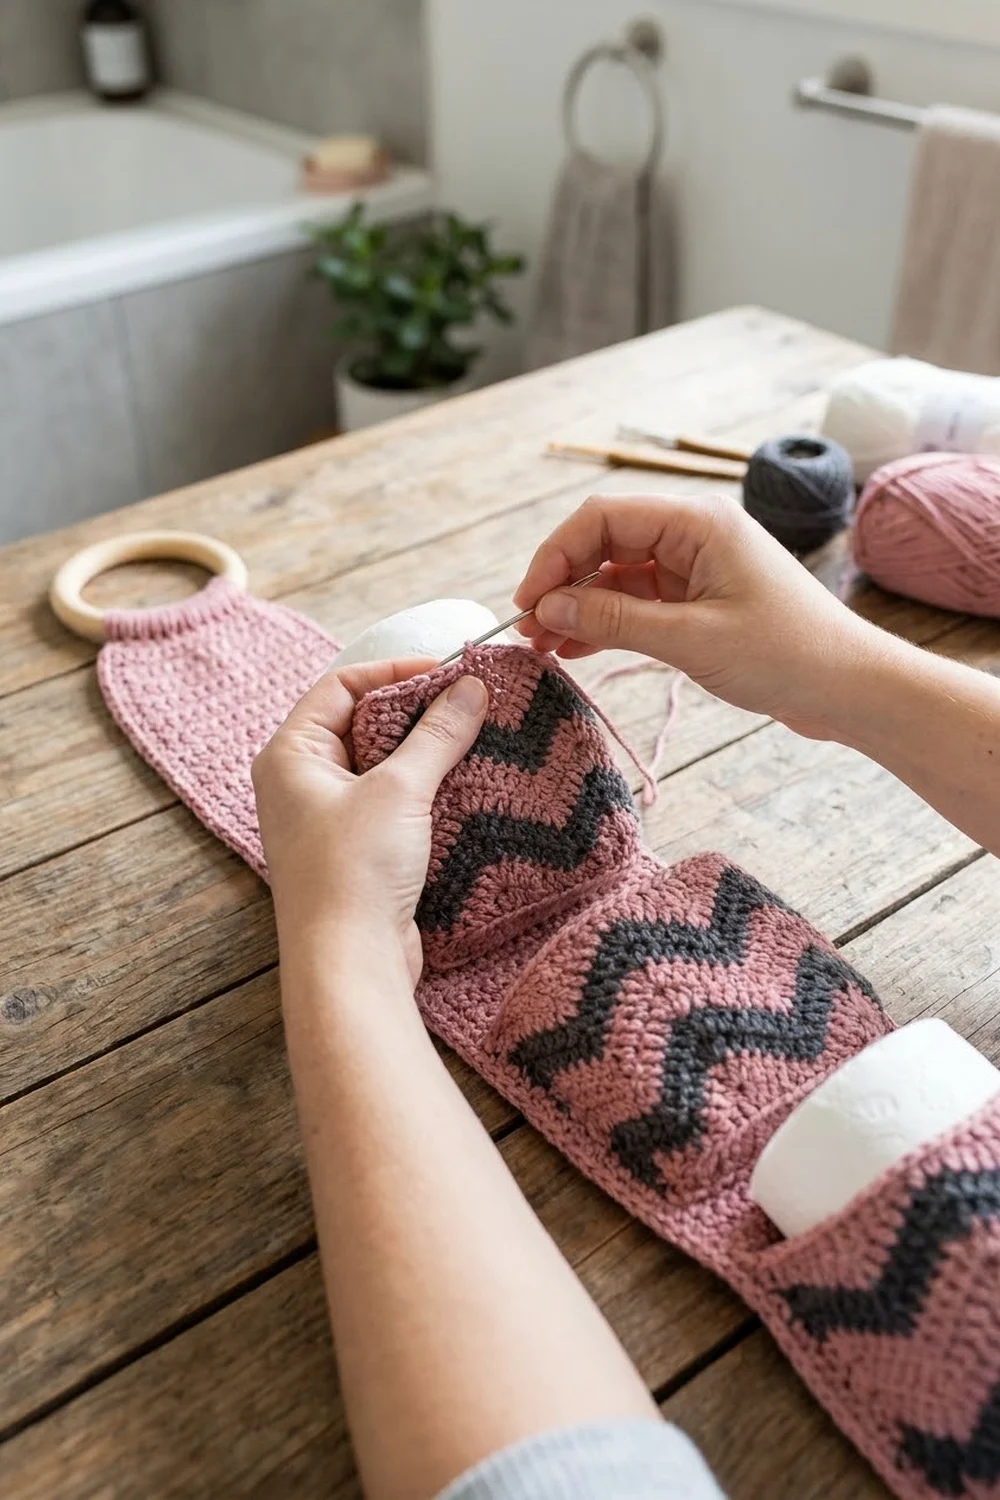
You’ll make three pockets in joined rounds, starting with a flat circle base and then working straight up with tapestry colorwork. Next you’ll work the back strip in rows and shape a tab at the top. Finally you’ll add a border round to the strip, sew on the pockets row by row, and wrap the tab around the ring.
Finished Size and Construction
- Finished size: 18.5 in (47.0 cm) long × 4.75 in (12.1 cm) deep at the pockets
- Skill level: Intermediate (tapestry crochet, working in rounds and rows)
- Terminology: US
- Yarn weight: Worsted (#4)
- Hook: 5.0 mm (H-8)
- Number of pieces: 4 (3 pockets, 1 back strip)
- Layout: 1 column of 3 pockets stacked on the strip
- Pocket size: 4.75 in (12.1 cm) diameter × 4 in (10.2 cm) deep
- Back strip before border: 3 in (7.6 cm) wide × 16 in (40.6 cm) long, plus the tab
- Back strip after border: 3.5 in (8.9 cm) wide × 16.5 in (41.9 cm) long, plus the tab
- Border depth: 0.25 in (0.6 cm), one round
Materials
Choose a firm worsted-weight acrylic or cotton blend that holds its shape. Pure cotton works but makes heavier pockets that are less springy. Avoid fuzzy yarn because the halo blurs the zigzag lines.
- Main color (MC), dusty rose pink: 220 g / 440 m (481 yd)
- Contrast color (CC), charcoal gray: 40 g / 80 m (87 yd)
Tools:
– 5.0 mm (H-8) crochet hook
– Wooden ring, 2 in (5.1 cm) inner diameter
– Tapestry needle
– Locking stitch markers (at least 6)
– Scissors and measuring tape
– Rust-proof pins for blocking
The quantities include a margin of about 15% for your gauge swatch and for differences in tension.
Abbreviations (US Terms)
- ch: chain
- sc: single crochet
- sc2tog: single crochet 2 together
- inc: 2 sc in the same stitch
- sl st: slip stitch
- BLO: back loop only
- MR: magic ring
- st(s): stitch(es)
- rnd(s): round(s)
- MC / CC: main color / contrast color
Tapestry sc (special stitch): Hold the unused color along the top of the previous round and work each sc over it, so the strand is hidden inside the stitches. To change color, work the last sc before the change until 2 loops are on the hook, then yarn over with the new color and pull through. Keep the carried strand relaxed, never tight.
Gauge and Checkpoints
Gauge: 16 sc and 17 rows/rnds = 4 in (10.2 cm) in single crochet, both flat and in tapestry rounds.
Make one full pocket first. It works as your gauge swatch, and it tells you whether a roll will fit.
- After Rnd 10 (base): the flat circle measures 4.75 in (12.1 cm) across.
- After Rnd 16 (first chevron repeat): the tube lies flat at 7.5 in (19.1 cm) wide, which is half of the 15 in (38.1 cm) circumference.
- After Rnd 27: the wall is 4 in (10.2 cm) tall from the ridge to the rim.
- Back strip after Row 17: 3 in (7.6 cm) wide × 4 in (10.2 cm) long.
If the pocket is too big, go down 0.5 mm in hook size. If it’s too small, go up 0.5 mm. Don’t add or remove stitches, because the chevron needs a stitch count that’s a multiple of 6. Do a test fit after Rnd 16: a roll up to 4.5 in (11.4 cm) wide should slide in snugly.
Pocket (Make 3)
Work in joined rounds. At the start of each round, ch 1 (doesn’t count as a stitch) and sc in the same stitch as the join. Join each round with a sl st to the first sc.
Base
With MC:
- Rnd 1: 6 sc in MR. (6 sts)
- Rnd 2: Inc in each st around. (12 sts)
- Rnd 3: Sc 1, inc 6 times. (18 sts)
- Rnd 4: Sc 2, inc 6 times. (24 sts)
- Rnd 5: Sc 3, inc 6 times. (30 sts)
- Rnd 6: Sc 4, inc 6 times. (36 sts)
- Rnd 7: Sc 5, inc 6 times. (42 sts)
- Rnd 8: Sc 6, inc 6 times. (48 sts)
- Rnd 9: Sc 7, inc 6 times. (54 sts)
- Rnd 10: Sc 8, inc 6 times. (60 sts)
Checkpoint: the base is flat and 4.75 in (12.1 cm) across.
Wall
- Rnd 11: Sc BLO in each st around. (60 sts) This leaves a ridge where the wall turns upward.
- Rnd 12: Sc in each st around. (60 sts) In the final sc, change to CC on the last yarn over so the next round starts in CC. Then switch back to MC as the chart below calls for, carrying CC from here on.
Chevron Band
Each chevron repeat is 6 stitches wide and 4 rounds tall. Each round has 10 repeats.
- Rnd 13: 2 MC, 2 CC, 2 MC 10 times. (60 sts: 40 MC, 20 CC)
- Rnd 14: 1 MC, 1 CC, 2 MC, 1 CC, 1 MC 10 times. (60 sts: 40 MC, 20 CC)
- Rnd 15: 1 CC, 4 MC, 1 CC 10 times. (60 sts: 40 MC, 20 CC)
- Rnd 16: With MC, sc in each st around, carrying CC. (60 sts)
These four rounds form a thin V that opens upward. The 2 CC stitches in Rnd 13 are the bottom point. Each round the arms move 1 stitch outward, and they meet the next repeat’s arms to form a 2-stitch peak in Rnd 15. The pink round on top separates one zigzag line from the next.
- Rnds 17–20: Repeat Rnds 13–16. (60 sts each)
- Rnds 21–24: Repeat Rnds 13–16. (60 sts each) Cut CC after Rnd 23 and work Rnd 24 in MC only.
Checkpoint: you have three charcoal zigzag lines, and the wall is about 3.3 in (8.4 cm) tall.
Rim
- Rnds 25–27: With MC, sc in each st around. (60 sts each)
Fasten off after Rnd 27, leaving a 30 in (76.2 cm) tail for sewing. Weave in the starting tail.
Checkpoint: the wall measures 4 in (10.2 cm) from the ridge to the rim, which is 17 rounds (Rnds 11–27) at 4.25 rounds per inch.
Back Strip
With MC, ch 13.
- Row 1: Sc in the 2nd ch from the hook and in each ch across, turn. (12 sts)
- Rows 2–68: Ch 1 (doesn’t count), sc in each st across, turn. (12 sts each)
Checkpoint: the strip is 3 in (7.6 cm) wide × 16 in (40.6 cm) long, which is 68 rows at 4.25 rows per inch.
Tab
- Row 69: Ch 1, sc2tog, sc 8, sc2tog, turn. (10 sts)
- Row 70: Ch 1, sc2tog, sc 6, sc2tog, turn. (8 sts)
- Row 71: Ch 1, sc2tog, sc 4, sc2tog, turn. (6 sts)
- Rows 72–87: Ch 1, sc in each st across, turn. (6 sts each)
The tab is 1.5 in (3.8 cm) wide and about 4.5 in (11.4 cm) long, counting Rows 69–87. Don’t fasten off; go straight on to the border.
Make All Pieces
- Pockets: 3, each using about 94 m (103 yd) of MC and 18 m (20 yd) of CC
- Back strip: 1, using about 87 m (95 yd) of MC
Pocket positions on the back strip (row numbers are strip rows):
[ tab, Rows 69–87 ]  wraps the ring
[ bare strip     ]   Rows 60–68  (2.1 in / 5.3 cm)
[ POCKET 3       ]   Rows 43–59
[ gap            ]   Rows 39–42
[ POCKET 2       ]   Rows 22–38
[ gap            ]   Rows 18–21
[ POCKET 1       ]   Rows 1–17
Check: 17 + 4 + 17 + 4 + 17 + 9 = 68 rows. ✓
Border (Back Strip)
Border gauge: the same as the body, with 1 sc per stitch and 1 sc per row end. Single crochet rows are about as tall as a stitch is wide, so 1 sc per row end lies flat.
Border Rnd: With the tab’s last row facing, ch 1.
- Tab top: Work 3 sc in the first st, sc in the next 4 sts, and 3 sc in the last st. This gives 6 + 4 = 10 sc (6 worked one per stitch, plus 2 extra in each corner stitch).
- First long side: Work 1 sc in each row end down the side: 16 tab rows, 3 shaping rows and 68 body rows, for 87 sc.
- Bottom: Working into the other side of the starting chain, work 3 sc in the first ch, sc in the next 10 ch, and 3 sc in the last ch. This gives 12 + 4 = 16 sc.
- Second long side: Work 1 sc in each row end up the side, for 87 sc.
Sl st to the first sc and fasten off. (200 sts: 10 + 87 + 16 + 87)
Why the math works: each straight edge gets exactly one sc per stitch or row end, so the edges neither ruffle nor pull in. The only extra stitches are the 2 added in each of the 4 corners (8 total), which let the corners turn flat. The strip grows by 1 stitch on each side: 12 + 2 = 14 stitches, or 3.5 in (8.9 cm). The length grows by about 0.25 in (0.6 cm) at each end, so the body measures 16.5 in (41.9 cm).
Joining
Method: whipstitch with MC, using each pocket’s long tail.
- Flatten a pocket with its starting join at the center back. Mark 7 stitches on each side of the join, which makes a 14-stitch span 3.5 in (8.9 cm) wide. This matches the bordered strip’s width.
- Lay the strip right side up. Place the pocket’s ridge (Rnd 11) along the strip row listed in the layout chart, for example Row 1 for Pocket 1.
- Bottom seam: whipstitch the 14 marked stitches of Rnd 11 to the strip’s 14 stitches across that row, one to one.
- Side seams: sew up each side of the 14-stitch span, matching one pocket round to one strip row. Rnds 11–27 are 17 rounds and line up with 17 strip rows (for example, Rows 1–17). Because the pocket and strip have the same 17-per-4-in (10.2 cm) row gauge, the seam stays straight without easing.
- Leave the rim free so the roll slides in easily. Repeat the steps for Pockets 2 and 3.
Tension: pull each stitch snug enough to close the gap, but not so tight that it puckers the strip. The strip should still lie flat.
Size checkpoint: pocket rims sit at Rows 17, 38 and 59, with about 1 in (2.5 cm) of bare strip showing between pockets.
Ring: pass the tab from front to back through the wooden ring. Fold back 2 in (5.1 cm) and whipstitch the tab’s end to the back of the strip, just above Row 68. The tab now shows about 2.5 in (6.4 cm) above the strip.
Final Blocking
- Spritz the whole holder lightly with water until it’s damp, not soaked.
- Put a roll in each pocket to set the round shape.
- Lay the holder flat with the pockets facing up and the strip straight.
- Pin the strip edges to 3.5 in (8.9 cm) wide.
- Check that the body is 16.5 in (41.9 cm) long and the gaps are even.
- Let it dry completely, then remove the rolls and pins.
Final Quality-Control Checklist
- Each pocket has 60 stitches in every wall round.
- Each pocket has three complete zigzag lines with crisp 2-stitch points.
- No charcoal shows through the pink rounds.
- Each pocket is 4 in (10.2 cm) deep.
- The strip is 3.5 in (8.9 cm) wide after the border, with 200 border stitches.
- All three pockets are centered on the strip with matching side seams.
- The tab is folded and secured, and the ring hangs straight.
- All ends are woven in.
Troubleshooting
- The zigzags lean diagonally: you’re working in a spiral. Join every round and start each one in the same stitch.
- Charcoal peeks through: tighten your tension slightly and keep the carried strand at the back of the stitch.
- The pocket puckers or narrows: the carried strand is too tight. Stretch the round gently before each color change.
- The base cups or ruffles: for cupping, go up a hook size. For ruffles, check that Rnd 10 has exactly 60 stitches.
- The strip bows under the rolls: sew the side seams through both layers all the way up to the rim round.
- The roll won’t fit: make a looser pocket with a 5.5 mm hook rather than adding stitches.
Care
Hand wash in cool water and lay flat to dry, reshaping the pockets around rolls. Don’t wring or tumble dry.
Final Notes
The sizes all build on each other. A gauge of 16 stitches and 17 rows to 4 in (10.2 cm) gives a 60-stitch base 4.75 in (12.1 cm) across. Seventeen wall rounds make a pocket 4 in (10.2 cm) deep. Twelve strip stitches make a 3 in (7.6 cm) strip, which becomes 3.5 in (8.9 cm) after the border. That matches each pocket’s 14-stitch sewn span. Sixty-eight rows, laid out as 17 + 4 + 17 + 4 + 17 + 9, place the pockets evenly, and the tab and ring bring the total to about 18.5 in (47.0 cm). If you check each stage, the finished holder will hang straight and hold three rolls neatly.
Happy crocheting!