

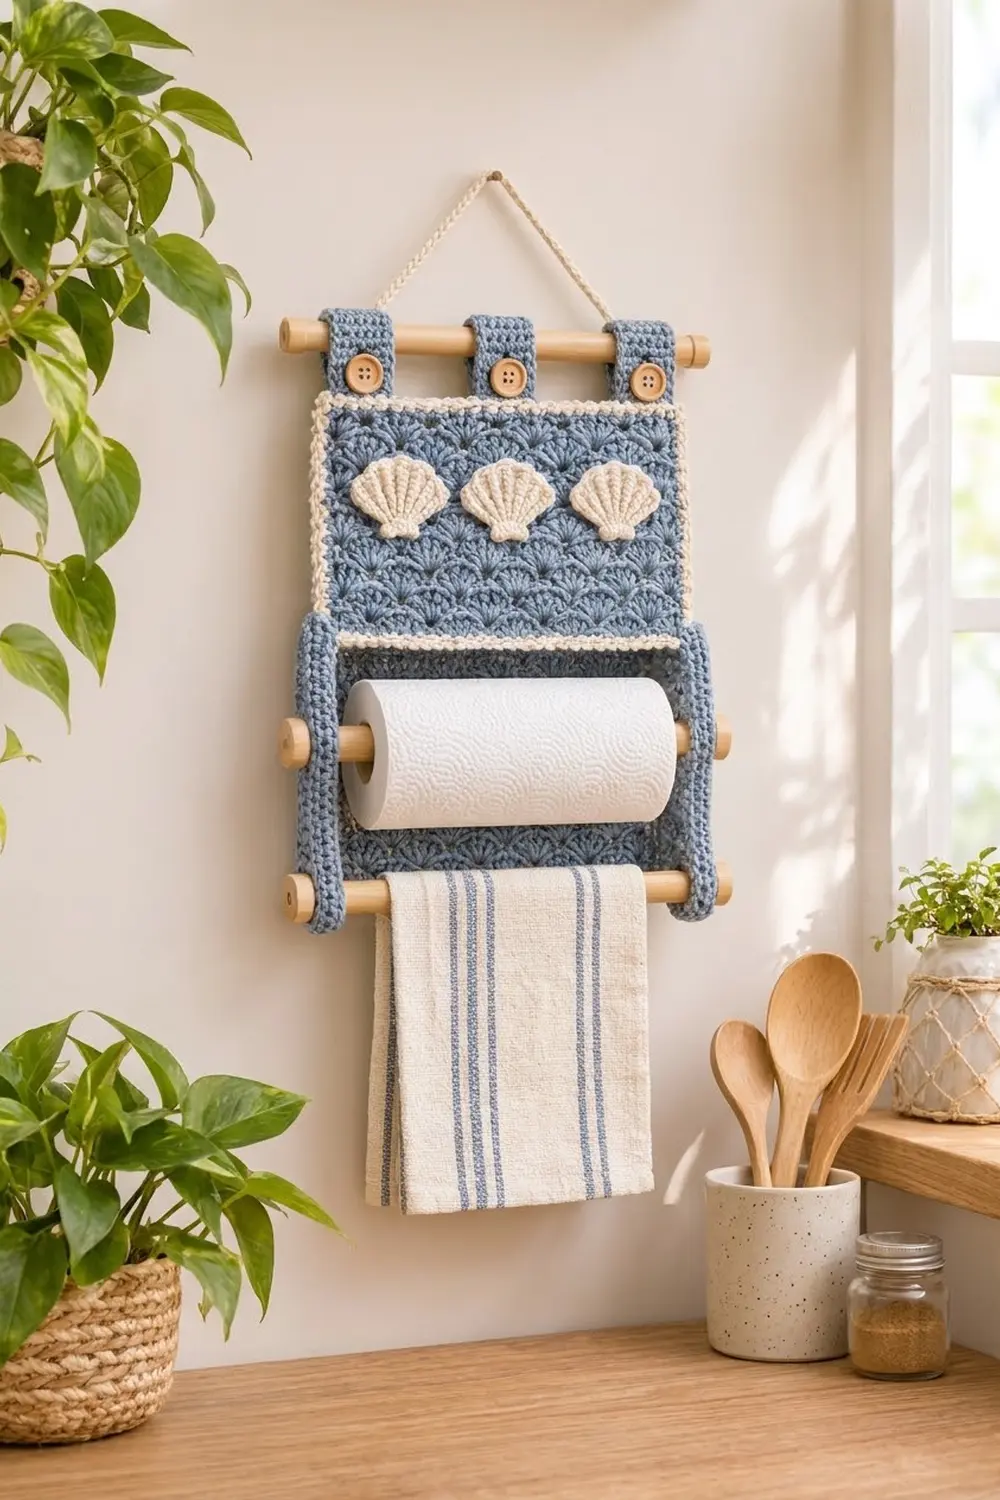
This wall-hanging paper towel holder gives a kitchen a calm coastal feel. The back panel is worked in a dusty blue shell stitch that looks like rows of tiny fans, and a crisp cream border frames it. Three raised cream seashells sit across the top, and three button tabs hang the whole piece from a wooden dowel.
Two blue side arms stand out from the lower half of the panel. One dowel between them holds a standard paper towel roll, and a second, lower dowel holds a dish towel. A cream surface line marks where the arms begin.
The pattern uses US crochet terms. The finished back panel measures 12 in (30.5 cm) wide and 16 in (40.6 cm) tall. Each arm sticks out 3.75 in (9.5 cm) from the panel.
You crochet the shell-stitch panel in rows and add a two-round border. Then you make the arms, tabs, shells and hanging cord separately. Everything is sewn together at the end, and the dowels slide through holes built into the arms.
Finished Size and Construction
- Finished panel size: 12 in x 16 in (30.5 cm x 40.6 cm)
- Skill level: Intermediate
- Terminology: US crochet terms
- Yarn weight: Worsted (#4) cotton
- Hook: 5.0 mm (H-8)
- Number of pieces: 10 crocheted parts (1 panel, 2 arms, 3 tabs, 3 shells, 1 cord)
- Layout: panel at the back; arms on the lower 8 in (20.3 cm) of each side; tabs along the top; shells in a row across the upper panel
- Arm size: 3.75 in x 8 in (9.5 cm x 20.3 cm), folded double
- Panel size before border: 11 in x 15 in (27.9 cm x 38.1 cm)
- Border depth: 0.5 in (1.3 cm) on every side
Materials
Choose a smooth worsted-weight yarn in 100% cotton or a cotton blend. Cotton holds its shape on the wall and washes well. Avoid fuzzy yarns, because they hide the shell texture.
- Dusty blue (main color): 200 g, about 380 m
- Cream (contrast color): 60 g, about 115 m
These amounts include extra for your gauge swatch and for differences between brands.
Tools and supplies:
– 5.0 mm (H-8) crochet hook
– Tapestry needle
– 3 wooden dowels, 0.5 in (1.3 cm) thick and 14 in (35.6 cm) long
– 6 round wooden end caps or large beads, plus wood glue
– 3 wooden buttons, 0.75 in (1.9 cm)
– Stitch markers
– Rust-proof pins and a blocking mat
Abbreviations (US Terms)
- ch: chain
- sl st: slip stitch
- sc: single crochet
- hdc: half double crochet
- dc: double crochet
- BLO: back loop only
- bpdc: back post double crochet
- sk: skip
- st(s): stitch(es)
- RS / WS: right side / wrong side
Shell (panel): 5 dc in the same stitch.
Scallop (appliqué edge): (hdc, dc, hdc) in the same stitch.
Gauge and Checkpoints
Make a swatch before you start the panel. Ch 26 and work the panel shell pattern for 8 rows.
- Shell stitch gauge: 25 sts (4 shell repeats) = 5 in (12.7 cm); 2 rows = 1 in (2.5 cm)
- Single crochet gauge (arms, tabs, border): 16 sc and 18 rows = 4 in (10.2 cm)
Checkpoints:
– Panel after Row 1: 11 in (27.9 cm) wide
– Panel after Row 15: 7.5 in (19.1 cm) tall
– Panel after Row 30: 11 in x 15 in (27.9 cm x 38.1 cm)
– Panel after the border: 12 in x 16 in (30.5 cm x 40.6 cm)
– Each arm strip before folding: 3.75 in x 16 in (9.5 cm x 40.6 cm)
If your swatch is too big, go down one hook size. If it is too small, go up one size. Panel width matters most, because the space between the arms has to fit an 11 in (27.9 cm) paper towel roll.
Back Panel (Dusty Blue)
This is a classic shell pattern. Odd rows have 9 full shells. Even rows have a half shell at each end with 8 full shells between them.
Foundation: Ch 56.
Row 1 (RS): Sc in 2nd ch from hook, sk 2 ch, shell in next ch, sk 2 ch, sc in next ch; repeat from * 8 more times. Turn. (55 sts: 10 sc, 9 shells)*
Row 2: Ch 3 (counts as dc), 2 dc in first sc, sc in center dc of next shell, shell in next sc; repeat from * 7 more times, sc in center dc of last shell, 3 dc in last sc. Turn. (55 sts: 2 half shells, 8 shells, 9 sc)*
Row 3: Ch 1, sc in first dc, shell in next sc, sc in center dc of next shell; repeat from * 7 more times, shell in last sc, sc in top of turning ch. Turn. (55 sts: 10 sc, 9 shells)*
Rows 4–30: Repeat Rows 2 and 3, ending with a Row 2. (30 rows, 55 sts in every row)
Fasten off. The panel measures 11 in x 15 in (27.9 cm x 38.1 cm).
Side Arms (Make 2, Dusty Blue)
Each arm is one long strip folded in half, so it is double thick and firm. Working in the back loop gives the ridges.
Foundation: Ch 16.
Row 1: Sc in 2nd ch from hook and in each ch across. Turn. (15 sc) Put a marker in the first stitch of this row. That edge is the seam edge, which you will sew to the panel later.
Rows 2–72: Ch 1, sc BLO in each st across. Turn. (15 sc)
On Rows 4, 27, 46 and 69, make a dowel hole:
– If the seam edge is at the start of the row: sc BLO in 8 sts, ch 3, sk 3, sc BLO in 4 sts.
– If the seam edge is at the end of the row: sc BLO in 4 sts, ch 3, sk 3, sc BLO in 8 sts.
On the row after each hole row, work 3 sc into the ch-3 space. (15 sc)
Each hole covers stitches 9 to 11 counted from the seam edge. That puts its center about 2.4 in (6.1 cm) out from the panel.
Fasten off and leave a 30 in (76.2 cm) tail. The strip measures 3.75 in x 16 in (9.5 cm x 40.6 cm).
Fold: Fold the strip between Rows 36 and 37. The holes on Rows 27 and 46 line up 2 in (5.1 cm) below the fold for the paper towel dowel. The holes on Rows 4 and 69 line up about 0.75 in (1.9 cm) above the bottom for the towel dowel. Each pair lines up because Row k always lands on Row 73 − k when folded.
Use the tail to whipstitch the two layers together along the bottom and the front edge. Leave the seam edge open for now.
Hanging Tabs (Make 3, Dusty Blue)
Foundation: Ch 6.
Row 1: Sc in 2nd ch from hook and in each ch across. Turn. (5 sc)
Rows 2–22: Ch 1, sc in each st across. Turn. (5 sc)
Fasten off and leave a long tail. Each tab measures 1.25 in x 4.9 in (3.2 cm x 12.4 cm). Sew a button to the center of each tab, 1.5 in (3.8 cm) from one end. That end becomes the front.
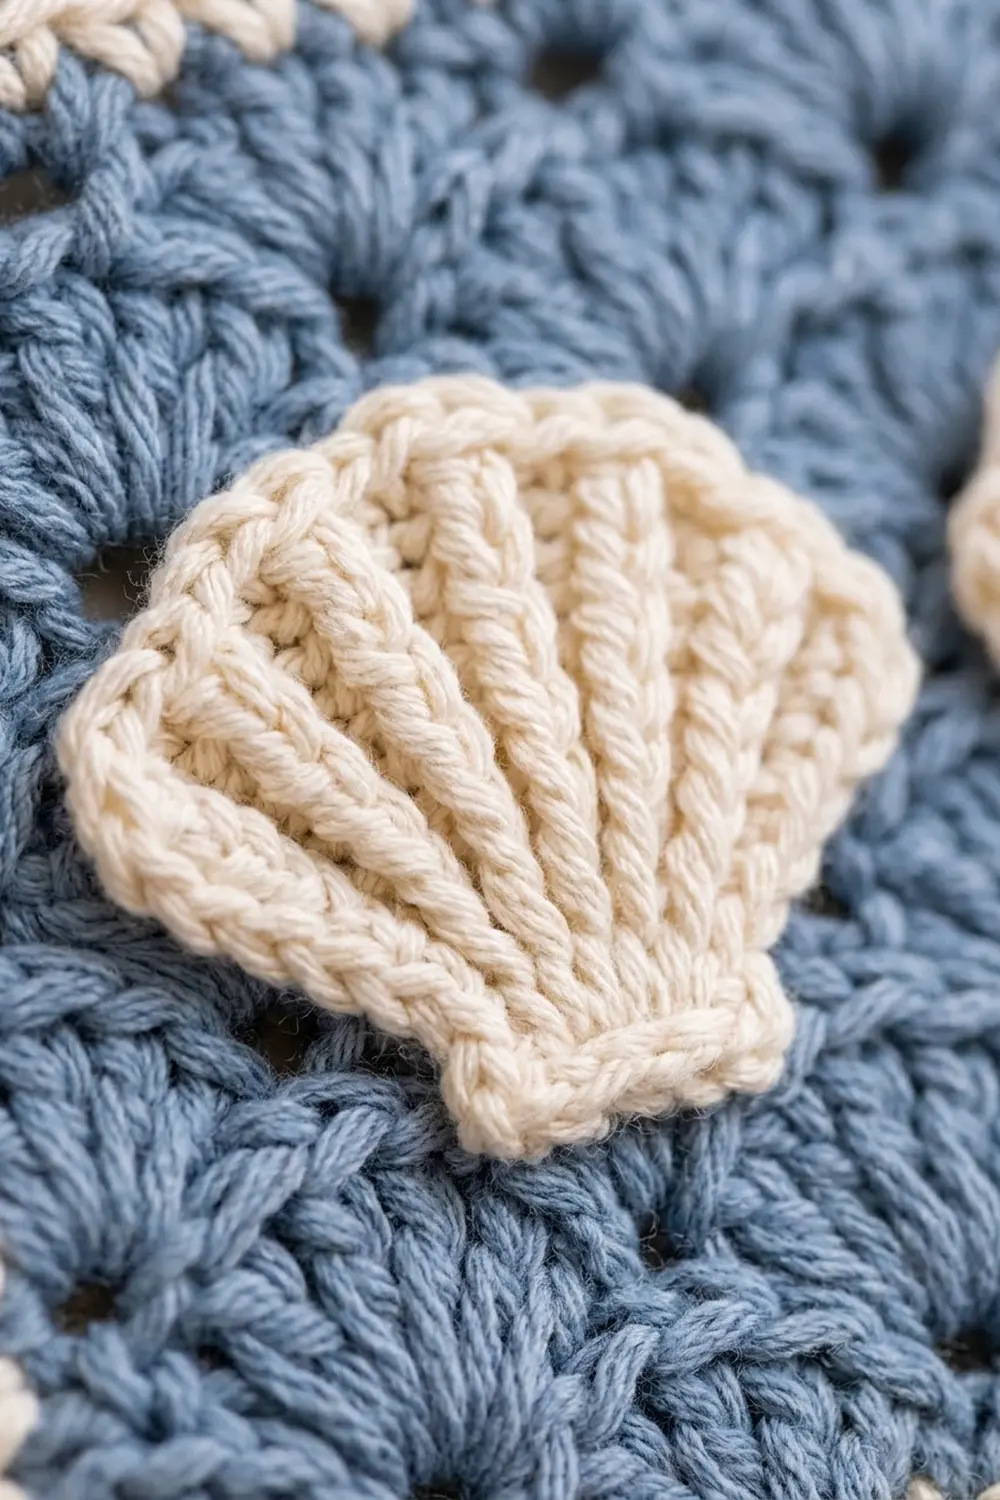
Seashell Appliqués (Make 3, Cream)
Row 1 (RS): Make a magic ring, ch 3 (counts as dc), 6 dc in ring. Pull the ring closed but do not join. Turn. (7 dc)
Row 2 (WS): Ch 3 (counts as dc), dc in first st, bpdc around next st, dc in same st; repeat from * 4 more times, 2 dc in top of turning ch. Turn. (14 sts: 9 dc, 5 bpdc)*
The 5 bpdc stand out on the RS and make the radiating ribs.
Row 3 (RS): Ch 1, sc in first st, scallop in next st, sc in next st; repeat from * 5 more times, sc in top of turning ch. (26 sts: 6 scallops, 8 sc)*
Hinge: Ch 1, rotate the piece and work 4 sc evenly across the flat base. Fasten off and leave a 12 in (30.5 cm) tail.
Each shell measures 2.5 in wide x 1.75 in tall (6.4 cm x 4.4 cm).
Hanging Cord (Cream)
Ch 72, then sl st in the back bump of each ch. Fasten off. The cord is about 18 in (45.7 cm) long.
Make All Pieces
Before you assemble, check that you have every part:
| Part | Qty | Color |
|---|---|---|
| Back panel | 1 | Dusty blue |
| Side arm | 2 | Dusty blue |
| Hanging tab | 3 | Dusty blue |
| Seashell | 3 | Cream |
| Hanging cord | 1 | Cream |
Front layout (not to scale):
   =====[T]=========[T]=========[T]=====   top dowel
   +-----------------------------------+
   |   (shell)    (shell)    (shell)   |
   |      blue shell-stitch panel      |
   |-------cream surface line----------|
 [A]                                   [A]
 [A]====== paper towel dowel ==========[A]
 [A]                                   [A]
 [A]======= dish towel dowel ==========[A]
   +-----------------------------------+
Joining and Assembly
Work the border (next section) on the panel first, then come back here.
Surface line: With cream, work surface sl sts across the top of Row 15, from the inner edge of the left border to the inner edge of the right border. Make each sl st as long as one blue stitch so the panel does not pull in. The line sits 8 in (20.3 cm) above the bottom of the finished panel.
Arms: Hold an arm at a right angle to the panel with the front edge toward you. Line up its folded top with the surface line and its bottom with the bottom of the panel. Whipstitch the open seam edge through both arm layers and the outer loops of the border. Here 36 folded rows meet 32 border stitches over 8 in (20.3 cm), so sew about 9 rows to every 8 stitches. Repeat on the other side, and check that the holes on the two arms are at the same height.
Shells: Pin the shells 1 in (2.5 cm) below the top of the blue body. Leave 0.75 in (1.9 cm) at each end and 1 in (2.5 cm) between shells: 0.75 + 2.5 + 1 + 2.5 + 1 + 2.5 + 0.75 = 11 in (27.9 cm). Sew around the outer edge of each shell with small hidden stitches.
Tabs: Center one tab on the panel. Place the other two so their outer edges sit 0.75 in (1.9 cm) in from the panel sides. Sew the button end 0.5 in (1.3 cm) onto the front of the border. Loop the tab over the top dowel and sew the other end to the back.
Tension: Sew firmly, but don’t pull tight enough to pucker the panel. Lay the piece flat after each seam. It should still measure 12 in x 16 in (30.5 cm x 40.6 cm).
Border (Cream)
Border gauge: 4 sc = 1 in (2.5 cm). Each round adds 0.25 in (0.6 cm) on every side.
Each side count runs from corner stitch to corner stitch and includes both corner stitches. The corner stitch is the center sc of each 3-sc group.
Round 1: With the RS facing, join cream in the first dc of Row 30.
– Top: 3 sc in first st (corner), sc in next 2 dc, sk sc, sc in each of next 5 dc; repeat from * 7 more times, sk sc, sc in next 2 dc, 3 sc in top of turning ch (corner). That gives 44 sc between the corners.
– Side: Work 2 sc in each row end. (60 sc between corners)
– Bottom: 3 sc in first free loop of the foundation ch (corner). Sc in each free loop, skipping each ch under a shell, up to the last ch. (53 chs − 9 skipped = 44 sc)* 3 sc in last ch (corner).
– Work the second side like the first. Join with a sl st to the first sc.
Count: 48 sts per side on the top and bottom, 64 sts per side on the sides, 220 sts total (4 corners x 3 + 2 x 44 + 2 x 60).
Round 2: Ch 1, sc in each st around, working 3 sc in each corner stitch. Join.
Count: 50 sts per side on the top and bottom, 66 sts per side on the sides, 228 sts total.
Fasten off.
Why the math works: At border gauge, the stitches between the corners match the body edge. 44 sc at 4 per inch is 11 in (27.9 cm), the body width. 60 sc is 15 in (38.1 cm), the body height. Skipping the sc between shells takes up the extra fullness of the shell fabric. Each corner adds exactly 2 sts per side per round, which turns the corner without cupping. Two rounds add 0.5 in (1.3 cm) per side, for a final size of 12 in x 16 in (30.5 cm x 40.6 cm).
Final Blocking
- Weave in all ends.
- Pin the panel to a blocking mat at 12 in x 16 in (30.5 cm x 40.6 cm), with the arms standing up.
- Mist the panel and arms evenly until they are damp.
- Straighten the border with your fingers and smooth each shell flat.
- Let everything dry completely, for at least 24 hours.
- Glue an end cap onto one end of each dowel. Slide the dowels through the arm holes and the tabs, then glue on the second caps.
- Tie the cord ends around the top dowel, just outside the outer tabs.
Final Quality-Control Checklist
- The panel measures 12 in x 16 in (30.5 cm x 40.6 cm).
- The border counts are 50 and 66 sts per side.
- The arms meet the surface line and stand square to the panel.
- Both pairs of dowel holes are level.
- An 11 in (27.9 cm) roll spins freely between the arms.
- The shells are evenly spaced and lie flat.
- The tabs and buttons line up across the top.
- No ends show on the front.
Troubleshooting
Panel is too wide: Go down one hook size. Shell stitch spreads quickly.
Border ruffles: You may have worked into the sc between shells. Recheck the count of 44.
Border pulls in: Work the border only with a hook 0.5 mm larger.
Dowel holes don’t line up: Count from the seam edge, not from the start of the row. Check that the holes are on Rows 4, 27, 46 and 69.
Shells curl: Steam-block them before sewing, and check that Row 3 has 6 scallops.
Care
Take out the dowels and hand wash in cool water with mild soap. Reshape and dry flat.
Final Notes
The measurements build in a chain. A swatch where 25 sts = 5 in (12.7 cm) gives a body of 11 in x 15 in (27.9 cm x 38.1 cm). Two border rounds bring it to 12 in x 16 in (30.5 cm x 40.6 cm), and arms of 3.75 in x 8 in (9.5 cm x 20.3 cm) hold the roll. If you check each stage, the pieces will fit together without fuss.
Happy crocheting!