

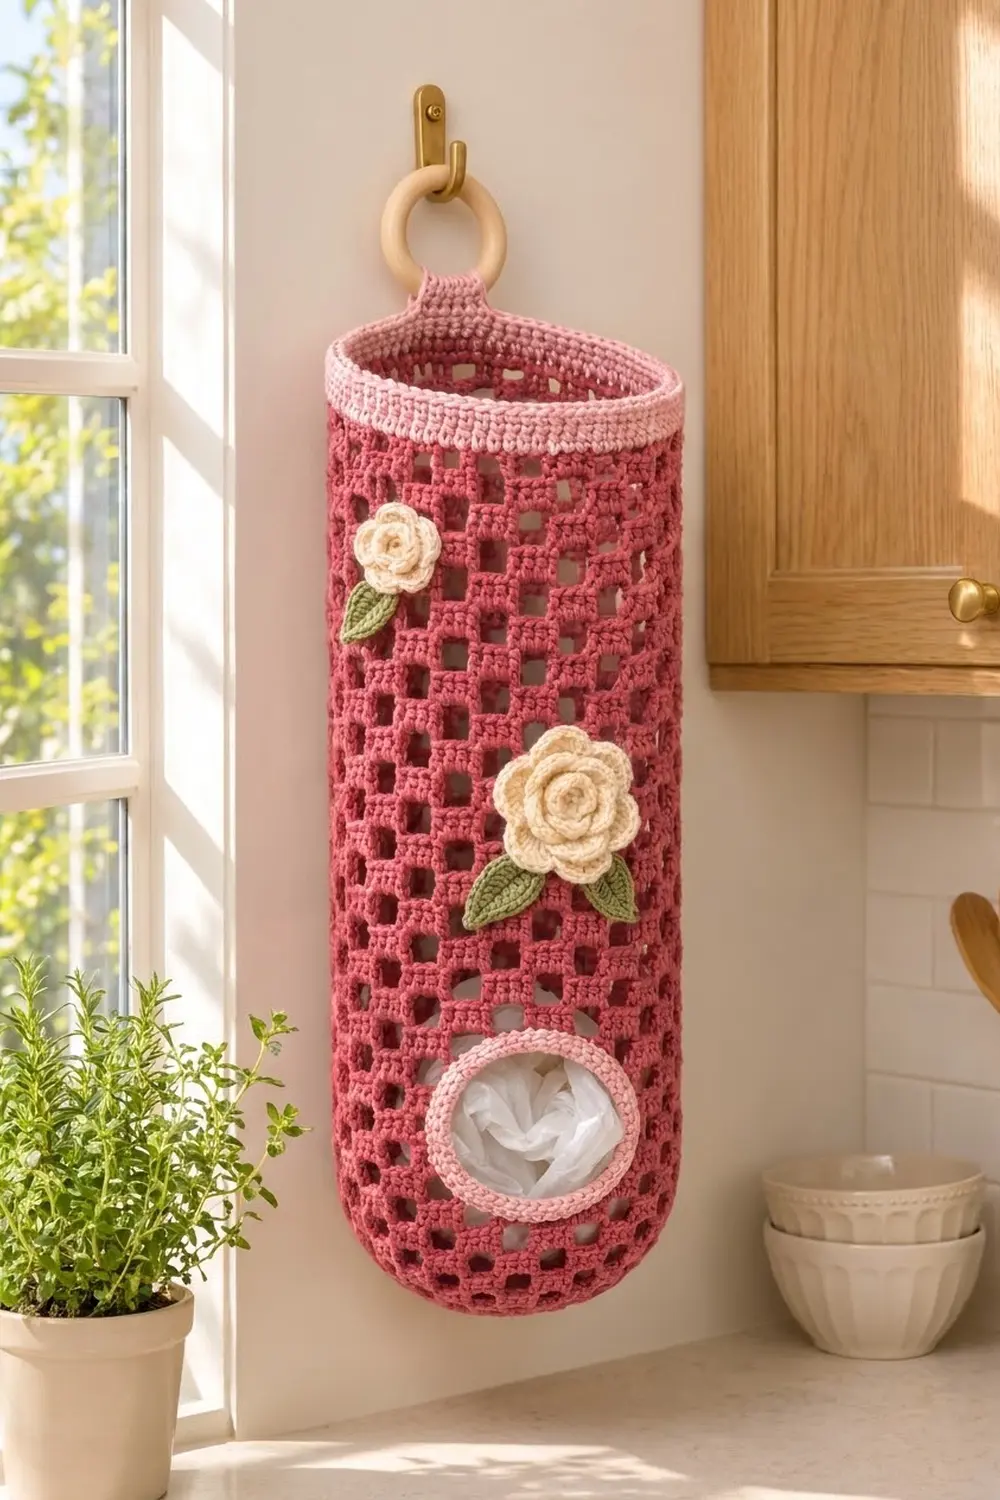
The Rosewood Grid Plastic Bag Holder is a tall crochet tube for storing grocery bags. It hangs from a wooden ring on a wall hook. You stuff bags in through the open top and pull them out one at a time through a round opening near the bottom. The body is an open grid of square windows in deep rose, so you can see when the holder is getting full.
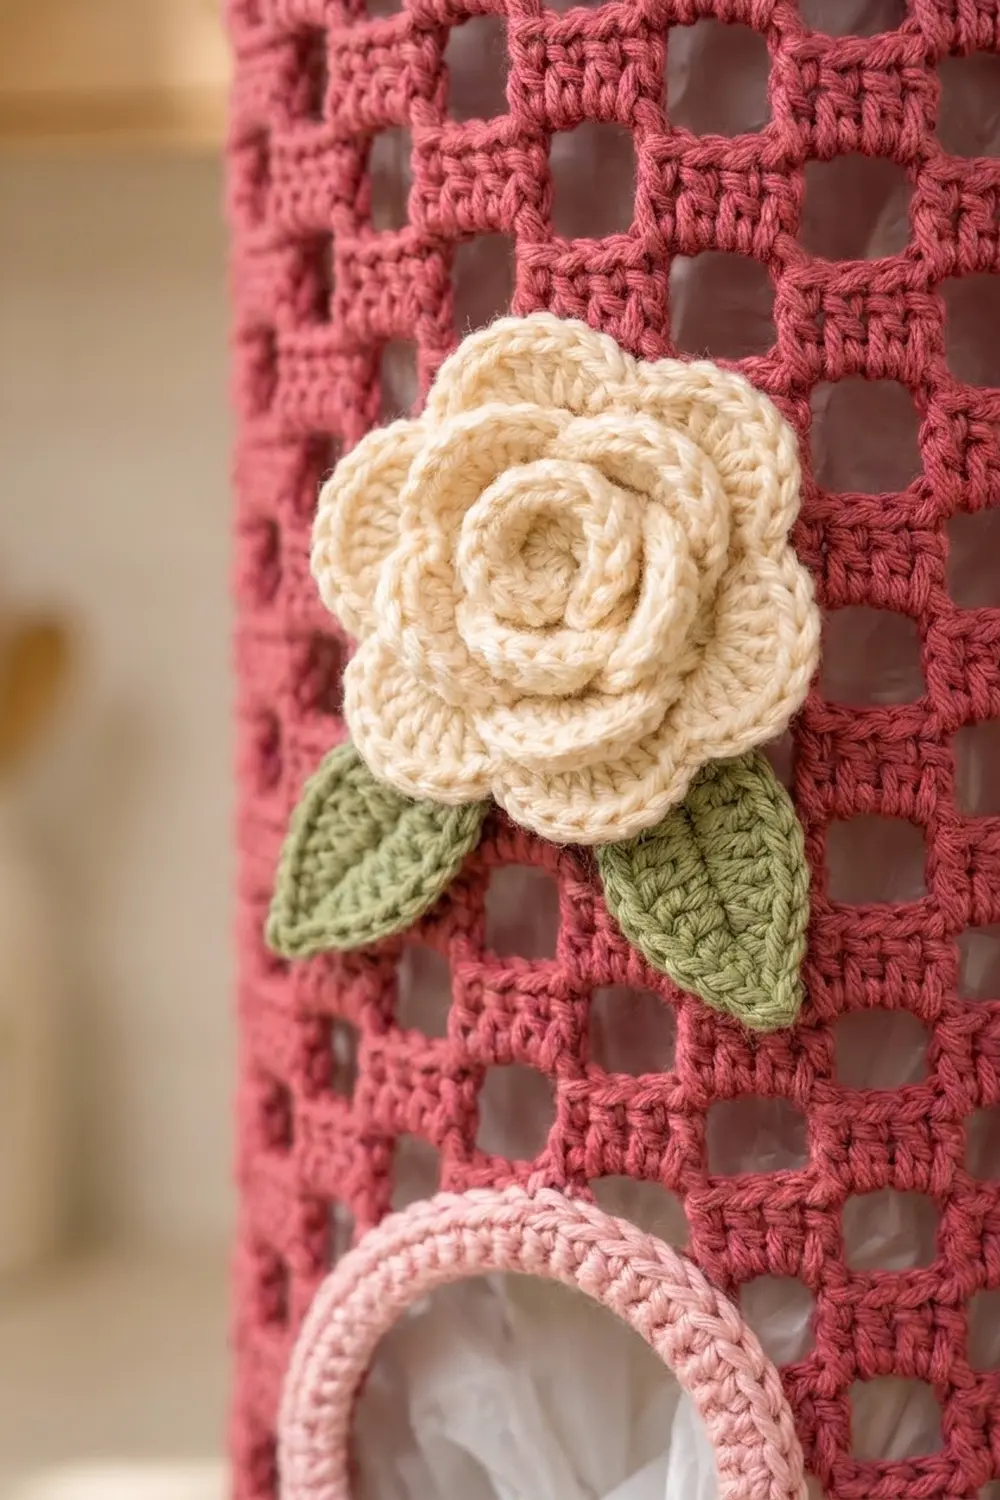
Light pink trims the top rim and the dispenser opening. Two cream roses with soft green leaves sit on the front, one small near the top and one larger above the opening. The result is a cottage-kitchen look that stays practical.
This pattern uses US crochet terms. The finished holder measures about 5.3 in (13.5 cm) wide laid flat, 10.7 in (27.2 cm) around, and 15.5 in (39.4 cm) tall from the base to the top of the rim. The hanging ring sits about 1.5 in (3.8 cm) above the rim.
Construction is simple. You work a cupped, solid base in joined rounds, then switch to alternating mesh and solid rounds for the tube. For six rows you work back and forth to leave the dispenser gap, then chain across it and go back to rounds. After that you add the rim and opening trims, a hanging tab, and two sewn-on roses with leaves.
Finished Size and Construction
- Finished size: 5.3 in (13.5 cm) wide flat × 15.5 in (39.4 cm) tall
- Circumference: 10.7 in (27.2 cm)
- Skill level: Easy-Intermediate
- Terminology: US
- Yarn weight: Worsted (#4) cotton
- Hook: 4.5 mm (US 7)
- Number of pieces: 1 tube, plus 2 roses and 2 leaves sewn on as appliqués
- Layout: Single vertical tube with a closed, rounded base
- Tube size before trim: 14.5 in (36.8 cm) tall
- Rim trim depth: 1 in (2.5 cm)
- Dispenser opening: about 2.25 in (5.7 cm) across once trimmed
Materials
Use a smooth worsted-weight cotton or cotton blend. Cotton holds its shape under the weight of the bags and shows the grid cleanly. Avoid fuzzy or very stretchy acrylics, because the tube will sag lengthwise.
- Color A, deep rose (body and tab): 70 g / 120 m
- Color B, light pink (rim and opening trim): 15 g / 25 m
- Color C, cream (roses): 15 g / 25 m
- Color D, sage green (leaves): 5 g / 8 m
These quantities include a margin of about 15 percent.
Tools:
– 4.5 mm (US 7) crochet hook
– Wooden ring, 2.75 in (7.0 cm) outside diameter
– Tapestry needle
– 4 stitch markers
– Scissors and a measuring tape
– Spray bottle and blocking pins
Abbreviations (US Terms)
- ch – chain
- sl st – slip stitch
- sc – single crochet
- hdc – half double crochet
- dc – double crochet
- sk – skip
- sp – space
- sc2tog – single crochet 2 together
- RS / WS – right side / wrong side
- st(s) – stitch(es)
Special stitch – V-stitch (V): (dc, ch 2, dc) all in the same stitch.
Pattern note: In every round and row, the beginning ch 3 counts as the first dc. Each round starts at the same point, and you join with a sl st to the top of the beginning ch 3.
Gauge and Checkpoints
Gauge: 15 dc and 8 rounds = 4 in (10.2 cm). In sc, 18 sts and 16 rows = 4 in (10.2 cm).
One mesh repeat (3 dc plus ch 2) is 5 sts, or 1.33 in (3.4 cm) wide.
Test piece: Work Rounds 1–7 first and measure. This short cup is your gauge swatch, and you can keep going from it if it matches.
Checkpoints:
– After Round 4: the base is a shallow cup about 3.4 in (8.6 cm) across the bottom.
– After Round 7: flat width is 5.3 in (13.5 cm).
– After Round 15: height is 6.5 in (16.5 cm) from the bottom of the base.
– After Round 31: height is 14.5 in (36.8 cm).
– After the rim: height is 15.5 in (39.4 cm).
If your piece is too big: go down a half size to 4.0 mm (US 6). If it is too small: go up to 5.0 mm (US H-8). Fix the width at the test piece stage. If only the height is off, add or remove one pair of rounds (one mesh plus one solid) between Rounds 16 and 31. Each pair changes the height by 1 in (2.5 cm).
Base
With Color A:
Round 1: Make a magic ring. Ch 3, 9 dc in ring. Sl st to the top of ch 3. (10 sts)
Round 2: Ch 3, dc in the same st, 2 dc in each st around. Join. (20 sts)
Round 3: Ch 3, 2 dc in next st, dc in next st, 2 dc in next st; repeat from * around. Join. (30 sts)
Round 4: Ch 3, dc in next st, 2 dc in next st, dc in next 2 sts, 2 dc in next st; repeat from * around. Join. (40 sts)
Round 5: Ch 3, dc in each st around. Join. (40 sts)
A flat dc circle needs about 12 increases per round. Using 10 makes the base cup gently upward, which gives the holder its rounded bottom. Do not add more increases.
Tube, Lower Section
Round 6 (mesh): Ch 3, dc in next 2 sts, ch 2, sk 2, dc in next 3 sts; repeat from * 6 more times, ch 2, sk 2. Join. (24 dc + 8 ch-2 sps = 40 sts)
Round 7 (solid): Ch 3, dc in next 2 sts, 2 dc in ch-2 sp, dc in next 3 sts; repeat from * 6 more times, 2 dc in last ch-2 sp. Join. (40 sts)
Each mesh round makes 8 windows. Each solid round fills them in, so the windows stack in straight columns separated by solid bars.
Dispenser Opening
For six rows you work back and forth over the first 28 sts only. The last 12 sts of Round 7 stay unworked and become the bottom edge of the opening. Because each round starts at the edge of the opening, the trim will hide the join seam.
Row 8 (RS, mesh): Ch 3, dc in next 2 sts, ch 2, sk 2, dc in next 3 sts; repeat from * 4 more times. Turn. (18 dc + 5 ch-2 sps = 28 sts)
Row 9 (WS, solid): Ch 3, dc in next 2 sts, 2 dc in ch-2 sp, dc in next 3 sts; repeat from * 4 more times, working the last dc in the top of the turning ch. Turn. (28 sts)
Rows 10 and 12: Repeat Row 8.
Rows 11 and 13: Repeat Row 9. After Row 13, turn so the RS faces you.
Round 14 (mesh, bridge): Ch 3, dc in next 2 sts, ch 2, sk 2, dc in next 3 sts; repeat from * 4 more times, ch 12. Sl st to the top of the beginning ch 3 to close the round. (18 dc + 10 ch in sps + 12 bridge ch = 40 sts)
Round 15 (solid): Ch 3, dc in next 2 sts, 2 dc in ch-2 sp, dc in next 3 sts; repeat from * 4 more times, dc in each of the 12 bridge ch. Join. (28 + 12 = 40 sts)
The opening is now 12 sts wide, or 3.2 in (8.1 cm), and 6 rows tall, or 3 in (7.6 cm). The bridge puts all 40 stitch positions back, so the windows above the opening line up with the rest.
Tube, Upper Section
Rounds 16–31: Alternate the rounds. Even-numbered rounds repeat Round 6 (mesh) and odd-numbered rounds repeat Round 7 (solid). Round 31 is a solid round. (40 sts each round)
Check the height now. It should be 14.5 in (36.8 cm). Fasten off Color A.
Trims and Hanging Tab
Border Gauge
In Color B sc, 18 sts = 4 in (10.2 cm), so 40 sc = 8.9 in (22.6 cm) unstretched. That is a little smaller than the 10.7 in (27.2 cm) dc tube. This is intentional: it gives a firm rim that won’t flare.
Top Rim
Round 32: Join Color B in the first st. Ch 1, sc in each st around. Join to the first sc. (40 sc + 0 extra = 40 sts)
Rounds 33–35: Ch 1, sc in each st around. Join. (40 sts each round)
Finish with an invisible join. The rim is 1 in (2.5 cm) deep.
Opening Trim
With the RS facing, join Color B at the bottom-right corner of the opening.
Round 1: Ch 1. Work 12 sc in the 12 unworked sts along the bottom edge. Work 12 sc up the side (2 sc around each row-end post, 6 rows). Work 12 sc in the free loops of the 12 bridge ch along the top. Work 12 sc down the other side. Join. (12 per side × 4 sides = 48 sts)
Round 2: Ch 1. Work sc in each st, but at each of the 4 corners, sc2tog over the last st of one side and the first st of the next. Join and fasten off. (40 sc + 4 sc2tog = 44 sts; 11 per side)
Why the math works: each side gets one sc per stitch or two per dc row-end, so 12 sts on every side lie flat. Taking out 4 sts at the corners rounds the rectangle into the soft circle shown. The clear opening ends up about 2.25 in (5.7 cm) across.
Hanging Tab
Lay the holder flat with the opening centered at the front. Count to the 5 sts directly opposite it on the back of the rim (sts 13–17 of Round 35).
Row 1: Join Color A in st 13. Ch 1, sc in sts 13–17. Turn. (5 sts)
Rows 2–16: Ch 1, sc in each st. Turn. (5 sts)
The tab is 1.1 in (2.8 cm) wide and 4 in (10.2 cm) long. Slip it through the wooden ring and fold it down inside the rim. Whipstitch Row 16 to the inside of Round 32. The ring should sit about 1.5 in (3.8 cm) above the rim.
Roses and Leaves
Small Rose (Color C)
Ch 24.
Row 1: V in 6th ch from hook, sk 2 ch, V in next ch; repeat from * to end. Turn. (7 Vs)
Row 2: Ch 1, (sc, 5 dc, sc) in each ch-2 sp across. Fasten off with a 12 in (30.5 cm) tail. (7 petals)
Large Rose (Color C)
Ch 33.
Row 1: Work as for the small rose. (10 Vs)
Row 2: Ch 1, (sc, 5 dc, sc) in each of the first 4 ch-2 sps, then (sc, 7 dc, sc) in each of the last 6 ch-2 sps. Fasten off with a 12 in (30.5 cm) tail. (10 petals)
Shaping: Start at the end where you began Row 2 and roll the strip into a spiral. The first petals make the tight center and the later ones wrap around it, so the petals build up in layers. Push the needle through all the layers at the base several times to lock the spiral. The small rose is about 1.5 in (3.8 cm) across and the large rose is about 2.25 in (5.7 cm).
Leaves (make 2, Color D)
Ch 8. Sc in 2nd ch from hook, hdc, dc, dc, hdc, sc, then 3 sc in the last ch. Rotate and work along the other side of the chain: sc, hdc, dc, dc, hdc, sc. Sl st to the first sc. (15 sts) Each leaf is about 2 in (5.1 cm) long.
Placement
Sew the small rose to the left of center, 3.5 in (8.9 cm) below the top edge of the rim. Sew the large rose to the right of center, 7 in (17.8 cm) below the rim, so it sits above the opening. Tuck one leaf under the lower left edge of each rose, angled down. Sew only through solid bars so the stitching stays hidden.
Final Blocking
- Weave in all ends along the solid bars.
- Spray the tube lightly until damp. Don’t soak it.
- Roll a towel to about 3.4 in (8.6 cm) across and slide it inside, or use a bottle of that size.
- Square the windows with your fingers and straighten the columns.
- Pin the opening trim into a round shape over a small cup.
- Shape the base into a smooth dome.
- Let it dry completely, then fluff the rose petals.
Final Quality-Control Checklist
- Every mesh and solid round has 40 sts.
- The windows run in 8 straight vertical columns.
- The flat width is 5.3 in (13.5 cm) and the height is 15.5 in (39.4 cm).
- The opening trim has 44 sts and the opening sits round.
- The rim lies flat and doesn’t flare.
- The tab is centered opposite the opening and the ring holds firm.
- The roses are tightly secured at the base, with the leaves tucked under.
Troubleshooting
- Base is flat instead of rounded: you added too many increases. Recheck Rounds 1–4 against the stitch counts.
- Window columns slant: the beginning ch 3 shifted. Always start in the joining st.
- The opening has a gap at one corner: you missed the last dc of Row 13 or Round 15 on the turning ch.
- Rim flares: go down a hook size for the trim.
- Tube stretches long when full: use a firmer cotton, or leave out one mesh-and-solid pair.
- Rose looks loose: roll the strip tighter and add more stitches through the base.
Care
Hand wash in cool water and lay flat to dry, shaping the tube over a towel roll. Don’t hang it to dry, because the wet weight will stretch the mesh.
Final Notes
Everything follows one measurement chain. The 15 dc gauge gives 40 sts, which makes a 10.7 in (27.2 cm) tube that lies 5.3 in (13.5 cm) flat. The cupped base and Rounds 1–31 give 14.5 in (36.8 cm), and the 1 in (2.5 cm) rim brings the total to 15.5 in (39.4 cm). The 12-stitch gap with 12 sc per side trims down to a 2.25 in (5.7 cm) dispenser opening. If you check each of these numbers as you go, the finished holder will come out right.
Happy crocheting!