

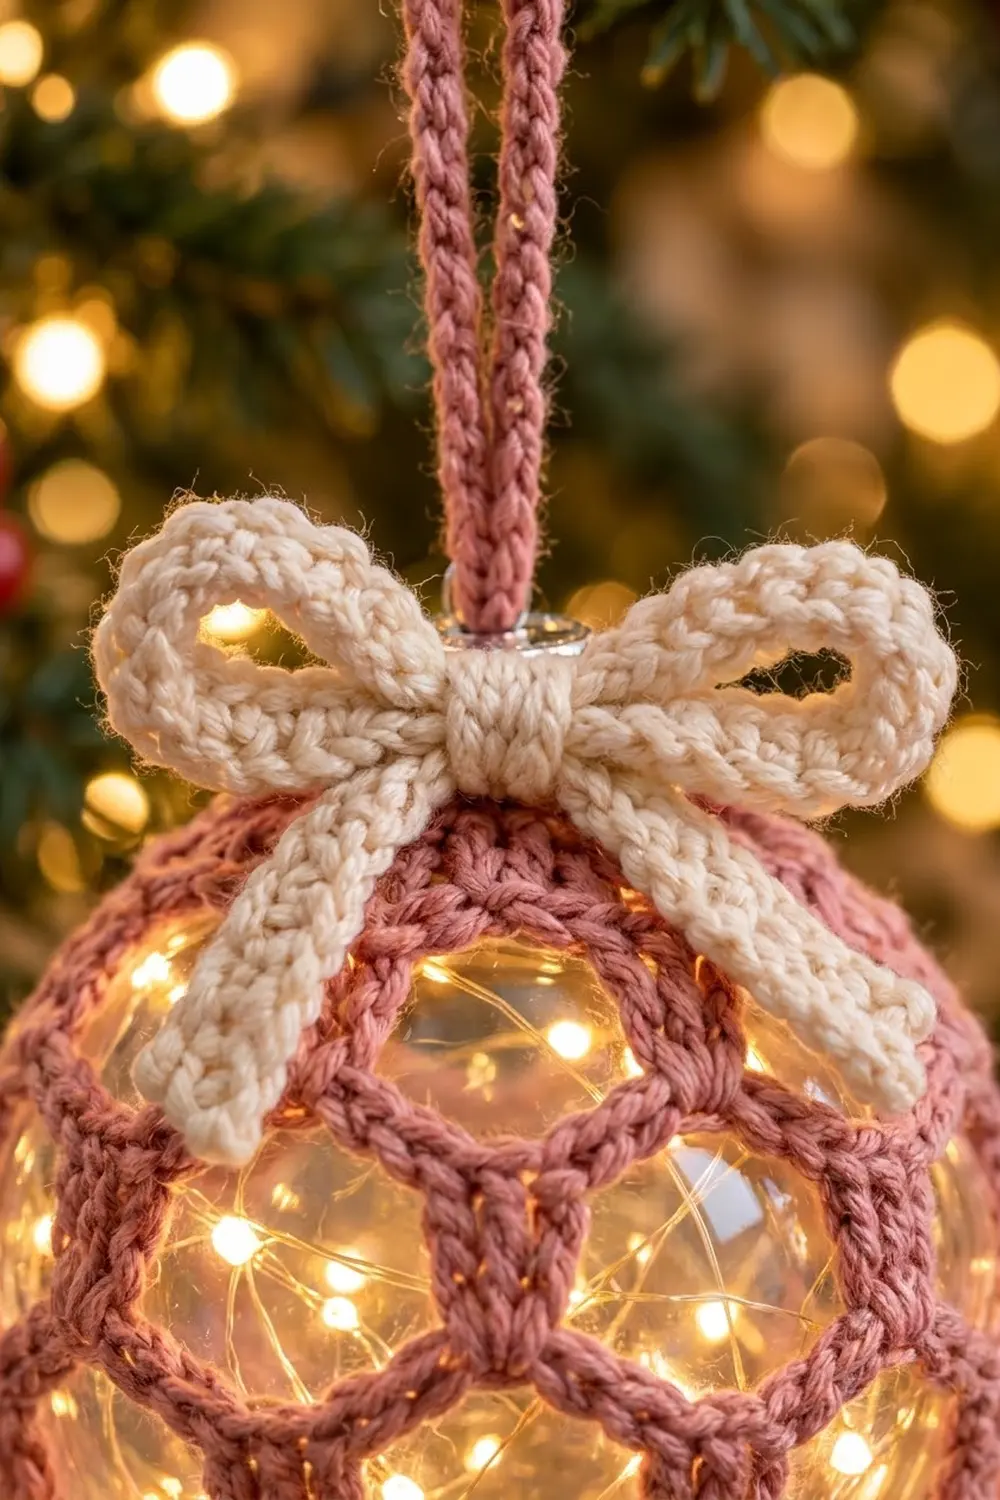
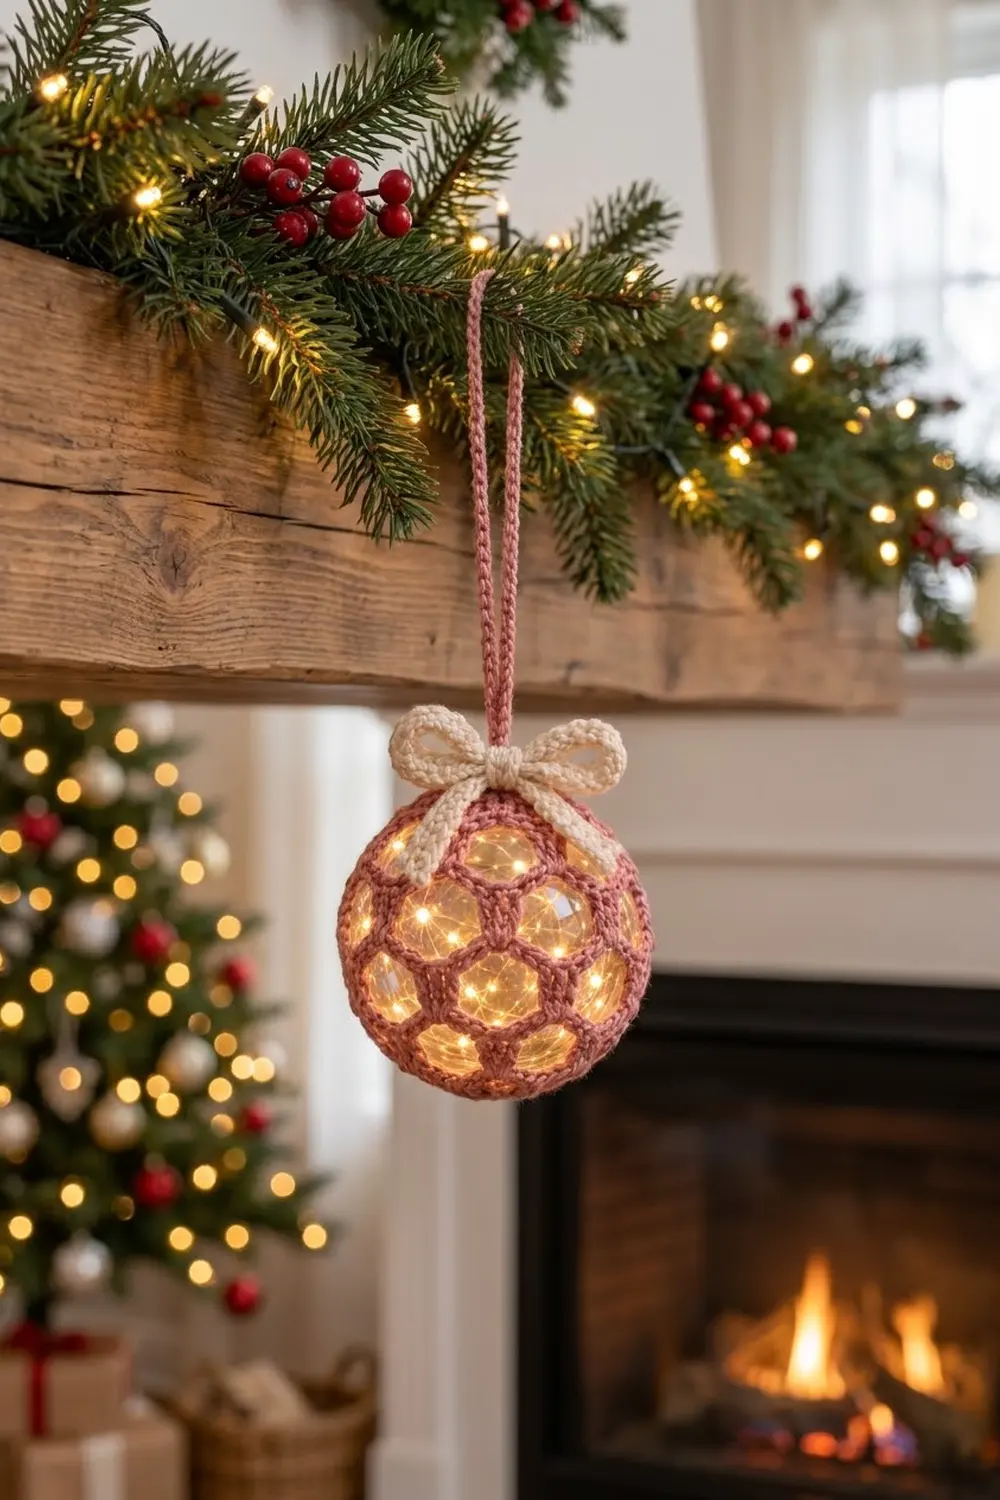
The Rosy Glow Honeycomb Ornament Cover is a lacy net that hugs a clear fillable ball ornament. Thick three-double-crochet columns linked by chain arcs form a honeycomb of open cells, so the fairy lights inside shine through every gap.
The colors are soft and vintage: dusty rose for the mesh and hanging cord, and a creamy off-white for the chunky bow at the top. It looks warm on a green tree and glows beautifully on a dark windowsill.
This pattern uses US crochet terms. The finished ornament is about 3.3 in (8.4 cm) wide and about 4 in (10.2 cm) tall including the bow, not counting the hanging loop. It fits a standard 3.15 in (8.0 cm) clear ball ornament.
The cover is worked top-down in joined rounds. You start with a small solid crown around the ornament cap and work six rounds of offset honeycomb mesh. The ball goes inside, and then you work a solid closing cap at the bottom. A one-round rim edging firms up the top opening. A separate cream bow cord and a rose hanging cord finish the piece.
Finished Size and Construction
- Finished size: about 3.3 in (8.4 cm) wide x 4 in (10.2 cm) tall with bow; the hanging loop drops 3.5 in (8.9 cm)
- Skill level: Easy to Intermediate
- Terminology: US crochet terms
- Yarn weight: DK / light (#3)
- Hook: 3.5 mm (E-4)
- Number of pieces: 1 ornament cover plus 2 small trims (bow cord and hanging cord)
- Layout: single fitted cover, no motifs to join
- Piece size: the cover fits a ball 9.9 in (25.1 cm) around
- Size before border: same as finished; the edging only firms the top opening, which is about 1.1 in (2.8 cm) across
- Border depth: one slip stitch round, about 0.1 in (0.3 cm)
Materials
Choose a smooth cotton or cotton-blend DK. Plant fibers hold the mesh shape and resist sagging over the ball. A slightly fuzzy blend gives a soft halo, but avoid heavy mohair because it blurs the cells.
- Dusty rose (Color A): 8 g / 18 m, for the cover and hanging cord
- Cream (Color B): 3 g / 7 m, for the bow
These amounts include about 20% extra for a test piece and weaving in.
Tools and notions:
- 3.5 mm (E-4) crochet hook
- One clear fillable ball ornament, 3.15 in (8.0 cm) diameter, with a removable metal cap
- One strand of battery micro fairy lights (copper wire) that fits inside the ornament
- Tapestry needle
- Locking stitch marker
- Scissors and a soft tape measure
Abbreviations (US Terms)
- ch – chain
- sl st – slip stitch
- sc – single crochet
- dc – double crochet
- sc2tog – single crochet 2 together
- sk – skip
- sp – space
- st(s) – stitch(es)
- Rnd – round
Special stitch – dc group: work 3 dc into the same stitch or space. At the start of a round, ch 3 counts as the first dc, so ch 3 plus 2 dc makes the first group. Pull each dc to full height so the group stands as a firm vertical column.
Gauge and Checkpoints
Base gauge: 11 sc = 2 in (5.1 cm) with a 3.5 mm hook.
Mesh gauge: each honeycomb round adds about 0.5 in (1.3 cm) of height, so the six mesh rounds total about 3 in (7.6 cm).
Before you buy extra ornaments, make one full cover through Rnd 6. That piece is your test.
Checkpoints:
- After Rnd 2: the crown lies flat and measures about 1.75 in (4.4 cm) across, with a center hole about 1.1 in (2.8 cm) across.
- After Rnd 3: the outer edge measures about 7 in (17.8 cm) around, relaxed.
- After Rnd 6 (equator): the cover measures about 9.5 in (24.1 cm) around, relaxed. That is slightly less than the ball’s 9.9 in (25.1 cm), so the mesh stretches to a snug fit.
- Finished cover, folded flat from rim to bottom center: about 4.5 in (11.4 cm).
If the cover is too big (equator over 9.9 in / 25.1 cm), drop to a 3.25 mm hook, or work ch 4 instead of ch 5 in Rnds 5 and 6. If it is too small (under 9 in / 22.9 cm), move up to a 3.75 mm hook. Don’t change the number of groups. With 10 groups, the bottom decreases come out right.
Ornament Cover
Use Color A.
Foundation: Ch 20, sl st in the first ch to form a ring, taking care not to twist.
Rnd 1: Ch 1, sc in each ch around, working under one loop only so the other loop stays free for the edging, sl st in first sc to join. (20 sc)
Rnd 2: Ch 1, sc in next st, 2 sc in next st; repeat from * 10 times in total, join. (30 sc)
This solid crown sits around the ornament cap.
Honeycomb Mesh
Each mesh round places its dc groups in the chain spaces of the round below. Because of this offset, each group sits between two groups from the previous round, and the chain arcs bend into the six-sided cells of the honeycomb.
Rnd 3: Ch 3 (counts as dc), 2 dc in same st, ch 3, sk 2 sts, dc group in next st, ch 3, sk 2 sts; work the bracketed repeat 9 times in total, sl st in top of beginning ch-3. (10 groups = 30 dc, 10 ch-3 sps)
Check: 10 sts used for groups + 20 skipped sts = the 30 sts of Rnd 2.
Rnd 4: Sl st in next 2 dc and into the next ch-3 sp, ch 3, 2 dc in same sp, ch 4, dc group in next ch-3 sp, ch 4; repeat 9 times in total, join. (10 groups = 30 dc, 10 ch-4 sps)
Rnd 5: Sl st in next 2 dc and into the next ch-4 sp, ch 3, 2 dc in same sp, ch 5, dc group in next ch-4 sp, ch 5; repeat 9 times in total, join. (10 groups = 30 dc, 10 ch-5 sps)
Rnd 6 (equator): Sl st in next 2 dc and into the next ch-5 sp, ch 3, 2 dc in same sp, ch 5, dc group in next ch-5 sp, ch 5; repeat 9 times in total, join. (10 groups = 30 dc, 10 ch-5 sps)
Measure now. The cover should be about 9.5 in (24.1 cm) around.
Insert the ornament. First put a stitch marker in your live loop so nothing unravels. Remove the metal cap, feed in the fairy lights, and replace the cap with the battery pack or switch at the top. Slide the ball into the cover so the cap neck pokes up through the crown hole.
Rnd 7: Sl st in next 2 dc and into the next ch-5 sp, ch 3, 2 dc in same sp, ch 4, dc group in next ch-5 sp, ch 4; repeat 9 times in total, join. (10 groups = 30 dc, 10 ch-4 sps)
Rnd 8: Sl st in next 2 dc and into the next ch-4 sp, ch 3, 2 dc in same sp, ch 3, dc group in next ch-4 sp, ch 3; repeat 9 times in total, join. (10 groups = 30 dc, 10 ch-3 sps)
Rnds 7 and 8 mirror Rnds 4 and 3, so the mesh narrows as smoothly as it widened.
Bottom Cap
Rnd 9 (conversion round): Sl st in next dc (the center dc of the first group), ch 1, sc in same st, 2 sc in next ch-3 sp, sc in center dc of next group, 2 sc in next ch-3 sp; repeat 9 times in total, join. (10 sc in group centers + 20 sc in spaces = 30 sc)
Rnd 10: Ch 1, sc in next st, sc2tog; repeat 10 times in total, join. (20 sc)
Rnd 11: Ch 1, sc2tog 10 times, join. (10 sc)
Rnd 12: Ch 1, sc2tog 5 times, join. (5 sc)
Fasten off, leaving a 6 in (15.2 cm) tail. Weave the tail through the front loop of each of the last 5 sts, pull tight to close the hole, and weave in.
The bottom cap (30, 20, 10, 5 sts) mirrors the crown (20, 30 sts), so the cover sits evenly on the sphere.
Bow (Color B)
Row 1: Ch 51, sc in 2nd ch from hook and in each ch across. (50 sc)
Row 2: Ch 1, turn, sl st in each sc across. (50 sl sts)
Fasten off and weave in both tails. The slip stitch row curls the strip into a firm, rounded cord about 9 in (22.9 cm) long and about 0.3 in (0.8 cm) thick.
Tie the cord in a standard bow with two loops about 1.1 in (2.8 cm) long and two tails about 1 in (2.5 cm) long. The finished bow spans about 2.75 in (7.0 cm). Pull the knot snug so it forms a neat round center.
Hanging Cord (Color A)
Row 1: Ch 41, sl st in back bump of 2nd ch from hook and each ch across. (40 sl sts)
Fasten off, leaving 6 in (15.2 cm) tails at both ends. The cord measures about 7 in (17.8 cm).
Top Rim Edging (Border)
Border gauge: work one firm sl st per foundation chain. The rim should not grow wider than the crown hole, which is about 1.1 in (2.8 cm) across.
Rnd 1: Turn the cover so the top opening faces you. Join Color A in any free loop of the foundation chain. Sl st in each free loop around, then join to the first sl st. (20 sl sts)
Why the math works: the foundation ring has 20 ch, and Rnd 1 of the cover used only one loop of each. The edging puts exactly 1 sl st in each of the 20 remaining loops, with no increases. The rim keeps the same 20-st circumference, so it grips the cap neck instead of flaring.
Assembly
- Thread the hanging cord through the wire loop on the ornament cap. Bring both ends together so the loop drops about 3.5 in (8.9 cm).
- Sew both cord ends to the rim edging on one side of the cap, and weave the tails into the crown.
- Center the bow over the front of the crown, just below the cap, so the loops fan out over Rnds 1 and 2.
- With a strand of Color B, stitch through the bow knot and into the crown sts 3 or 4 times. Tack each loop once at its base so it holds its shape.
Final Blocking
- Turn off the lights and remove the battery pack if possible.
- Lightly mist the cover with water while it is on the ornament.
- Nudge each dc group with your fingers so it stands straight up and down.
- Ease the chain arcs until all cells in a round look the same size.
- Shape the bow loops into round curves and fluff the tails.
- Hang the ornament by its loop and let the cover dry fully on it, which takes several hours.
Never steam a plastic ornament, because heat can warp it.
Final Quality-Control Checklist
- Crown: 20 sc, then 30 sc, with a hole about 1.1 in (2.8 cm) across.
- Each mesh round, Rnds 3 to 8: exactly 10 dc groups.
- Chain spaces: ch-3, ch-4, ch-5, ch-5, ch-4, ch-3.
- Equator: about 9.5 in (24.1 cm) relaxed, snug on a 9.9 in (25.1 cm) ball.
- Bottom cap: 30, 20, 10, 5 sc, closed without a gap.
- Rim edging: 20 sl sts, no flare.
- Bow centered, loops even, about 2.75 in (7.0 cm) wide.
- Hanging loop secure, dropping about 3.5 in (8.9 cm).
- All tails woven in on the inside.
Troubleshooting
The cells are uneven. You probably miscounted chains in one repeat. Count each arc as you work it, or mark the first group.
The cover is loose at the equator. Rework Rnds 5 to 7 with one fewer chain per arc.
The ball won’t fit in. Insert it right after Rnd 6, not later. If it is still tight, work Rnds 5 and 6 with ch 6.
The groups lean sideways. Make sure every group goes into a chain space, not into a dc. Slip stitch across exactly 2 dc to reach the next space.
The bottom has a hole. Pull the closing tail tighter, then make a second pass through the 5 sts.
The rim flares. Your slip stitches are too loose. Rework them with a smaller hook.
Care
Take the cover off the ornament and hand wash it in cool water with mild soap. Reshape it on the ornament and let it air dry.
Final Notes
The measurements build on each other. The gauge of 11 sc = 2 in (5.1 cm) sets the crown. Rounds of 20 sc and then 30 sc leave a hole about 1.1 in (2.8 cm) across. Six mesh rounds of 10 groups each add about 3 in (7.6 cm) of height. The equator stretches from 9.5 in (24.1 cm) to fit the 9.9 in (25.1 cm) ball. The bottom cap closes in rounds of 30, 20, 10 and 5 sts, and a 20-st rim firms up the top. Add the bow and loop, and your glowing ornament is ready to hang.
Happy crocheting!