

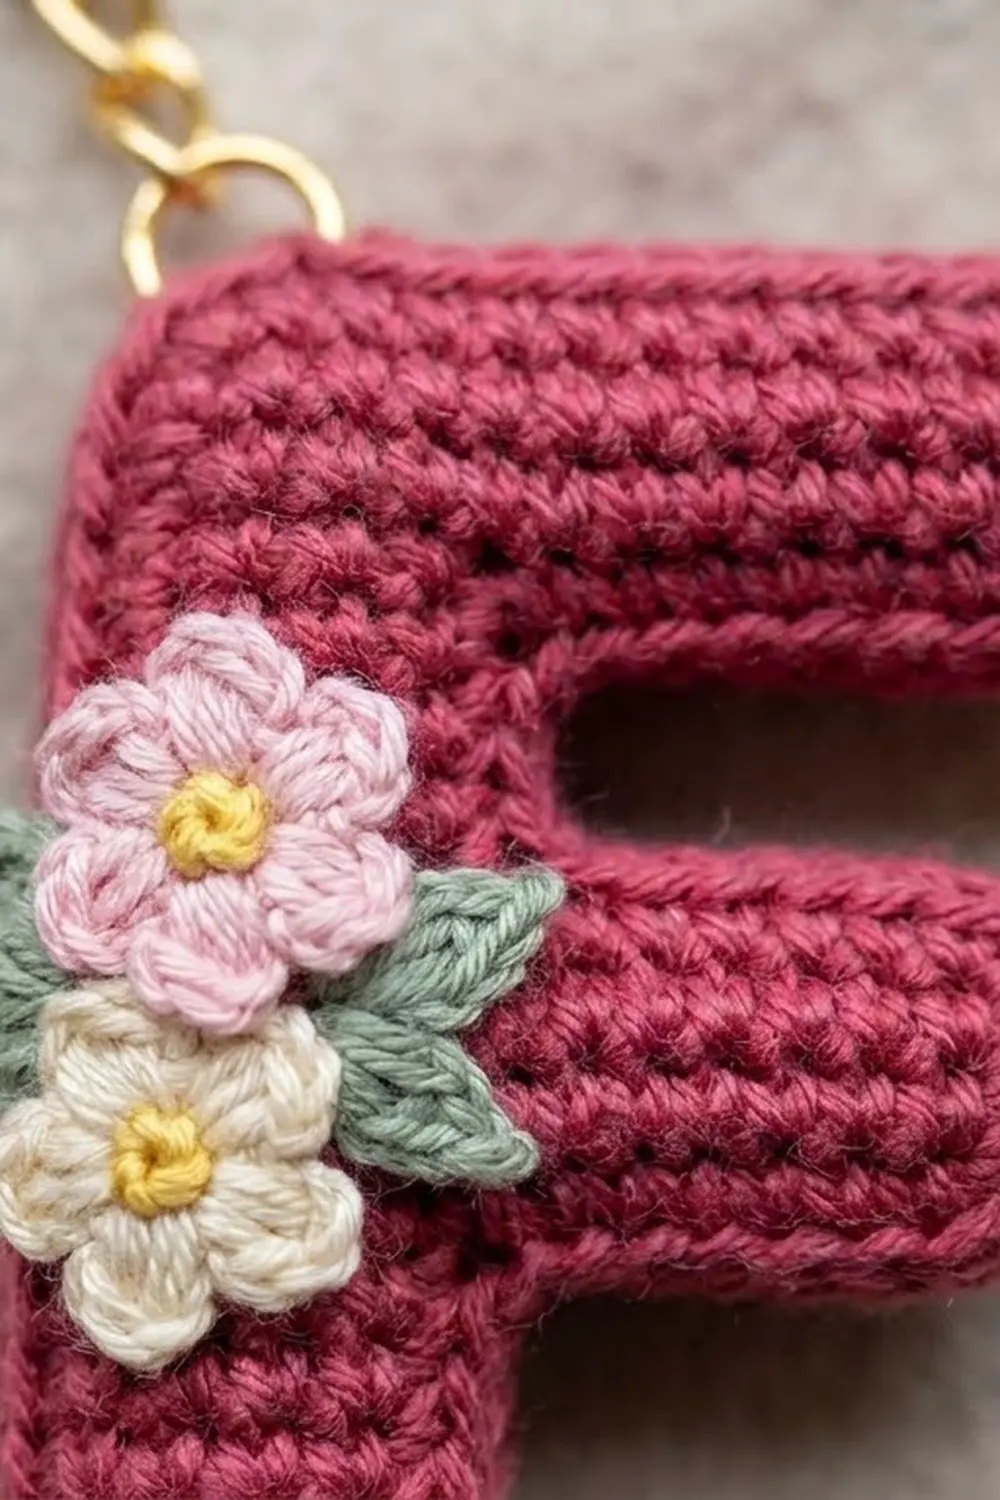
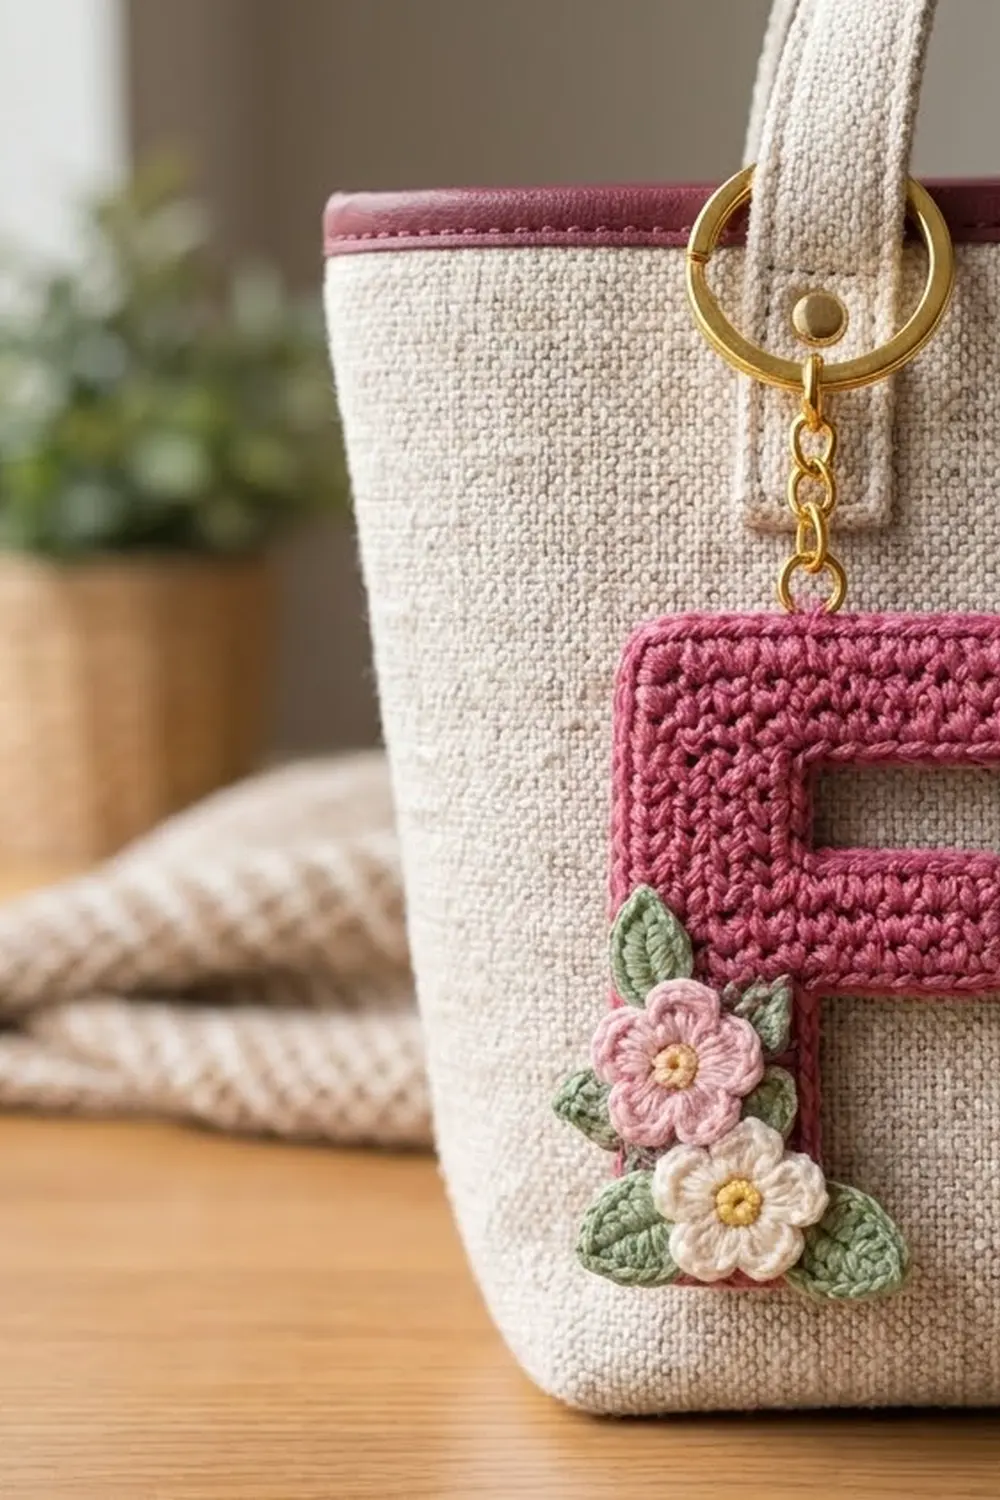
This little letter F keychain is a quick, personal accessory that looks polished on a bag handle, a set of keys, or a gift wrap ribbon. You work the letter in a dense raspberry-rose single crochet fabric and finish it with a neat edging that rounds the outer corners. A tiny posy of two flowers and three leaves decorates the stem.
The colors are soft and romantic: raspberry for the letter, light pink and cream for the flowers, buttery yellow for the centers, and sage green for the leaves. Gold hardware finishes it off.
This pattern uses US crochet terms. The finished letter measures about 2.33 in (5.9 cm) wide and 3.33 in (8.5 cm) tall. It is about 5 in (12.7 cm) long including the key ring and chain.
The construction is simple. You crochet the F flat in rows from the bottom up, adding chains to create the middle arm and the top bar. Then you work one round of single crochet and one round of slip stitch around the whole outline. Finally, you make two flowers and three leaves and sew them onto the lower stem.
Finished Size and Construction
- Finished size: 2.33 in (5.9 cm) wide x 3.33 in (8.5 cm) tall
- Skill level: Easy / advanced beginner
- Terminology: US crochet terms
- Yarn weight: Sport weight cotton (#2 Fine)
- Hook: 2.75 mm (US C-2)
- Number of pieces: 1 letter panel plus 5 small appliqués (2 flowers, 3 leaves)
- Layout: Single letter F, appliqués clustered on the lower left of the stem
- Letter size before border: 2 in (5.1 cm) wide x 3 in (7.6 cm) tall
- Border depth: about 0.17 in (0.4 cm) on every edge
- Flower size: about 0.8 in (2.0 cm) across
- Leaf size: about 0.75 in (1.9 cm) long
Materials
Choose a smooth, mercerized sport weight cotton. Cotton gives crisp stitch definition, holds the letter shape, and stands up to the rubbing a keychain gets. Avoid fuzzy or very stretchy yarns, which blur the letter edges.
- Raspberry rose (letter): 10 g, about 31 m
- Light pink (flower): 2 g, about 6 m
- Cream (flower): 2 g, about 6 m
- Yellow (flower centers): 1 g, about 3 m
- Sage green (leaves): 2 g, about 6 m
These quantities include a comfortable margin for gauge swatching, tails, and sewing.
Tools:
- 2.75 mm (US C-2) crochet hook
- Tapestry needle with a sharp or semi-sharp tip
- Gold split key ring, 1 in (2.5 cm)
- Short gold chain, about 0.75 in (1.9 cm), with 2 small jump rings
- Two pairs of flat-nose pliers
- Stitch markers
- Blocking board and rust-proof pins
- Scissors and a ruler
Abbreviations (US Terms)
- ch – chain
- sl st – slip stitch
- sc – single crochet
- hdc – half double crochet
- dc – double crochet
- sc2tog – single crochet 2 together
- st(s) – stitch(es)
- RS – right side
Special stitch – sc2tog across a corner: Insert hook in the first stitch or row end named in the pattern, yarn over and pull up a loop. Insert hook in the second stitch or row end named in the pattern, yarn over and pull up a loop. Yarn over and pull through all 3 loops on hook. You use this only at the three inner corners of the F.
Gauge and Checkpoints
Gauge: 24 sc and 24 rows = 4 in (10.2 cm), which is 6 sc and 6 rows per 1 in (2.5 cm).
The letter is small, so it works as its own test piece. Work Rows 1–8 and measure before going further.
Checkpoints:
- After Row 8: 1 in (2.5 cm) wide x 1.33 in (3.4 cm) tall
- After Row 11: 1.67 in (4.2 cm) wide across the middle arm x 1.83 in (4.6 cm) tall
- After Row 18: 2 in (5.1 cm) wide x 3 in (7.6 cm) tall
- After border: 2.33 in (5.9 cm) wide x 3.33 in (8.5 cm) tall
If your piece is too big: Go down to a 2.5 mm hook. If it is too small or stiff: Go up to a 3.0 mm hook. Square stitches matter more than exact size here. If your stitches are wider than they are tall, the F will look squat, so adjust your tension until 6 sts and 6 rows each measure 1 in (2.5 cm).
Letter F Panel
Use raspberry rose. You work flat in rows from the bottom of the stem upward. The ch 1 at the start of each row does not count as a stitch.
Lower stem
Row 1: Ch 7, sc in 2nd ch from hook and in each remaining ch. (6 sc)
Rows 2–8: Ch 1, turn, sc in each st across. (6 sc)
Checkpoint: 1 in (2.5 cm) wide x 1.33 in (3.4 cm) tall. Row 8 ends on the side where the arms will grow, so place a marker on this edge. This is the right-hand edge when you view the letter from the front.
Middle arm
At the end of Row 8, do not turn yet. Ch 5.
Row 9: Turn, sc in 2nd ch from hook and in next 3 ch (4 sc), sc in each of the 6 stem sts. (10 sc)
Rows 10–11: Ch 1, turn, sc in each st across. (10 sc)
Checkpoint: 1.67 in (4.2 cm) wide x 1.83 in (4.6 cm) tall. The arm sticks out 4 sts, or 0.67 in (1.7 cm), beyond the stem. Row 11 ends on the straight left edge.
Gap between arms
Row 12: Ch 1, turn, sc in next 6 sts, leave the remaining 4 arm sts unworked. (6 sc)
Rows 13–14: Ch 1, turn, sc in each st across. (6 sc)
The gap is 3 rows, or 0.5 in (1.3 cm), tall. Row 14 ends on the arm side again.
Top bar
At the end of Row 14, do not turn yet. Ch 7.
Row 15: Turn, sc in 2nd ch from hook and in next 5 ch (6 sc), sc in each of the 6 stem sts. (12 sc)
Rows 16–18: Ch 1, turn, sc in each st across. (12 sc)
The top bar is 4 rows, or 0.67 in (1.7 cm), tall and reaches 6 sts, or 1 in (2.5 cm), beyond the stem. Do not fasten off. Go straight on to the border.
Checkpoint: 2 in (5.1 cm) wide x 3 in (7.6 cm) tall.
Flowers (Make 2)
Make one with light pink petals and one with cream petals. Both use yellow centers.
Round 1: With yellow, make a magic ring, ch 1, 5 sc in ring, pull ring closed, join with sl st to first sc. (5 sc) Fasten off yellow.
Round 2: Join petal color in any sc. *(Sl st, ch 2, 2 dc, ch 2, sl st) all in same st, move to next st; repeat from * 4 more times. (5 petals, 10 dc total) Join with sl st to first sl st and fasten off, leaving a 6 in (15.2 cm) tail for sewing.
Each flower measures about 0.8 in (2.0 cm) across. Weave in the yellow tail on the back and pull the ring tight so the center sits slightly domed.
Leaves (Make 3)
Use sage green.
Leaf: Ch 5. Sc in 2nd ch from hook, hdc in next ch, dc in next ch, sc in last ch. (4 sts)
Tip: Ch 2, sl st in 2nd ch from hook. (picot)
Second side: Work into the free loops on the other side of the foundation ch: sc in first ch, dc in next ch, hdc in next ch, sc in last ch. (4 sts) Join with sl st to the first sc. Fasten off, leaving a 6 in (15.2 cm) tail.
Each leaf has 8 sts plus the picot tip. It measures about 0.75 in (1.9 cm) long and is widest at the dc on each side.
Posy Placement
Sew the appliqués on after blocking (see Final Blocking). Lay the letter RS up with the arms pointing right.
- Place the pink flower on the stem around Rows 4–7. Set its center about 0.33 in (0.8 cm) in from the left edge, so one petal slightly overhangs that edge.
- Place the cream flower around Rows 1–4, slightly lower and to the right, with one petal tucked under the pink flower.
- Tuck one leaf under the upper-left petals of the pink flower, pointing up and to the left.
- Tuck one leaf under the left side of the cream flower, pointing left and slightly down.
- Tuck the third leaf under the lower right of the cream flower, pointing right and slightly down.
Sew the leaves first, then the cream flower, then the pink flower. Use small stitches through the base of each piece only, so the stitching hides under the petals.
Border
Border gauge: One round of sc adds about 0.17 in (0.4 cm) on every edge. Work 1 sc per stitch and 1 sc per row end. Because the fabric has 6 sts and 6 rows per inch, this matches it exactly and the edges lie flat.
Outer corners (7): 3 sc in the corner st. Inner corners (3): sc2tog across the two positions that meet at the corner.
Round 1: Ch 1, rotate to work down the left edge. Work in this order:
- Left edge: sc in each row end from Row 18 down to Row 1. (18 sc)
- Bottom edge: 3 sc in first foundation ch, sc in next 4 ch, 3 sc in last ch. (10 sc)
- Right side of lower stem: sc in row ends of Rows 1–7 (7 sc), sc2tog over row end of Row 8 and first ch of arm underside (1). (8 sts)
- Underside of middle arm: sc in next 2 ch, 3 sc in last ch. (5 sc)
- End of middle arm: sc in row ends of Rows 9–11. (3 sc)
- Top of middle arm: 3 sc in first unworked st, sc in next 2 sts, sc2tog over last unworked st and row end of Row 12. (6 sts)
- Gap: sc in row end of Row 13, sc2tog over row end of Row 14 and first ch of top bar underside. (2 sts)
- Underside of top bar: sc in next 4 ch, 3 sc in last ch. (7 sc)
- End of top bar: sc in row ends of Rows 15–18. (4 sc)
- Top edge: 3 sc in first st, sc in next 10 sts, 3 sc in last st. (16 sc)
Join with sl st to first sc. (79 sts)
Why the math works: The F has 68 edge positions: 6 + 8 + 4 + 3 + 4 + 3 + 6 + 4 + 12 + 18. Each of the 7 outer corners adds 2 extra sc (+14), and each of the 3 inner sc2tog corners removes 1 (−3). 68 + 14 − 3 = 79. The edge-position counts already include each corner stitch, so no corner is counted twice.
Round 2: Ch 1, sl st loosely in each st around. (79 sl st) Join to the first sl st and fasten off.
This slip-stitch round firms the outline and gives a smooth, slightly raised rim. Keep it loose. If the edge puckers, rework this round with a 3.0 mm hook.
Checkpoint: 2.33 in (5.9 cm) wide x 3.33 in (8.5 cm) tall.
Final Blocking
- Weave in all letter tails before blocking. Leave the flower and leaf sewing tails free.
- Lightly mist the letter with water until damp, not soaked.
- Pin it RS up on a blocking board to 2.33 in (5.9 cm) x 3.33 in (8.5 cm).
- Pin the 7 outer corners first, then put a pin at each inner corner to square it.
- Check that the stem is straight and both arms line up with the grid lines.
- Pin the flowers and leaves flat beside the letter and mist them too, pressing the petals open with a fingertip.
- Let everything dry completely, at least 4 hours.
- Unpin, sew on the posy as described in Posy Placement, and weave in the sewing tails.
- Open a jump ring with two pliers. Pass it through the 3rd and 4th stitches of the top edge, above the stem, catching both the border and the top row of the panel for strength. Add one end of the chain and close the ring. Use the second jump ring to attach the other end of the chain to the split key ring.
Final Quality-Control Checklist
- Letter measures 2.33 in (5.9 cm) x 3.33 in (8.5 cm).
- Stem is 1 in (2.5 cm) wide before border and perfectly straight on the left.
- Middle arm is shorter than the top bar by 2 sts, or 0.33 in (0.8 cm).
- Gap between the arms is 0.5 in (1.3 cm) tall and not pulled shut.
- Border Round 1 has 79 sts; Round 2 has 79 sl st.
- Outer corners are softly rounded; inner corners are crisp.
- Flowers have 5 even petals and yellow centers that sit domed.
- No sewing stitches show on the front.
- Jump rings are fully closed with no gap.
Troubleshooting
The letter leans or twists. Your rows are taller than your stitches are wide. Pull up shorter loops or go down a hook size.
The border ruffles. You probably added extra sc at the row ends. Recount each edge against the Border list.
The border cups. Your tension is too tight, or you skipped a row end. Rework Round 1 more loosely.
The inner corners gape. Make sure each sc2tog pulls up a loop from both positions named in the pattern.
The flower petals curl. Block them flat while damp before sewing.
The jump ring pulls through. Move it so it catches both the border and the top row of the panel.
Care
Hand wash in cool water with mild soap, press out the water in a towel, and dry flat. Take off the key ring first if it is not stainless.
Final Notes
The measurement chain is simple. At 6 sc and 6 rows per 1 in (2.5 cm), the letter measures 2 in (5.1 cm) x 3 in (7.6 cm) after Row 18. One border round of 79 sts adds 0.17 in (0.4 cm) on each edge, bringing it to 2.33 in (5.9 cm) x 3.33 in (8.5 cm). Two 0.8 in (2.0 cm) flowers and three 0.75 in (1.9 cm) leaves complete the posy.
Change the letter color to match a bag, or switch the flower colors for a seasonal look. The structure stays the same.
Happy crocheting!