

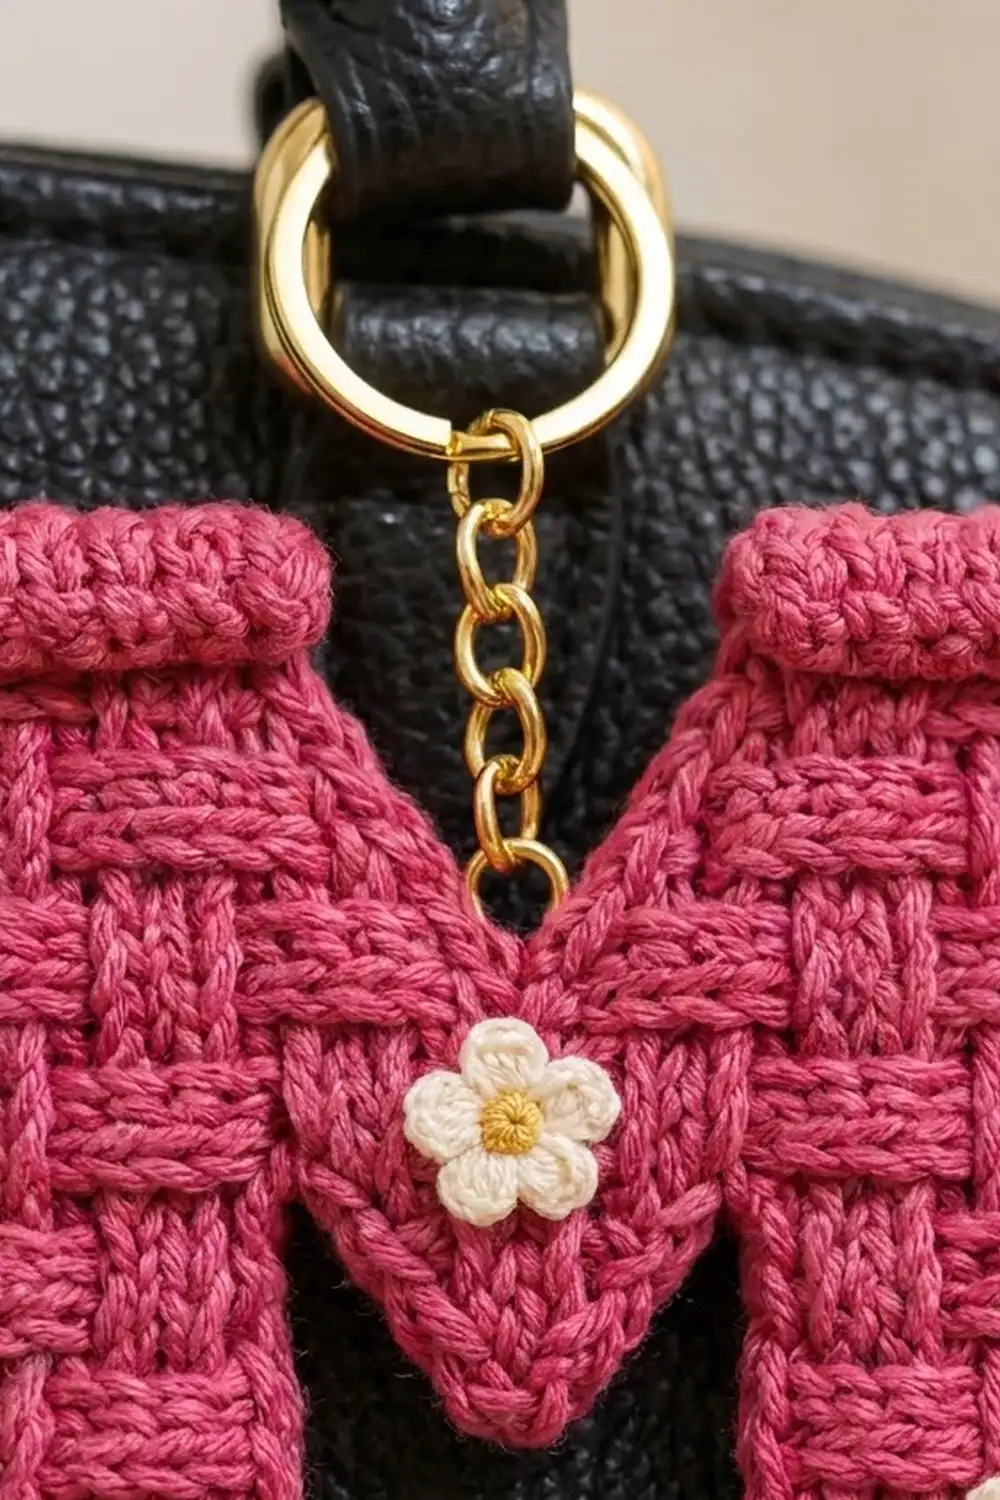
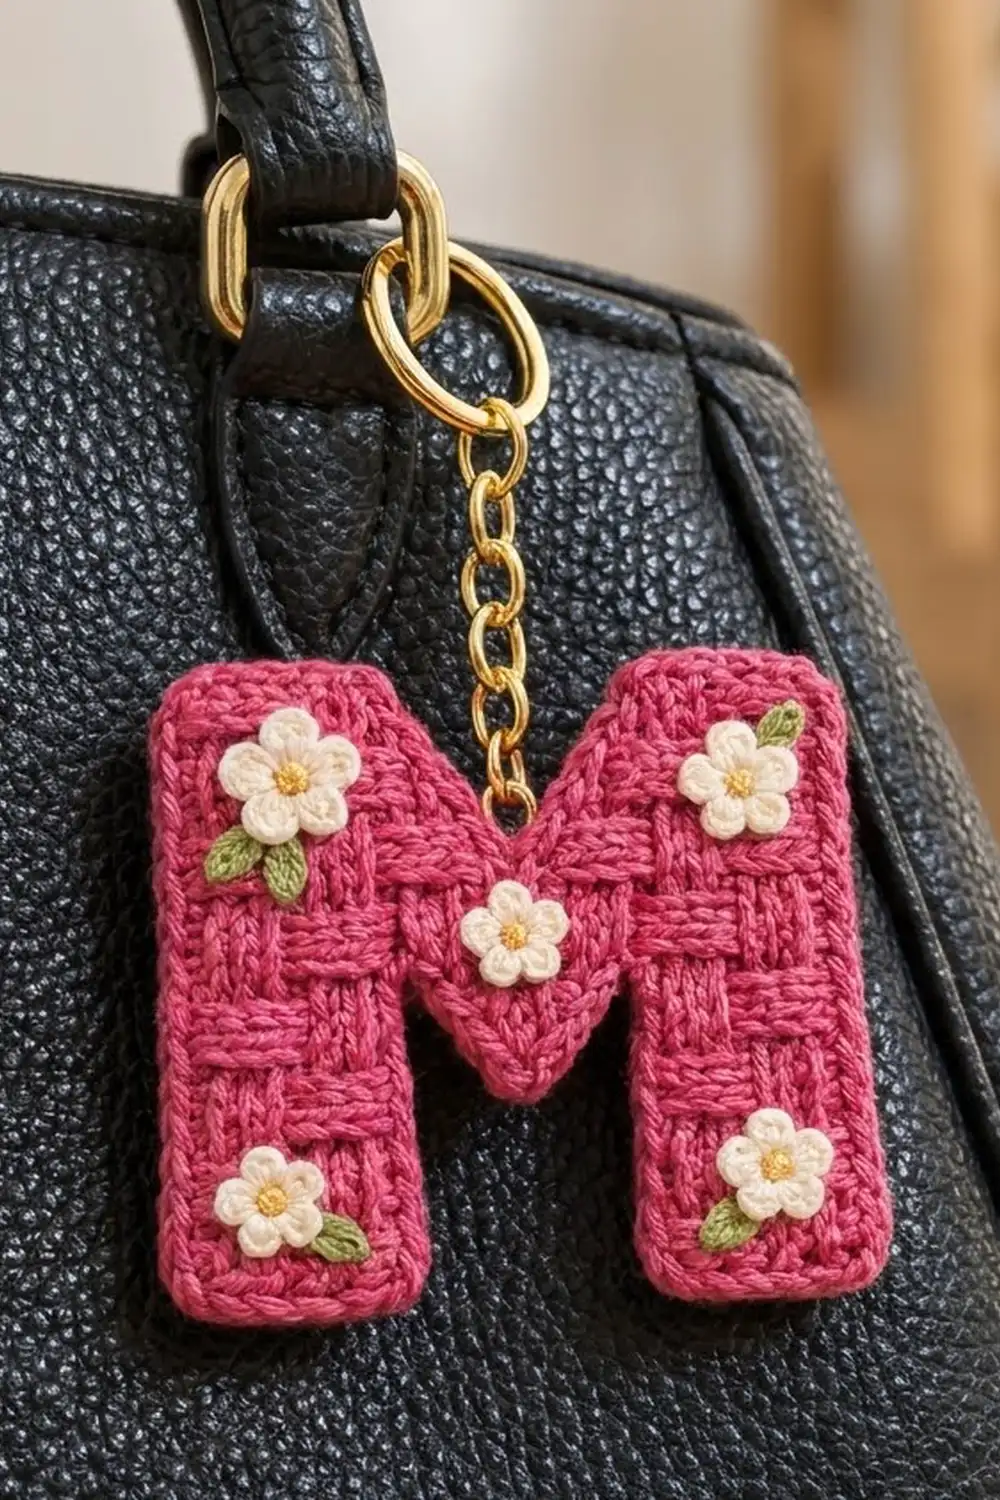
The Rosy Weave Letter M is a small, sturdy keychain worked in a raised basketweave texture. Blocks of raised and recessed post stitches alternate like a woven checkerboard, so the letter looks almost braided. A slip-stitch outline around the whole shape keeps the edges crisp.
The letter is raspberry pink. Five tiny cream flowers with sunny yellow centers sit on top, four on the legs and one at the point of the center V, and four of them have small green leaves. A gold split ring and a short gold chain turn the letter into a bag charm.
This pattern uses US crochet terms. After the border and blocking, the letter measures 3.75 in (9.5 cm) wide by 3.5 in (8.9 cm) tall.
You work the M as one flat piece from the top down. The first three rows run across the full width. Then the piece splits into three sections: two straight legs and a center section that decreases to a point to form the V. You finish with a two-round border around the whole outline, sew on the flowers and leaves, and attach the hardware.
Finished Size and Construction
- Finished size: 3.75 in (9.5 cm) wide x 3.5 in (8.9 cm) tall
- Skill level: Intermediate (post stitches, decreases, shaped border)
- Terminology: US
- Yarn weight: Sport (2) cotton for the letter, fingering (1) cotton for the appliqués
- Hook: 3.25 mm (US D/3) for the letter, 2.0 mm for the appliqués
- Number of pieces: 1 letter, plus 5 flowers and 5 leaves sewn on as appliqués
- Layout: one single letter M, not joined to other pieces
- Piece size before border: 3.5 in (8.9 cm) wide x 3.25 in (8.3 cm) tall
- Border depth: 0.125 in (0.3 cm) on every edge
- Leg width: 8 sts, about 1.25 in (3.2 cm) before the border
Materials
Choose a smooth, tightly plied cotton or cotton blend. Post stitches show up best in mercerized or matte cotton with good stitch definition. Fuzzy yarns hide the basketweave.
- Raspberry pink, sport weight cotton (about 150 m per 50 g): 12 g, about 36 m
- Cream, fingering weight cotton (about 170 m per 50 g): 3 g, about 10 m
- Golden yellow, fingering weight cotton: 1 g, about 3 m
- Leaf green, fingering weight cotton: 1 g, about 3 m
These quantities include a margin of about 25% for swatching and weaving in ends.
Tools
- 3.25 mm (US D/3) crochet hook
- 2.0 mm crochet hook
- Tapestry needle
- Rust-proof pins and a foam blocking mat
- Gold split keyring, 1 in (2.5 cm) across, with a 1.25 in (3.2 cm) gold chain
- One gold jump ring, 0.25 in (0.6 cm), and two pairs of flat-nose pliers
- Scissors and a ruler
Abbreviations (US Terms)
- ch – chain
- sl st – slip stitch
- sc – single crochet
- hdc – half double crochet
- dc – double crochet
- dc2tog – double crochet 2 together
- sc2tog – single crochet 2 together
- FPdc – front post double crochet
- BPdc – back post double crochet
- BLO – back loop only
- st(s) – stitch(es)
- RS / WS – right side / wrong side
Special stitches
- R (Raise): a stitch that sits raised on the RS. Work FPdc on RS rows and BPdc on WS rows. R3 means Raise the next 3 sts.
- Rc (Recess): a stitch that sits recessed on the RS. Work BPdc on RS rows and FPdc on WS rows. Rc3 means Recess the next 3 sts.
R and Rc are always defined from the RS, so you can just follow the letters.
Row sequences
- Full row P: dc, [R3, Rc3, dc] 3 times = 22 sts
- Full row Q: dc, [Rc3, R3, dc] 3 times = 22 sts
- Leg row P: dc, R3, Rc3, dc = 8 sts
- Leg row Q: dc, Rc3, R3, dc = 8 sts
Every row begins with ch 2. The ch 2 does not count as a stitch.
Gauge and Checkpoints
Gauge in basketweave with the 3.25 mm hook: 22 sts = 3.5 in (8.9 cm) wide and 11 rows = 3.25 in (8.3 cm) tall.
Because the letter is a single piece, Rows 1–3 are your gauge test. Measure them before you split the work into sections.
- After Row 1: 3.5 in (8.9 cm) wide.
- After Row 3: still 3.5 in (8.9 cm) wide and about 0.875 in (2.2 cm) tall.
- After the center section: the V point sits about 1.75 in (4.4 cm) below the top edge.
- After each leg: each leg adds about 2.375 in (6.0 cm), for a full height of 3.25 in (8.3 cm).
- After the border: 3.75 in (9.5 cm) x 3.5 in (8.9 cm).
If your piece is wider than 3.5 in (8.9 cm), change to a 3.0 mm hook. If it is narrower, change to a 3.5 mm (US E/4) hook. Post stitches pull the fabric in, so measure after Row 3 and not only after Row 1. If the width is off by 0.25 in (0.6 cm) or more, start again with the new hook.
Letter M Body
With the raspberry yarn and the 3.25 mm hook, ch 24.
Row 1 (RS): Dc in the 3rd ch from the hook and in each ch across. Turn. (22 dc)
Row 2 (WS): Ch 2, Full row P. Turn. (22 sts)
Row 3 (RS): Ch 2, Full row Q. Turn. (22 sts)
Check your gauge now. Plain dc columns at sts 1, 8, 15, and 22 separate the 3-st blocks. These columns mark the outer edges of the legs and the boundaries between the legs and the center. Do not fasten off.
First Leg
You work the first leg over the first 8 sts of Row 3. Leave the remaining 14 sts unworked for now.
Row 4 (WS): Ch 2, Leg row Q over the next 8 sts. Turn. (8 sts)
Row 5 (RS): Ch 2, Leg row P. Turn. (8 sts)
Row 6 (WS): Ch 2, Leg row P. Turn. (8 sts)
Row 7 (RS): Ch 2, Leg row Q. Turn. (8 sts)
Row 8 (WS): Ch 2, Leg row Q. Turn. (8 sts)
Row 9 (RS): Ch 2, Leg row P. Turn. (8 sts)
Row 10 (WS): Ch 2, Leg row P. Turn. (8 sts)
Row 11 (RS): Ch 2, Leg row Q. Fasten off. (8 sts)
The blocks swap between raised and recessed every two rows. Including the shared top band, this gives you five bands of checkerboard texture.
Center V
With the WS facing, go back to Row 3. Join the raspberry yarn with a sl st in the 9th st, which is the first st after the first leg. The center uses sts 9–14, which is 6 sts.
Row 4 (WS): Ch 2, dc2tog over sts 9 and 10, Rc1, R1, dc2tog over sts 13 and 14. Turn. (4 sts)
Row 5 (RS): Ch 2, [dc2tog] twice. Turn. (2 sts)
Row 6 (WS): Ch 2, dc2tog. Fasten off. (1 st)
Each dc2tog takes away one edge stitch, so the sides of the V slant evenly. The single stitch in Row 6 is the point of the V. The point hangs free, and the gaps on each side of the V open up from Row 4 down.
Second Leg
With the WS facing, join the raspberry yarn with a sl st in the 15th st of Row 3. This is the plain dc that comes right after the center section.
Rows 4–11: Work Rows 4–11 exactly as for the First Leg, in the same sequence: Q, P, P, Q, Q, P, P, Q. Fasten off. (8 sts in every row)
Flowers (make 5)
Use the cream yarn and the 2.0 mm hook.
Round 1: Make a magic ring. Ch 1 and work 5 sc in the ring, then pull the ring closed. Sl st to the first sc. (5 sc)
Round 2: (Sl st, ch 1, hdc, dc, hdc, ch 1, sl st) all in the next sc, repeat 5 times. (5 petals)
Fasten off, leaving an 8 in (20.3 cm) tail. With the golden yellow yarn, make a French knot with three wraps in the center of the flower. Each flower measures about 0.6 in (1.5 cm) across.
Leaves (make 5)
Use the green yarn and the 2.0 mm hook. Ch 5.
Sc in the 2nd ch from the hook, hdc in the next ch, sc in the next ch, and sl st in the last ch. Then work along the other side of the chain: sc in the next ch, hdc in the next ch, sc in the next ch, and sl st in the tip. (8 sts)
Fasten off, leaving a 6 in (15.2 cm) tail. Each leaf is about 0.375 in (1.0 cm) long.
Border
Use the raspberry yarn and the 3.25 mm hook, and work with the RS facing.
Border gauge: 1 sc in each stitch along the top and bottom edges and 2 sc in each dc row end along the sides. The finished border is 0.125 in (0.3 cm) deep.
Round 1: Join the yarn with a sc in the first foundation ch loop at one top corner. Work around the letter in this order:
- Top edge (22 loops): 2 more sc in the same corner loop, sc in the next 9 loops, sc2tog over the 2 center loops, sc in the next 9 loops, and 3 sc in the last loop. (25 sc)
- First outer side (Rows 1–11): 2 sc in each row end. (22 sc)
- First leg bottom (8 sts): 3 sc in the first st, sc in the next 6 sts, and 3 sc in the last st. (12 sc)
- First inner side: 2 sc in each row end of Rows 11–5, then 1 sc in the Row 4 row end. (15 sc)
- Inner corner: sc2tog over the leg’s Row 4 row end and the center’s Row 4 row end. (1 sc)
- First V side: 1 more sc in the same center Row 4 row end, then 2 sc in each of the Row 5 and Row 6 row ends. (5 sc)
- V point: 3 sc in the top of the Row 6 st. (3 sc)
- Second V side: 2 sc in each of the Row 6 and Row 5 row ends, and 1 sc in the Row 4 row end. (5 sc)
- Inner corner: sc2tog over the center’s Row 4 row end and the second leg’s Row 4 row end. (1 sc)
- Second inner side: 1 more sc in the same leg Row 4 row end, then 2 sc in each row end of Rows 5–11. (15 sc)
- Second leg bottom: 3 sc in the first st, sc in the next 6 sts, and 3 sc in the last st. (12 sc)
- Second outer side (Rows 11–1): 2 sc in each row end. (22 sc)
Sl st to the first sc.
Round 1 total: 25 + 22 + 12 + 15 + 1 + 5 + 3 + 5 + 1 + 15 + 12 + 22 = 138 sc.
Round 2: Sl st in the BLO of each sc around, keeping your tension loose and even. (138 sl sts) Fasten off with an invisible join.
Why the math works: A dc row is about as tall as two sc, so 2 sc per row end keeps the sides flat. Along the top and bottom edges, one sc per stitch matches the width exactly. At each outer corner, 3 sc turn the edge 90 degrees, and 3 sc also wrap neatly around the single stitch at the V point. The two inner corners and the top center need less fullness, so each gets an sc2tog. The sc2tog at the top center also shapes the shallow dip at the top of the M. The BLO slip-stitch round makes a chain outline without adding much width.
Final Blocking
- On the WS, weave in all the ends from the letter. Leave the appliqué tails long.
- Place the letter RS up on the mat and pin it to 3.75 in (9.5 cm) wide by 3.5 in (8.9 cm) tall.
- Pin both legs so they are straight and parallel, with their bottom edges level.
- Pin the V point centered between the legs, about 1.875 in (4.8 cm) below the top edge of the border.
- Put one pin in the top-center dip to set its shape.
- Spritz the letter until it is damp, or hold a steam iron 1 in (2.5 cm) above it. Never press the iron onto the post stitches.
- Let the letter dry completely, which takes at least 4 hours. Spritz the flowers and leaves flat at the same time.
- Sew on the flowers: one on the upper part of each leg, one on the lower part of each leg, and one in the center of the V. Tuck two leaves beside the upper-left flower and one leaf beside the upper-right flower and each lower flower. The center flower has no leaves.
- Use the pliers to open the jump ring. Pass it through both loops of the border at the top-center dip, add the chain and keyring, and close the ring.
Final Quality-Control Checklist
- The letter measures 3.75 in (9.5 cm) x 3.5 in (8.9 cm).
- Each leg is 8 sts wide and 8 rows long below the full-width band.
- The basketweave blocks alternate cleanly every 2 rows.
- The V ends in a single-stitch point, centered between the legs.
- Border Round 1 has 138 sc, and Round 2 has 138 sl sts.
- The edges lie flat, with no ruffling or cupping.
- All five flowers have yellow centers and are sewn on securely.
- The jump ring is fully closed, and the chain hangs from the top center.
Troubleshooting
The fabric curls toward the WS. Post-stitch fabric tends to curl. Block it firmly, and check that you used the correct post stitches on WS rows.
The texture looks like ribbing instead of blocks. You probably repeated P where you needed Q. The correct sequence for Rows 2–11 is P, Q, Q, P, P, Q, Q, P, P, Q.
The legs are different lengths. Count the rows. Each leg needs exactly 8 rows (Rows 4–11).
The V point is blunt. Make sure Row 6 is a single dc2tog. Pin the point when you block.
The border ruffles along the sides. Make sure you are working 2 sc per row end, not 3. If it still ruffles, work the border with a hook one size smaller.
The inner corners pucker. Make sure you worked an sc2tog at each inner corner.
The keychain hangs crooked. Move the jump ring to the exact center of the top dip.
Care
Hand wash in cool water with mild soap. Press out the water in a towel, dry flat, and don’t leave the metal hardware soaking.
Final Notes
Each stage sets up the next measurement. Row 1 sets the width at 3.5 in (8.9 cm). Rows 1–3 make up the first 0.875 in (2.2 cm) of height. The point of the V ends about 1.75 in (4.4 cm) below the top, and the legs bring the body to 3.25 in (8.3 cm). The 138-stitch border adds 0.125 in (0.3 cm) on every edge, so the finished letter is 3.75 in (9.5 cm) by 3.5 in (8.9 cm). If you check each stage as you go, your M will hang straight and neat on any bag.
Happy crocheting!