

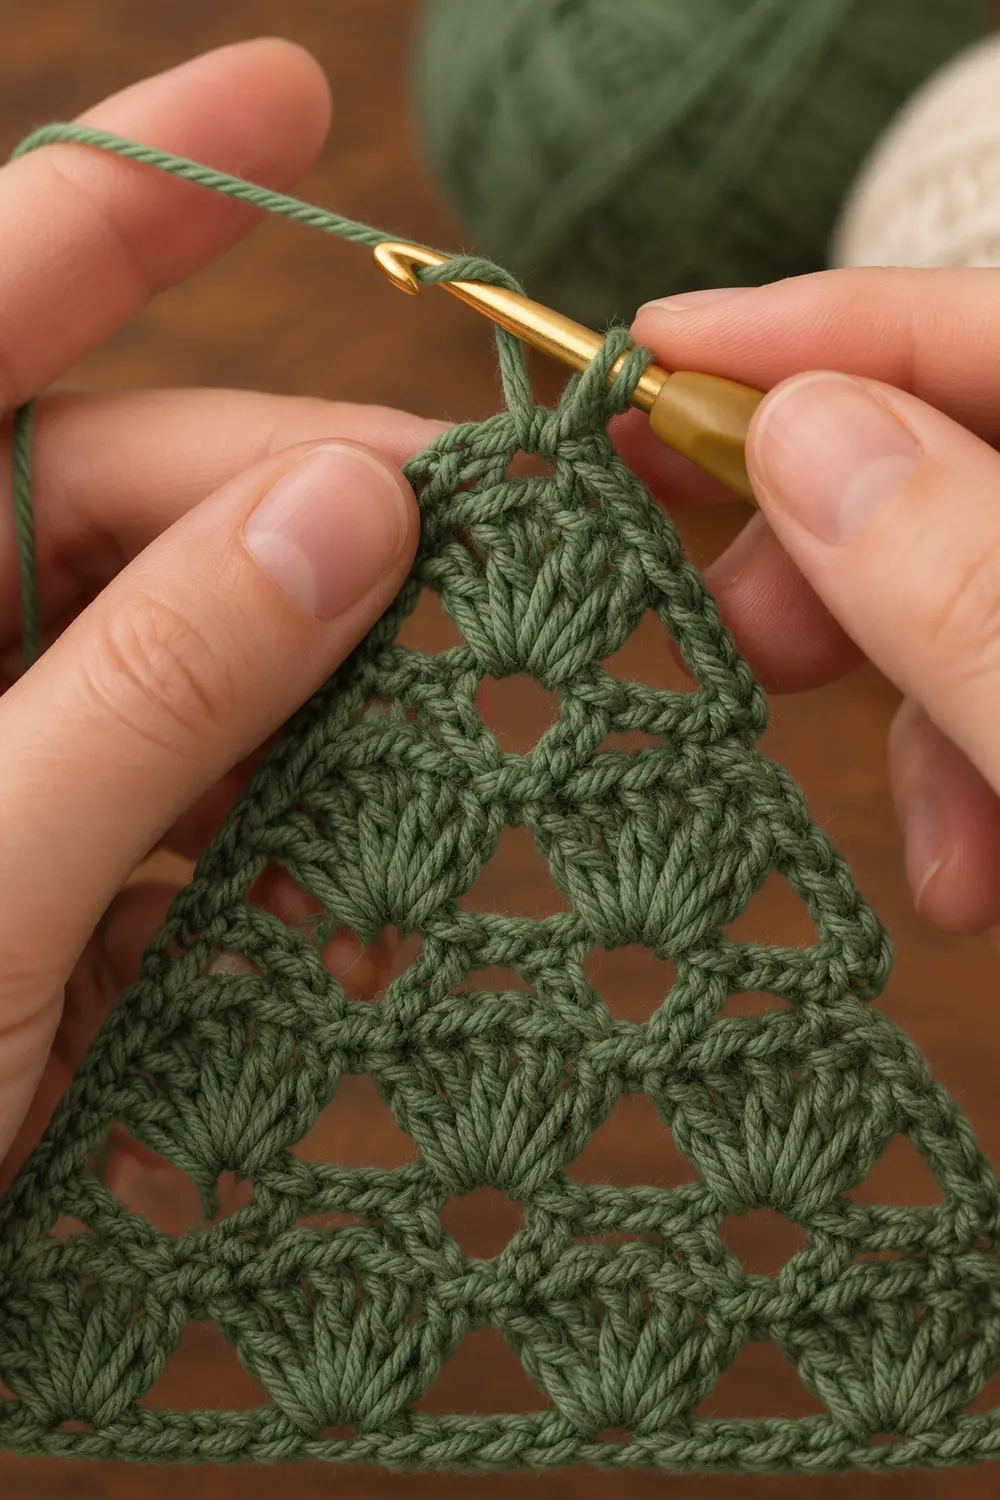
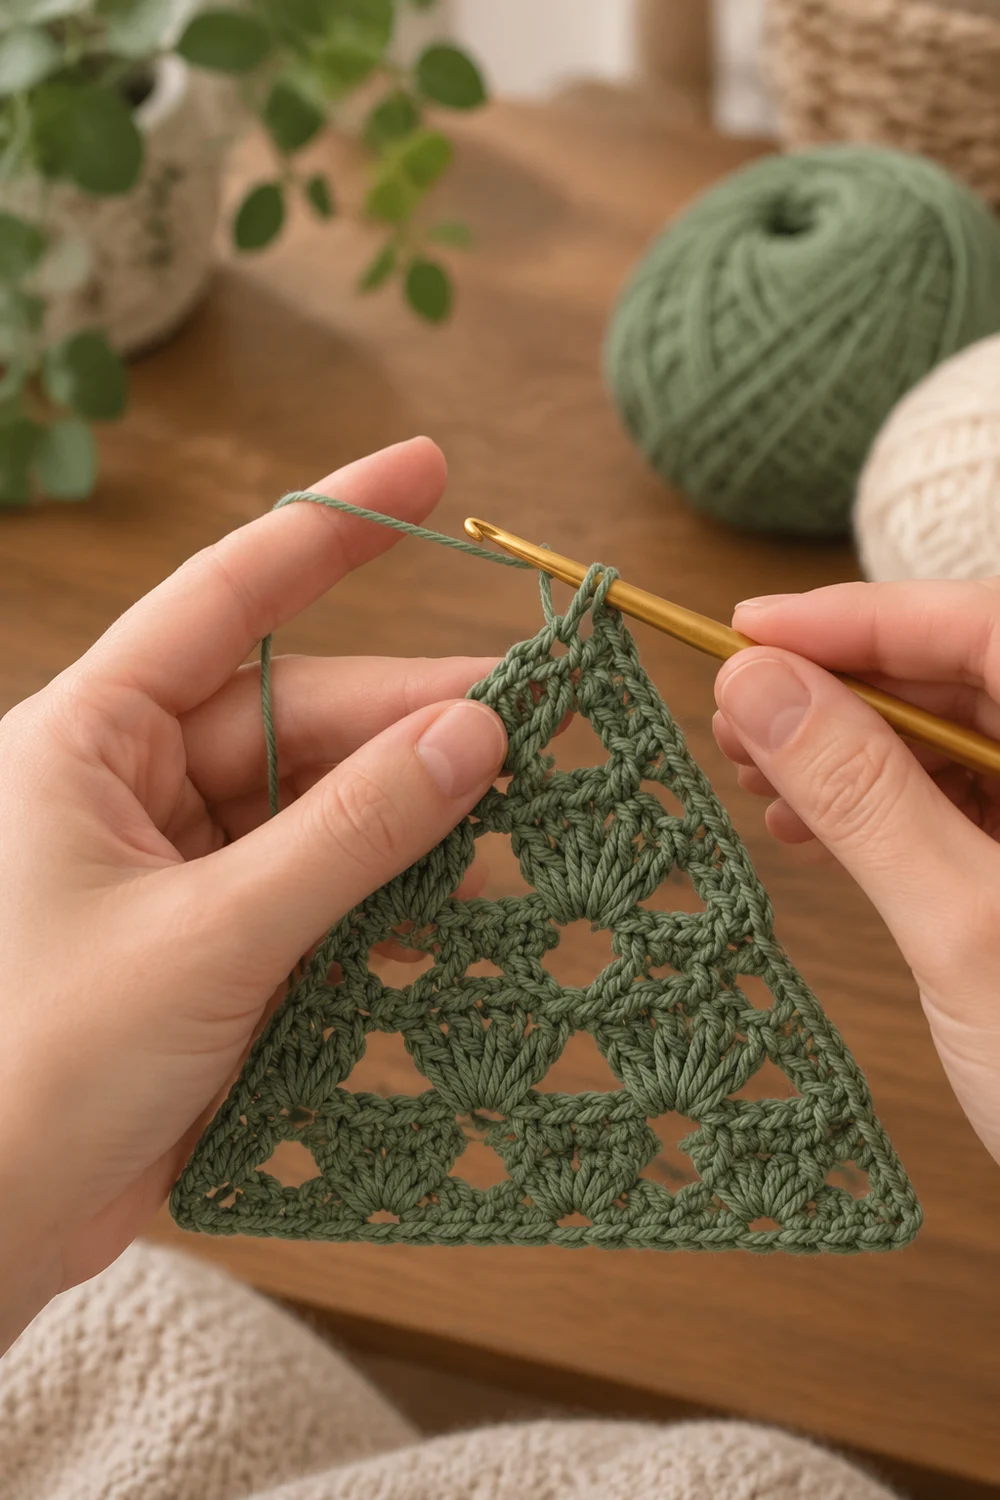
This little triangle is all texture and air. Rows of fan-shaped shells stack into a neat point, and the chain loops between them open into a pattern of diamond-shaped spaces. The result is a light, lacy motif that looks more complicated than it is.
The sample is worked in one solid sage green cotton with a twisted, slightly ribbed look. That twist gives every shell crisp definition, and the soft green keeps the lace calm rather than busy. There is only one color and one piece, so it is a relaxing project.
This pattern uses US crochet terms. The finished triangle measures 4.5 in (11.4 cm) across the base and 4.25 in (10.8 cm) tall after a single round of sc edging.
You work the piece flat in rows from the base up to the tip. Four shells sit across the bottom row. Each shell row is followed by a row of chain loops that steps in by half a shell on each side. The shells then reduce to 3, 2, and 1, which forms the triangle. A plain sc round finishes all three edges.
Finished Size and Construction
- Finished size: 4.5 in (11.4 cm) base × 4.25 in (10.8 cm) tall
- Skill level: Easy+ (simple stitches; you need to track your stitch counts)
- Terminology: US crochet terms
- Yarn weight: DK / light worsted (weight 3) cotton
- Hook: 3.5 mm (US E-4)
- Number of pieces: 1
- Layout: Single triangle, worked in rows from base to tip
- Piece size before border: 4.25 in (10.8 cm) base × 4 in (10.2 cm) tall
- Border depth: 0.125 in (0.3 cm) on each edge (1 round of sc)
Materials
Yarn: Choose a smooth, tightly twisted cotton or cotton blend in DK weight. Twisted cotton shows the shells and diamond spaces clearly, and it blocks to a firm, flat shape. Avoid fuzzy or very splitty yarns, because they blur the lace.
- Sage green: 10 g, about 23 m (based on a cotton of roughly 115 m per 50 g)
These quantities include a margin for your gauge swatch-in-progress, the weaving tails, and small differences in tension. The motif itself uses about 6–7 g.
Tools:
– 3.5 mm (US E-4) crochet hook
– Tapestry needle
– Scissors
– Ruler or tape measure
– Rust-proof pins and a blocking mat
– Spray bottle with clean water
Abbreviations (US Terms)
- ch – chain
- sl st – slip stitch
- sc – single crochet
- dc – double crochet
- sk – skip
- st(s) – stitch(es)
- sp – space
- ch-5 sp – space under a chain-5 loop
- RS / WS – right side / wrong side
- [ ] – repeat the instructions inside the brackets as directed
Special stitch:
– Shell: Work 5 dc in the same stitch or space. The 3rd dc is the center dc of the shell.
Gauge and Checkpoints
Gauge matters here because the shells must line up for the triangle to stay straight. You do not need a separate swatch. Instead, test with the first rows of the motif and measure as you go.
Base gauge: 6 sc = 1 in (2.5 cm) in Row 1.
Shell repeat: One repeat (shell plus sc, 6 sts) = about 1 in (2.5 cm) wide.
Row pair: One ch-loop row plus one shell row = about 1 in (2.5 cm) tall.
Checkpoints (before border):
– After Row 1: 25 sc measure 4.25 in (10.8 cm) across.
– After Row 2: 4.25 in (10.8 cm) wide, 0.75 in (1.9 cm) tall.
– After Row 4: about 3.25 in (8.3 cm) across the shell row, 1.75 in (4.4 cm) tall in total.
– After Row 6: about 2.25 in (5.7 cm) across, 2.75 in (7.0 cm) tall.
– After Row 8: about 1.25 in (3.2 cm) across, 3.75 in (9.5 cm) tall.
– After Row 9: 4 in (10.2 cm) tall at the tip.
If your piece is too big (Row 1 over 4.5 in / 11.4 cm), go down to a 3.25 mm hook. If it is too small (Row 1 under 4 in / 10.2 cm), go up to a 3.75 mm hook. Start again from the foundation chain each time. A difference of 0.25 in (0.6 cm) or less is fine, because blocking will even it out.
Pattern
Leave a 6 in (15.2 cm) tail at the start for weaving in.
Foundation and Base Row
Row 1 (RS): Ch 26. Sc in 2nd ch from hook and in each ch across. Turn. (25 sc)
Check: 25 sc should measure 4.25 in (10.8 cm). The number 25 is 4 shell repeats of 6 sts, plus 1 sc to close the last repeat (4 × 6 + 1 = 25).
Shell Row 1 (4 Shells)
Row 2 (WS): Ch 1. Sc in first sc. [Sk 2 sc, shell in next sc, sk 2 sc, sc in next sc] 4 times. Turn. (4 shells, 5 sc = 25 sts)
You use exactly 1 + (4 × 6) = 25 sts of Row 1, so the row ends in the last sc.
Decrease Step 1
Row 3 (RS): Sl st in first sc and in next 2 dc. Ch 1. Sc in next dc (the center dc of the first shell). [Ch 5, sc in center dc of next shell] 3 times. Turn. Leave the remaining 2 dc and the last sc unworked. (4 sc, 3 ch-5 sps)
The sl sts carry you inward by half a shell without adding height. Leaving the last half-shell unworked does the same on the other edge. Each ch-5 loop arches over the sc between two shells, and this opens the first row of diamond spaces.
Row 4 (WS): Ch 1. Sc in first sc. [Shell in next ch-5 sp, sc in next sc] 3 times. Turn. (3 shells, 4 sc = 19 sts)
Checkpoint: about 3.25 in (8.3 cm) across and 1.75 in (4.4 cm) tall in total.
Decrease Step 2
Row 5 (RS): Sl st in first sc and in next 2 dc. Ch 1. Sc in next dc (center dc of first shell). [Ch 5, sc in center dc of next shell] 2 times. Turn. (3 sc, 2 ch-5 sps)
Row 6 (WS): Ch 1. Sc in first sc. [Shell in next ch-5 sp, sc in next sc] 2 times. Turn. (2 shells, 3 sc = 13 sts)
Checkpoint: about 2.25 in (5.7 cm) across and 2.75 in (7.0 cm) tall.
Decrease Step 3
Row 7 (RS): Sl st in first sc and in next 2 dc. Ch 1. Sc in next dc (center dc of first shell). Ch 5, sc in center dc of next shell. Turn. (2 sc, 1 ch-5 sp)
Row 8 (WS): Ch 1. Sc in first sc. Shell in ch-5 sp. Sc in last sc. Turn. (1 shell, 2 sc = 7 sts)
Checkpoint: about 1.25 in (3.2 cm) across and 3.75 in (9.5 cm) tall.
Tip
Row 9 (RS): Sl st in first sc and in next 2 dc. Ch 1. Sc in next dc (center dc of the shell). (1 sc)
Do not fasten off. This single sc is the tip of the triangle, and the border starts here.
Stitch count summary:
– Shell rows: 25 → 19 → 13 → 7 sts. Each loses exactly 1 repeat of 6 sts.
– Loop rows: 4 sc / 3 loops → 3 sc / 2 loops → 2 sc / 1 loop → 1 sc.
– Each loop row always has 1 more sc than ch-5 loops, and the next shell row always has 1 shell per loop.
Border
The border is one round of sc. It squares up the stepped edges and frames the lace without adding texture.
Border gauge:
– Base: 6 sc per inch, the same as Row 1.
– Slanted sides: The sides are worked deliberately looser, at about 5.3 sc per inch. Row-end edges stretch more than stitch tops, so matching the base density would make the sides ruffle.
Corner rule: Each corner gets 3 sc in one stitch. The side counts below do not include these corner groups.
Border Round (RS): Continue from the tip sc. Ch 1.
1. Tip corner: 3 sc in the tip sc.
2. First slanted side: Work 24 sc evenly down the side to the base.
– Place 6 sc per step. One step is one shell row plus the loop row on top of it.
– In each step, work 4 sc around the outer edge of the end half-shell and 2 sc into the row ends of the loop row.
– There are 4 steps (Rows 1–2, 3–4, 5–6, 7–8), so 4 × 6 = 24 sc.
3. Base corner: 3 sc in the first remaining loop of the foundation chain.
4. Base: 1 sc in each of the next 23 foundation loops.
5. Base corner: 3 sc in the last foundation loop.
6. Second slanted side: Work 24 sc evenly up the side. Use the same 6-per-step placement, mirrored.
7. Join: Sl st to the first sc of the round. Fasten off, leaving a 6 in (15.2 cm) tail.
Round total: 3 + 24 + 3 + 23 + 3 + 24 = 80 sc
Why the math works:
– Base: The foundation chain has 25 loops. You work 23 of them singly and use the other 2 as base corners. That gives 23 + 2 = 25, matching Row 1 exactly. At 6 sc per inch, the base keeps its 4.25 in (10.8 cm) width, and the border adds 0.125 in (0.3 cm) at each end, for 4.5 in (11.4 cm) in total.
– Slanted sides: Each side measures about 4.5 in (11.4 cm) before the border, and 24 sc ÷ 4.5 in ≈ 5.3 sc per inch. After the border, each side measures about 4.75 in (12.1 cm).
– Height: The border adds 0.125 in (0.3 cm) at the tip and 0.125 in (0.3 cm) at the base. That brings the height from 4 in (10.2 cm) to 4.25 in (10.8 cm).
Final Blocking
- Weave in both tails along the WS of the border, then trim them.
- Soak the triangle in cool water for 10 minutes, or spray it until it is fully damp.
- Press out the excess water in a towel. Do not wring it.
- Lay the triangle RS up on the blocking mat.
- Pin the 3 corners first: base corners 4.5 in (11.4 cm) apart, and the tip 4.25 in (10.8 cm) above the center of the base.
- Pin along each slanted side every 0.5 in (1.3 cm), keeping the edge straight.
- Pin into the top of each ch-5 loop to open the diamond spaces evenly.
- Gently fan out each shell with your fingertips so the 5 dc spread evenly.
- Let it dry completely, then unpin.
Final Quality-Control Checklist
- Base measures 4.5 in (11.4 cm) and height measures 4.25 in (10.8 cm).
- Both slanted sides measure about 4.75 in (12.1 cm) and match each other.
- Shell counts are 4, 3, 2, and 1 from bottom to top.
- Every shell has exactly 5 dc.
- Every loop row has 1 more sc than ch-5 loops.
- Each sc in a loop row sits in a center dc, so the shells stack in straight columns.
- The diamond spaces are open and evenly sized.
- The border round totals 80 sc, with 3 sc at each corner.
- The edges lie flat, with no ruffling or cupping.
- All tails are woven in securely.
Troubleshooting
The triangle leans to one side. You likely skipped the sl sts at the start of a loop row, or you worked into the final half-shell. Check that each loop row starts with sl sts into 1 sc and 2 dc, and ends at the center dc of the last shell.
The shells look crowded or cupped. Your dc are too tight. Try going up a hook size, or pull up each dc loop a little taller.
The diamond spaces look stretched or droopy. Your ch-5 loops are too loose. Chain more firmly, or work ch 4 instead if your tension is very relaxed. Keep the count the same across every loop row.
Row 1 ends with stitches left over. Recount your foundation chain. You need 26 ch for 25 sc.
The border sides ruffle. You worked too many sc. Rework the side with exactly 6 sc per step.
The border sides pull in. You worked too few sc or chained too tightly. Check for 24 sc per side and loosen your tension slightly.
The tip looks blunt. Make sure the tip corner has 3 sc in a single stitch, then pin the point firmly while blocking.
Care
Hand wash cool and lay flat to dry. If the shape relaxes, re-block it with a light spray and pins.
Final Notes
The measurement chain is short and easy to check:
– Row 1: 25 sc at 6 sc per inch gives 4.25 in (10.8 cm).
– Shell rows: Each one loses one 6-st repeat, going 25 → 19 → 13 → 7 sts.
– Height: Each row pair adds about 1 in (2.5 cm), so the tip lands at 4 in (10.2 cm).
– Border: A round of 80 sc adds 0.125 in (0.3 cm) on every edge. The finished triangle is 4.5 in (11.4 cm) wide by 4.25 in (10.8 cm) tall.
Measure at each checkpoint and the triangle will block into a neat, crisp point with open diamond lace.
Happy crocheting!