

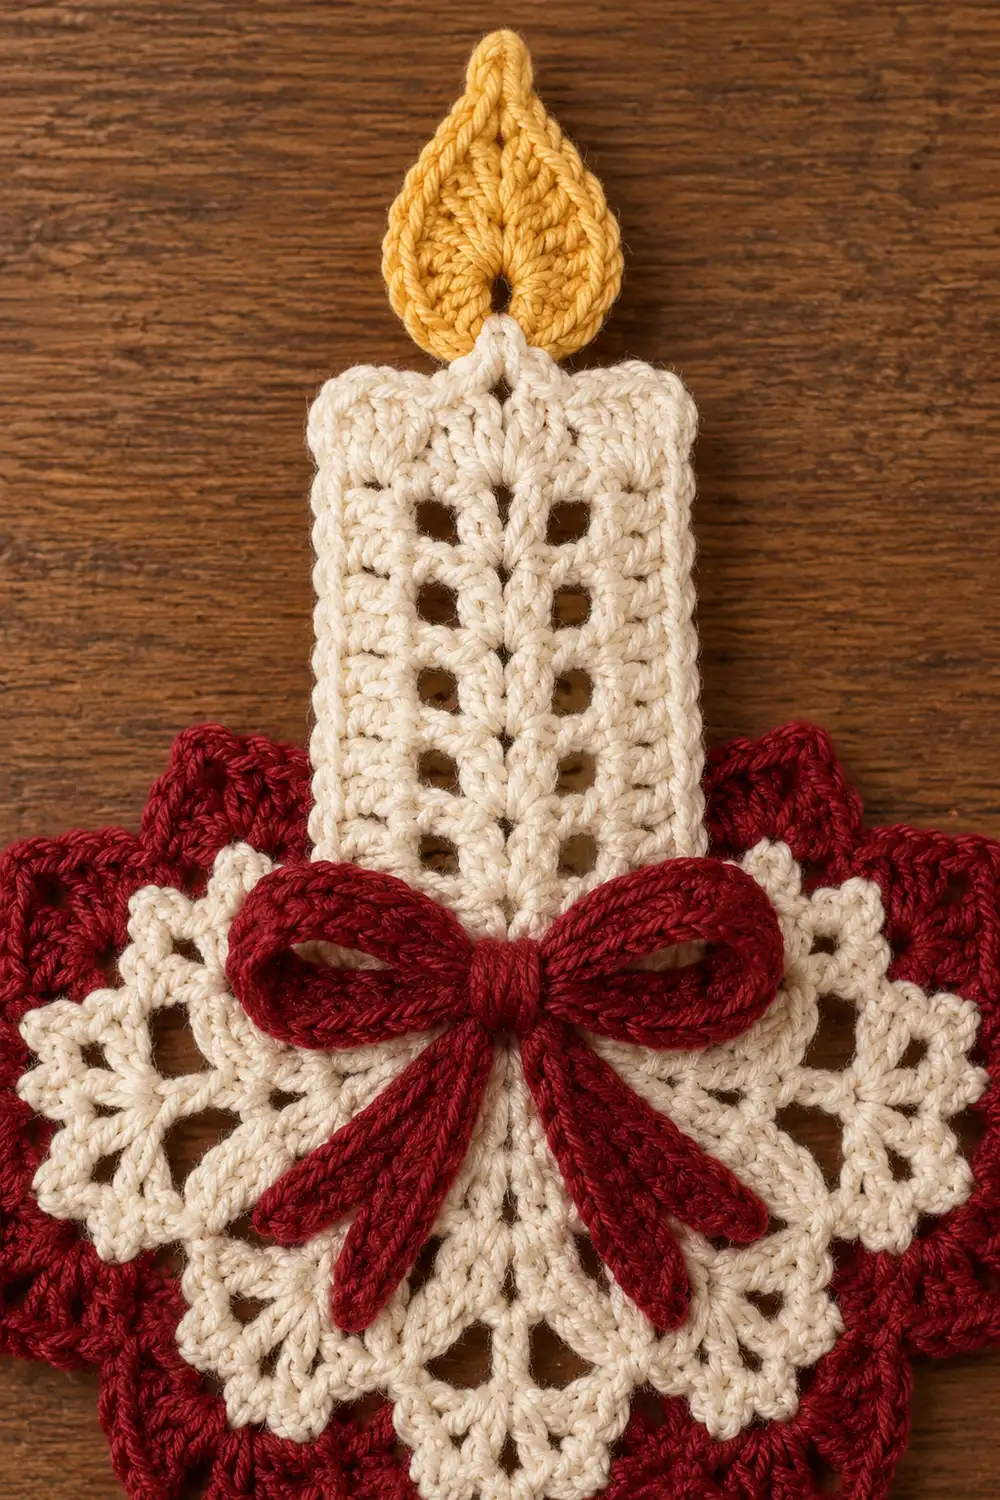
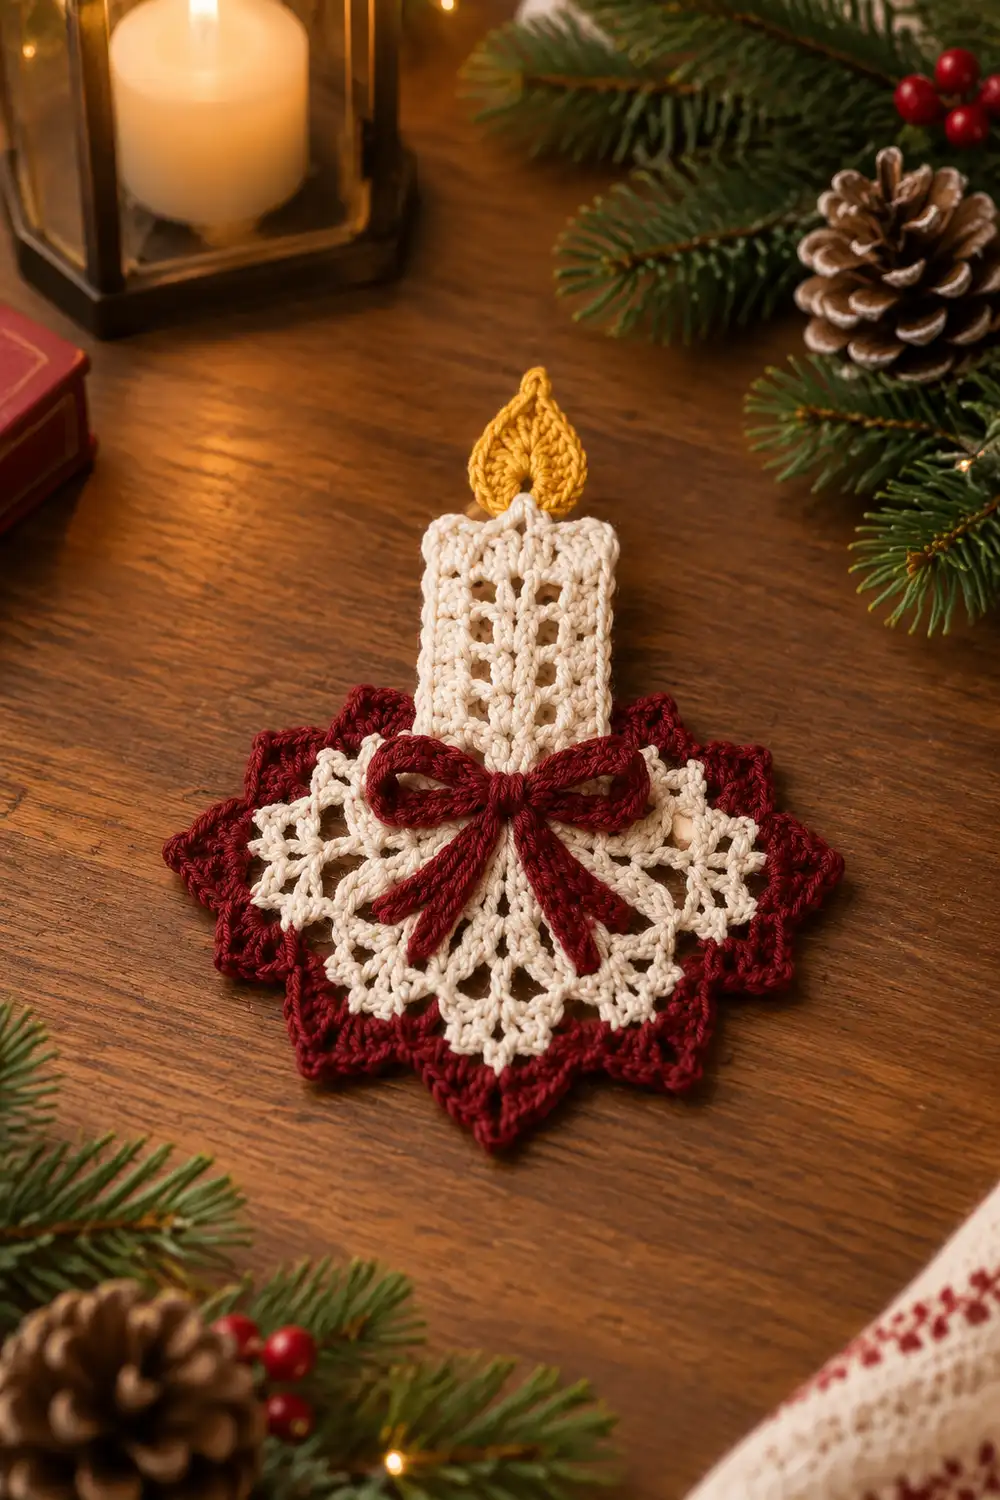
This holiday candle is a layered, ornamental piece. A cream candle with vertical ridges and an open lattice stands at the center, topped with a golden-yellow flame. Behind it sits a cream lacy star with pointed petals, and behind that a deep burgundy ruffle with scalloped, petal-shaped edges peeks out between the star points.
The palette is classic: cream, golden yellow, and wine red. The style is vintage doily lace with a cozy, festive finish. The piece looks lovely laid flat on a table among evergreen and pine cones, or hung as a decoration.
This pattern uses US crochet terms. The finished piece measures 5.5 in (14.0 cm) wide and 6.1 in (15.5 cm) tall from the lowest ruffle petal to the flame tip.
Construction is simple. You make three motifs: a cylindrical candle tube with a flame worked onto its top, a cream lace star, and a burgundy ruffle. You stack and sew the three layers together, then work the ruffle’s scalloped petal edge last.
Finished Size and Construction
- Finished size: 5.5 in (14.0 cm) wide x 6.1 in (15.5 cm) tall
- Skill level: Intermediate (front post stitches, working in joined rounds, layering)
- Terminology: US
- Yarn weight: Light (#3 / DK) cotton
- Hook: 3.25 mm (US D-3)
- Number of pieces: 3 motifs joined into one single piece
- Layout: layered stack: ruffle at the back, star in the middle, candle in front
- Piece sizes:
- Candle body: 1.6 in (4.1 cm) wide x 2.6 in (6.6 cm) tall
- Flame: 1.2 in (3.0 cm) wide x 1.0 in (2.5 cm) tall
- Star: 4.5 in (11.4 cm) point to point
- Size before border: ruffle 4.5 in (11.4 cm) across
- Border depth: 0.5 in (1.3 cm) per side, giving 5.5 in (14.0 cm)
Materials
Choose a smooth mercerized cotton in light (#3) weight. Cotton holds the points and lattice crisply and blocks well. The figures below assume about 125 m per 50 g.
- Cream: 10 g / 25 m (candle body and star)
- Burgundy: 8 g / 20 m (ruffle)
- Golden yellow: 3 g / 8 m (flame)
Tools:
– 3.25 mm (US D-3) hook
– Tapestry needle
– Scissors
– Stitch marker
– Ruler or tape measure
– Blocking mat and rust-proof pins
– Spray bottle
All quantities include roughly a 40% margin for swatching and weaving in ends.
Abbreviations (US Terms)
- ch – chain
- sl st – slip stitch
- sc – single crochet
- hdc – half double crochet
- dc – double crochet
- tr – treble crochet
- FPdc – front post double crochet
- sc2tog – single crochet 2 together
- sp – space
- st(s) – stitch(es)
- rnd – round
- RS – right side
Special stitches:
– FPdc: Yarn over and insert the hook from front to back to front around the post of the stitch. Complete as a dc. This raises a vertical ridge.
– Picot: Ch 3, then sl st in the 3rd ch from the hook.
– Star point: Work (hdc, dc, tr, ch 3, tr, dc, hdc) all in the same loop.
Gauge and Checkpoints
Gauge: 20 dc x 10 dc rounds = 4 in (10.2 cm). This works out to 5 sts and 2.5 rounds per 1 in (2.5 cm). Single crochet rows measure about 0.2 in (0.5 cm) each.
Test one motif first. The star is a good choice because it uses every stitch height. Check it against these points:
- Rnd 1: 0.9 in (2.3 cm) across
- Rnd 2: 1.6 in (4.1 cm) across
- Rnd 3: 2.4 in (6.1 cm) across
- Rnd 5: 4.5 in (11.4 cm) point to point
If it is too big: go down 0.25 mm and remake it. Do not drop stitches; the counts are what make the layers line up.
If it is too small: go up 0.25 mm.
All three motifs must use the same hook. Rnds 1–3 of the star and ruffle are identical and must match stitch for stitch when you join them.
Candle Body (Cream, Worked as a Tube)
The candle is a true cylinder worked in joined rounds. It is then flattened so it lies flat with two layers.
Foundation: Ch 16 and join with a sl st to the first ch, taking care not to twist the chain.
Rnd 1: Ch 3 (counts as dc). Dc in each remaining ch around. Join to the top of the ch-3. (16 dc)
Rnd 2: Ch 2 (does not count as a st). FPdc around the next st, dc in the next st, ch 1, skip the next st, dc in the next st. Repeat from * 4 times in total. Join with a sl st to the first FPdc.
(4 FPdc + 8 dc + 4 ch-1 sps = 16 sts)
Rnds 3–6: Ch 2 (does not count). FPdc around the FPdc, dc in the dc, ch 1, skip the ch-1 sp, dc in the dc. Repeat from * 4 times in total. Join.
(16 sts each round)
The stacked FPdc form the vertical ridges. The stacked ch-1 sps form the open lattice columns.
Checkpoint: the tube is 2.4 in (6.1 cm) tall and 1.6 in (4.1 cm) wide when flattened.
Rnd 7 (top closure): Flatten the tube so that 2 pattern repeats (8 sts) face front, with the join at one side fold. Ch 1. Working through each front st and the back st directly behind it, sc 8 across. (8 sc) Fasten off.
Bottom closure: Join cream at one bottom corner, keeping the same alignment. Sc 8 through both layers of the foundation ch. (8 sc) Fasten off.
Checkpoint: the candle body is 2.6 in (6.6 cm) tall.
Flame (Golden Yellow, Worked onto the Candle)
With the RS facing, join yellow in the 3rd sc of the top closure row. This leaves 2 sc free on each side.
Row 1: Ch 1. Sc in the same st and in the next 3 sts. (4 sc)
Row 2: Ch 1, turn. 2 sc in the first st, sc in the next 2 sts, 2 sc in the last st. (6 sc)
Row 3: Ch 1, turn. Sc2tog, sc in the next 2 sts, sc2tog. (4 sc)
Row 4: Ch 1, turn. Sc2tog twice. (2 sc)
Row 5: Ch 1, turn. Sc2tog (1 sc). Work a picot for the flame tip. Fasten off.
Checkpoint: the flame is 1.2 in (3.0 cm) wide at Row 2 and 1.0 in (2.5 cm) tall including the tip.
Lace Star (Cream)
Rnd 1: Make a magic ring. Ch 3 (counts as dc), then work 15 dc in the ring. Join. (16 dc)
Rnd 2: Ch 4 (counts as dc + ch 1). (Dc, ch 1) in each remaining st around. Join to the 3rd ch.
(16 dc + 16 ch-1 sps)
Rnd 3: Sl st into the first ch-1 sp. Ch 3 and dc in the same sp, then ch 2. (2 dc in the next ch-1 sp, ch 2) 15 times. Join.
(32 dc + 16 ch-2 sps)
Rnd 4: Sl st into the first ch-2 sp. Ch 1, sc in the same sp, ch 4. (Sc in the next ch-2 sp, ch 4) 15 times. Join to the first sc.
(16 sc + 16 ch-4 loops)
Rnd 5: Sl st into the first loop. Ch 1 (does not count). Work a star point in the same loop, then sc in the next loop. (Star point in the next loop, sc in the next loop) 7 times. Join to the first hdc.
(8 points: 48 sts + 8 ch-3 tips, plus 8 sc = 56 sts)
Fasten off, leaving a 16 in (40.6 cm) tail for sewing.
Checkpoint: 4.5 in (11.4 cm) point to point.
Burgundy Ruffle (Rounds 1–5)
Rnds 1–3: Work exactly as Star Rnds 1–3.
(32 dc + 16 ch-2 sps)
Rnd 4: Sl st into the first ch-2 sp. Ch 1, sc in the same sp, ch 5. (Sc in the next ch-2 sp, ch 5) 15 times. Join.
(16 sc + 16 ch-5 loops; 3.6 in / 9.1 cm across)
Rnd 5: Sl st into the first loop. Ch 3 (counts as dc), then work (2 dc, ch 2, 3 dc) in the same loop for the first shell. Ch 3, sc in the next loop, ch 3.
(3 dc, ch 2, 3 dc) in the next loop, ch 3, sc in the next loop, ch 3. Repeat from * 7 times. Join to the top of the ch-3.
(8 shells = 48 dc + 8 ch-2 sps; plus 8 sc and 16 ch-3 sps)
Do not fasten off. Place the live loop on a stitch marker.
Checkpoint: 4.5 in (11.4 cm) across.
Make All Pieces
- Cream: 2 motifs (candle body, star)
- Golden yellow: 1 flame, already worked onto the candle
- Burgundy: 1 ruffle
Layout, front to back:
LAYER 3 (FRONT):  CANDLE (CREAM) + FLAME (YELLOW)
LAYER 2 (MIDDLE): STAR (CREAM)
LAYER 1 (BACK):   RUFFLE (BURGUNDY)
Vertical view:
ROW 1: FLAME
ROW 2: CANDLE
ROW 3: CANDLE BASE OVER STAR + RUFFLE CENTER
ROW 4: STAR POINTS + RUFFLE PETALS
Joining
Method: whipstitch with the cream tail. Work through back loops wherever possible so the stitching hides.
Star to ruffle: Lay the ruffle RS up and the star on top of it. Rotate the star so that each star point sits directly over a ruffle Rnd 5 sc. This places each burgundy shell between two star points.
Whipstitch Star Rnd 3 to Ruffle Rnd 3, working stitch to stitch. Each layer has 32 dc, so every star dc meets one ruffle dc. Then tack the base of each star point to the ruffle sc beneath it with a single stitch, for 8 tacks in total.
Candle to star: Center the candle vertically, with its bottom edge 0.25 in (0.6 cm) below the star’s center. Whipstitch the candle’s back layer only along both long sides and the bottom edge, catching the star stitches beneath. The front layer stays clean, and the flame stays free.
Tension: Snug but not tight. Pulling hard will cup the star. After every few stitches, press the piece flat with your palm.
Checkpoint: The star still measures 4.5 in (11.4 cm), and the stack lies flat with no ripples.
Border: Scalloped Petal Edge (Ruffle Rnd 6)
Border gauge: same as the body, 5 sts per 1 in (2.5 cm). The petals add 0.5 in (1.3 cm) per side.
Return the live burgundy loop to your hook. Fold the star and candle forward out of the way.
Rnd 6: Sl st in the next 2 dc and into the ch-2 sp. Ch 3 (counts as dc). In the same sp, work (dc, tr, picot, tr, 2 dc). Ch 4, sc in the next sc, ch 4.
(2 dc, tr, picot, tr, 2 dc) in the next ch-2 sp, ch 4, sc in the next sc, ch 4. Repeat from * 7 times. Join. Fasten off.
Counts per petal (“side”): 6 sts + 1 picot, plus 1 sc and 2 ch-4 sps between petals.
Round totals: 48 petal sts + 8 picots + 8 sc + 16 ch-4 sps.
Why the math works:
– The 16 loops of Rnd 4 split into 8 shell loops and 8 sc loops in Rnd 5.
– Each shell becomes exactly one petal, giving 8 petals.
– These alternate with the 8 star points, because the star points sit over the 8 sc.
– The ch-4 spans bridge the 3 dc plus the ch-3 sp on each side of a shell without pulling, which creates the lacy openwork.
Checkpoint: 5.5 in (14.0 cm) petal tip to petal tip.
Final Blocking
- Mist the whole piece until it is damp, not soaked.
- Lay it RS up on the mat.
- Pin the 8 burgundy picots to a 5.5 in (14.0 cm) circle.
- Pin the 8 star tips to a 4.5 in (11.4 cm) circle, centered.
- Square the candle to 1.6 in (4.1 cm) wide and straighten its ridges.
- Pin the flame tip so the overall height is 6.1 in (15.5 cm).
- Let it dry completely, then unpin.
Final Quality-Control Checklist
- Candle: 16 sts every round, 4 straight ridges, and open lattice columns.
- Candle is 1.6 in (4.1 cm) x 2.6 in (6.6 cm).
- Flame is centered, with 2 sc free on each side.
- Star has 8 points and measures 4.5 in (11.4 cm).
- Ruffle has 8 petals that alternate with the star points.
- Finished piece is 5.5 in (14.0 cm) x 6.1 in (15.5 cm).
- No stitching shows on the front of the candle.
- All ends are woven in and trimmed.
Troubleshooting
- Candle twists in a spiral: The join is drifting. Always sl st into the first FPdc, not into the ch-2.
- Lattice columns wander: You skipped the wrong stitch. Every ch 1 goes over the previous ch-1 sp.
- Star cups: Your tension is tight in Rnd 4. Go up a hook size for that round only.
- Ruffle petals flip: Block them firmly, or loosen your ch-4 spans slightly.
- Flame leans: Re-center Row 1 on sc 3–6 of the closure row.
- Burgundy is barely visible: The star may be oversized. Recheck it against 4.5 in (11.4 cm).
Care
Hand wash in cool water with mild soap and lay flat to dry. Re-pin the points if needed.
Optional: For a larger display, you could make two or three candles and hang them at staggered heights. The pattern itself stays a single piece.
Final Notes
The measurement chain:
- Gauge of 5 sts per 1 in (2.5 cm).
- Candle at 1.6 in (4.1 cm) x 2.6 in (6.6 cm), with a 1.0 in (2.5 cm) flame.
- Star and ruffle matching stitch for stitch through Rnd 3 at 2.4 in (6.1 cm).
- Both reaching 4.5 in (11.4 cm).
- Petal edge adding 0.5 in (1.3 cm) per side, for 5.5 in (14.0 cm) wide by 6.1 in (15.5 cm) tall.
Check each step and the layers will fall into place.
Happy crocheting!