

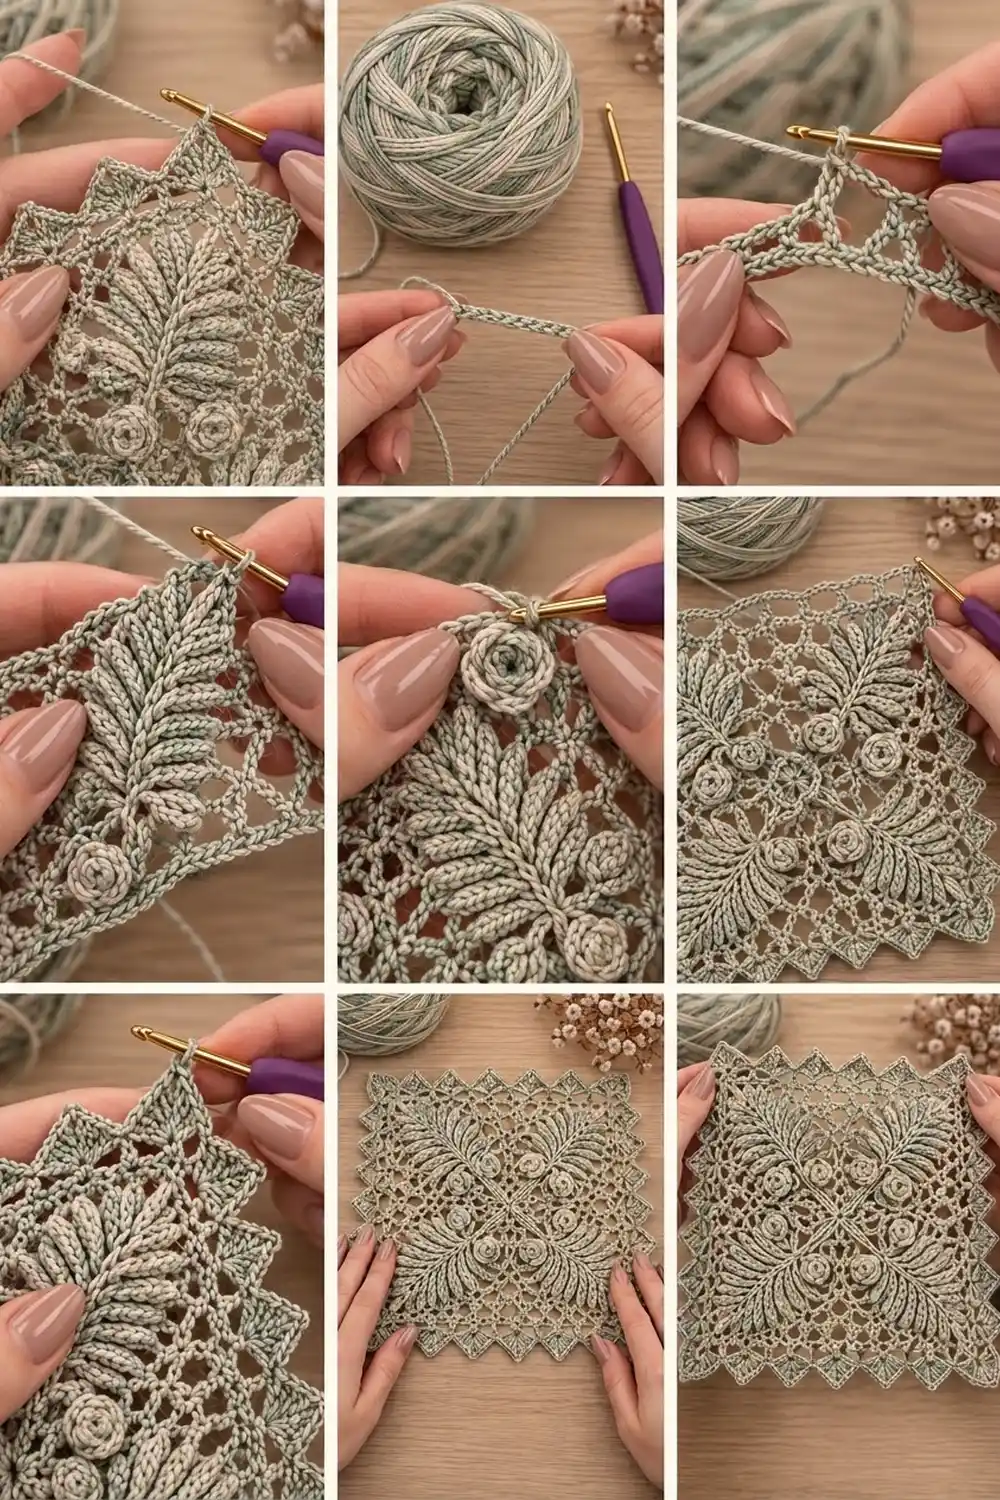
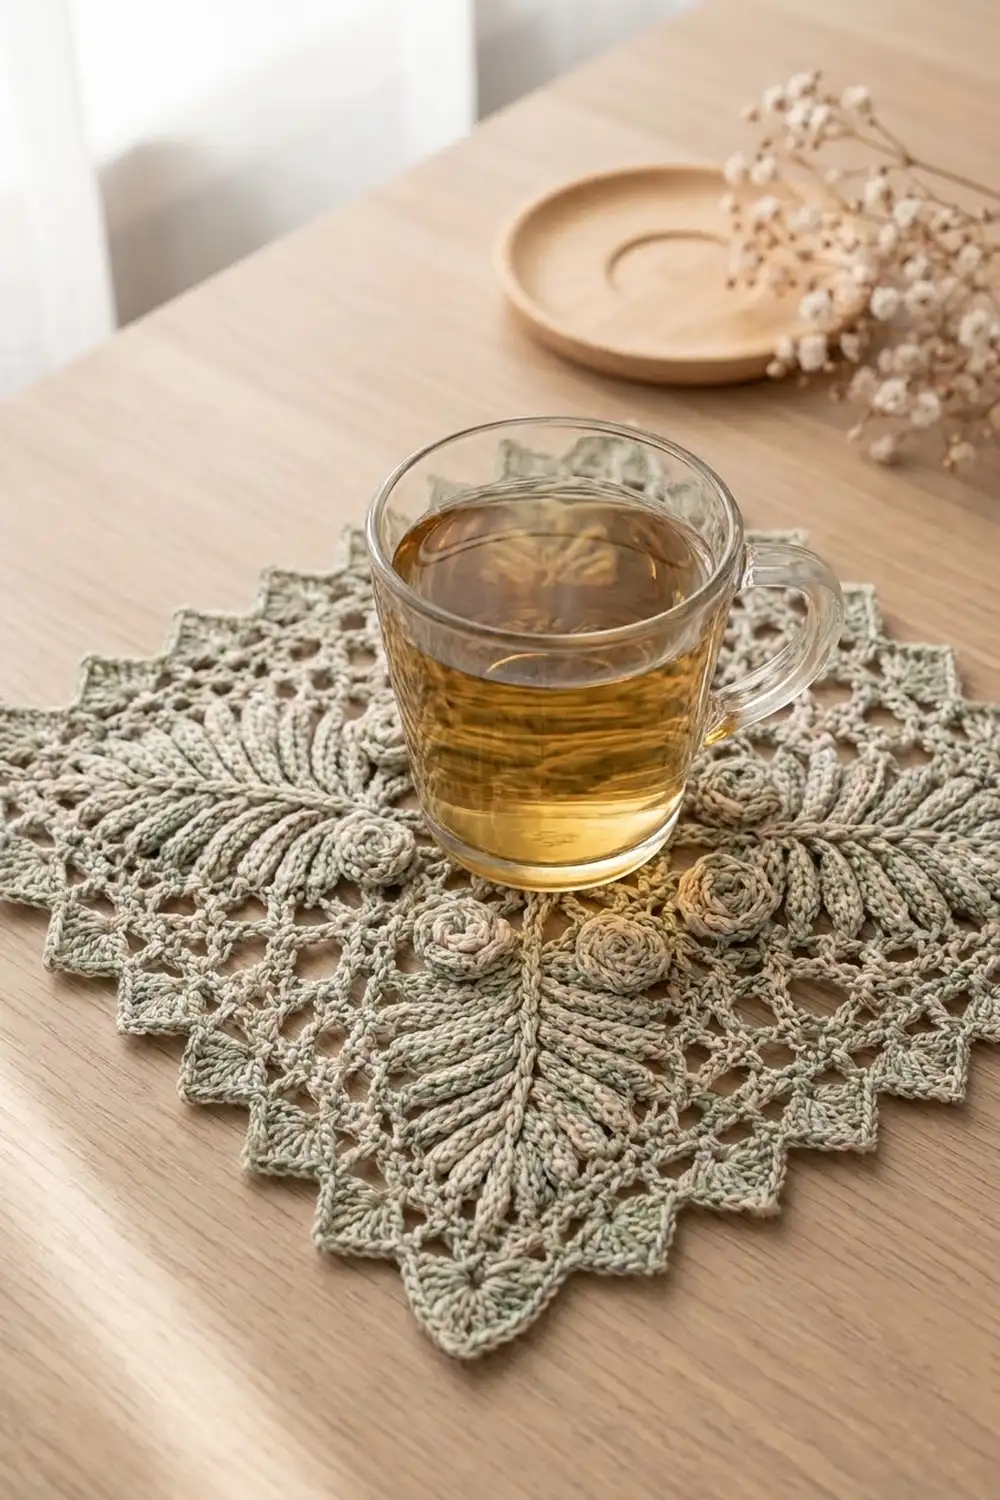
This lace square pairs an airy chain-loop lattice with raised fern leaves and tiny rolled roses. A crisp sawtooth edge frames it, so it looks like an heirloom doily but works up quickly.
It uses one variegated thread in sage green, cream and soft blush. The color shifts give the ribbed leaves a braided look without any color changes. The style is romantic and vintage, in the spirit of Irish crochet, but every step is simple.
The pattern uses US crochet terms. The finished square measures 8.5 x 8.5 in (21.6 x 21.6 cm) after blocking.
Construction happens in four stages. First you work the lattice panel in rows. Then you crochet the leaves and roses separately and sew them on. Next you add a single crochet round and a sawtooth round as the border. Finally you block the piece flat.
Finished Size and Construction
- Finished size: 8.5 x 8.5 in (21.6 x 21.6 cm)
- Skill level: Intermediate
- Terminology: US
- Yarn weight: Sport (#2) cotton
- Hook: 3.25 mm (US D/3)
- Number of pieces: 1 square panel with 20 sewn-on appliqués (12 leaves, 8 roses)
- Layout: Single square. A fern spray sits in each quadrant and the roses cluster around the center.
- Panel size before border: 7 x 7 in (17.8 x 17.8 cm)
- Size after border Round 1: 7.5 x 7.5 in (19.1 x 19.1 cm)
- Border depth: 0.75 in (1.9 cm) per side
Materials
Use a smooth, mercerized sport-weight cotton or cotton blend so the leaf ridges and the lattice stay crisp. A long-repeat variegated yarn works best. Short color repeats can pool in the narrow leaves.
- Variegated sage/cream/blush sport cotton: 65 g / 200 m (about 2 skeins of 50 g)
- Lattice panel: about 20 g / 62 m
- Border: about 9 g / 28 m
- 12 leaves: about 18 g / 56 m
- 8 roses: about 8 g / 25 m
Tools:
– 3.25 mm (US D/3) crochet hook
– Tapestry needle
– Sharp sewing needle and matching cotton sewing thread (optional, for appliqués)
– Rust-proof pins
– Blocking mat and spray bottle
– Measuring tape
The quantities include a margin of about 15% for swatching and tails.
Abbreviations (US Terms)
- ch: chain
- sl st: slip stitch
- sc: single crochet
- hdc: half double crochet
- dc: double crochet
- tr: treble crochet
- BLO: back loop only
- sk: skip
- sp: space
- st(s): stitch(es)
- rep: repeat
Special stitch: Tooth. Ch 5, sc in 2nd ch from hook, hdc in next ch, dc in next ch, tr in last ch. This makes one small solid triangle that hangs from the stitch before it.
Gauge and Checkpoints
Lattice gauge: 4 ch-5 loops x 8 rows = 2 x 2 in (5.1 x 5.1 cm), which works out to 2 loops and 4 rows per 1 in (2.5 cm).
Border sc gauge: 6 sc = 1 in (2.5 cm).
Before you start the panel, make one leaf as your test piece. It should measure 2.75 in (7.0 cm) long and 1.25 in (3.2 cm) wide. If it does, your tension suits the appliqués.
Checkpoints:
– After Row 8: the panel is 7 in (17.8 cm) wide and 2 in (5.1 cm) tall.
– After Row 28: 7 x 7 in (17.8 x 17.8 cm).
– After border Round 1: 7.5 x 7.5 in (19.1 x 19.1 cm).
– After border Round 2 and blocking: 8.5 x 8.5 in (21.6 x 21.6 cm).
Too big? Go down to a 3.0 mm hook. Too small? Go up to a 3.5 mm hook. Don’t change the loop or stitch counts. The border math depends on them.
Lattice Panel
The panel is worked in rows. Row 1 sets up 14 loops. After that, rows with full loops alternate with rows that have half loops at each end, which keeps the side edges straight.
Foundation: Ch 58.
Row 1: Sc in 2nd ch from hook, ch 5, sk 3 ch, sc in next ch; rep from * across. (14 ch-5 loops, 15 sc)*
Row 2: Ch 5 (counts as dc + ch 2), turn, sc in first ch-5 loop, ch 5, sc in next ch-5 loop; rep from * 12 more times, ch 2, dc in last sc. (13 full loops + 2 half loops)*
Row 3: Ch 1, turn, sc in dc, ch 5, sc in next ch-5 loop; rep from * 12 more times, ch 5, sc in 3rd ch of turning ch. (14 ch-5 loops, 15 sc)*
Rows 4–27: Rep Rows 2 and 3 twelve more times. Row 27 is a Row 3 type. (14 ch-5 loops)
Checkpoint: The panel should be about 6.75 in (17.1 cm) tall and 7 in (17.8 cm) wide.
Row 28 (flattening row): Ch 1, turn, sc in first sc, 2 sc in next ch-5 loop, sc in next sc; rep from * 13 more times. (43 sc = 15 sc worked 1 into each existing sc + 28 sc added in the loops)*
Don’t fasten off. The border starts from here.
Checkpoint: 7 x 7 in (17.8 x 17.8 cm).
Fern Leaves (Make 12)
Each leaf is ribbed with a BLO ridge on every row. Short-turning near the stem leaves an open stem end, and the 3 sc at the center of the tip make it pointed.
Foundation: Ch 16.
Row 1: Sc in 2nd ch from hook and next 13 ch (14 sc), 3 sc in last ch (this is the tip), then working along the other side of the foundation ch, sc in next 13 ch. (30 sc)
Row 2: Ch 1, turn, sc BLO in next 14 sts, 3 sc in center st of the tip, sc BLO in next 12 sts. Leave the last 3 sts unworked. (29 sc)
Row 3: Ch 1, turn, sc BLO in next 13 sts, 3 sc in center st, sc BLO in next 12 sts. Leave 3 unworked. (28 sc)
Row 4: Ch 1, turn, sc BLO in next 13 sts, 3 sc in center st, sc BLO in next 11 sts. Leave 3 unworked. (27 sc)
Row 5: Ch 1, turn, sc BLO in next 12 sts, 3 sc in center st, sc BLO in next 11 sts. Leave 3 unworked. (26 sc)
Fasten off and leave a 10 in (25.4 cm) tail for sewing.
Checkpoint: 2.75 x 1.25 in (7.0 x 3.2 cm). The unworked stitches at the end of each row make the stepped edge that reads as separate leaflets.
Rolled Roses (Make 8)
Foundation: Ch 22.
Row 1: Sc in 2nd ch from hook and each ch across. (21 sc)
Row 2: Ch 2 (does not count), turn, 2 hdc in each sc across. (42 hdc)
Fasten off and leave an 8 in (20.3 cm) tail. Starting from the end without the tail, roll the strip tightly with Row 1 at the base. Thread the tail onto a needle and stitch through every layer of the base 3–4 times to lock the spiral.
Checkpoint: About 0.9 in (2.3 cm) across.
Border
Border gauge: 6 sc = 1 in (2.5 cm), so 43 sc spans 7.2 in (18.3 cm). That slight extra length lets the edge lie flat without cupping.
Round 1 (sc frame): Keep the loop from Row 28 on your hook.
– Top: Ch 1, sc in each of the 43 sts of Row 28, then ch 2 for the corner.
– Left side: Work 43 sc evenly along the row ends. That’s 3 sc over every pair of rows (14 pairs = 42 sc) plus 1 extra sc at the row-14 end. Ch 2 for the corner.
– Bottom: Work into the foundation chain. Sc in each of the 15 ch that hold Row 1 sc, and work 2 sc into each of the 14 skipped 3-ch groups (15 + 28 = 43 sc). Ch 2 for the corner.
– Right side: 43 sc as for the left side, ch 2, then sl st to the first sc.
(172 sc: 43 per side, plus 4 ch-2 corner sps that are not counted in the sides)
Checkpoint: 7.5 x 7.5 in (19.1 x 19.1 cm).
Round 2 (sawtooth): Sl st into the next corner ch-2 sp.
– Corner: (Sc, Tooth, sc) in the corner sp.
– Each side: Sc in first 2 sts, *sc in next st, Tooth, sk next 3 sts; rep from * 9 more times, then sc in last st.
– Rep the corner and side instructions around and sl st to the first sc. Fasten off.
(Per side: 13 sc worked into Round 1 and 10 teeth. Per corner: 2 sc and 1 tooth. Total: 60 sc and 44 teeth.)
Why the math works: Each side has 43 sts = 2 plain + (10 repeats x 4 sts) + 1 plain. Each tooth uses a 4-st base (1 anchor sc + 3 skipped sts), so the side ends exactly at the corner with no leftover stitches. The corner sp holds its own tooth, so every corner gets a point and no stitches are added along the sides.
The teeth stand about 0.5 in (1.3 cm) beyond Round 1. Together with Round 1, that gives a border depth of 0.75 in (1.9 cm) per side. 7 in + 0.75 in + 0.75 in = 8.5 in (21.6 cm).
Assembling the Appliqués
Lightly block the leaves and roses before sewing them on.
- Pin the panel flat at 8.5 x 8.5 in (21.6 x 21.6 cm). Mark the center and both diagonals with removable markers.
- Fern sprays: On each diagonal, mark a point 1.5 in (3.8 cm) from the center. Pin 3 leaves with their stem ends together at that point, fanned about 30° apart, with the tips pointing toward the corner.
- Using the tail, whipstitch around each leaf edge and down its center ridge into the lattice strands. Keep the stitches small and hidden under the ridges.
- Roses: Sew one rose over each spray’s stem join to cover the raw ends (4 roses). Sew the other 4 on the horizontal and vertical center lines, each 1 in (2.5 cm) from the center, to form a diamond.
- Sew through the rose base only, so the petals stay raised.
Final Blocking
- Weave in all ends along the BLO ridges or inside the sc rows.
- Soak the square in cool water for 10 minutes, then press out the water in a towel. Don’t wring it.
- Lay it face down on the mat over a folded towel. This protects the raised leaves and roses.
- Pin the four corners to 8.5 x 8.5 in (21.6 x 21.6 cm) and check that both diagonals measure the same.
- Pin the tip of each tooth outward so it stands as a sharp point.
- Pull each lattice loop open into a diamond with your fingers.
- Mist again and let it dry completely, about 12 hours.
- Turn it face up and gently lift each leaf ridge and rose with your fingertips.
Final Quality-Control Checklist
- Panel is 14 loops wide and 28 rows tall.
- Row 28 has 43 sc.
- Border Round 1 has exactly 43 sc on each side, with a ch-2 sp at each corner.
- Each side has 10 teeth, with 1 tooth at each corner (44 total).
- All 12 leaves have 26 sc in Row 5 and match in length.
- All 8 roses are tightly rolled and about 0.9 in (2.3 cm) across.
- The sprays are mirrored on both diagonals and the roses form an even diamond.
- The square measures 8.5 x 8.5 in (21.6 x 21.6 cm) and the diagonals are equal.
- No ends or sewing stitches are visible from the front.
Troubleshooting
- Panel slants: Check that each Row 2 type starts with ch 5 and ends with a dc. Missing half loops pull the edge in.
- Edge ruffles after Round 1: You have more than 43 sc on a side. Count again, or go down a hook size for the border only.
- Edge cups: You have fewer than 43 sc, or your tension is tight. Count again, or loosen up.
- Teeth curl under: Pin them out firmly while blocking. Next time, work the tr loosely.
- Leaves are lopsided: Recount the sts before the 3-sc tip in each row. The tip must sit on the center st.
- Roses unroll: Add 2 more anchor passes through the base.
- Variegation pools in the leaves: Start each leaf at a different point in the color repeat.
Care
Hand wash cool with a mild detergent, then lay flat to dry, pinning out the teeth if needed. Don’t tumble dry or press directly on the raised leaves.
Final Notes
The measurement chain is simple. Your swatch sets the gauge at 2 loops and 4 rows per 1 in (2.5 cm). That gives a 7 x 7 in (17.8 x 17.8 cm) panel with 43 stitches per edge. Round 1 frames it at 7.5 in (19.1 cm), and the sawtooth round takes it to 8.5 in (21.6 cm). If you hit each checkpoint, the teeth land evenly and the fern sprays sit centered in their quadrants.
Happy crocheting!