

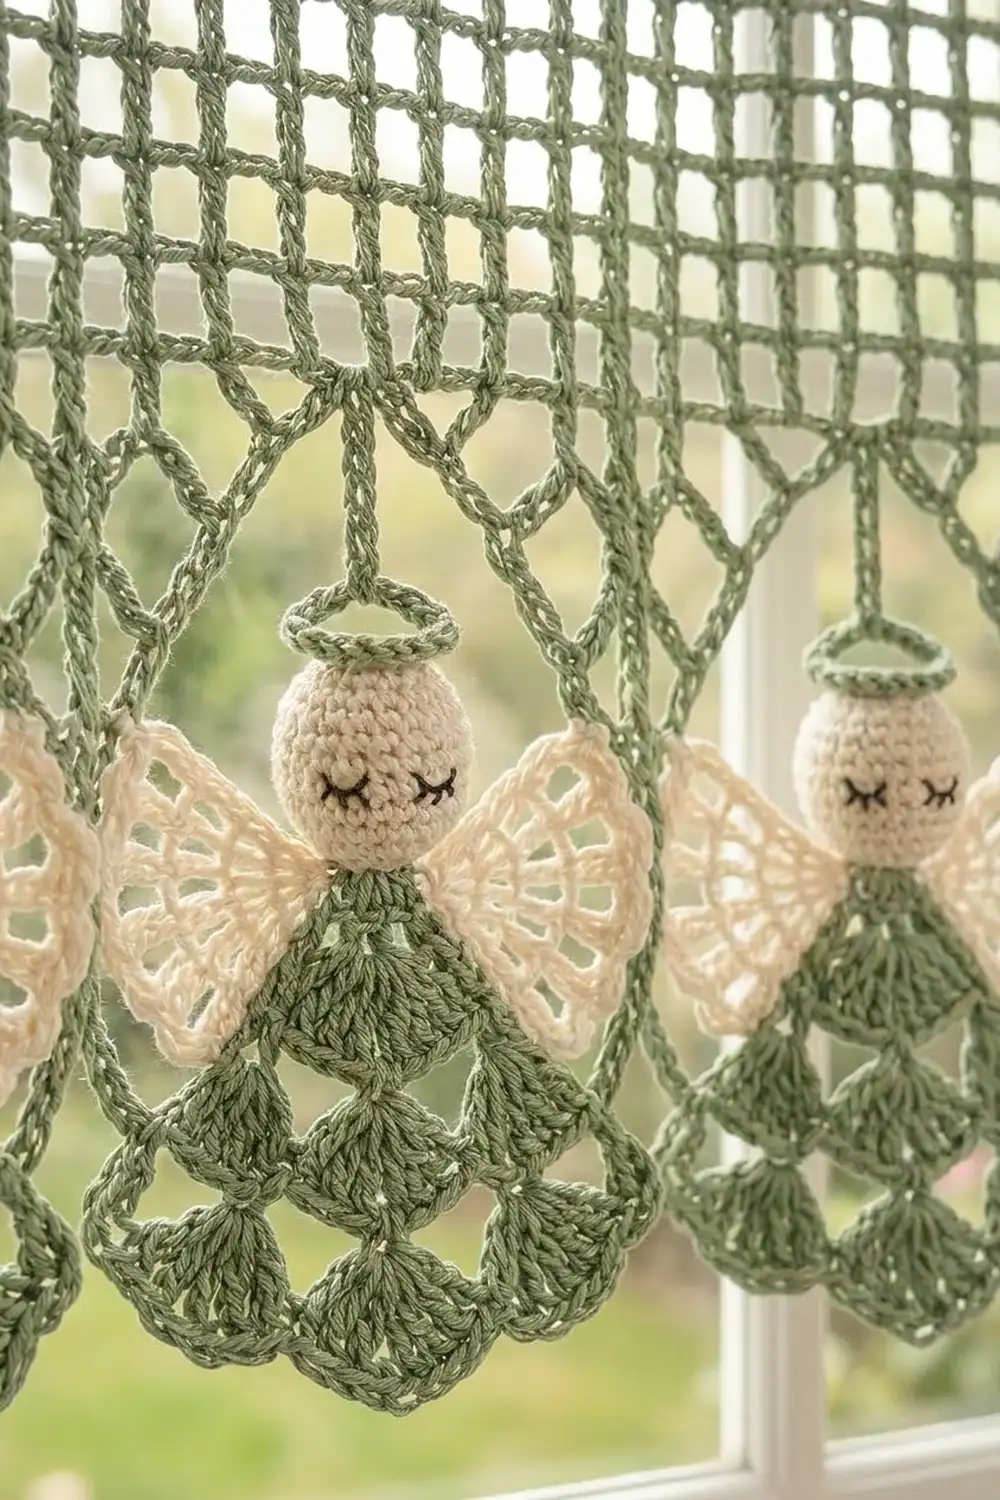
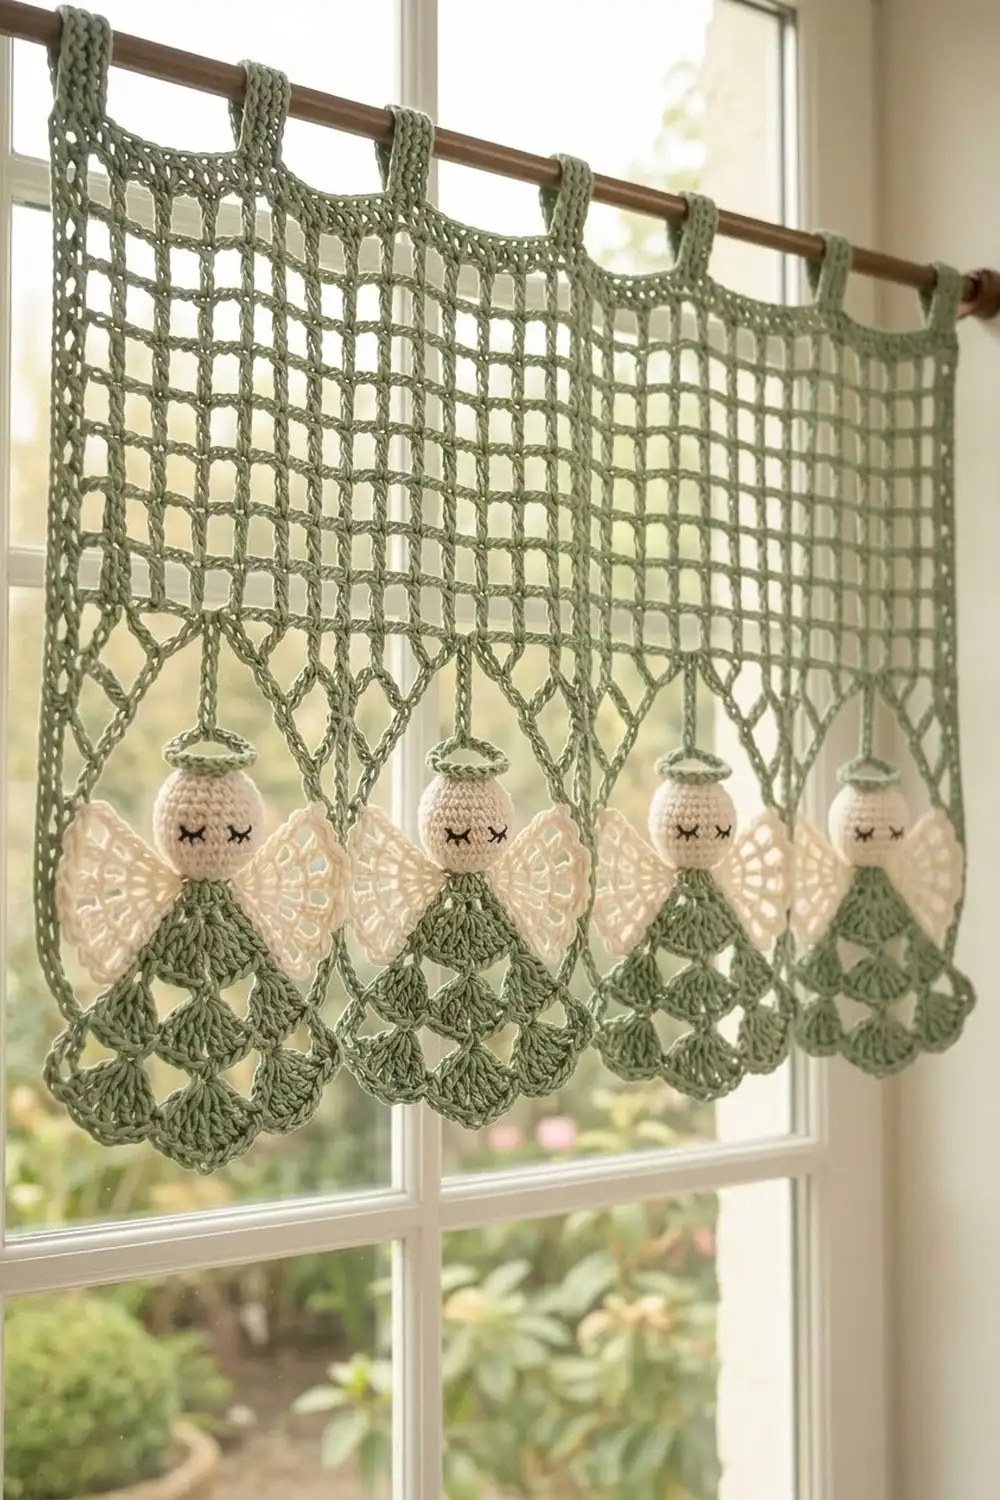
This curtain panel turns a plain window into a soft, airy focal point. A large sage green filet mesh fills the upper two-thirds, and four rectangular loops across the top slide over a wooden rod. The lower third becomes a decorative scalloped edge made of four hanging motifs. Each motif has a small textured cream sphere topped with a sage tassel, a cream mesh wing shape on both sides, and sage shell clusters below.
The palette is calm and natural: sage green for the mesh, loops, tassels, cords and shells, and cream for the spheres and wings. The style is cottage-meets-modern, with enough lace to let light through.
The pattern uses US crochet terms. The finished panel measures 28 in (71.1 cm) wide by 22 in (55.9 cm) tall, measured from the top of the hanging loops to the bottom of the shell clusters.
Construction is simple to follow. You work the mesh flat in rows, then add a 2-round sc border. Next you make the 4 hanging loops on the top edge. Each motif is made in small pieces, assembled, and hung from the bottom edge on a thin crocheted cord.
Finished Size and Construction
- Finished size: 28 in x 22 in (71.1 cm x 55.9 cm)
- Skill level: Intermediate
- Terminology: US crochet terms
- Yarn weight: Worsted (#4) cotton
- Hooks: 5.0 mm (H-8) for the panel, 4.0 mm (G-6) for wings, clusters and cords, 3.25 mm (D-3) for spheres
- Number of pieces: 1 mesh panel plus 4 motifs. Each motif has 1 sphere, 2 wings, 1 shell cluster, 1 tassel and 1 cord.
- Layout: 4 motifs in a single row along the bottom edge
- Piece sizes:
- Mesh square: 0.75 in (1.9 cm)
- Sphere: 1.5 in (3.8 cm) diameter
- Wing: 2 in (5.1 cm) across
- Shell cluster: 5 in x 2.5 in (12.7 cm x 6.4 cm)
- Size before border: 27 in x 12 in (68.6 cm x 30.5 cm), which is 36 squares x 16 rows
- Border depth: 0.5 in (1.3 cm) per side, giving a bordered panel of 28 in x 13 in (71.1 cm x 33.0 cm)
- Vertical layout:
- Hanging loops: 2 in (5.1 cm)
- Bordered panel: 13 in (33.0 cm)
- Motif drop: 7 in (17.8 cm)
- Total: 22 in (55.9 cm)
Materials
Choose a smooth, mercerized or matte 100% cotton in worsted weight. Cotton holds the mesh square, resists sagging in sunlight, and blocks crisply. Avoid fuzzy or very stretchy yarns, because they blur the grid.
- Sage green: 150 g / 240 m
- Cream: 40 g / 64 m
Quantities include a comfortable margin for swatching and tension differences.
Tools:
– 5.0 mm (H-8), 4.0 mm (G-6) and 3.25 mm (D-3) crochet hooks
– Small amount of polyester fiberfill
– Tapestry needle
– Stitch markers (at least 8)
– Scissors
– Measuring tape
– 1.5 in (3.8 cm) wide piece of cardboard for the tassels
– Rust-proof pins and a blocking surface
– Spray bottle, and optional spray starch
Abbreviations (US Terms)
- ch – chain
- sl st – slip stitch
- sc – single crochet
- dc – double crochet
- sk – skip
- sp – space
- st(s) – stitch(es)
- tch – turning chain
- MR – magic ring
- inc – 2 sc in the same st
- dec – sc2tog (invisible decrease recommended)
- RS / WS – right side / wrong side
Special stitches:
– Bead st (bead): (Yo, insert hook in st, yo, pull up a loop) 3 times, yo, pull through all 7 loops on hook. Worked on the sphere, it pops outward to create the beaded texture.
– Shell: 5 dc in the same st.
Gauge and Checkpoints
Test one piece first. Work a mesh swatch of 6 squares by 6 rows with the 5.0 mm hook, then crochet one sphere with the 3.25 mm hook.
Mesh gauge: 4 squares x 4 rows = 3 in x 3 in (7.6 cm x 7.6 cm). Each square is 0.75 in (1.9 cm).
Border gauge: 4 sc = 1 in (2.5 cm), worked with the 5.0 mm hook.
Checkpoints:
– After Row 1: 27 in (68.6 cm) wide
– After Row 8: 6 in (15.2 cm) tall
– After Row 16: 27 in x 12 in (68.6 cm x 30.5 cm)
– After the border: 28 in x 13 in (71.1 cm x 33.0 cm)
– Each tab before folding: 4 in (10.2 cm) long
– Sphere after Round 4: about 1.25 in (3.2 cm) flat
– Finished sphere: 1.5 in (3.8 cm)
– Wing: 2 in (5.1 cm)
– Shell cluster: 5 in x 2.5 in (12.7 cm x 6.4 cm)
If your swatch is too big, go down 0.5 mm in hook size. If it is too small, go up 0.5 mm. Fix gauge before starting the panel. Being 0.1 in (0.3 cm) off per square adds up to 3.6 in (9.1 cm) across 36 squares.
Pattern: Mesh Panel
Use sage and the 5.0 mm hook.
Foundation: Ch 113.
Row 1: Dc in 8th ch from hook. The skipped chains count as a dc, a ch-2 sp, and 2 skipped base chains. *Ch 2, sk 2 ch, dc in next ch; rep from * across. (37 dc, 36 ch-2 sps = 36 squares)
The math: 113 = (3 x 36) + 5. After the first dc, 105 chains remain, which is 35 repeats of 3. That gives 1 + 35 = 36 squares.
Rows 2–16: Ch 5 (counts as dc + ch 2), turn. Dc in next dc, *ch 2, dc in next dc; rep from * across, working the last dc in the 3rd ch of the tch. (37 dc, 36 squares)
Do not fasten off at the end of Row 16. Check the size: 27 in x 12 in (68.6 cm x 30.5 cm). Fasten off. The border is added later.
Pattern: Textured Sphere (make 4)
Use cream and the 3.25 mm hook. Work in continuous rounds and mark the first st of each round.
- Rnd 1: 6 sc in MR. (6)
- Rnd 2: Inc in each st around. (12)
- Rnd 3: (Sc, inc) 6 times. (18)
- Rnd 4: (2 sc, inc) 6 times. (24)
- Rnd 5: (Sc, bead) 12 times. (24)
- Rnd 6: Sc in each st around. (24)
- Rnd 7: (Bead, sc) 12 times. The beads sit offset from Round 5. (24)
- Rnd 8: (2 sc, dec) 6 times. Stuff firmly. (18)
- Rnd 9: (Sc, dec) 6 times. Top up the stuffing. (12)
- Rnd 10: Dec 6 times. (6)
Fasten off, leaving a 10 in (25.4 cm) tail. Close the hole. The MR end is the top and the closed end is the bottom. Check the diameter: 1.5 in (3.8 cm).
Pattern: Mesh Wing (make 8)
Use cream and the 4.0 mm hook.
Ring: Ch 4, sl st to the first ch to form a ring.
Row 1: Ch 4 (counts as dc + ch 1). (Dc, ch 1) 4 times in the ring, then dc in the ring. (6 dc, 5 ch-1 sps)
Row 2: Ch 5 (counts as dc + ch 2), turn. Dc in next dc, (ch 2, dc in next dc) 3 times, ch 2, dc in 3rd ch of tch. (6 dc, 5 ch-2 sps)
Row 3: Ch 1, turn. Sc in first dc, *ch 3, sc in next ch-2 sp, ch 3, sc in next dc; rep from * 4 more times, working the last sc in the 3rd ch of tch. (11 sc, 10 ch-3 loops)
Fasten off, leaving an 8 in (20.3 cm) tail. The wing is a lacy fan 2 in (5.1 cm) across, with the ring as its point.
Pattern: Shell Cluster (make 4)
Use sage and the 4.0 mm hook.
Ring: Ch 4, sl st to the first ch to form a ring.
Row 1: Ch 3 (counts as dc), 8 dc in the ring. (9 dc)
Row 2: Ch 3 (counts as dc), turn. 2 dc in each of the next 7 dc, then 2 dc in the top of the tch. (1 + 14 + 2 = 17 dc)
Row 3: Ch 1, turn. Sc in first dc, *sk 1 dc, shell in next dc, sk 1 dc, sc in next dc; rep from * 3 more times, working the last sc in the top of the tch. (4 shells, 5 sc)
The math: 1 + (4 x 4) = 17, so every stitch of Row 2 is used.
Fasten off, leaving a 10 in (25.4 cm) tail. The cluster is a half-round fan 5 in x 2.5 in (12.7 cm x 6.4 cm). The ring sits at the top center, and the 4 shells form the scalloped lower edge.
Pattern: Tassel and Cord (make 4 of each)
Tassel: Use sage. Wrap the yarn 10 times around the 1.5 in (3.8 cm) cardboard. Slide a 6 in (15.2 cm) strand under the top loops and tie tightly. Cut the bottom loops. Wrap a second strand around the bundle 0.25 in (0.6 cm) below the top and knot it. Trim the strands to 0.75 in (1.9 cm).
Cord: Use sage and the 4.0 mm hook. Leave a 10 in (25.4 cm) starting tail and ch 14. Sl st in the back bump of each ch back to the start. (13 sl sts)
Fasten off, leaving a 10 in (25.4 cm) tail. The cord should measure 3 in (7.6 cm). Add or remove chains if needed.
Make All Pieces
| Piece | Sage | Cream |
|---|---|---|
| Mesh panel | 1 | — |
| Sphere | — | 4 |
| Wing | — | 8 |
| Shell cluster | 4 | — |
| Tassel | 4 | — |
| Cord | 4 | — |
Layout grid (bottom edge, left to right):
BOTTOM EDGE: MOTIF 1 | MOTIF 2 | MOTIF 3 | MOTIF 4
EACH MOTIF (top to bottom):
  CORD
  TASSEL
  WING – SPHERE – WING
  SHELL CLUSTER
Joining (Motif Assembly)
Assemble all 4 motifs completely before attaching them to the panel.
Method: Use whipstitch with a tapestry needle and the matching tails.
- Sphere to cluster: Center the bottom of the sphere over the ring at the top of the cluster. Sew through the ring stitch by stitch, going all the way around the closing round of the sphere. Make 6–8 small stitches so the sphere cannot tilt.
- Wings: Hold 2 wings with their ring points touching to form a bow shape. Sew the points together, then sew this joined center to the back of the sphere at Rounds 5–7. Each wing fans out to one side, with its edge overlapping the top of the cluster by about 0.25 in (0.6 cm). Tack each wing to the cluster at 1 point so it stays flat.
- Tassel: Thread the cord’s lower tail down through the center of the tassel head. Sew it into the sphere’s MR at the top, knot it inside, and bury it. Fan the tassel strands evenly around the crown.
Tension advice: Pull the sewing stitches snug, but do not cinch them. Over-tight seams pucker the wings and flatten the sphere.
Checkpoint: Each assembled motif should be 5.5 in (14.0 cm) across the wings and hang 7 in (17.8 cm) from the top of the cord to the bottom of the shells.
Border
Border gauge: 4 sc = 1 in (2.5 cm). Each mesh square is 0.75 in (1.9 cm), so it takes 3 sc: 1 sc on its dc and 2 sc in its ch-2 sp. The side edges take 3 sc per row-end, because each row is 0.75 in tall.
Use sage and the 5.0 mm hook. In this border, the side counts below are stitches between the corner groups and do not include the corner sts.
Round 1 (conversion round): With the RS facing, join yarn in the corner dc at the top right.
- Corner: Ch 1, 3 sc in the same st. The turning ch-5 counts as a dc plus a ch-2 sp.
- Top edge: 2 sc in each ch-2 sp and 1 sc in each of the 35 inner dc. (72 + 35 = 107)
- Corner: 3 sc in the corner dc.
- Left side: 3 sc around each row-end post. (16 x 3 = 48)
- Corner: 3 sc at the foundation corner.
- Bottom edge: Work along the foundation chain, with 2 sc in each skipped-chain space and 1 sc in the base of each inner dc. (72 + 35 = 107)
- Corner: 3 sc at the foundation corner.
- Right side: 3 sc around each row-end post. (48)
Sl st to the first sc.
Count: 107 + 48 + 107 + 48 + (4 x 3 corner sc) = 322 sts. This is 1 sc per existing stitch and space, plus 12 corner sc.
Round 2: Ch 1. Sc in the first sc, 3 sc in the next sc (the corner center), then sc in each sc around, working 3 sc in the center sc of each corner. Sl st to the first sc.
- Top and bottom: 109 sts each between corner groups.
- Sides: 50 sts each between corner groups.
- Corners: 4 x 3 sc.
- Total: 109 + 109 + 50 + 50 + 12 = 330 sts.
Each side gains 2 sts because the former corner-flanking stitches become part of that side. Fasten off.
Why the math works: 109 sc at 4 sc/in is about 27.25 in (69.2 cm), which matches the 27 in (68.6 cm) mesh. 48 sc at 4 sc/in is 12 in (30.5 cm), which matches 16 rows. The 2 rounds add 0.5 in (1.3 cm) on every edge, giving 28 in x 13 in (71.1 cm x 33.0 cm).
Hanging loops (make 4): Work across the 109 top-edge sts of Round 2, counting from the st after the top right corner group:
2 skipped | Tab | 27 skipped | Tab | 27 skipped | Tab | 27 skipped | Tab | 2 skipped
Check: 2 + 6 + 27 + 6 + 27 + 6 + 27 + 6 + 2 = 109.
For each tab:
- Row 1: Join sage, ch 1, sc in the same st and the next 5 sts. (6 sc)
- Rows 2–16: Ch 1, turn, sc in each st across. (6 sc)
The tab should be 4 in (10.2 cm) long and 1.5 in (3.8 cm) wide. Fold it to the WS and whipstitch Row 16 to the back of Round 1, directly behind the tab base. This forms a rectangular loop 2 in (5.1 cm) tall that fits rods up to 1 in (2.5 cm) in diameter. The tab centers are 33 sts apart, which is 8.25 in (21.0 cm).
Attaching the motifs: On the bottom edge of Round 2, count from the st after the bottom left corner group. Place markers at sts 14, 41, 69 and 96 of the 109.
- The spacing is 27, 28 and 27 sts, or about 6.75–7 in (17.1–17.8 cm).
- There are 13 sts outside each end marker, so the layout is symmetrical around the center st 55.
Sew the top cord tail of each motif securely into its marked st and bury the tail.
Final Blocking
- Soak the whole panel, with the motifs attached, in cool water for 15 minutes.
- Press out the water in a towel. Do not wring.
- Lay the panel flat and pin it to 28 in x 13 in (71.1 cm x 33.0 cm), pinning each corner first.
- Run a measuring tape along the rows and nudge the mesh squares to 0.75 in (1.9 cm).
- Pin the tabs straight, then pin the cords straight down at 3 in (7.6 cm).
- Open each wing fan and pin out its ch-3 loops. Spread each shell cluster to 5 in (12.7 cm) and pin every shell.
- Reshape the spheres by hand without flattening them.
- Optionally, mist the wings with spray starch.
- Let everything dry completely before unpinning.
Final Quality-Control Checklist
- [ ] Mesh: 36 squares x 16 rows, all squares even
- [ ] Bordered panel: 28 in x 13 in (71.1 cm x 33.0 cm)
- [ ] Border Round 2: 109 / 50 / 109 / 50 between corners, with 330 sts total
- [ ] 4 tabs, each 6 sc wide, with loops 2 in (5.1 cm) tall
- [ ] 4 spheres at 1.5 in (3.8 cm), firm and evenly beaded
- [ ] 8 wings with 10 ch-3 loops each
- [ ] 4 clusters with 4 shells each
- [ ] Cords at 3 in (7.6 cm) and attached at sts 14, 41, 69 and 96
- [ ] Total height of 22 in (55.9 cm) when hanging
- [ ] All tails secured and buried
Troubleshooting
- The mesh slants or the edges wave: You probably missed the turning ch-5 or worked into it incorrectly. Count 37 dc on every row.
- The squares are rectangles: Your dc height doesn’t match the ch-2 width. Try ch 3 in place of ch 2 for wider squares, or use a shorter dc pull-through. Block firmly.
- The border ruffles: Your border gauge is looser than 4 sc/in. Drop to a 4.5 mm hook for the border only.
- The border cups: Your border is too tight. Go up 0.5 mm.
- The beads sink inward: Make sure the RS faces out, and push each bead outward with your fingertip.
- The wings droop: Tack them to the cluster in a second spot and starch them.
- The motifs hang at uneven heights: Re-measure the cords and adjust the chain count.
Care
Hand wash in cool water with mild soap and dry flat, reshaping the motifs. Avoid hanging the panel while it is wet, because the weight of the motifs can stretch the mesh.
Final Notes
The measurement chain is what keeps this panel accurate:
- A gauge of 0.75 in (1.9 cm) per square gives a mesh of 36 x 16 squares, or 27 in x 12 in (68.6 cm x 30.5 cm).
- The border at 4 sc/in (330 sts in Round 2) brings it to 28 in x 13 in (71.1 cm x 33.0 cm).
- The 2 in (5.1 cm) loops and the 7 in (17.8 cm) motif drop complete the 22 in (55.9 cm) height.
Check each stage, and the motifs will hang evenly against the light.
Happy crocheting!