

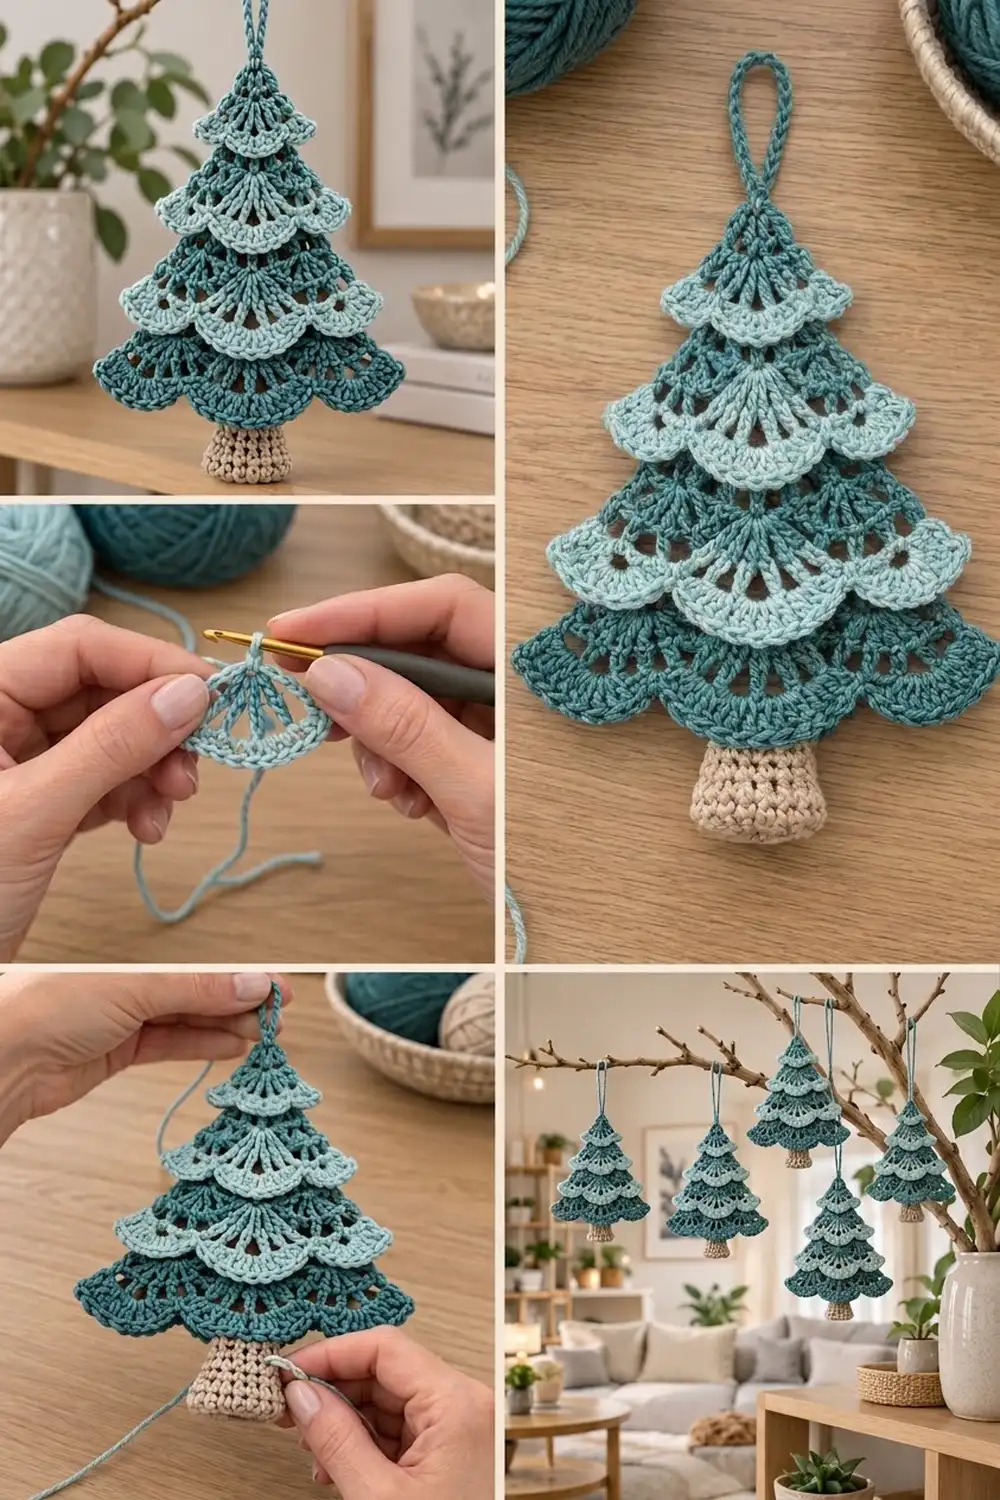
The Seaglass Pine is a small, lacy Christmas tree ornament made from four stacked fan-shaped tiers. Each tier has a curved, scalloped lower edge that overlaps the tier below it, so the tree looks soft and layered rather than flat.
The colors are calm and coastal. The tier bodies are deep teal, the scallops on the top three tiers are pale aqua, and the trunk is natural beige. The bottom tier is edged in deep teal to match its body, which visually anchors the base.
This pattern uses US crochet terms. The finished ornament is about 4.8 in (12.2 cm) wide at the bottom tier and 6.0 in (15.2 cm) tall from tip to trunk base, plus a 1.5 in (3.8 cm) hanging loop.
The construction is simple. You work four tiers flat in rows from the top point down, and each one is a slightly larger version of the same fan. Then you add a scalloped edging to each tier, crochet a short stuffed trunk in rounds, sew everything together, and finish with a chain loop.
Finished Size and Construction
- Finished size: 4.8 in (12.2 cm) wide x 6.0 in (15.2 cm) tall, not counting the loop
- Hanging loop: 1.5 in (3.8 cm)
- Skill level: Easy-Intermediate
- Terminology: US crochet terms
- Yarn weight: Sport (#2) cotton
- Hook: 3.25 mm (US D/3)
- Number of pieces: One ornament made from 5 parts (4 tiers + 1 trunk)
- Layout: Tiers stacked vertically, with each tip 0.8 in (2.0 cm) below the one above
- Piece size (largest tier, edged): 4.8 in (12.2 cm) wide x 2.8 in (7.1 cm) tall
- Size before border (largest tier): 4.2 in (10.7 cm) wide x 2.4 in (6.1 cm) tall
- Border depth: 0.4 in (1.0 cm), one row of 5-dc scallops
Materials
Choose a smooth mercerized or combed cotton in sport weight. Cotton holds the scallop shape, shows the eyelets clearly, and blocks crisply. Avoid fuzzy yarns, which blur the lace.
Yarn:
- Color A, Deep Teal: 15 g, about 45 m (49 yd). Used for the tier bodies, the Tier 4 edging, and the loop.
- Color B, Pale Aqua: 5 g, about 15 m (16 yd). Used for the scallop edging on Tiers 1–3.
- Color C, Natural Beige: 5 g, about 15 m (16 yd). Used for the trunk.
All quantities include a margin of about 25 percent for swatching, weaving in ends, and differences in tension.
Tools:
- 3.25 mm (US D/3) crochet hook
- Tapestry needle
- 4 stitch markers
- Small pinch of polyester fiberfill
- Rust-proof pins and a blocking mat or folded towel
- Spray bottle with water (optional: diluted fabric stiffener)
- Scissors and a ruler
Abbreviations (US Terms)
- ch: chain
- sl st: slip stitch
- sc: single crochet
- dc: double crochet
- MR: magic ring
- BLO: back loop only
- st(s): stitch(es)
- sp: space
- rnd: round
Special stitch, Scallop: Work 5 dc in the stitch indicated. A scallop always sits between two sc, with one skipped stitch on each side.
Counting note: A turning ch-3 counts as 1 dc. A ch-1 space counts as one stitch, both when you count and when you work the edging.
Gauge and Checkpoints
Gauge: 20 dc and 10 dc rows = 4 in (10.2 cm). For the trunk: 22 sc and 24 sc rnds = 4 in (10.2 cm).
Exact gauge matters less for an ornament than for a garment, but it controls how well the tiers fit together. Make Tier 4 first. It is the largest, so it shows any problem clearly.
Checkpoints (measured flat, from the tip to the center of the bottom edge):
- After Row 3: 1.2 in (3.0 cm) tall
- After Row 4: 1.6 in (4.1 cm) tall
- After Row 5: 2.0 in (5.1 cm) tall
- After Row 6: 2.4 in (6.1 cm) tall and 4.2 in (10.7 cm) wide
- After edging: 2.8 in (7.1 cm) tall and 4.8 in (12.2 cm) wide
If your tier is more than 0.25 in (0.6 cm) too large, go down one hook size. If it’s too small, go up one size. If it ruffles even though the height is right, your chain-1 spaces are too loose, so tighten them slightly.
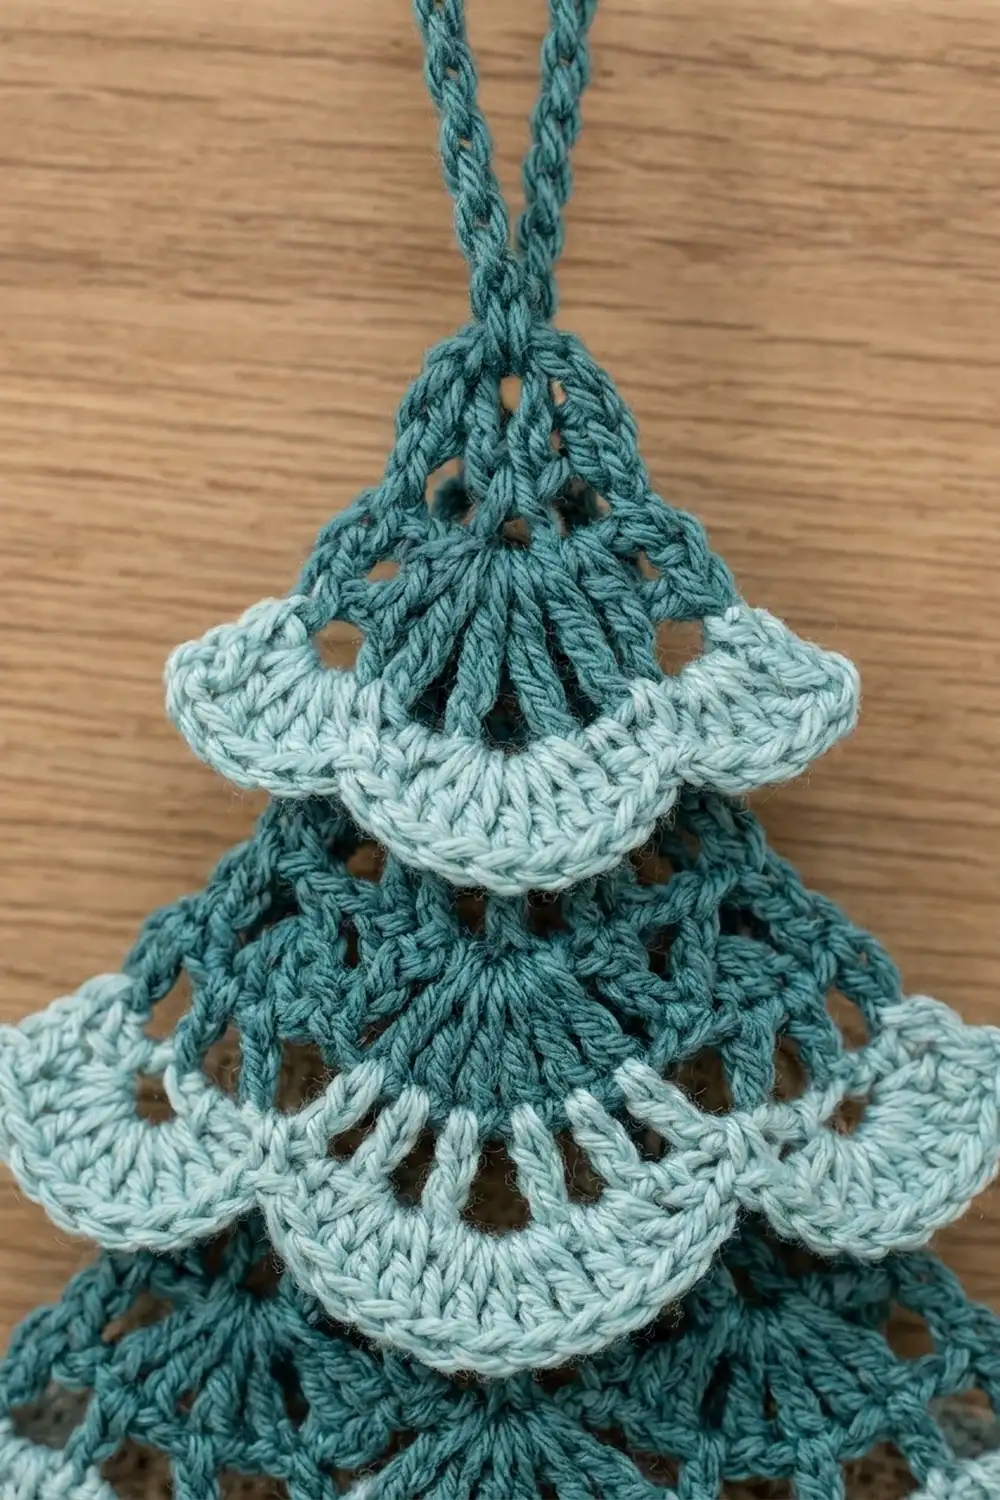
Tier Body (Make 4)
All four tiers use the same rows. You just stop at a different row for each tier. Work all tier bodies in Color A.
Each row grows by exactly 4 stitches. That steady growth makes a fan of about 120 degrees. The fan lies flat and gives the tree its triangle shape with a curved hem.
Row 1: With A, make a MR. Ch 3 (counts as dc), then work 4 dc in the ring. Pull the ring closed and turn. (5 dc)
Row 2 (eyelet row): Ch 4 (counts as dc + ch 1), [dc in next st, ch 1] 3 times, dc in top of turning ch. Turn. (5 dc + 4 ch-1 sps = 9 sts)
Row 3: Ch 3 (counts as dc), 2 dc in next ch-1 sp, dc in next dc 4 times. The last dc goes into the 3rd ch of the ch-4. Turn. (13 dc)
Tier 1 stops here. Fasten off.
Row 4 (eyelet row): Ch 3 (counts as dc), dc in next st, ch 1, dc in next 3 sts 3 times, ch 1, dc in last 2 sts. Turn. (13 dc + 4 ch-1 sps = 17 sts)
Each ch 1 is worked without skipping a stitch, which is how this row grows by 4.
Tier 2 stops here. Fasten off.
Row 5: Ch 3 (counts as dc), dc in each dc, and 2 dc in each ch-1 sp across. Turn. (13 dc + 8 dc = 21 dc)
Tier 3 stops here. Fasten off.
Row 6 (eyelet row): Ch 3 (counts as dc), dc in next 2 sts, [ch 1, dc in next 5 sts] 3 times, ch 1, dc in last 3 sts. Turn. (21 dc + 4 ch-1 sps = 25 sts)
Tier 4 stops here. Fasten off.
Tier bodies before edging:
| Tier | Last row | Sts in last row | Width | Height |
|---|---|---|---|---|
| 1 | Row 3 | 13 | 2.1 in (5.3 cm) | 1.2 in (3.0 cm) |
| 2 | Row 4 | 17 | 2.8 in (7.1 cm) | 1.6 in (4.1 cm) |
| 3 | Row 5 | 21 | 3.5 in (8.9 cm) | 2.0 in (5.1 cm) |
| 4 | Row 6 | 25 | 4.2 in (10.7 cm) | 2.4 in (6.1 cm) |
Rows 2, 4, and 6 create the small openings between the solid dc bands. The solid rows fill in those spaces and keep each fan firm.
Trunk
Work the trunk in Color C in continuous rounds. Put a marker in the first st of each rnd.
Rnd 1: Make a MR and work 6 sc in the ring. (6 sc)
Rnd 2: 2 sc in each st around. (12 sc)
Rnd 3: Sc in BLO of each st around. (12 sc) This turns the flat base up into the trunk wall.
Rnds 4–9: Sc in each st around. (12 sc)
Sl st in the next st and fasten off, leaving a 12 in (30.5 cm) tail.
Checkpoint: The trunk should be about 1.25 in (3.2 cm) tall and 0.7 in (1.8 cm) across. Add a small pinch of fiberfill so it holds a cylinder shape without bulging. Flatten the top opening so 6 sts sit on each side, then whipstitch the 6 pairs closed.
Border: Scalloped Tier Edging
The scallop edging is the border of each tier. You work it along the last row only, across the curved bottom edge. The straight sides of each fan are left plain. They are either hidden under the tier above or form the outline of the tree.
Border gauge: One scallop repeat (sc, skip 1, 5 dc, skip 1) uses 4 stitches and is about 0.8 in (2.0 cm) wide and 0.4 in (1.0 cm) deep.
Colors: Edge Tiers 1, 2, and 3 in Color B. Edge Tier 4 in Color A.
Edging Row: With the last row facing you, join the edging color with a sl st in the first st. Ch 1, sc in the same st, then skip next st, Scallop in next st, skip next st, sc in next st across. Fasten off. Treat each ch-1 sp as one st, skipping it or working into it exactly as you would a dc.
Exact counts per tier:
- Tier 1: 13 sts → 3 scallops, 4 sc, 15 dc (19 sts)
- Tier 2: 17 sts → 4 scallops, 5 sc, 20 dc (25 sts)
- Tier 3: 21 sts → 5 scallops, 6 sc, 25 dc (31 sts)
- Tier 4: 25 sts → 6 scallops, 7 sc, 30 dc (37 sts)
Why the math works: One scallop repeat uses 4 stitches, and the row needs one more stitch for the first sc. So the last row must have a multiple of 4, plus 1 (4n + 1). Each tier starts with 5 stitches and grows by exactly 4 per row, so every last row fits: 13 = 4 x 3 + 1, 17 = 4 x 4 + 1, 21 = 4 x 5 + 1, and 25 = 4 x 6 + 1. Every edging starts and ends with a sc, and there are no partial scallops.
Checkpoint after edging:
- Tier 1: 2.75 in (7.0 cm) wide, 1.6 in (4.1 cm) tall
- Tier 2: 3.5 in (8.9 cm) wide, 2.0 in (5.1 cm) tall
- Tier 3: 4.2 in (10.7 cm) wide, 2.4 in (6.1 cm) tall
- Tier 4: 4.8 in (12.2 cm) wide, 2.8 in (7.1 cm) tall
Stacking and Sewing the Tiers
Block each tier before assembly (Final Blocking, Steps 1–3). Then stack the tiers face up.
- Measure from the top. Tier 1’s tip is the top of the tree. Place Tier 2’s tip 0.8 in (2.0 cm) below that, Tier 3’s tip 1.6 in (4.1 cm) below, and Tier 4’s tip 2.4 in (6.1 cm) below. Each tip is hidden under the tier above it.
- Check what shows: Tier 1 shows 1.6 in (4.1 cm). Tiers 2, 3, and 4 each show 1.2 in (3.0 cm) below the scallops above them.
- Pin along the center line. With Color A, sew each tier to the one beneath it using small running stitches along the center line. Add a few tacks just above the upper tier’s sc stitches. Keep the tacks behind the scallops so the edging stays free.
- The tree body now measures 5.2 in (13.2 cm) from the tip to the bottom of the Tier 4 scallops.
- Slide the flattened top of the trunk behind the center of Tier 4. It should overlap by 0.45 in (1.1 cm), so 0.8 in (2.0 cm) shows below. Whipstitch it to the back of Rows 5 and 6 of Tier 4 using the trunk tail.
- Hanging loop: With Color A, join with a sl st through the tips of Tiers 1 and 2 together. Ch 20, then sl st into the same spot. Fasten off. The loop is about 1.5 in (3.8 cm) tall.
Final size checkpoint: 4.8 in (12.2 cm) wide x 6.0 in (15.2 cm) tall, plus the loop.
Final Blocking
- Weave in all ends on the back, hiding them inside the solid dc rows.
- Mist each tier lightly with water. Use diluted fabric stiffener instead if you want firm tiers for display.
- Pin each tier face up. Pin the tip first, then both straight sides, then each scallop, gently opening the 5-dc fans into even half-circles. Check the measurements against the edging checkpoints and let the tiers dry completely.
- After assembly, mist the ornament lightly and press the tiers flat with your palm.
- Use your fingertips to curve the scallops slightly forward over the tier below.
- Roll the trunk between your palms to round it, then let the ornament dry flat, face up.
Final Quality-Control Checklist
- The last rows of the tier bodies have 13, 17, 21, and 25 stitches
- The edgings have 3, 4, 5, and 6 full scallops, each starting and ending with a sc
- Tiers 1–3 are edged in pale aqua and Tier 4 in deep teal
- The eyelets in Rows 2, 4, and 6 are open and evenly spaced
- The tier tips are 0.8 in (2.0 cm) apart and hidden
- The trunk is centered and shows 0.8 in (2.0 cm) below the bottom tier
- The ornament hangs straight from its loop
- All ends are woven in on the back
Troubleshooting
A tier cups into a cone. Your dc stitches are tight. Go up one hook size or loosen the ch-1 spaces.
A tier ruffles. Your stitches are too loose, or a ch 1 replaced a stitch instead of being added. Recount: each eyelet row must have exactly 4 more stitches than the row before.
The edging ends with a partial scallop. The last row has the wrong count. It must be 13, 17, 21, or 25. Fix the tier body, not the edging.
The scallops flip backward. Mist them and pin them forward, or use a light coat of stiffener.
The ornament hangs crooked. The loop is off-center. Move it to the exact tip, or re-tack the tiers along a true center line.
The trunk is floppy. Add a little more fiberfill, or go down one hook size for the trunk.
Care
Hand wash in cool water with mild soap, roll in a towel to remove the water, and reshape flat to dry. Store the ornament flat or hanging so the scallops keep their shape.
Final Notes
Here is how the measurements build on each other. The 5-stitch start grows by 4 per row to 13, 17, 21, and 25 stitches. Those counts fit the 4n + 1 scallop repeat exactly, which gives edged tiers 2.75 in (7.0 cm), 3.5 in (8.9 cm), 4.2 in (10.7 cm), and 4.8 in (12.2 cm) wide. With the tips stacked 0.8 in (2.0 cm) apart, the tiers make a tree body 5.2 in (13.2 cm) tall. The trunk adds 0.8 in (2.0 cm), for a finished height of 6.0 in (15.2 cm).
Make one, then make a few more in the same colors to hang from a branch or tree. Happy crocheting!