

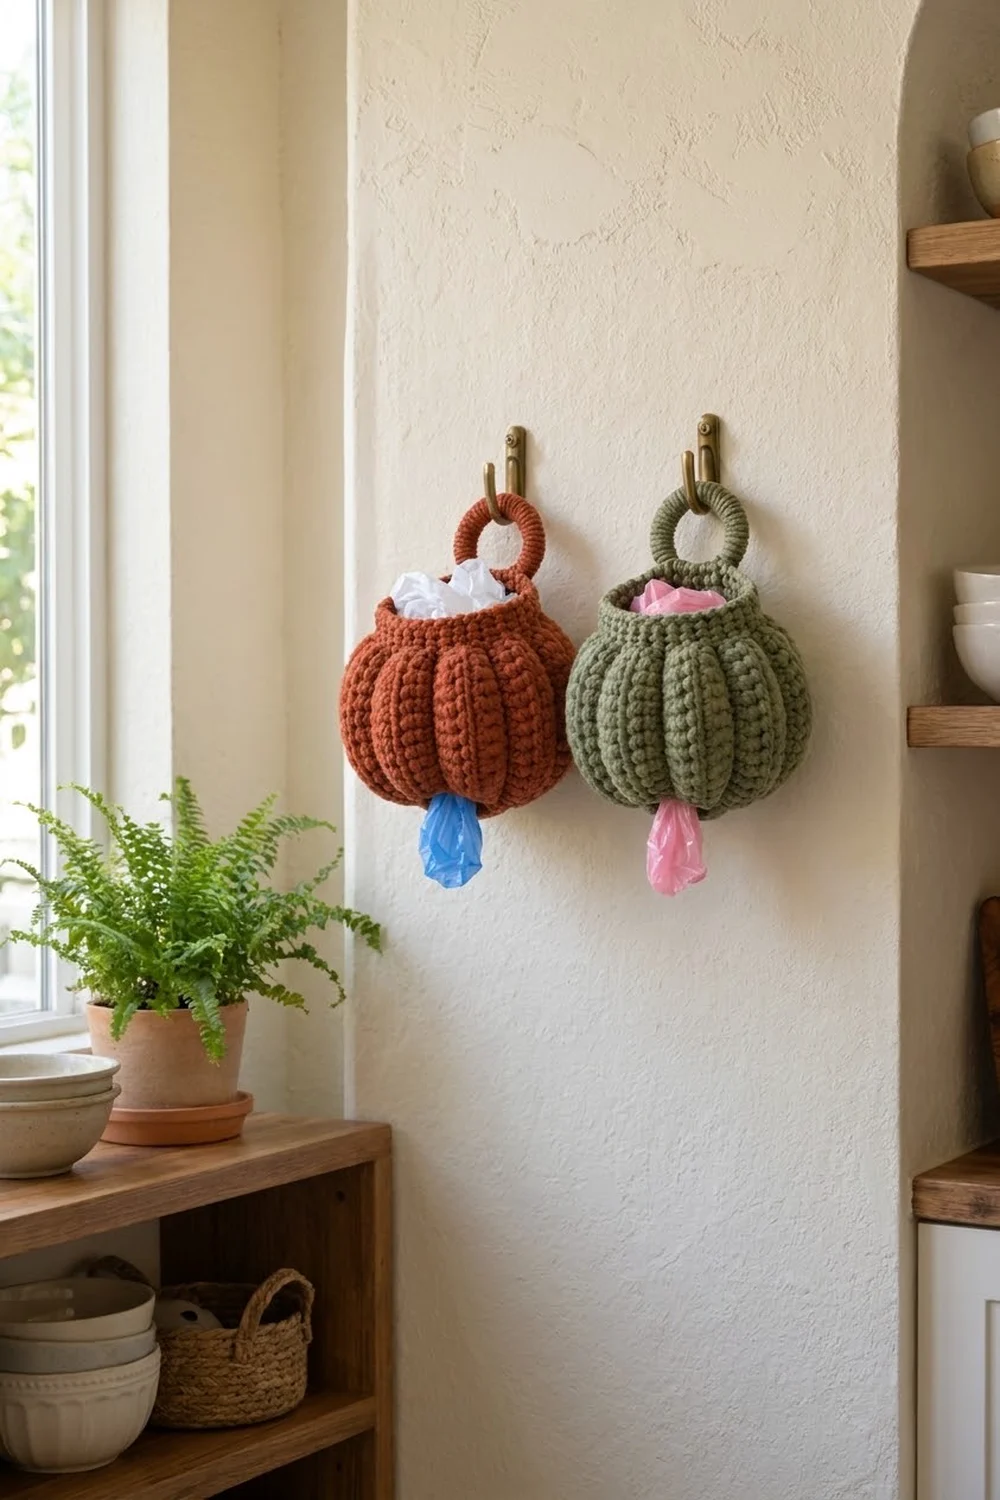
The Harvest Lantern is a round, pumpkin-shaped plastic bag holder. It hangs from a wall hook by a crocheted ring. You push used grocery bags in through the wide top opening and pull them out one at a time through the small hole at the bottom. Ten soft lobes and a neat rolled collar make it look like a little pumpkin.
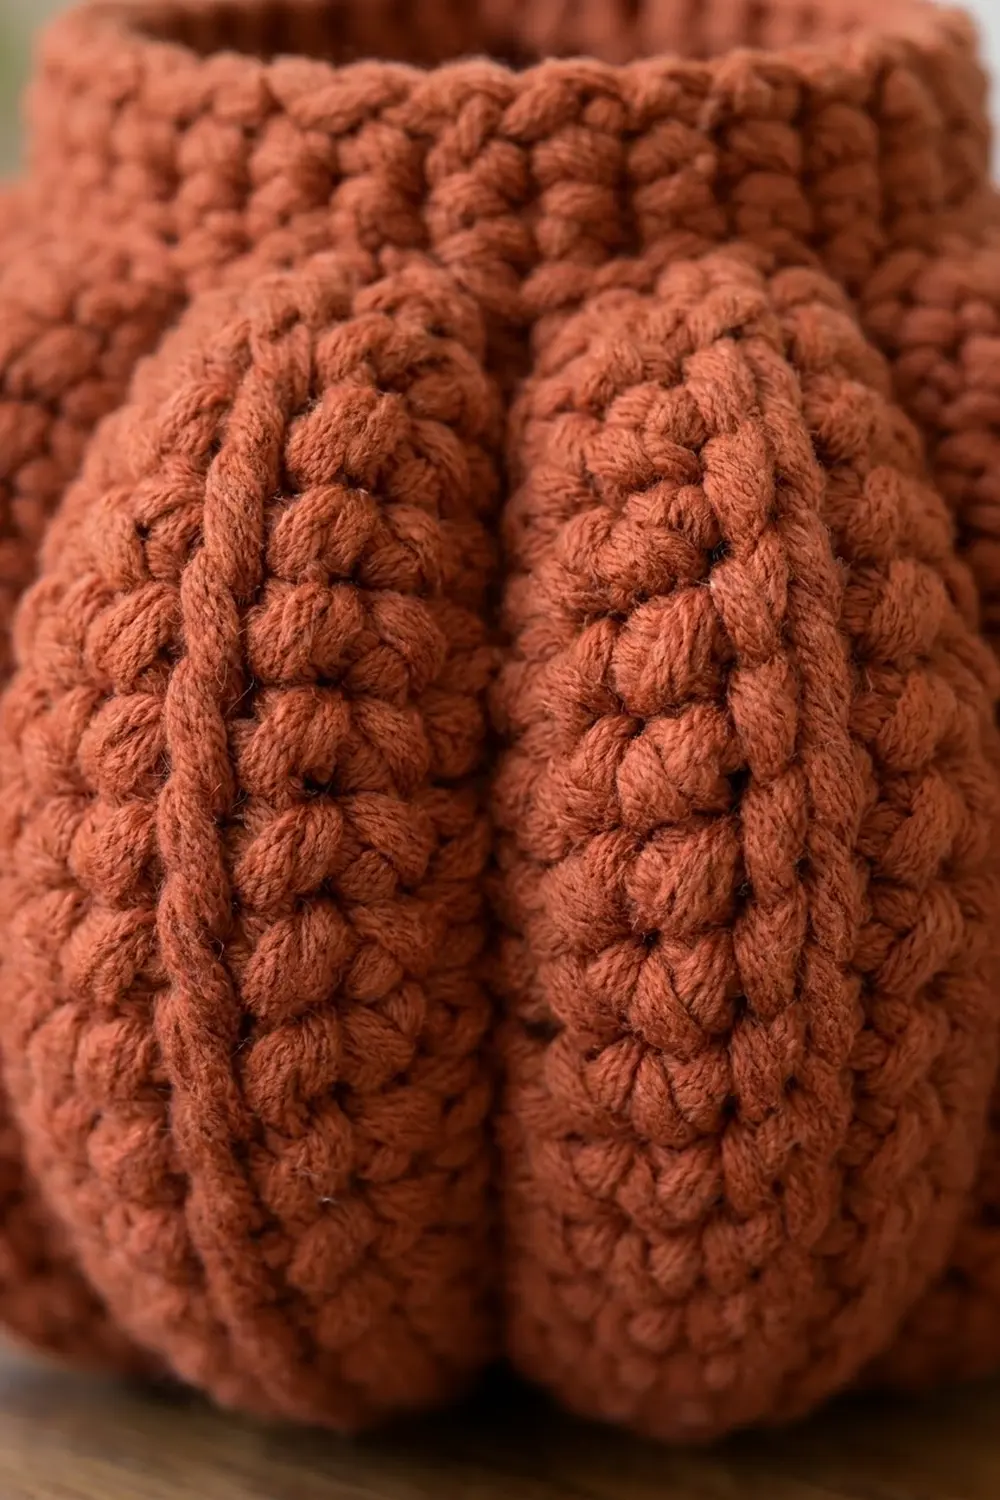
The sample is a warm rust, close to terracotta. A sage green version looks just as good. Making one of each is an easy way to sort bags by size or color. The fabric is firm single crochet worked in the round, so the stitches stack into clear vertical columns that run down each lobe.
This pattern uses US crochet terms. The finished holder is about 8 in (20.3 cm) wide and 7 in (17.8 cm) tall without the ring. With the ring it is about 9.5 in (24.1 cm) tall.
The construction is simple. You start at the bottom opening with a chain ring and increase out to the widest round. Then you work straight, decrease to the neck, and finish with a collar. A short tab at the back holds a covered ring. Last, ten lines of surface slip stitch are pulled snug to sink the grooves between the lobes.
Finished Size and Construction
- Finished size: about 8 in (20.3 cm) wide x 7 in (17.8 cm) tall body; 9.5 in (24.1 cm) tall with ring
- Skill level: Easy+
- Terminology: US crochet terms
- Yarn weight: Bulky (#5)
- Hook: 6 mm (US J-10)
- Number of pieces: 1 (body, tab and ring cover worked in one continuous piece)
- Layout: single seamless pumpkin, worked bottom-up in joined rounds
- Piece size: 80 stitches around at the widest point
- Size before border: 50 stitches around at Rnd 23, an opening about 5.3 in (13.5 cm) across
- Border depth: 4-round collar, about 1.2 in (3.0 cm)
Materials
Pick a smooth, sturdy bulky yarn. Cotton, cotton blends and acrylic all work. Avoid fuzzy or very soft yarn: bags rub against the fabric every day, and fuzzy yarn pills fast. A yarn with a tight twist gives the crispest stitch columns.
- Main color, rust/terracotta: about 75 g / 90 m (98 yd)
- Optional second holder, sage green: about 75 g / 90 m (98 yd)
Tools:
- 6 mm (US J-10) crochet hook
- 1 wooden or metal ring, 2.5 in (6.4 cm) outer diameter
- Stitch marker
- Tapestry needle
- Scissors
- Measuring tape
The yarn amounts include a margin of about 25 percent for your gauge swatch and the groove lines.
Abbreviations (US Terms)
- ch – chain
- sl st – slip stitch
- sc – single crochet
- inc – 2 sc in the same stitch
- dec – single crochet 2 together (insert hook in next st, pull up a loop, insert in following st, pull up a loop, yarn over and pull through all 3 loops)
- BLO – back loop only
- st(s) – stitch(es)
- rnd(s) – round(s)
Special stitch – surface slip stitch: Hold the working yarn on the inside (wrong side) of the piece. Insert the hook from the right side between two stitches, catch the yarn, and pull a loop through to the right side and through the loop on the hook. Repeat one round higher each time. This makes a chain line on the surface.
Gauge and Checkpoints
Gauge: 12 sc and 13 rnds = 4 in (10.2 cm) in sc worked in joined rounds.
Gauge matters here. The bottom opening must be big enough to pull a bag through but small enough to keep bags from falling out. Treat the first rounds as your test piece: work Rnds 1–4 and check the opening before you go on.
Checkpoints:
- After Rnd 1: the opening is about 2.1 in (5.3 cm) across.
- After Rnd 10: the piece forms a shallow bowl. The top edge measures 13.3 in (33.8 cm) across when pressed flat in half.
- After Rnd 18: the body is about 5 in (12.7 cm) tall when flattened from the side.
- After Rnd 27: the collar measures 8.3 in (21.1 cm) across when pressed flat.
If your work is too big, go down to a 5.5 mm hook. If it is too small, go up to a 6.5 mm hook. Change hook size rather than tension, because tight stitches make bags catch as you pull them.
Pattern Notes
- Work in joined rounds. At the end of each round, sl st to the first sc. Ch 1 at the start of each round; the ch 1 does not count as a stitch.
- Place a marker in the first sc of each round.
- Keep the right side facing you the whole time. Do not turn.
- Each increase is worked at the end of its repeat, so the increases stack in 10 rough columns. These columns mark where the grooves go later.
Body
Foundation: Ch 20 and sl st to the first ch to form a ring. Check that the chain is not twisted.
Rnd 1: Ch 1, sc in each ch around, sl st to first sc. (20 sts)
Rnd 2: Ch 1, (sc 1, inc) 10 times, sl st to first sc. (30 sts)
Rnd 3: Ch 1, sc in each st around, sl st to first sc. (30 sts)
Rnd 4: Ch 1, (sc 2, inc) 10 times, sl st to first sc. (40 sts)
Rnd 5: Ch 1, sc in each st around, sl st to first sc. (40 sts)
Rnd 6: Ch 1, (sc 3, inc) 10 times, sl st to first sc. (50 sts)
Rnd 7: Ch 1, (sc 4, inc) 10 times, sl st to first sc. (60 sts)
Rnd 8: Ch 1, sc in each st around, sl st to first sc. (60 sts)
Rnd 9: Ch 1, (sc 5, inc) 10 times, sl st to first sc. (70 sts)
Rnd 10: Ch 1, (sc 6, inc) 10 times, sl st to first sc. (80 sts)
The plain rounds between the increase rounds keep the bottom from lying flat. The piece should start to curve up into a shallow bowl around Rnd 7.
Rnds 11–18: Ch 1, sc in each st around, sl st to first sc. (80 sts in each round)
These 8 straight rounds form the widest part of the pumpkin, a band about 2.5 in (6.4 cm) tall.
Rnd 19: Ch 1, (sc 6, dec) 10 times, sl st to first sc. (70 sts)
Rnd 20: Ch 1, sc in each st around, sl st to first sc. (70 sts)
Rnd 21: Ch 1, (sc 5, dec) 10 times, sl st to first sc. (60 sts)
Rnd 22: Ch 1, sc in each st around, sl st to first sc. (60 sts)
Rnd 23: Ch 1, (sc 4, dec) 10 times, sl st to first sc. (50 sts)
Try to place each decrease roughly above an increase column. If one drifts by a stitch, that is fine.
Top Collar (Border)
The collar is the border of this piece. It is a straight band with the same count in every round, so the opening stays a clean, even circle.
Border gauge: same as the body, 12 sc = 4 in (10.2 cm).
Rnd 24 (fold round): Ch 1, sc in BLO of each st around, sl st to first sc. (50 sts)
The unused front loops leave a small ridge. This ridge is the crease where the shoulder of the pumpkin turns into the neck.
Rnds 25–27: Ch 1, sc in both loops of each st around, sl st to first sc. (50 sts in each round)
Do not fasten off. Go straight on to the tab.
Why the math works: At 12 sts per 4 in, 50 sts give a circumference of 16.7 in (42.4 cm). That makes an opening about 5.3 in (13.5 cm) across, which is wide enough to push a handful of bags through. At 13 rnds per 4 in, the 4 collar rounds add 1.2 in (3.0 cm) of height. Because the count stays at 50 in all 4 rounds, the collar neither flares nor pulls in.
Hanging Tab and Ring
Find the back of the holder: the side where the round joins line up. The tab hides that slanted joining line against the wall.
Tab Row 1: Sl st along the top of Rnd 27 until you reach the 3rd st before the join. Ch 1, sc in the next 5 sts, turn. (5 sts)
Tab Rows 2–6: Ch 1, sc in each st across, turn. (5 sts in each row)
The tab is now about 1.8 in (4.6 cm) tall.
Ring cover: Ch 1 and hold the ring just above the tab. To sc over the ring, insert the hook through the center of the ring, yarn over, pull up a loop and finish the sc. Work 42 sc around the ring, pushing the stitches together as you go so none of the ring shows. Sl st to the first sc on the ring.
If the ring still shows after 42 sc, add 2 to 4 more. If the stitches buckle, take a few out. The count only needs to cover the ring evenly.
Attach: Hold the bottom of the covered ring against the top of the tab. Sl st through 5 ring-cover stitches and the 5 tab stitches together to join them. Fasten off, leaving a 10 in (25.4 cm) tail. Use the tail to whipstitch the sides of the tab to the ring cover for extra strength. Weave in the end.
Grooves
The grooves turn a round bag into a pumpkin. Each one is a line of surface slip stitch running from the bottom opening up to the shoulder.
- Find the 10 increase columns. At Rnd 10 they are 8 sts apart.
- Join yarn on the inside at Rnd 1, in line with the first increase column.
- Work surface sl st up the column, one stitch per round, through Rnd 23. That is 23 sl sts per line.
- Pull each sl st snug so the fabric puckers slightly along the line.
- Fasten off on the inside and weave in.
- Repeat for all 10 columns.
Stop at Rnd 23 so the collar stays smooth.
Checkpoint: Before the grooves, the body is about 7.5 in (19.1 cm) tall. After the grooves, it should be about 7 in (17.8 cm) tall, with rounded lobes. If one line is much tighter than the others, that lobe will look flat; undo it and work it again.
Final Blocking
- Weave in all remaining ends on the inside.
- Mist the whole holder lightly with water until it is damp, not wet.
- Stuff it firmly with plastic bags or a towel so it takes a round pumpkin shape.
- Press each lobe outward with your fingers, and press the grooves in.
- Shape the collar so the BLO ridge sits neatly as a crease.
- Set the covered ring flat and straight above the collar.
- Let it dry completely, about 24 hours.
- Check the size: the body should be 8 in (20.3 cm) wide and 7 in (17.8 cm) tall.
You can steam block acrylic instead. Hold the iron above the fabric and never let it touch.
Final Quality-Control Checklist
- Bottom opening about 2.1 in (5.3 cm) across and round
- 80 sts in Rnds 10–18, 50 sts in Rnds 23–27
- 10 grooves, evenly spaced, all equally tight
- Collar ridge visible all the way around
- Ring fully covered with no gaps
- Tab firmly joined and strong enough to hold a full load of bags
- All ends woven in on the inside
- Finished size 8 in (20.3 cm) x 7 in (17.8 cm), 9.5 in (24.1 cm) with ring
Troubleshooting
The bottom ruffles instead of cupping. Your tension is loose on the increase rounds. Go down a hook size for Rnds 1–10.
The bottom opening is too tight. Bags will stick. Work the foundation chain with a hook one size larger, then switch back to the 6 mm hook for Rnd 1. The stitch counts stay the same.
The round joins make a slanted line. This is normal for joined rounds. Keep it at the back, under the tab.
The lobes look uneven. The grooves are not evenly spaced. Check that the columns are 8 sts apart at Rnd 10 and redo any line that is off.
The holder tips forward on the hook. The tab is too long. Undo back to Row 4 and reattach the ring.
The ring shows through. Add more sc around the ring and push them tightly together.
Care
Hand wash in cool water. Dry it flat, stuffed with a towel to keep the pumpkin shape, and do not tumble dry.
Final Notes
Here is the measurement chain in one place:
- Gauge: 12 sc and 13 rnds = 4 in (10.2 cm).
- Rnd 1: 20 sts give a 2.1 in (5.3 cm) bottom opening.
- Widest band: 80 sts give a circumference of 26.7 in (67.8 cm) before shaping.
- Collar: 50 sts give a 5.3 in (13.5 cm) top opening, 1.2 in (3.0 cm) deep.
- Grooves: they pull the body from 7.5 in (19.1 cm) to 7 in (17.8 cm) tall, and it finishes 8 in (20.3 cm) wide.
- Ring: it brings the total height to 9.5 in (24.1 cm).
Check each stage as you go and the holder will come out right. Make one in rust and one in sage, and your bags will stay tidy all year.
Happy crocheting!