

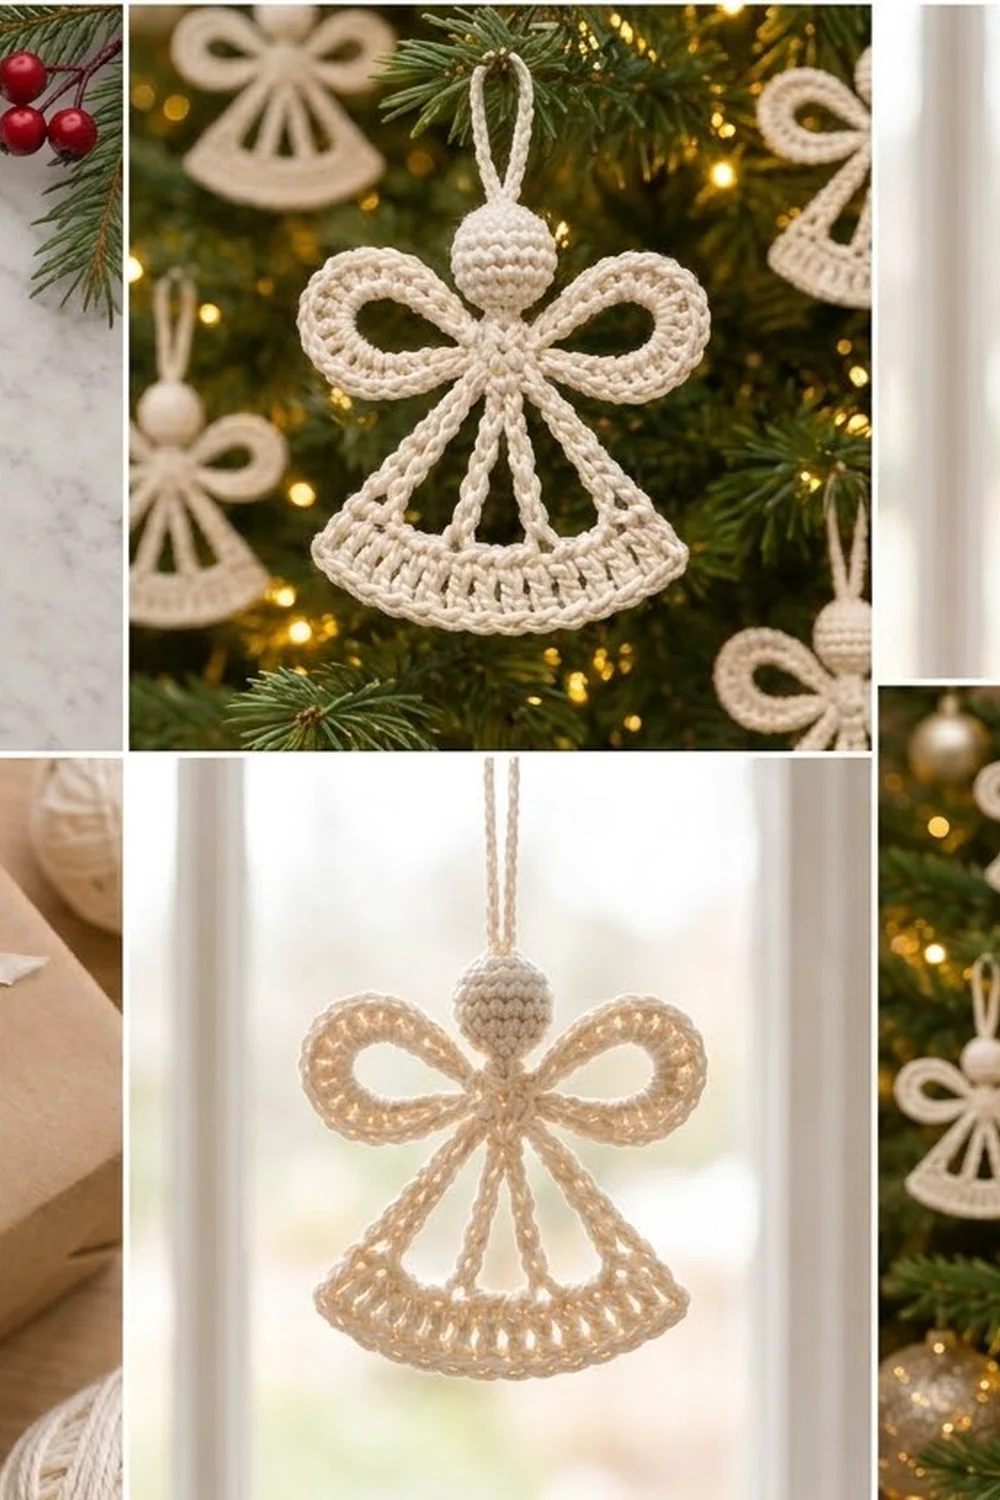
The Snowlace Angel is a small, airy Christmas ornament made in a single cream cotton. It has a round stuffed head, two open loop wings, a skirt of four corded spokes, and a solid curved hem. The open spaces between the spokes let tree lights shine through.
It uses just one color, soft cream or ivory. The style is classic and a little vintage, like a starched lace angel. Cotton keeps the stitches crisp and holds its shape well after blocking.
This pattern uses US crochet terms. The finished angel measures about 4 in (10.2 cm) across the hem and about 4 in (10.2 cm) tall from the hem to the top of the head. The hanging loop adds 1.25 in (3.2 cm), and the wingspan is about 3.75 in (9.5 cm).
Here’s how it’s built. First you make a tiny ball for the head. Next you work the curved hem in three short rows, and the spokes and neck ring come straight off the last row without fastening off. Each wing is a chain loop covered in single crochet. Then you sew the head on, and a one-row border finishes the hem.
Finished Size and Construction
- Finished size: 4 in (10.2 cm) wide at the hem x 4 in (10.2 cm) tall, plus a 1.25 in (3.2 cm) hanging loop
- Wingspan: about 3.75 in (9.5 cm)
- Skill level: Easy to intermediate
- Terminology: US crochet terms
- Yarn weight: DK / light worsted (#3) cotton
- Hook: 3.25 mm (US D/3)
- Number of pieces: 1 finished ornament, made from 2 parts (head, and body frame with wings) sewn together
- Layout: One standalone ornament with no motifs to join
- Hem band size before border: 4 in (10.2 cm) along the bottom x 0.85 in (2.2 cm) deep
- Border depth: 0.2 in (0.5 cm), so the finished hem band is 1.05 in (2.7 cm) deep
Materials
Yarn: Use a smooth DK-weight cotton, mercerized or matte. Cotton gives the spokes a clean, rope-like texture and takes starch well. Acrylic also works, but the wings will be floppier and need more stiffener.
- Cream / ivory: 8 g (about 17 m) of DK cotton
This amount includes about a 30% margin for the gauge swatch, sewing tails, and hanging loop. One 50 g ball makes five or six angels.
Tools:
- 3.25 mm (US D/3) crochet hook
- Tapestry needle
- 2 stitch markers
- A small pinch of polyester fiberfill
- Blocking mat or foam board and rust-proof pins
- Optional: fabric stiffener or spray starch
- Scissors and a ruler
Abbreviations (US Terms)
- ch – chain
- sl st – slip stitch
- sc – single crochet
- dc – double crochet
- MR – magic ring
- inc – 2 sc in the same stitch
- sc2tog – single crochet 2 together
- dc2tog – double crochet 2 together
- st(s) – stitch(es)
- sp – space
Special stitch – corded spoke: Chain the stated length and slip stitch into the target. Then work 1 sl st into the back bump of each chain on the way back. This doubles the chain into a firm, braided-looking cord.
Gauge and Checkpoints
Gauge: 5 sc = 1 in (2.5 cm) and 6 ch = 1 in (2.5 cm) on a 3.25 mm hook. One sc row is about 0.2 in (0.5 cm) tall, and one dc row is about 0.45 in (1.1 cm) tall.
Make one complete angel as a test piece before making a set. Gauge controls the proportions: loose spokes with a tight hem make the skirt look stretched.
Checkpoints:
- Head: after Round 6, about 0.75 in (1.9 cm) across.
- Hem Row 1: 20 sc measure 4 in (10.2 cm) laid flat.
- Hem Row 3: the top edge is about 3.2 in (8.1 cm), and the band is 0.85 in (2.2 cm) deep.
- Spokes: each is 2 in (5.1 cm) from hem to neck ring.
- Wings: each is about 1.75 in (4.4 cm) long and 1.1 in (2.8 cm) tall.
- After border: the hem band is 1.05 in (2.7 cm) deep.
Too big: Go down to a 3.0 mm hook, or tighten your chains. Loose chains are the most common cause of long, droopy spokes.
Too small: Go up to a 3.5 mm hook. Don’t add stitches, because the spoke spacing depends on the exact 16-stitch top edge.
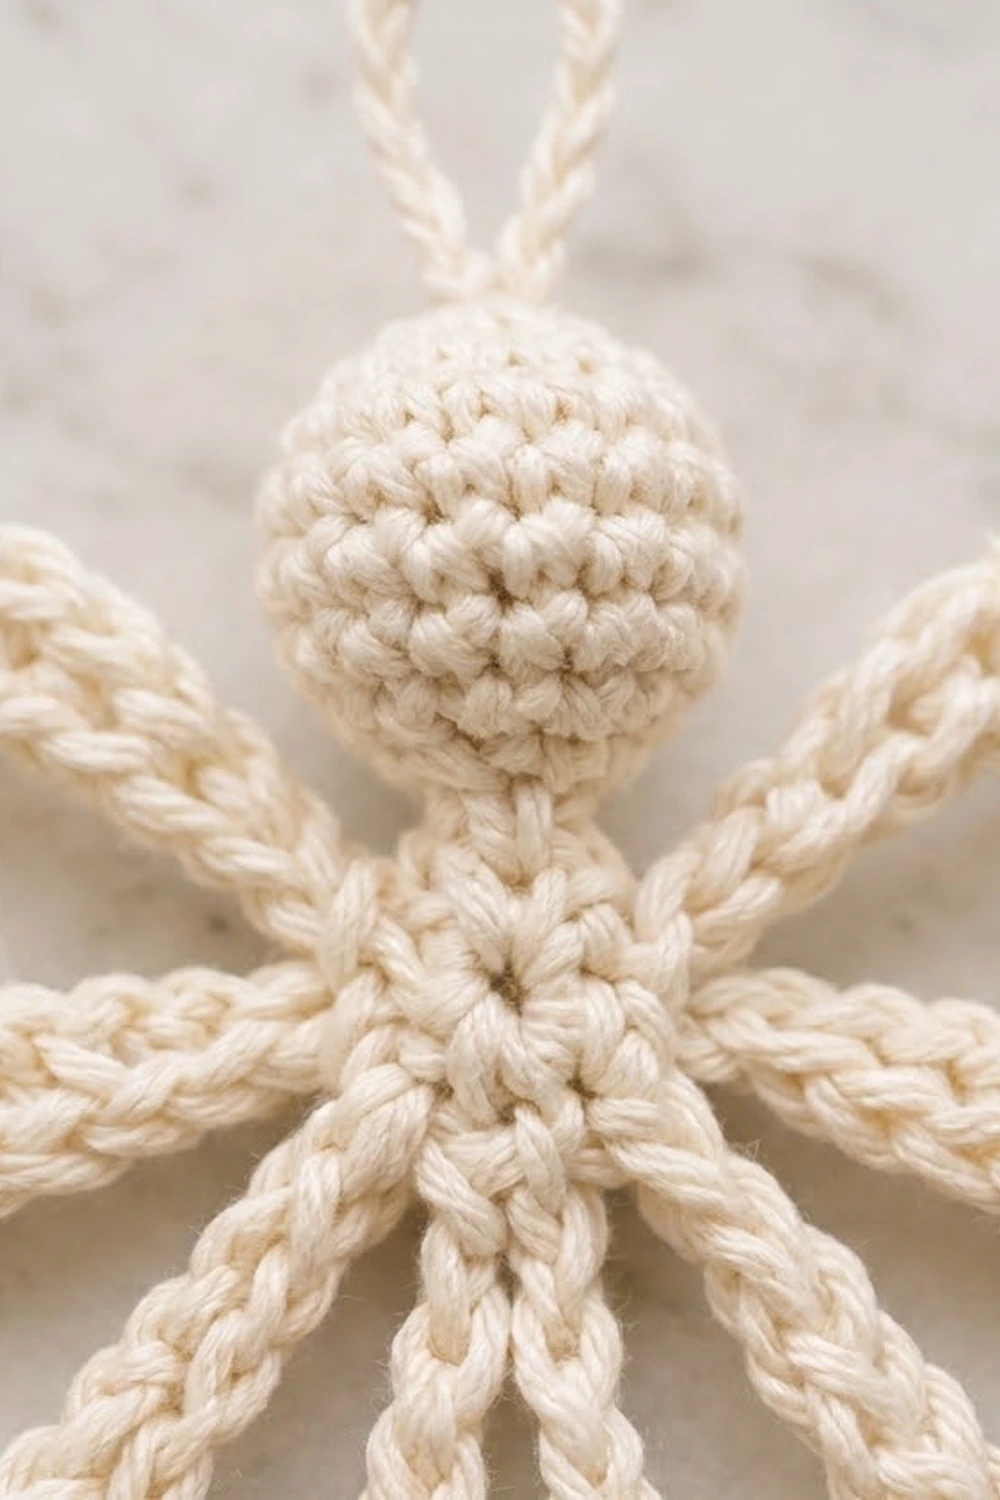
Head
Work in continuous spiral rounds and mark the first stitch of each round. Start with a 10 in (25.4 cm) tail for sewing.
Round 1: MR, 6 sc in ring. Pull the ring closed. (6 sts)
Round 2: Inc in each st around. (12 sts)
Rounds 3–5: Sc in each st around. (12 sts in each round)
Stuff the head firmly with a small pinch of fiberfill, keeping it round.
Round 6: Sc2tog around. (6 sts)
Check: the head is about 0.75 in (1.9 cm) across and 2.4 in (6.1 cm) around.
Hanging loop: Sl st into the next st, at the center top of the head. Ch 16, then sl st into the same st to form a loop. Work 1 sl st into the back bump of each of the 16 ch, then sl st into the head again. Fasten off, and weave the end through the head to close the hole. The loop should stand about 1.25 in (3.2 cm) tall.
Hem Band
Work the hem flat in rows. The decreases in Rows 2 and 3 make the top edge shorter than the bottom, which bends the band into a fan curve.
Row 1: Ch 21. Sc in 2nd ch from hook and in each ch across. (20 sc)
Check: 4 in (10.2 cm) wide.
Row 2: Ch 2 (does not count as a st), turn. Dc in first 6 sts, dc2tog, dc in next 4 sts, dc2tog, dc in last 6 sts. (18 sts: 16 dc + 2 dc2tog)
This uses all 20 sts below: 6 + 2 + 4 + 2 + 6 = 20.
Row 3: Ch 1, turn. Sc in first 5 sts, sc2tog, sc in next 4 sts, sc2tog, sc in last 5 sts. (16 sts: 14 sc + 2 sc2tog)
This uses all 18 sts below: 5 + 2 + 4 + 2 + 5 = 18.
Check: the band is 0.85 in (2.2 cm) deep and curves slightly. Don’t fasten off.
Number the Row 3 stitches 1 to 16 in the order you worked them. Your hook is now at st 16. Mark sts 11, 6, and 1. The spokes sit at sts 16, 11, 6, and 1, with 4 stitches between each pair. This spacing creates the three open triangles.
Spokes and Neck Ring
All four spokes are the same length and meet at one neck ring. The ring acts as the center of the fan.
Spoke 1 (right outer edge) and neck ring: Ch 16. Sl st into 4th ch from hook to form the neck ring. Work 1 sl st into the back bump of each of the remaining 12 ch, back down to the hem. (12 ch + 12 sl st)
Travel: Sl st in sts 15, 14, 13, 12, and 11. (5 sl st)
Spoke 2 (inner right): Ch 12, sl st into neck ring. Work 1 sl st into the back bump of each of the 12 ch, back down. (12 ch + 12 sl st)
Travel: Sl st in sts 10, 9, 8, 7, and 6. (5 sl st)
Spoke 3 (inner left): Work as Spoke 2.
Travel: Sl st in sts 5, 4, 3, 2, and 1. (5 sl st)
Spoke 4 (left outer edge): Work as Spoke 2. Fasten off.
Totals: 4 spokes of 12 ch + 12 sl st each, plus 15 travel sl sts. Each of the 16 top stitches is covered by either a spoke base or a travel slip stitch (4 + 12 = 16), which gives a neat raised line.
Check: each spoke is 2 in (5.1 cm) long, and the neck ring is about 0.25 in (0.6 cm) across.
Wings
Each wing is an open oval: a chain loop fully covered with sc.
Left wing: Join yarn with a sl st on the left side of the neck ring. Ch 20, sl st into neck ring to form a loop. Work 28 sc into the ch-20 sp, going over the chain rather than into it. Sl st into neck ring. (28 sc)
Right wing: Sl st across the top of the ring to its right side. Ch 20, sl st into neck ring. Work 28 sc into the ch-20 sp, then sl st into neck ring. (28 sc) Fasten off.
Spread the stitches evenly so they sit snug but not bunched. Check: each wing is about 1.75 in (4.4 cm) long and 1.1 in (2.8 cm) tall. The wingspan is about 3.75 in (9.5 cm).
Assembly
Thread the head’s starting tail onto a tapestry needle. Center the head on top of the neck ring, between the wings, with the loop pointing straight up. Sew it down with 4 or 5 small stitches through the ring chains, then weave in all ends.
Border
The border is one row of sc around the short ends and bottom of the hem. It repeats the braided look of Row 3 along the bottom edge.
Border gauge: 5 sc = 1 in (2.5 cm), the same as the main gauge. On row ends, work 1 sc per sc row and 2 sc per dc row.
With the bottom of the hem facing up, join yarn at the top of the right short edge, at the base of Spoke 1.
Right short edge: Sc in end of Row 3, 2 sc in end of Row 2, sc in end of Row 1. (4 sc)
Bottom edge: Working into the free loops of the foundation chain, 2 sc in first ch, sc in each of next 18 ch, 2 sc in last ch. (22 sc: 20 worked 1-per-chain + 2 corner extras)
Left short edge: Sc in end of Row 1, 2 sc in end of Row 2, sc in end of Row 3. (4 sc)
Fasten off. (Total: 4 + 22 + 4 = 30 sc)
Why the math works: The foundation has 20 chains, and Row 1 has 20 sc. One sc per chain keeps the bottom at 4 in (10.2 cm), so the hem doesn’t ruffle or pull in. The 2 corner extras let the border turn without pinching. On the short edges, 1 sc per 0.2 in (0.5 cm) sc row and 2 sc per 0.45 in (1.1 cm) dc row match the row heights, so the sides lie flat.
Check: the hem band is now 1.05 in (2.7 cm) deep.
Final Blocking
- Wet the ornament in cool water, or spray it until evenly damp.
- Press out extra water in a towel. Don’t wring it.
- Lay it face up on a blocking mat.
- Pin the bottom corners of the hem 4 in (10.2 cm) apart, then pin the bottom edge into a smooth curve.
- Pin the neck ring 2 in (5.1 cm) above the top of the hem, centered.
- Straighten each spoke and pin the three openings into clean triangles.
- Open each wing into an oval level with the neck ring, for a 3.75 in (9.5 cm) wingspan.
- For a stiff ornament, apply fabric stiffener or spray starch now.
- Let it dry completely, 12 to 24 hours, before unpinning.
Final Quality-Control Checklist
- Head is round, firm, and about 0.75 in (1.9 cm) across.
- Hanging loop is centered and about 1.25 in (3.2 cm) tall.
- Hem bottom measures 4 in (10.2 cm).
- Hem top has 16 sts, with spokes at sts 1, 6, 11, and 16.
- All four spokes are corded and 2 in (5.1 cm) long.
- The three skirt openings match in size.
- Each wing has 28 sc, and the two wings match.
- Border has 30 sc: 4 + 22 + 4.
- All ends are woven in.
Troubleshooting
Hem stays straight: Check that you made both decreases in Rows 2 and 3.
Hem ruffles: Row 1 or the border is too loose. Use a smaller hook for the foundation chain.
Spokes differ in length: Recount your chains; every spoke needs 12. Keep the return slip stitches relaxed.
Spokes twist: Work the return slip stitches into the back bump only.
Wings ruffle: Too many sc for your chain. Work 26 sc instead.
Wings show gaps: Too few sc. Work 30 sc instead.
Head looks flat: Add more fiberfill before Round 6.
Care
Hand wash in cool water with mild soap and lay flat to dry, then re-block and re-starch if needed. Store flat in tissue paper so the wings keep their shape.
Final Notes
The measurement chain is simple. A 0.75 in (1.9 cm) head sits on a 0.25 in (0.6 cm) neck ring. Four 2 in (5.1 cm) spokes drop to a hem band that is 0.85 in (2.2 cm) deep before the border and 1.05 in (2.7 cm) after. The hem is 4 in (10.2 cm) wide, the wingspan is 3.75 in (9.5 cm), and the angel is 4 in (10.2 cm) tall plus a 1.25 in (3.2 cm) loop.
If Row 1 measures 4 in (10.2 cm) and your spokes measure 2 in (5.1 cm), the rest will fall into place. Make one, check it against the list, then make a whole choir for the tree.
Happy crocheting!