

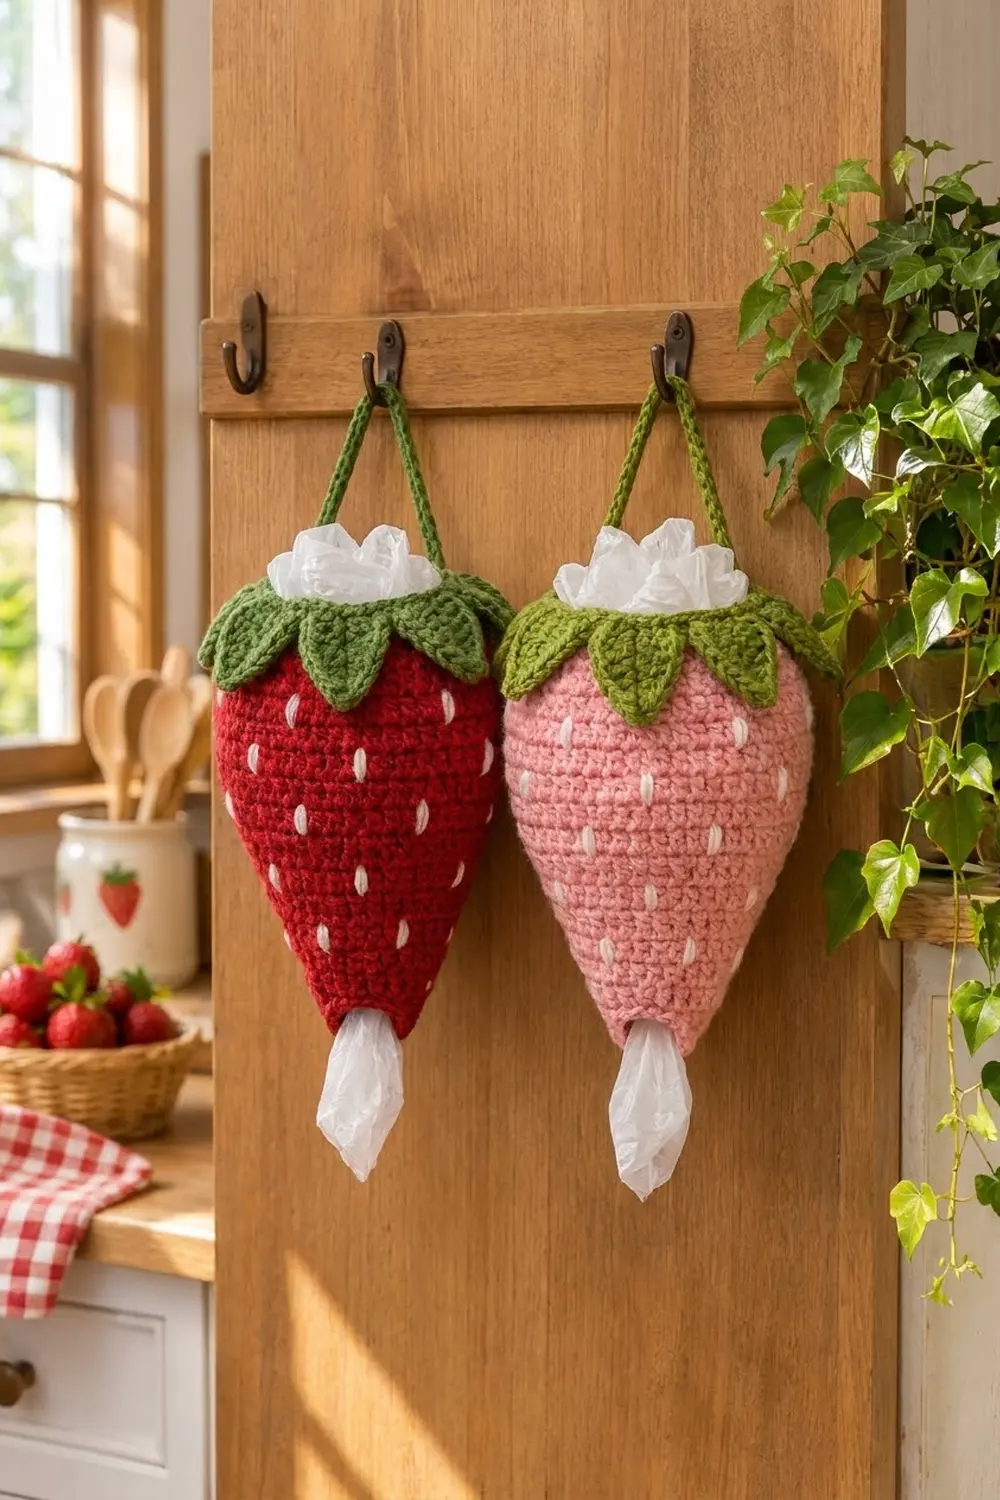
The Sweet Berry Bag Holder is a plump, hanging strawberry that stores plastic grocery bags. You stuff bags in through the wide top, and you pull them out one at a time through a small opening at the pointed bottom. It looks like a big ripe berry hanging on a cabinet door, and it keeps a messy pile of bags out of sight.
The body is a deep strawberry red, sprinkled with short white embroidered seeds. A green collar circles the top opening, and eight pointed green leaves fold down over the shoulders of the berry. A thin green slip-stitch strap lets it hang from a hook or a door knob. It also works well in pink if you want a softer, sweeter look.
The pattern uses US crochet terms. The finished holder measures about 7 in (17.8 cm) wide at its widest point when flat and about 10.2 in (25.9 cm) tall, not counting the strap. The strap adds a loop of about 9 in (22.9 cm).
The body is one piece of single crochet, worked in joined rounds from the bottom opening up. It widens slowly into a cone, stays straight for a few rounds, and then curves in at the shoulders. You then change to green for the collar, work the leaves into the spare front loops, embroider the seeds, finish both openings, and sew on the strap.
Finished Size and Construction
- Finished size: about 7 in (17.8 cm) wide × 10.2 in (25.9 cm) tall, laid flat
- Skill level: Easy (advanced beginner)
- Terminology: US crochet terms
- Yarn weight: Worsted (#4)
- Hook: 4.5 mm (US 7)
- Number of pieces: 1 body (with collar and leaves worked on) + 1 strap
- Layout: Single hanging piece; no motifs to join
- Piece size: Widest round is 56 sts, 14 in (35.6 cm) around
- Size before border: 7 in × 10 in (17.8 × 25.4 cm) after Rnd 45
- Border depth: Top slip-stitch rim adds about 0.2 in (0.5 cm); the bottom slip-stitch edge adds no height
Materials
Pick a smooth worsted-weight yarn. Cotton or a cotton blend gives crisp stitches and a firm shape. Acrylic is lighter and softer and is fine too. Choose a true berry red, a medium leaf green, and a bright white so the seeds stand out.
- Red (body): 60 g, about 120 m
- Green (collar, leaves, strap): 20 g, about 40 m
- White (seeds): 5 g, about 10 m
These amounts include a margin of about 20%, so you have room for a gauge swatch and small differences in tension.
Tools:
- 4.5 mm (US 7) crochet hook
- Yarn needle with a blunt tip
- Scissors
- 1 stitch marker
- Measuring tape
- Spray bottle or steam iron for blocking
Abbreviations (US Terms)
- ch – chain
- sl st – slip stitch
- sc – single crochet
- inc – 2 sc in the same stitch
- sc2tog – single crochet 2 together (decrease)
- sc3tog – single crochet 3 together (decrease)
- FLO / BLO – front loop only / back loop only
- st(s) – stitch(es)
- Rnd – round
- rep – repeat
Special stitch – sc3tog: Insert the hook in the next st, yarn over, pull up a loop. Repeat in each of the next 2 sts (4 loops on hook). Yarn over and pull through all 4 loops.
Joined rounds: Each round ends with a sl st into the first sc. Then ch 1 (does not count as a stitch) and work the first sc into the same st as the join.
Gauge and Checkpoints
Gauge: 16 sc and 18 rounds = 4 in (10.2 cm) in sc, worked in joined rounds. That is 4 sts and 4.5 rounds per inch.
Work Rnds 1–15 first as your test piece. Then stop and measure. If the numbers below match, keep going. The fabric should be firm and dense so the bags do not show through.
Checkpoints (measured flat and gently smoothed):
- After Rnd 2 (16 sts): 4 in (10.2 cm) around; 2 in (5.1 cm) flat width
- After Rnd 15 (36 sts): 9 in (22.9 cm) around; 4.5 in (11.4 cm) flat width; 3.3 in (8.4 cm) tall
- After Rnd 30 (56 sts): 14 in (35.6 cm) around; 7 in (17.8 cm) flat width; 6.7 in (17.0 cm) tall
- After Rnd 36 (56 sts): 8 in (20.3 cm) tall
- After Rnd 42 (44 sts): 11 in (27.9 cm) around; 5.5 in (14.0 cm) flat width; 9.3 in (23.6 cm) tall
- After Rnd 45 (40 sts): 10 in (25.4 cm) around; 5 in (12.7 cm) flat width; 10 in (25.4 cm) tall
If your piece is too big: go down one hook size, to 4 mm (US 6), and test again.
If your piece is too small: go up one hook size, to 5 mm (US H-8).
If your width is right but your height is off, your round gauge is different. You can add or remove one plain round in Rnds 31–36 to fix the height without changing the stitch counts.
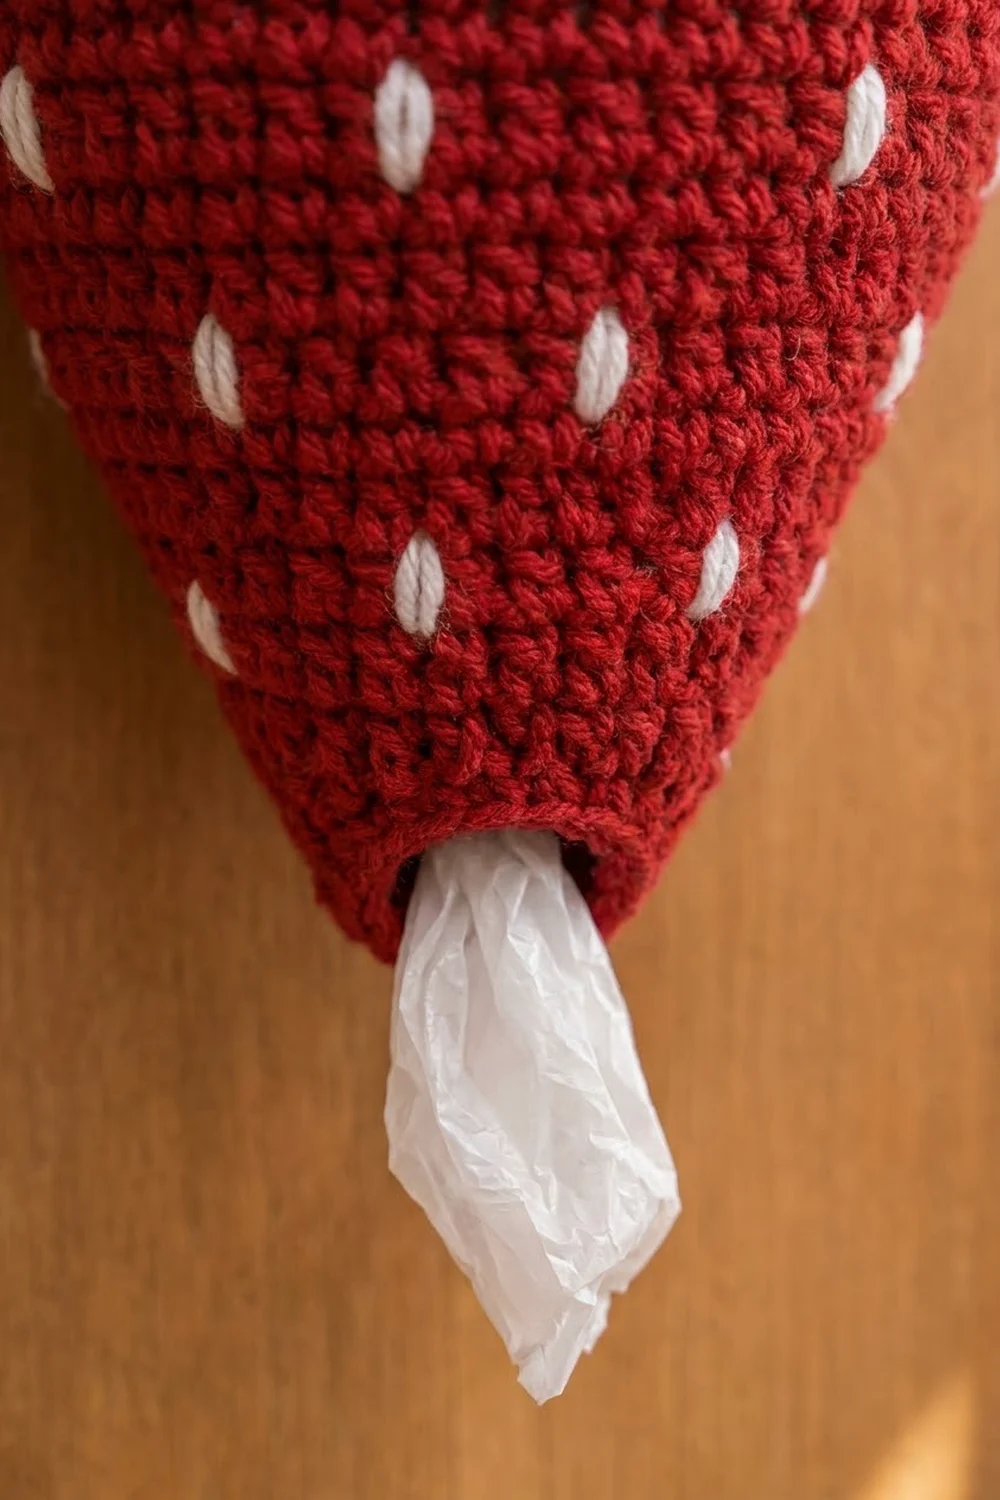
Body (Red)
With red, ch 16. Sl st into the first ch to make a ring, taking care not to twist the chain. This ring is the bottom opening.
Rnd 1: Ch 1, sc in each ch around, join. (16 sts)
Rnd 2: Ch 1, sc in each st around, join. (16 sts)
Rnd 3: Ch 1, *sc in next 3 sts, inc in next st; rep from * 3 more times, join. (20 sts)
Rnds 4–5: Ch 1, sc in each st around, join. (20 sts)
Rnd 6: Ch 1, *sc in next 4 sts, inc; rep from * 3 more times, join. (24 sts)
Rnds 7–8: Ch 1, sc around, join. (24 sts)
Rnd 9: Ch 1, *sc in next 5 sts, inc; rep from * 3 more times, join. (28 sts)
Rnds 10–11: Ch 1, sc around, join. (28 sts)
Rnd 12: Ch 1, *sc in next 6 sts, inc; rep from * 3 more times, join. (32 sts)
Rnds 13–14: Ch 1, sc around, join. (32 sts)
Rnd 15: Ch 1, *sc in next 7 sts, inc; rep from * 3 more times, join. (36 sts)
Check your gauge now.
Rnds 16–17: Ch 1, sc around, join. (36 sts)
Rnd 18: Ch 1, *sc in next 8 sts, inc; rep from * 3 more times, join. (40 sts)
Rnds 19–20: Ch 1, sc around, join. (40 sts)
Rnd 21: Ch 1, *sc in next 9 sts, inc; rep from * 3 more times, join. (44 sts)
Rnds 22–23: Ch 1, sc around, join. (44 sts)
Rnd 24: Ch 1, *sc in next 10 sts, inc; rep from * 3 more times, join. (48 sts)
Rnds 25–26: Ch 1, sc around, join. (48 sts)
Rnd 27: Ch 1, *sc in next 11 sts, inc; rep from * 3 more times, join. (52 sts)
Rnds 28–29: Ch 1, sc around, join. (52 sts)
Rnd 30: Ch 1, *sc in next 12 sts, inc; rep from * 3 more times, join. (56 sts)
Each increase round adds exactly 4 sts. Ten increase rounds take you from 16 to 56 sts. The plain rounds between them give the long, gentle taper of a strawberry tip. If you see four sharp corners forming, shift the increases a few sts to the left on every other increase round. The count stays the same.
Rnds 31–36: Ch 1, sc around, join. (56 sts)
Rnd 37: Ch 1, *sc in next 12 sts, sc2tog; rep from * 3 more times, join. (52 sts)
Rnd 38: Ch 1, sc around, join. (52 sts)
Rnd 39: Ch 1, *sc in next 11 sts, sc2tog; rep from * 3 more times, join. (48 sts)
Rnd 40: Ch 1, sc around, join. (48 sts)
Rnd 41: Ch 1, *sc in next 10 sts, sc2tog; rep from * 3 more times, join. (44 sts)
Rnd 42: Ch 1, sc around. Change to green on the final yarn-over of the join. Cut red, leaving a 6 in (15.2 cm) tail. (44 sts)
These decreases round the shoulders of the berry, just like the top of a real strawberry.
Collar (Green)
Rnd 43: Ch 1, *sc in next 9 sts, sc2tog; rep from * 3 more times, join. (40 sts)
Rnd 44: Ch 1, working in BLO, sc in each st around, join. (40 sts)
This round leaves a ring of 40 free front loops on Rnd 43. The leaves are worked into those loops.
Rnd 45: Ch 1, sc in each st around, join. Fasten off. (40 sts)
Leaves (Green)
There are 8 leaves. Each one uses 5 free front loops of Rnd 43, so 8 × 5 = 40 loops. Hold the body upside down so the free loops face you.
Leaf 1: Join green with a sl st in the free front loop at the join seam.
- Row 1: Ch 1, sc in the same loop and in the next 4 free front loops, turn. (5 sts)
- Rows 2–3: Ch 1, sc in each st, turn. (5 sts)
- Row 4: Ch 1, sc2tog, sc in next st, sc2tog, turn. (3 sts)
- Rows 5–6: Ch 1, sc in each st, turn. (3 sts)
- Row 7: Ch 1, sc3tog. Do not turn. (1 st – the leaf tip)
- Edge: Sl st 6 times evenly down the side of the leaf, ending at Rnd 43.
Leaves 2–8: Ch 1, sc in the next 5 free front loops, turn. Then work Rows 2–7 and the edge as for Leaf 1.
After Leaf 8, sl st into the base of Leaf 1 and fasten off.
Each leaf is about 1.25 in (3.2 cm) wide at the base and about 1.5 in (3.8 cm) long. The leaves sit side by side with no gaps, and they fold down over the red shoulders.
Seeds (White Embroidery)
Thread the yarn needle with white. Each seed is one straight stitch running up over one round. Wrap it twice in the same holes so it looks plump.
Place the seeds on Rnds 6, 10, 14, 18, 22, 26, 30, 34, and 38. On each seed round, place one seed about every 6 sts. On the next seed round, shift by 3 sts so the seeds sit in staggered rows.
Seeds per round: 4, 4, 5, 6, 7, 8, 9, 9, 8. That makes 60 seeds in total. Keep the bottom 5 rounds and the area under the leaves plain. Work loosely so the red fabric does not pucker. Weave in the ends on the inside.
Strap (Green)
Ch 41. Sl st in the back bump of the 2nd ch from the hook and in each ch across. (40 sl sts)
Fasten off, leaving a 12 in (30.5 cm) tail. The strap should measure about 9 in (22.9 cm). Set it aside until the border is done.
Border: Opening Edges
Border gauge: The slip-stitch rims are worked 1 sl st per sc. They match the gauge of the body, at 4 sts per inch (1 st = 0.25 in, or 0.6 cm), so they do not stretch or pull in the openings.
Top rim (Rnd 46): Join green in any st of Rnd 45. Sl st loosely in each st around, join. (40 sl sts)
With the berry flattened, that is 20 sl sts per side, which is 5 in (12.7 cm) per side. Fasten off.
Bottom edge: Join red in any free loop of the starting chain. Sl st loosely in each of the 16 free loops, join. (16 sl sts)
With the opening flattened, that is 8 sl sts per side, which is 2 in (5.1 cm) per side. The opening is about 1.3 in (3.3 cm) across. Fasten off.
Why the math works: Rnd 45 has 40 sts. 40 × 0.25 in = 10 in (25.4 cm) around, which matches 8 leaves × 1.25 in. The rim has the same 40 sts, so it lies flat with no ruffling or cupping. The bottom edge uses the 16 loops of the starting chain, 1 per loop. That firms up the opening without making it smaller, so bags still pull out smoothly.
Attach the strap: Flatten the berry with the join seam at one side edge. Sew one end of the strap to the inside of the collar at st 1 of Rnd 45. Sew the other end at st 21, which sits exactly opposite (20 sts away). Stitch through Rnds 44–45 for strength.
Final Blocking
- Weave in all remaining ends on the inside, along the round seams.
- Stuff the body with plastic bags or a rolled towel so the berry holds its shape.
- Mist the body lightly with water, or hold a steam iron just above it without touching.
- Gently shape the cone: round shoulders, a straight middle, and a neat point at the bottom.
- Fold each leaf down over the shoulder, smooth it flat, and pinch the tip into a point.
- Let it dry completely while it stays stuffed, then take out the filling.
Final Quality-Control Checklist
- Rnd 30 count is 56 sts; Rnd 42 is 44 sts; Rnd 45 is 40 sts
- Flat width at the widest point is 7 in (17.8 cm)
- Total height is about 10.2 in (25.9 cm)
- Bottom opening is about 1.3 in (3.3 cm) across and lets a bag pull through
- 8 leaves of equal size, with no gaps between them
- 60 seeds, evenly staggered and not puckered
- Strap ends sit exactly opposite each other, so the berry hangs straight
- All ends are hidden on the inside
Troubleshooting
Cone has sharp corners: Shift the increase positions on alternate increase rounds.
Join seam slants: Always work the first sc into the same st as the join, and keep the ch 1 out of the count.
Leaves curl up: Steam them flat and pin them pointing down while they dry.
Gaps between leaves: Check that each leaf uses exactly 5 free loops.
Bottom opening too tight: Redo the bottom edge with a larger hook.
Bags show through the fabric: Go down a hook size to get a denser fabric.
Berry hangs crooked: Check that the strap ends are exactly 20 sts apart.
Care
Hand wash in cool water and lay flat to dry, reshaping while damp. Cotton versions can also go through a gentle machine cycle inside a mesh bag.
Final Notes
The measurement chain is simple. Gauge is 4 sts and 4.5 rounds per inch. That gives a 16-st bottom opening, a 56-st widest round of 14 in (35.6 cm) around (7 in, or 17.8 cm, flat), and a 40-st top. The top carries 8 leaves of 5 sts and a 40-st rim, for a finished height of about 10.2 in (25.9 cm). Check your counts at each checkpoint, and your strawberry will hold its shape for many years of grocery bags.
Happy crocheting!