

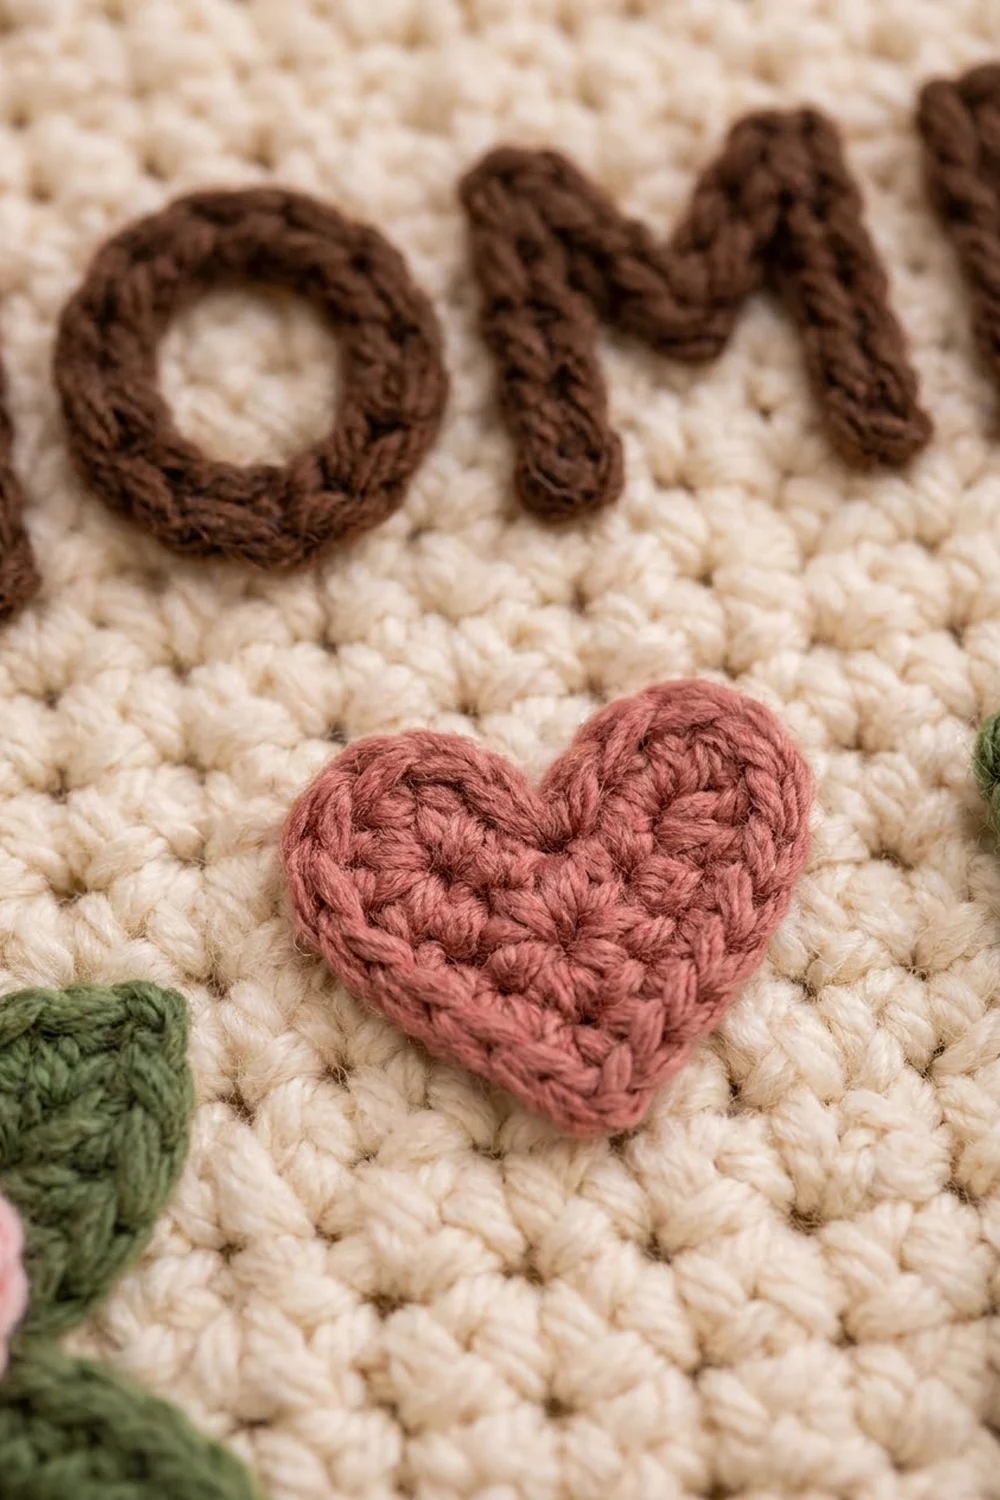
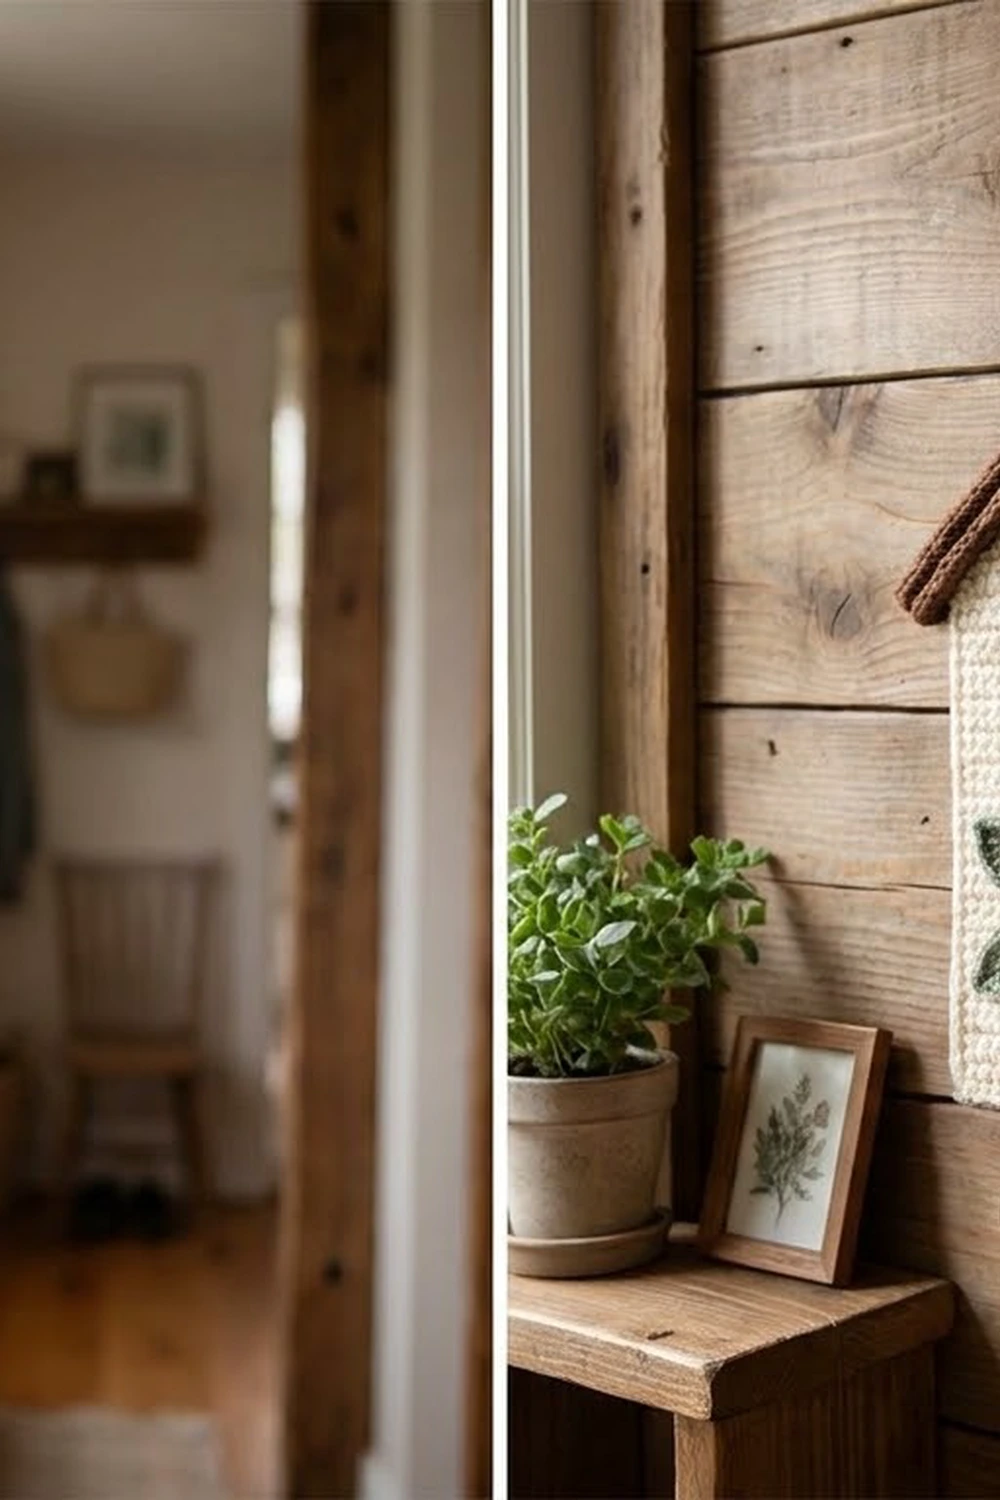
This little cottage holds your keys and makes the entryway look cozy. It’s one house-shaped panel in soft cream single crochet. A rope-textured brown roof, raised “HOME” lettering and a cheerful row of appliqués finish the front: two five-petal flowers on green leaves with a dusty-rose heart between them.
The palette is warm and calm: cream, two browns, blush pink, white, sunny yellow, sage green and dusty rose. The style is cottagecore with a farmhouse feel, and it fits a hallway, mudroom or kitchen wall.
This pattern uses US crochet terms. The finished key holder measures about 9.5 in (24.1 cm) wide at the base, about 10 in (25.4 cm) across the roof overhang, and about 9.25 in (23.5 cm) tall, not counting the hanging loop.
Construction is simple. You crochet the house body bottom-up in rows: first a rectangle, then decreases to form the gable. A cream edging round neatens all edges, and three brown rows build the roof band. You add the lettering with surface slip stitch, sew on the appliqués, mount the panel on a thin backing board and screw in three wooden hooks.
Finished Size and Construction
- Finished size: 9.5 in (24.1 cm) wide at the base × 9.25 in (23.5 cm) tall
- Skill level: Easy–Intermediate
- Terminology: US
- Yarn weight: Worsted (#4), cotton
- Hook: 4.5 mm (US 7)
- Number of pieces: 1 main panel, plus 11 small appliqués (2 flowers, 8 leaves, 1 heart)
- Layout: Single house shape; lettering in the gable; flower–heart–flower row below
- Body size before border: 9 in (22.9 cm) wide × about 7.75 in (19.7 cm) tall
- Border depth: cream edging 0.25 in (0.6 cm) all around; brown roof band about 0.75 in (1.9 cm)
Materials
Use a smooth, firm cotton or cotton blend in worsted weight. Cotton holds the crisp grid texture and doesn’t stretch under the weight of keys. These amounts assume about 1.7 m per gram (roughly 85 m per 50 g ball).
- Cream (body and edging): 40 g / 68 m
- Medium brown (roof band and loop): 15 g / 26 m
- Dark brown (lettering, used doubled): 10 g / 17 m
- Sage green (leaves): 10 g / 17 m
- Blush pink (flower): 4 g / 7 m
- White (flower): 4 g / 7 m
- Dusty rose (heart): 4 g / 7 m
- Yellow (flower centers): 2 g / 3 m
All quantities include a safety margin of roughly 20%.
Tools:
– 4.5 mm (US 7) crochet hook
– Tapestry needle
– 6 locking stitch markers
– Scissors
– 3 small wooden peg hooks with screws
– 3 mm plywood or heavy chipboard, cut to the body shape (see Final Blocking)
– Fabric glue or double-sided craft tape
– Wooden wall peg or nail for hanging
Abbreviations (US Terms)
- ch – chain
- sl st – slip stitch
- sc – single crochet
- hdc – half double crochet
- dc – double crochet
- tr – treble crochet
- sc2tog – single crochet 2 together
- MR – magic ring
- sp – space
- RS – right side
Special stitches:
- Reverse sc (crab stitch): Work sc from left to right (right to left if you crochet left-handed). Insert the hook into the next stitch to the right, yarn over, pull up a loop, then yarn over and pull through both loops. This makes the twisted rope edge on the roof.
- Surface slip stitch: Hold the yarn behind the fabric. Insert the hook from front to back through a gap between stitches, pull up a loop, then insert into the next gap along your line, pull up a loop and draw it through the loop on the hook.
Gauge and Checkpoints
Gauge: 16 sc × 18 rows = 4 in (10.2 cm) in sc rows, with a 4.5 mm hook.
Since this is a single piece, your test piece is a swatch. Chain 21, then work 20 sc rows of 20 stitches. The swatch should measure 5 in (12.7 cm) square. Check it before you start the body.
Checkpoints:
1. After Row 18: 9 in (22.9 cm) wide × 4 in (10.2 cm) tall.
2. After Row 35: about 7.75 in (19.7 cm) from the bottom edge to the peak. The roof section adds about 3.75 in (9.5 cm).
3. After the cream edging: 9.5 in (24.1 cm) wide at the base.
4. After the roof band: about 10 in (25.4 cm) across the eaves and about 9.25 in (23.5 cm) tall.
Too big? Go down 0.5 mm in hook size. Too small? Go up 0.5 mm. Don’t add or remove stitches, because the letter grid and the edging counts depend on 36 stitches.
House Body
Use cream.
Row 1 (RS): Ch 37. Sc in the 2nd ch from the hook and in each ch across. (36 sc)
Rows 2–18: Ch 1, turn. Sc in each st across. (36 sc)
Checkpoint: 9 in × 4 in (22.9 cm × 10.2 cm).
Next, shape the roof. Every roof row decreases 1 stitch at each end.
Row 19: Ch 1, turn. Sc2tog, sc across to the last 2 sts, sc2tog. (34 sc)
Rows 20–35: Repeat Row 19. Each row has 2 fewer sts than the one before it:
– Row 20: 32
– Row 21: 30
– Row 22: 28
– Row 23: 26
– Row 24: 24
– Row 25: 22
– Row 26: 20
– Row 27: 18
– Row 28: 16
– Row 29: 14
– Row 30: 12
– Row 31: 10
– Row 32: 8
– Row 33: 6
– Row 34: 4
– Row 35: 2
Fasten off.
Checkpoint: about 7.75 in (19.7 cm) tall at the peak.
The 2-stitch-per-row decrease takes 0.25 in off each side for every 0.22 in of height. That gives a roof pitch of a little over 40°, which matches the classic cottage gable.
Cream Edging Round
With the RS facing, join cream in the first foundation chain at the bottom-right corner.
Bottom edge: Work 3 sc in the corner ch, sc in the next 34 ch, then 3 sc in the last ch. (40 sc)
Left wall: Sc in each of the 18 row ends of Rows 1–18. (18 sc)
Left slope (Rows 19–35): Work [sc in the next 2 row ends, 2 sc in the next row end] 5 times, then sc in the last 2 row ends. (22 sc)
Peak: Sc in the first st of Row 35, ch 2, sc in the second st. (2 sc + one ch-2 sp)
Right slope: Sc in the next 2 row ends, then work [2 sc in the next row end, sc in the next 2 row ends] 5 times. (22 sc)
Right wall: Sc in each of the 18 row ends. (18 sc)
Sl st to the first sc. Fasten off.
Round total: 40 + 18 + 22 + 2 + 22 + 18 = 122 sc, plus 1 ch-2 sp.
Why the math works: Each roof slope covers 4.25 in horizontally and 3.78 in vertically, so its true edge length is about 5.7 in (14.5 cm). At 4 sts per inch, that edge needs 22 to 23 sts, but it has only 17 row ends. Adding 5 increases brings it to 22 sc, so the edge lies flat instead of pulling in. The walls take 1 sc per row end, which is standard for sc fabric. The 3-sc corners on the bottom edge turn the 90° corners cleanly.
Brown Roof Band
The roof band is worked in rows across both slopes only.
Row A: With the RS facing, join medium brown in the first sc of the left slope (at the left eave). Sc in each of the 22 slope sts, sc in the peak sc, 3 sc in the ch-2 sp, sc in the peak sc, then sc in each of the 22 right-slope sts. (49 sc)
The center stitch is the 25th, with 24 sts on each side of it. Place a marker in it.
Row B: Ch 1, turn. Sc in the next 24 sts, 3 sc in the marked st, sc in the last 24 sts. (51 sc; move the marker to the new center, the 26th st)
Row C: Ch 1, do not turn. Work reverse sc in each st across. (51 reverse sc) Fasten off.
The 3-sc increase at the peak keeps the band’s point sharp. Row C twists into the rope texture and rolls slightly outward, so the band hangs over the walls at the eaves.
Hanging loop: Join medium brown in the 26th (center) st of Row C. Ch 10, then sl st in the same st. Fasten off and weave the ends in securely. The loop measures about 1.5 in (3.8 cm).
“HOME” Lettering
Hold two strands of dark brown together. Number the columns 1–36 from left to right with the RS facing, so that each column continues straight up from a Row 18 stitch. The letters sit in Rows 20–25, which makes them about 1.3 in (3.3 cm) tall. They fill columns 10–27, about 4.5 in (11.4 cm) wide and centered. Mark the corners with stitch markers before you start.
Work every stroke in surface slip stitch, with 1 sl st per row going vertically or 1 per column going horizontally. Start and finish each letter on the back.
- H (cols 10–12): a vertical stroke up col 10 (Rows 20–25) and another up col 12. Add a crossbar through col 11 between Rows 22 and 23.
- O (cols 14–17): go up col 14 for Rows 21–24, across Row 25 through cols 15–16, down col 17 for Rows 24–21, then across Row 20 through cols 16–15. Skipping the four corners rounds the letter.
- M (cols 19–23): go up col 19 (Rows 20–25), diagonally down to col 21 at Row 22, diagonally up to col 23 at Row 25, then down col 23 to Row 20.
- E (cols 25–27): a vertical stroke up col 25 (Rows 20–25), with bars through cols 26–27 at Row 25, between Rows 22 and 23, and at Row 20.
Row 25 spans columns 8–29, so the tops of H and E stay inside the roof edge.
Appliqués
Flowers (make 2: 1 pink, 1 white)
Rnd 1: With yellow, work 10 sc in a MR. Pull the ring closed and sl st to the first sc. Fasten off. (10 sc)
Rnd 2: Join the petal color in any st. (Sl st, ch 2, 2 dc) in the next st, (2 dc, ch 2, sl st) in the following st. Repeat from * to * 4 more times. (5 petals, 4 dc each)
Fasten off. The flower measures about 1.75 in (4.4 cm) across.
Leaves (make 8 in sage green)
Ch 7. Work along the chain starting in the 2nd ch from the hook: sl st, sc, hdc, dc, hdc, then (sc, ch 2, sc) in the last ch for the tip. Rotate and work along the other side of the chain: hdc, dc, hdc, sc, sl st.
Fasten off. Each leaf is about 1.5 in (3.8 cm) long.
Heart (make 1 in dusty rose)
In a MR, work: ch 3, 3 tr, 3 dc, ch 1, tr, ch 1, 3 dc, 3 tr, ch 3, sl st into the ring. (13 sts)
Pull the ring tight to form the top dip. Fasten off. The heart is about 1.5 in (3.8 cm) wide.
Placement:
– Both flowers are centered 2.25 in (5.7 cm) above the bottom edge and 2 in (5.1 cm) in from each side edge. The pink flower goes on the left and the white flower on the right.
– Tuck four leaves behind each flower, two angled to each side. The outer leaves should extend past the house edge.
– Center the heart horizontally, level with the flowers.
– Pin everything, then sew it on with matching yarn using small stitches through the leaf centers and petal bases.
Final Blocking
- Wet-block or steam the body before you add the lettering if you can. If not, block the finished piece face down on a towel so the appliqués keep their shape.
- Pin to 9.5 in (24.1 cm) wide at the base, keeping the walls straight and square.
- Pin each roof slope straight from the eave to the peak, so the peak sits centered about 9.25 in (23.5 cm) above the base.
- Spritz or hover steam over the panel. Don’t press the lettering or the rope band flat.
- Let it dry completely.
- Trace the body (without the brown band) onto plywood or chipboard and cut it 0.25 in (0.6 cm) smaller all around. Glue or tape the panel onto the board.
- Screw the three wooden hooks through the fabric into the board along the bottom. Place them 2 in (5.1 cm) in from each side and at the center, with the bottoms of the hook plates about 0.5 in (1.3 cm) above the lower edge.
Final Quality-Control Checklist
- [ ] Body is 36 sts wide, with Row 35 ending at 2 sts
- [ ] Cream edging totals 122 sc plus the peak ch-2 sp
- [ ] Roof band rows are 49 / 51 / 51, with a centered point
- [ ] Letters are level, evenly spaced, and fill columns 10–27
- [ ] Flowers and heart sit on one level line
- [ ] Leaves overhang the sides evenly on both sides
- [ ] Hanging loop is centered and firmly anchored
- [ ] Hooks are evenly spaced and screwed in solidly
Troubleshooting
- Roof slopes ripple: You worked too many edging increases. Use exactly 5 extra sc per slope.
- Roof slopes pull tight: Your edging tension is too firm. Redo the slopes with a hook 0.5 mm larger.
- Peak is off-center: A decrease was missed. Count the stitches against the Row 19–35 list.
- Letters look thin: Make sure you’re holding two strands, and keep the surface slip stitches loose.
- Petals curl: Your tension is too tight. Steam the flowers lightly and flatten them.
- Panel sags with keys: The board is too thin or the glue too weak. Use plywood and secure the hook screws through it.
Care
Spot-clean with a damp cloth and mild soap. Because of the board and hooks, don’t machine wash it.
Final Notes
The measurement chain is simple. Gauge of 16 sc × 18 rows = 4 in (10.2 cm) gives a 9 in × 4 in (22.9 cm × 10.2 cm) wall section after Row 18 and a body about 7.75 in (19.7 cm) tall after Row 35. The cream edging brings the base to 9.5 in (24.1 cm). The brown rope roof band finishes the piece at about 10 in (25.4 cm) across the eaves and 9.25 in (23.5 cm) tall. Check each stage as you go, and your cottage will come out square, balanced and ready for your keys.
Happy crocheting!