
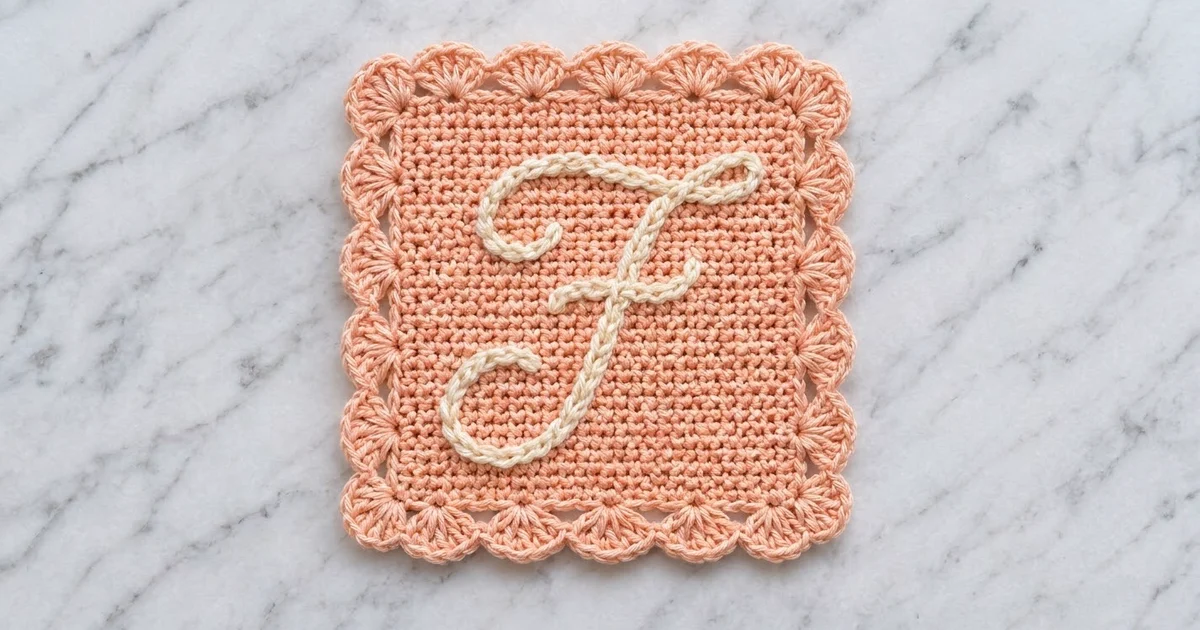
This little square pairs a soft peach background with a raised cream script “F” and a scalloped fan border. It looks like embroidery, but the letter is crocheted right onto the surface with slip stitches, so you don’t need a needle or any embroidery skills.
The body is plain single crochet worked in rows, which gives you a tidy, even grid. That grid is what makes the monogram easy to place. The border is a round of single crochet followed by a round of shells, with bigger seven-stitch fans at the corners so the square stays flat and the corners stay crisp.
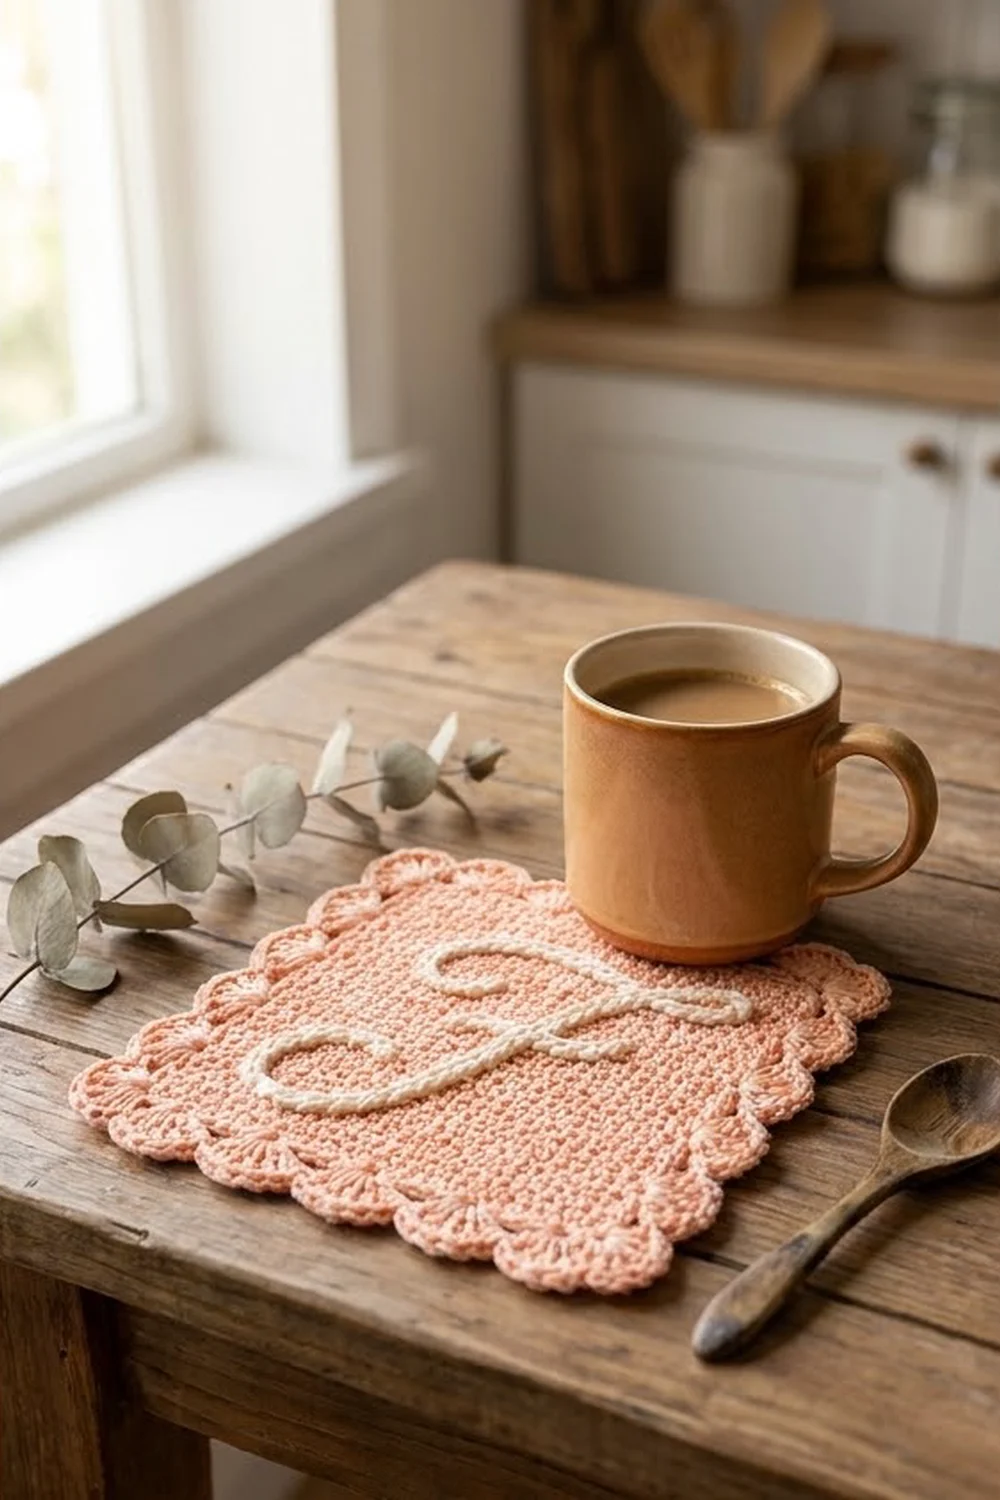
The pattern uses US crochet terms. The finished square measures 7.4 in (18.8 cm) on each side after blocking. It works as a coaster-mat, a gift-box topper, a frame insert, or a keepsake with someone’s initial on it.
Construction is simple. You crochet one single crochet rectangle, add the monogram with surface slip stitches, work two border rounds, and block. Swap the “F” for any initial by using the same grid method.
Finished Size and Construction
- Finished size: 7.4 in × 7.4 in (18.8 cm × 18.8 cm)
- Skill level: Easy-intermediate
- Terminology: US crochet terms
- Yarn weight: DK (light worsted / #3), cotton or cotton blend
- Hook: 3.5 mm (E-4)
- Number of pieces: 1
- Layout: One single square, no joining
- Body size: 29 sts × 32 rows = 5.8 in × 5.8 in (14.7 cm × 14.7 cm)
- Size before shell round: 6.2 in (15.7 cm) square after Border Round 1
- Border depth: 0.8 in (2.0 cm) per side
Materials
Yarn: Use a smooth mercerized or matte DK cotton. Cotton shows the single crochet grid clearly, keeps the surface slip stitches sharp, and holds a scalloped edge well after blocking. Acrylic DK also works, but the fans will be softer.
- Color A – Peach: 25 g / about 55 m (60 yd)
- Color B – Cream: 5 g / about 11 m (12 yd)
The quantities include a margin of about 20% for your gauge swatch, weaving in ends, and pulling out a monogram line if you need to redo one.
Tools:
– 3.5 mm (E-4) crochet hook
– 3.0 mm (C-2/D-3) hook, optional, for the surface slip stitches
– Tapestry needle
– 6 to 10 locking stitch markers or rustproof pins
– Scissors
– Measuring tape or ruler
– Blocking mat and rustproof pins
– Spray bottle
Abbreviations (US Terms)
- ch – chain
- sc – single crochet
- dc – double crochet
- sl st – slip stitch
- st(s) – stitch(es)
- RS – right side
- WS – wrong side
- sk – skip
Special stitches:
- Shell: 5 dc in the same stitch.
- Corner shell: 7 dc in the same stitch.
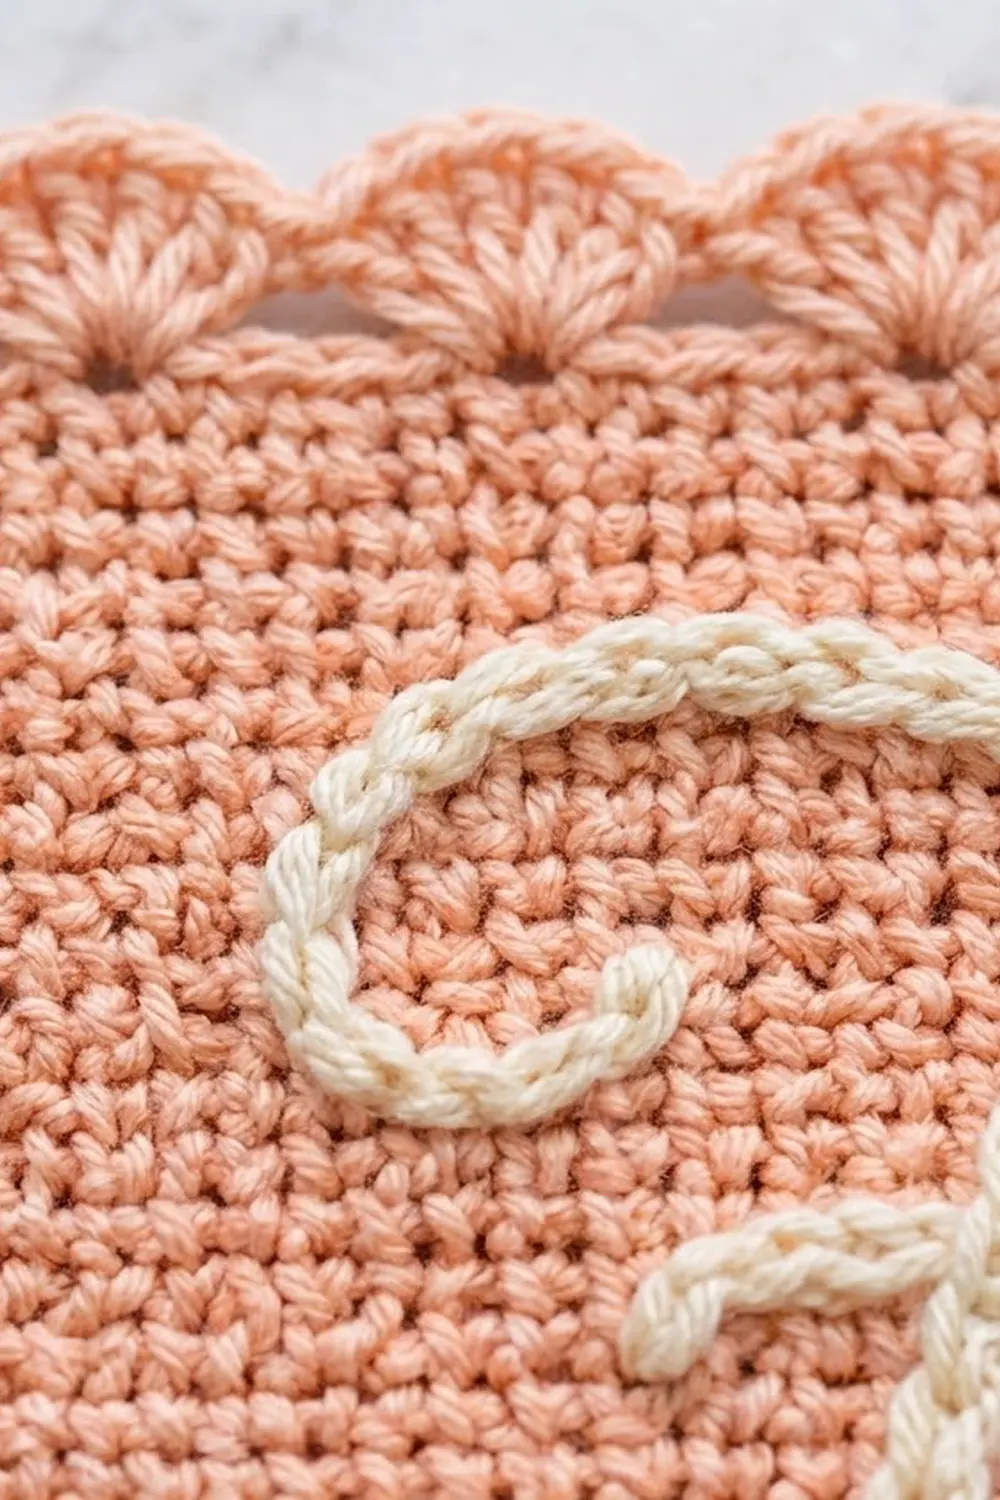
- Surface slip stitch (surface sl st): Hold Color B behind the work. Insert the hook from the front through the fabric, yarn over behind, and pull a loop to the front. Insert the hook through the fabric at the next point on your line, yarn over behind, and pull the loop up through the fabric and through the loop on the hook. Repeat. On the front you get a raised chain.
Gauge and Checkpoints
Gauge: 20 sc × 22 rows = 4 in (10.2 cm) in sc worked in rows.
Before you start, make a 24-st swatch about 24 rows tall. Measure the middle 20 sts and 22 rows. Gauge matters here because the monogram grid and the border math both rely on the body being 29 sts wide and 32 rows tall.
Checkpoints:
- After Row 1: The strip should measure 5.8 in (14.7 cm).
- After Row 11: The body should be about 2.0 in (5.1 cm) tall.
- After Row 32: The body should be 5.8 in × 5.8 in (14.7 cm × 14.7 cm).
- After Border Round 1: 6.2 in (15.7 cm) square.
- After Border Round 2, blocked: 7.4 in (18.8 cm) square.
If your square is too big, go down a hook size, to 3.25 mm. If it’s too small, go up to 3.75 mm. Keep the stitch and row counts the same, because the border depends on them.
If your stitch gauge is right but your rows come out taller or shorter, a difference of one or two rows is fine. Block the body square at the end. Don’t add or remove rows unless you’re off by 0.5 in (1.3 cm) or more, and if you do, see the note in Border Round 1.
Body
With Color A and a 3.5 mm hook:
Foundation: Ch 30.
Row 1 (RS): Sc in 2nd ch from hook and in each ch across. Turn. (29 sc)
Row 2: Ch 1 (does not count as a st), sc in each st across. Turn. (29 sc)
Rows 3–32: Repeat Row 2. (29 sc in each row)
At the end of Row 32, don’t fasten off. Put a locking marker in the loop on your hook so it can’t unravel while you work the monogram.
Check that the body is 5.8 in × 5.8 in (14.7 cm × 14.7 cm). Count the stitches in the last row. There must be exactly 29, or the border corners won’t line up.
Weave in the starting tail now, along the bottom edge. This keeps it out of the way of the monogram.
Monogram “F” (Surface Slip Stitch)
Lay the body RS up with Row 1 at the bottom. Picture a grid: columns 1–29 from left to right and rows 1–32 from bottom to top. Each “point” below is (column, row). Mark the main points with pins first and check the shape from a distance before you crochet.
Work loosely, with about one surface sl st for each stitch or row you cross. Use the 3.0 mm hook if it slides through the dense fabric more easily. Leave a 6 in (15.2 cm) tail on the WS at the start and end of each stroke.
Stroke 1 – Top swash with loops:
Start at (10, 24). Work up and to the left to (8, 26), curve over the top to (10, 28), and then sweep right through (15, 27) and (20, 27) to (24, 28). Curl down around (25, 27) and (23, 26), and end where the curl meets the line at (20, 27). The small loop at the left and the curl at the right should each be about 0.5 in (1.3 cm) across.
Stroke 2 – Stem and bottom hook:
Start at (20, 27), right where Stroke 1 ended. Work down and to the left in a smooth diagonal through (18, 22), (16, 16), and (14, 10), then curve through (12, 7) to (9, 6). Hook up and around through (7, 7) and (7, 9) to (9, 10), and end at (11, 9). This bottom curl is about 1 in (2.5 cm) across.
Stroke 3 – Crossbar:
Start at (12, 16). Work right through (16, 17) to (21, 17). It should cross the stem with a slight upward wave and be about 1.8 in (4.6 cm) long.
On the WS, weave each tail behind the Color B stitches only, so no cream shows through the peach.
Check: The letter should fill about 4 in (10.2 cm) of height, from row 6 to row 28, with at least 0.8 in (2.0 cm) of plain fabric on every side. If a line looks too tight and puckers the fabric, pull out that stroke and redo it with longer loops.
Border
Border gauge: Border Round 1 is worked at the same 20 sc per 4 in (10.2 cm) as the body. To match it, the side edges need fewer stitches than there are rows. That’s why you skip three row-ends on each side.
How the sides are counted: In this pattern, each side’s count runs from one corner’s center sc to the next corner’s center sc, counting both corners. Each corner sc belongs to two sides, so the round total is (4 × 31) − 4 = 120.
Border Round 1 (sc round)
Remove the marker and put the loop back on your 3.5 mm hook. Continue with Color A. RS should be facing for the round. If Row 32 ended on the WS, ch 1 and turn so the RS faces you.
Top edge: Ch 1. Work 3 sc in the first st (corner), sc in each of the next 27 sts, and 3 sc in the last st (corner).
Left side: Work into the row-ends from Row 31 down to Row 2. That’s 30 row-ends. Sc in each of the next 9 row-ends, sk 1 row-end. Repeat 3 times. (27 sc)
Bottom edge: Work into the free loops of the foundation ch. Work 3 sc in the first loop (corner), sc in each of the next 27 loops, and 3 sc in the last loop (corner).
Right side: Work up the row-ends from Row 2 to Row 31 the same way as the left side: sc in the next 9 row-ends, sk 1, 3 times. (27 sc)
Sl st to the first sc to join.
Count: 33 + 27 + 33 + 27 = 120 sc.
Per side, counting both corner center sts: top = 1 + 1 + 27 + 1 + 1 = 31; sides = 1 + 1 + 27 + 1 + 1 = 31. All four sides match.
Put a marker in the center sc of each 3-sc corner.
Gauge note: If you changed the row count, work 27 sc evenly across whatever row-ends you have. The count of 27 is what matters, not the number of row-ends you skip.
Checkpoint: 6.2 in (15.7 cm) square.
Border Round 2 (shell round)
Sl st into the next sc so you’re in the marked corner sc at the top-left corner.
First corner: Ch 3 (counts as dc), 6 dc in the same st. (Corner shell made)
Each side: Sk 2 sts, sc in next st, sk 2 sts, shell in next st. Repeat 3 more times (4 side shells), then sk 2 sts, sc in next st, sk 2 sts. Work a corner shell in the marked corner st.
Repeat Each side around. On the last side, after the final “sk 2 sts” you’re back at the first corner. Sl st to the top of the beginning ch-3 instead of working another corner shell.
Why the math works: Along one side, the corner stitches sit at positions 1 and 31. Shells go at positions 7, 13, 19, and 25. Sc go at positions 4, 10, 16, 22, and 28. Every element is 3 sts from the next, so 30 steps take you from corner to corner exactly: 1 + (5 × 6) = 31.
Count:
– Per side: 4 shells × 5 dc = 20 dc, plus 5 sc
– Corners: 4 × 7 dc = 28 dc
– Total: (4 × 20) + 28 = 108 dc, plus 4 × 5 = 20 sc, for 128 sts
Each side shows 6 scallops: 4 side shells plus the 2 corner fans.
Fasten off. Weave in the end through the back of the corner shell.
Checkpoint: About 7.4 in (18.8 cm) square before blocking. The fans may cup slightly until you block.
Final Blocking
- Weave in any remaining ends. Make sure no cream tails show on the RS.
- Wet the square in cool water, or mist it heavily until it’s damp all the way through.
- Press out the extra water in a towel. Don’t wring it.
- Lay it RS up on a blocking mat and shape it to 7.4 in × 7.4 in (18.8 cm × 18.8 cm).
- Pin the four corner fans first, then the center top of each side shell. Open each scallop into an even semicircle.
- Check that the body sides are straight and measure 5.8 in (14.7 cm) between where the border meets the body on opposite sides.
- Gently smooth the monogram with your fingertips so the chains sit flat and evenly raised.
- Let it dry completely, usually 6 to 12 hours, before you unpin it.
Final Quality-Control Checklist
- Body is 29 sts × 32 rows and measures 5.8 in (14.7 cm) square.
- Border Round 1 has 120 sc, with 31 per side counting the corners.
- Border Round 2 has 128 sts: 108 dc and 20 sc.
- Each side has 6 scallops, counting the corner fans.
- All four corners have 7-dc fans and lie flat.
- The “F” sits centered, with clear space on all sides.
- The monogram doesn’t pucker the background.
- No cream shows through to the front where it shouldn’t.
- Finished size is 7.4 in (18.8 cm) square after blocking.
Troubleshooting
Edges of the body slant or wave. You’re adding or skipping stitches at the row ends. Put a marker in the first and last sc of each row.
The border ruffles. Your Round 1 has too many stitches. Recount it to 120 and make sure you skipped three row-ends on each side.
The border pulls the corners in. Your Round 1 has too few stitches, or your corner groups are missing. Each corner needs 3 sc, and each corner shell needs 7 dc.
Shells don’t land on the corners. One side has a count other than 31. Pull out the side and recount.
The monogram puckers. Your surface slip stitches are too tight. Redo the stroke with longer loops or a larger hook.
Cream shows on the front between chains. You’re catching the cream strand behind the work. Keep it fully at the back and insert the hook only from the front.
The square isn’t square. Block it to 7.4 in (18.8 cm). If the body is off by 0.5 in (1.3 cm) or more, change the row count and rework Border Round 1 to 27 sc per side.
Care
Hand wash in cool water with mild soap, press it flat in a towel, and dry it flat, re-pinning the scallops if needed. Don’t tumble dry, because heat can loosen the monogram and flatten the fans.
Final Notes
The measurements build on each other. Gauge of 20 sc × 22 rows = 4 in (10.2 cm) gives a body of 29 sts × 32 rows at 5.8 in (14.7 cm). Border Round 1 brings it to 120 sc, with 31 sts per side, and 6.2 in (15.7 cm). The shell round adds 128 sts with 6 scallops per side and finishes at 7.4 in (18.8 cm) square. If each step measures right, the next one will too.
Once you’ve made the “F,” try your own initials on the same 29 × 32 grid. Sketch the letter on graph paper first, then pin and crochet it the same way.
Happy crocheting!