
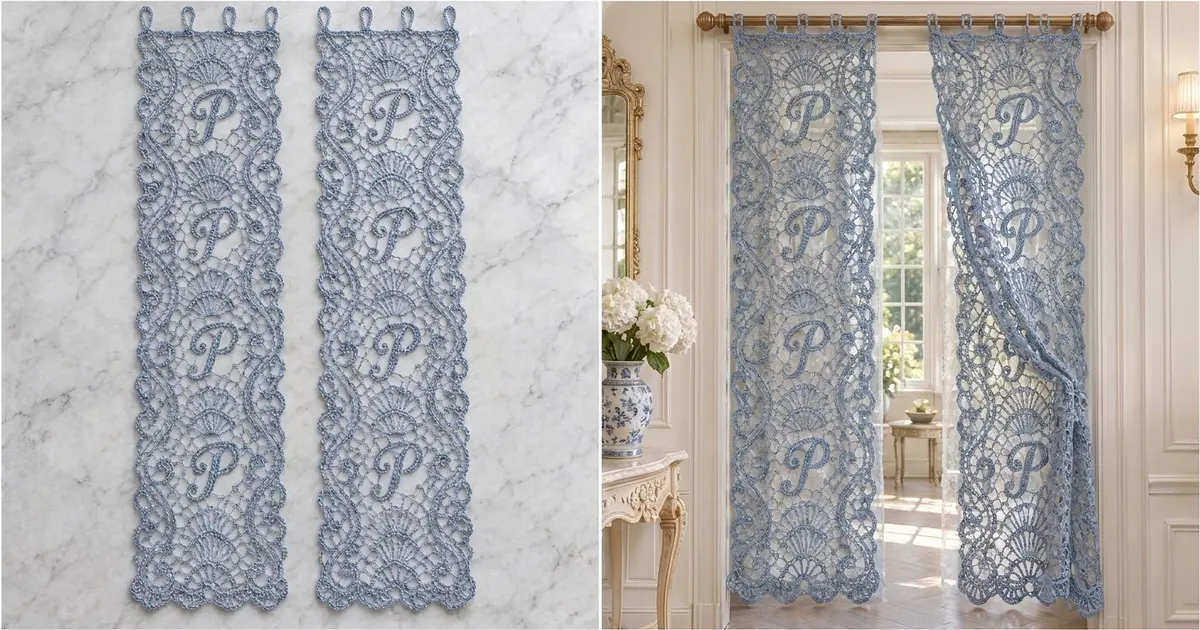
These tall lace panels are worked in one soft periwinkle-blue cotton. Each one has an open mesh ground and a wavy solid band down both long sides. Five sunrise fans run down the center, with four raised script “P” monograms sewn on between them.
The style is vintage filet lace with a monogram added. The panels suit French doors, a narrow window or a closet opening. The letter is a simple cord, so you can shape your own initial instead.
This pattern uses US crochet terms. Each finished panel measures 20.4 in wide by 60.4 in long (51.8 cm by 153.4 cm), plus 1.25 in (3.2 cm) hanging tabs. The pattern makes a pair of two separate panels.
You work each panel from the bottom up in filet mesh, building the side waves and fans into the rows. Then you add a border with bottom scallops and side rings, add the tabs, and sew the four cord monograms in place.
Finished Size and Construction
- Finished panel size: 20.4 in x 60.4 in (51.8 cm x 153.4 cm), not counting tabs
- Skill level: Intermediate
- Terminology: US
- Yarn weight: #2 sport, mercerized cotton
- Hook: 3.5 mm (E-4)
- Number of pieces: 2 panels and 8 “P” appliqués (4 per panel)
- Layout: 2 panels hung side by side, not joined
- Panel body before border: 19.4 in x 58.4 in (49.3 cm x 148.3 cm)
- Border depth: 0.5 in (1.3 cm) at the sides and top, 1.5 in (3.8 cm) at the bottom
- Appliqué size: about 5.5 in (14.0 cm) tall x 3.5 in (8.9 cm) wide
Materials
Choose a smooth mercerized cotton in sport weight, about 125 m per 50 g. Mercerized cotton shows the mesh clearly and hangs straight. Avoid fuzzy yarns, which blur the fans.
- Light Periwinkle Blue: 350 g (about 875 m) for the pair. Each panel uses about 160 g (about 400 m), including its four appliqués.
Tools:
- 3.5 mm (E-4) hook
- Tapestry needle
- Locking stitch markers
- Rust-proof pins and a blocking surface at least 22 in x 62 in (55.9 cm x 157.5 cm), or block in sections
- Spray bottle and a tape measure
The quantities include a margin of about 10% for swatching and blocking differences.
Abbreviations (US Terms)
- ch: chain
- sl st: slip stitch
- sc: single crochet
- hdc: half double crochet
- dc: double crochet
- tr: treble crochet
- sk: skip
- sp(s): space(s)
- st(s): stitch(es)
Special stitches
- Mesh: ch 2, sk 2 sts, dc in next st. A mesh is 3 sts wide.
- Block: dc in each of next 2 sts (or 2 dc in a ch-2 sp), dc in next st. A block is also 3 sts wide.
- Post: the dc at the start of a row and at the end of each mesh or block. Each row has 33 posts.
- 7-spoke fan: (dc, ch 1) 6 times in the same st, dc in that st again.
- Ring: ch 5, sl st in the sc just made.
Gauge and Checkpoints
Gauge in filet mesh, after blocking: 20 sts and 10 rows = 4 in (10.2 cm).
Make a swatch before you start. Ch 29, dc in 8th ch from hook, and work mesh across (8 meshes, 25 sts). Work 11 more rows of mesh, turning with ch 5 (counts as dc and ch 2). Block it. It should measure 5 in (12.7 cm) wide by 4.8 in (12.2 cm) tall.
Checkpoints (lightly stretched flat):
- After Row 10: 19.4 in wide x 4.0 in tall (49.3 cm x 10.2 cm)
- After Row 34: 13.6 in (34.5 cm) tall
- After Row 146: 58.4 in (148.3 cm) tall
- After the border: 20.4 in x 60.4 in (51.8 cm x 153.4 cm)
If your swatch is too big, go down a hook size. If it is too small, go up a size. Row height matters as much as width here, because the fans and letters are placed by row.
Panel Body
The body is 32 meshes wide (97 sts, 33 posts) and 146 rows tall. Rows alternate direction, but the design is symmetrical, so number the meshes 1 to 32 from whichever edge you start at.
The Wave Band Key
Each long side has a band 2 blocks wide that shifts in and out every 4 rows. That shift creates the wavy edge.
- Position A: mesh 1 open, meshes 2–3 blocks, center meshes, meshes 30–31 blocks, mesh 32 open.
- Position B: meshes 1–2 open, meshes 3–4 blocks, center meshes, meshes 29–30 blocks, meshes 31–32 open.
Row 1 has no band. Rows 2–5 use Position A, Rows 6–9 use Position B, and the positions keep alternating every 4 rows through Row 145. Row 146 is all mesh.
Every mesh or band row has 97 sts. Mesh 1 is always open, so start each row with ch 5 (counts as dc and ch 2), sk the first 2 sts, and dc in the next post.
The Zone Map
The center meshes (5–28) follow this map:
- Fan zones: Rows 1–10, 35–44, 69–78, 103–112, 137–146
- Letter zones (plain mesh): Rows 11–34, 45–68, 79–102, 113–136
Inside each 10-row fan zone, zone rows 1–2 are mesh, zone rows 3–6 are the fan rows below, and zone rows 7–10 are mesh. So the fan rows fall on Rows 3–6, 37–40, 71–74, 105–108 and 139–142.
Foundation
Row 1: Ch 101, dc in 8th ch from hook, *ch 2, sk 2 ch, dc in next ch; repeat from * across. Turn. (32 meshes, 97 sts)
Row 2: Ch 5, work across in Position A. Turn. (97 sts)
Continue in the band key. When you reach a fan row, work the fan as follows.
Fan Rows
The fan sits over meshes 14–19. Post A is the post at the start of mesh 14 (st 40). Post B is the post at the end of mesh 19 (st 58). The center post (st 49) sits between meshes 16 and 17. Work meshes 1–13 and 20–32 as usual, band included.
Fan Row 1 (zone row 3): Dc in post A, ch 5, sk 3 meshes, work a 7-spoke fan in the center post, ch 5, sk 3 meshes, dc in post B. (Fan unit: 7 spokes, 6 ch-1 sps and 2 ch-5 bridges = 23 sts between the posts; row total 103 sts)
Fan Row 2 (zone row 4): Dc in post A, ch 2, dc in first spoke, (ch 2, dc in next spoke) 6 times, ch 2, dc in post B. (7 spokes, 6 ch-2 sps and 2 ch-2 bridges = 23 sts; row total 103 sts)
Fan Row 3, the arc (zone row 5): Dc in post A, ch 1, sc in first spoke, (3 dc in next ch-2 sp, sc in next spoke) 6 times, ch 1, dc in post B. (7 sc, 18 dc and 2 ch-1 = 27 sts; row total 107 sts)
Fan Row 4, restore (zone row 6): Dc in post A, ch 2, sk first sc, dc in 2nd sc, (ch 2, dc in next sc) 4 times, ch 2, sk last sc, dc in post B. This turns the fan area back into 6 meshes. (Row total 97 sts)
The restore row gathers the arc slightly, which rounds the fan into a half circle.
Continue through Row 146 following the map and the band key. Do not fasten off. You are now at a top corner, ready for the border.
Make All Pieces
For the pair you need:
- Panels: 2, Light Periwinkle Blue, about 155 g each
- “P” appliqués: 8, Light Periwinkle Blue, about 10 g for all 8
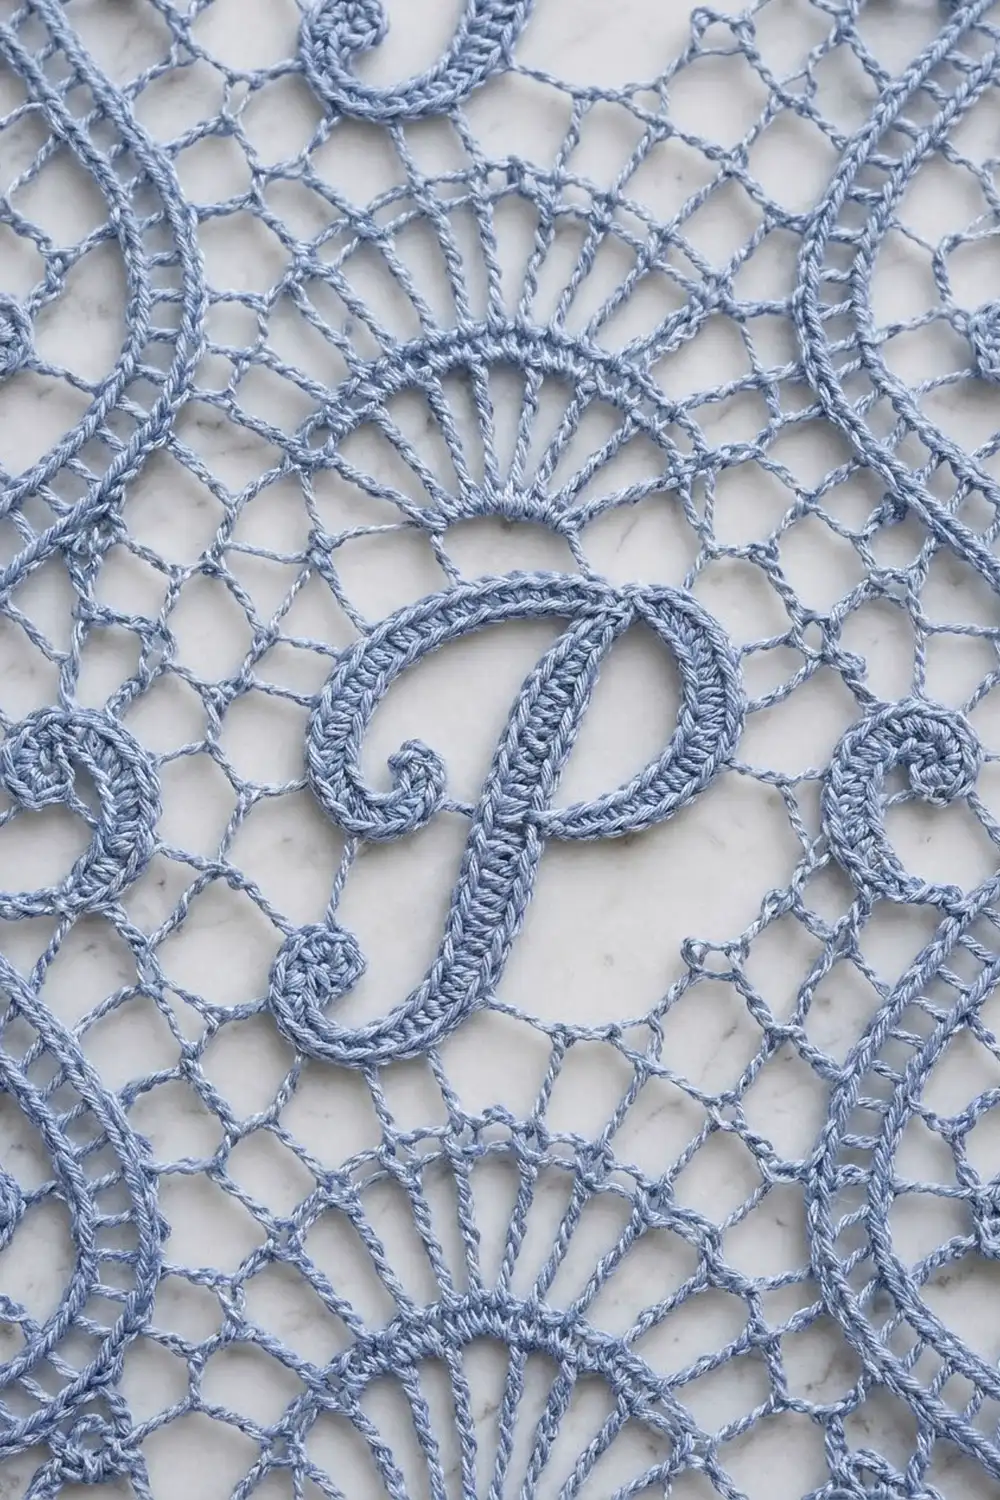
“P” Appliqué (make 8)
Ch 62. Row 1: Hdc in 3rd ch from hook and in each ch across. (60 hdc) Fasten off, leaving a 24 in (61.0 cm) tail.
The cord measures 12 in (30.5 cm) after blocking.
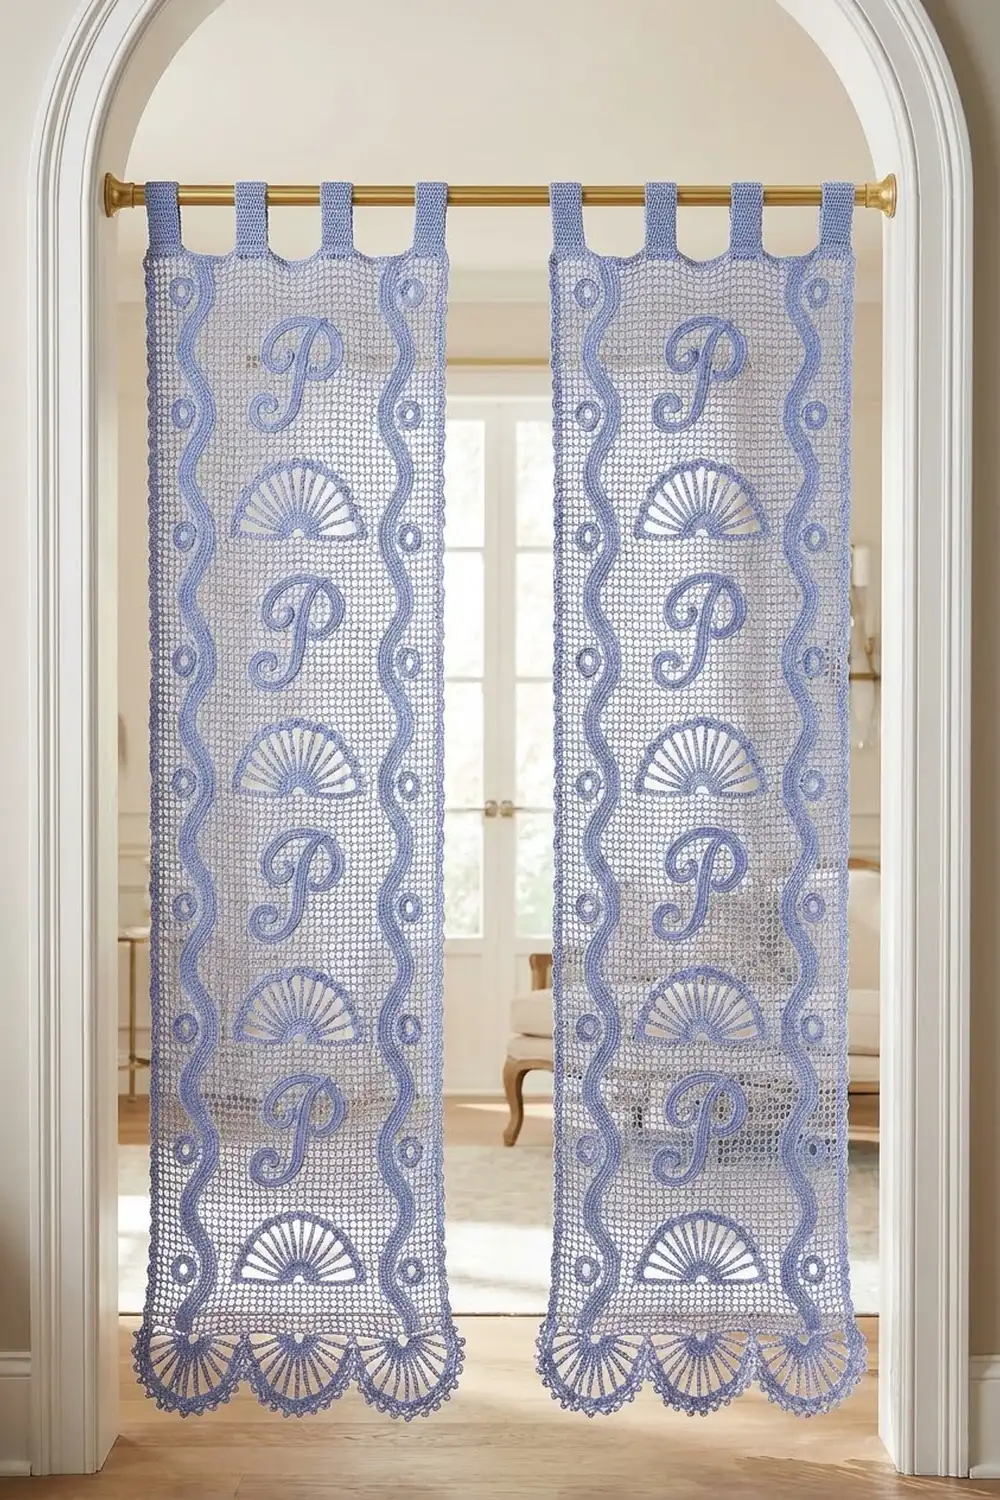
Layout of one panel, top to bottom. The two panels hang side by side and are not joined.
[ tabs ][ tabs ][ tabs ][ tabs ]
|  wave |   Fan 5    |  wave  |
|  wave |   P  #4    |  wave  |
|  wave |   Fan 4    |  wave  |
|  wave |   P  #3    |  wave  |
|  wave |   Fan 3    |  wave  |
|  wave |   P  #2    |  wave  |
|  wave |   Fan 2    |  wave  |
|  wave |   P  #1    |  wave  |
|  wave |   Fan 1    |  wave  |
[ scallops x 12 across bottom ]
Attaching the Appliqués
Sew each “P” to the center of a letter zone after the panel is blocked. Each letter zone is 24 rows, or 9.6 in (24.4 cm) tall.
- Pin the cord’s starting end into a small curl about 2.5 in (6.4 cm) above the bottom of the zone, just left of center.
- Run the cord up 5.5 in (14.0 cm) in a gentle S-curve to form the stem.
- Loop the rest of the cord down and to the right to form the bowl, ending against the stem about halfway down.
- Check the size: 5.5 in x 3.5 in (14.0 cm x 8.9 cm), centered within meshes 11–22.
Whipstitch along the foundation-chain edge of the cord, catching the mesh chains and posts behind it. Make one stitch about every 0.25 in (0.6 cm).
Keep your tension relaxed, because tight stitches pucker the mesh. After sewing, the panel should still lie flat at 19.4 in (49.3 cm) wide across the letter.
Border
Border gauge: 5 sc = 1 in (2.5 cm). This matches the body: 97 sts / 5 = 19.4 in, and 146 rows x 2 sc = 292 sc, and 292 / 5 = 58.4 in.
Corner ch-1 sps are not counted as stitches.
Rnd 1: Ch 1. Top edge: sc in each of the 97 sts (1 per dc, 1 per ch). Ch 1 for the corner. Side: 2 sc in each row-end (292 sc). Ch 1. Bottom: working across the foundation, sc in the base of each post and 2 sc in each ch-2 sp (33 + 64 = 97 sc). Ch 1. Second side: 292 sc. Ch 1, sl st to the first sc.
Per side: top 97, each long side 292, bottom 97. Total 778 sc.
Rnd 2: Ch 1.
- Top: sc in each sc (97 sc). Ch 1 at the corner.
- Side: (sc in each of next 4 sc, ring) 73 times (292 sc, 73 rings). Ch 1.
- Bottom: sc in first sc, (sk 3, 7-tr fan [(tr, ch 1) 6 times, tr] in next sc, sk 3, sc in next sc) 12 times. Ch 1. (12 scallops; 1 + 12 x 8 = 97 sts used)
- Second side: work as the first side. Ch 1, sl st to the first sc. Fasten off.
Rnd 3 (bottom only): Join yarn in the first sc of the bottom edge. *In each ch-1 sp of the scallop, work (sc, ch 3, sc); sl st in the sc between scallops; repeat from * across. (6 picots per scallop, 72 picots) Fasten off.
The math works because each edge’s count divides exactly by its repeat: 292 = 4 x 73, and 97 = 1 + 8 x 12. No stitches are added or dropped, so the border lies flat.
Hanging Tabs (make 4 per panel)
Work the tabs off the top edge of Rnd 2. Place them over sts 1–7, 31–37, 61–67 and 91–97, leaving 23 sts between each pair of tabs.
Row 1: Join in the first st, sc in each of the 7 sts. Turn. (7 sc)
Rows 2–10: Ch 1, sc in each sc. Turn. (7 sc)
Fasten off with a 12 in (30.5 cm) tail. The tab is 1.4 in (3.6 cm) wide and 2.5 in (6.4 cm) long. Fold it to the back and sew the last row to Rnd 1. This forms a 1.25 in (3.2 cm) loop that fits rods up to 0.75 in (1.9 cm) across.
Final Blocking
- Weave in all ends along posts or solid bands.
- Soak the panel in cool water for 15 minutes. Press the water out in a towel; do not wring.
- Pin the body to 19.4 in x 58.4 in (49.3 cm x 148.3 cm), measuring at the inner edge of the border.
- Pin each bottom scallop into a rounded point and open each picot.
- Pin the side rings outward so they read as small curls.
- Let the panel dry fully, then sew on the appliqués.
- Lightly steam the letters from above, without touching the iron to the cotton.
Final Quality-Control Checklist
- Each panel is 20.4 in x 60.4 in (51.8 cm x 153.4 cm) without tabs.
- Both panels match within 0.5 in (1.3 cm) in length.
- The wave band shifts on the same rows on both long sides.
- Five fans per panel, each centered over the center post.
- Four letters per panel, all facing the same way.
- 12 bottom scallops and 73 rings per long side.
- Four tabs, evenly spaced and the same length.
Troubleshooting
- Fans pucker: The arc is too tight. Go up a hook size for Fan Rows 3 and 4 only.
- Panel narrows near the top: Your ch-2 sps are getting tighter. Check the width every 24 rows.
- Wave looks lopsided: You probably shifted the band on different rows on each side. Re-check the band key.
- Border ruffles: You worked more than 2 sc per row-end. Recount to 292.
- Letter looks stiff: Sew with less tension and steam it after sewing.
- Tabs twist: Sew the fold evenly across all 7 sts.
Care
Hand wash in cool water with mild soap and dry flat, pinned if needed. Do not hang the panel wet, or it will stretch in length.
Final Notes
The measurement chain is short and easy to check. A gauge of 20 sts and 10 rows to 4 in (10.2 cm) gives a body of 97 sts by 146 rows, or 19.4 in x 58.4 in (49.3 cm x 148.3 cm). The border adds 0.5 in (1.3 cm) to each side and the top, and 1.5 in (3.8 cm) to the bottom. That gives a finished panel of 20.4 in x 60.4 in (51.8 cm x 153.4 cm). Make two, hang them side by side, and enjoy the light coming through.
Happy crocheting!