

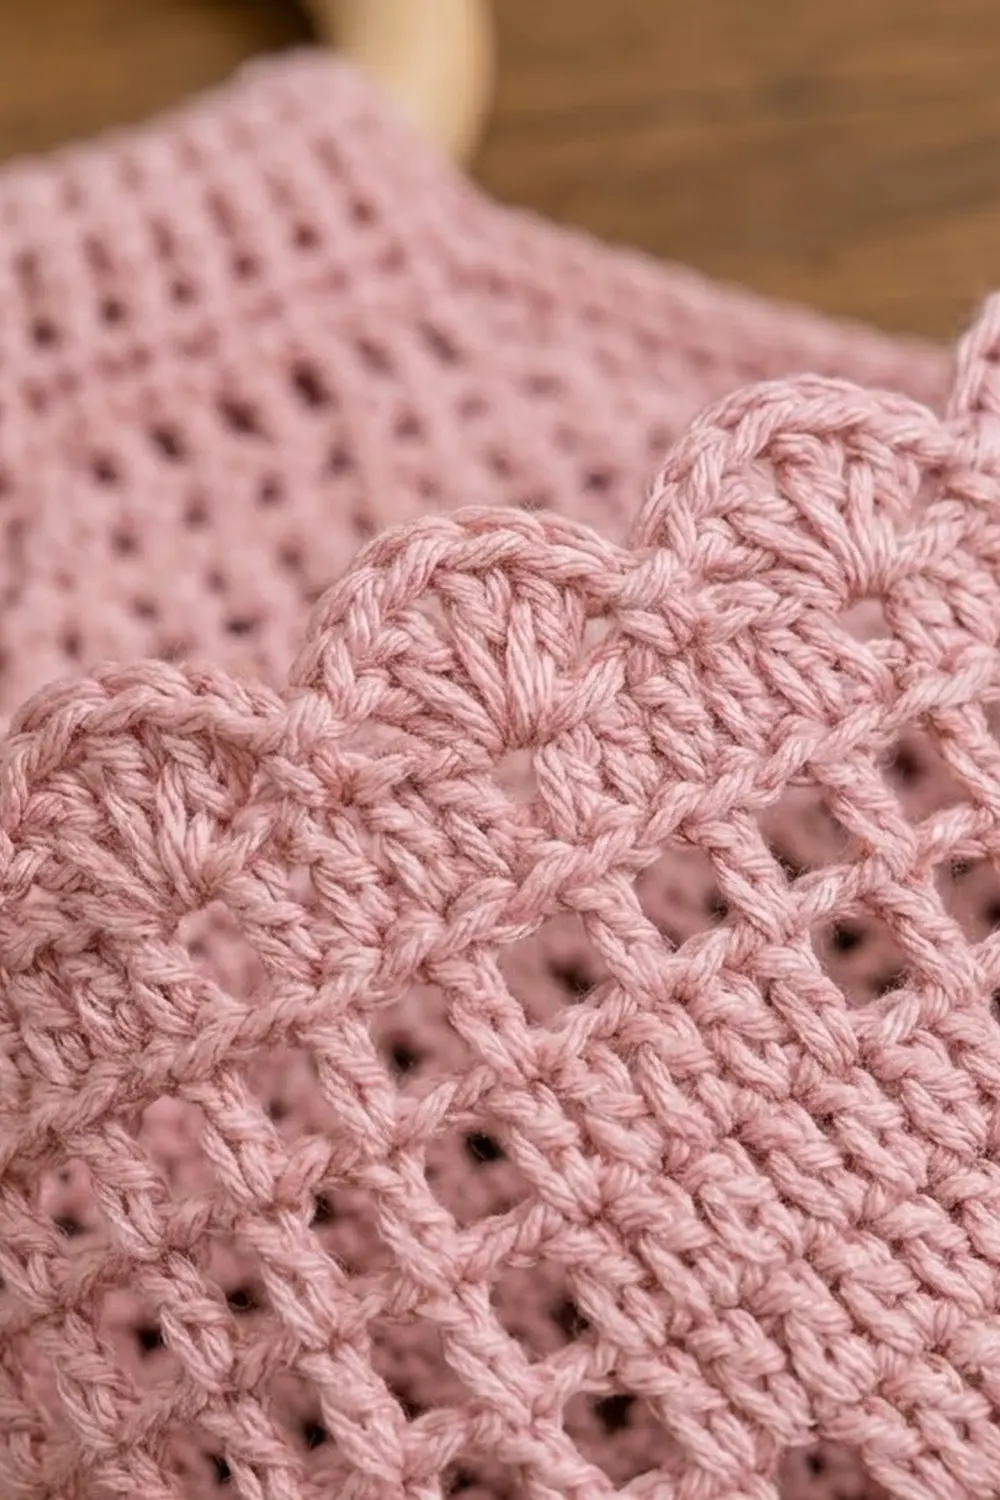
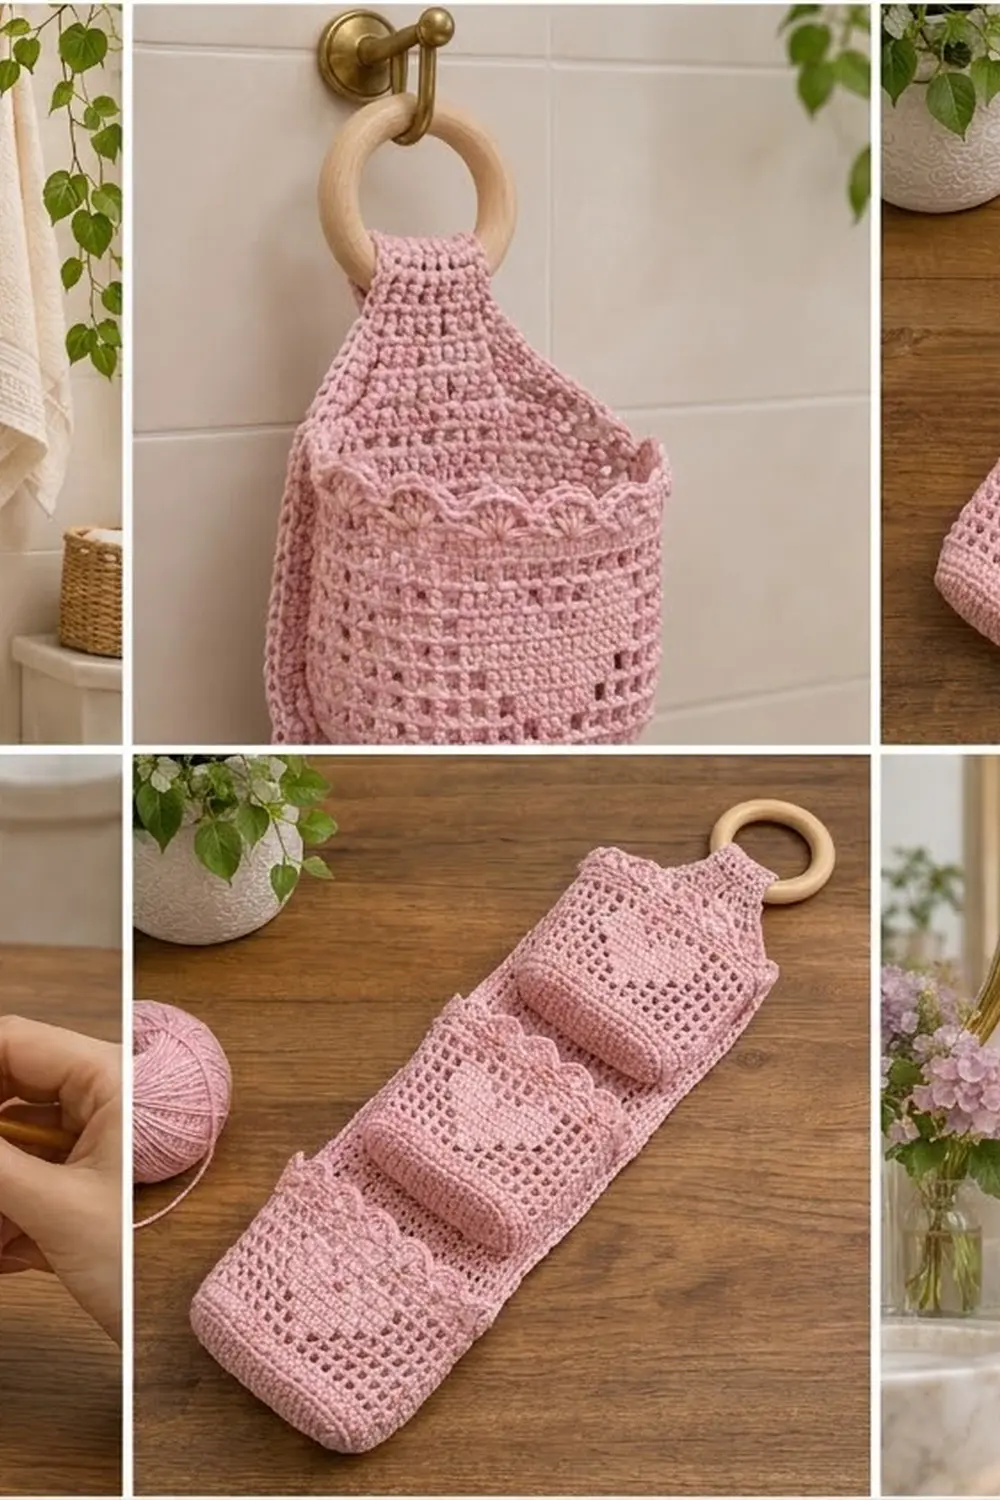
This hanging toilet paper holder has one filet mesh back panel and three round pocket baskets stacked down its front. Each pocket has a solid filled heart in the open mesh, a solid base, and a scalloped shell edge at the top. A solid strap at the top wraps over a wooden ring so the holder can hang from any hook.
It is worked in a single soft pink cotton, which keeps the look simple. The filet mesh lets the paper show through, and the scalloped tops make it look a little vintage. All instructions use US crochet terms.
The finished holder measures 5.5 in (14.0 cm) wide and 24 in (61.0 cm) long from the folded strap to the bottom edge. Each pocket is 4.75 in (12.1 cm) across and 4.75 in (12.1 cm) tall, which fits a standard roll up to 4.5 in (11.4 cm) wide.
You make one back panel in rows and three pockets in joined rounds. Then you sew the pockets to the panel, add one sc border round around the panel, and fold the strap over the ring.
Finished Size and Construction
- Finished size: 5.5 in (14.0 cm) wide × 24 in (61.0 cm) long, hanging
- Skill level: Intermediate (filet blocks worked in the round)
- Terminology: US
- Yarn weight: Worsted (#4) cotton
- Hook: 4.5 mm (US 7)
- Number of pieces: 4 (1 back panel + 3 pockets)
- Layout: 1 column of 3 pockets, set 6 in (15.2 cm) apart from bottom to bottom
- Pocket size: 4.75 in (12.1 cm) across × 4.75 in (12.1 cm) tall
- Panel size before border: 5 in (12.7 cm) wide × 25.5 in (64.8 cm) long, unfolded
- Border depth: 0.25 in (0.6 cm), 1 round of sc
Materials
Yarn: Use a smooth worsted-weight 100% cotton or cotton blend. Cotton holds its shape when filled and stands up to bathroom humidity. Avoid fuzzy yarns, because they blur the filet heart.
- Pink: 75 g (about 135 m / 148 yd)
These quantities include a margin of roughly 30% for your gauge test, sewing, and tension differences.
Tools:
– 4.5 mm (US 7) crochet hook
– Wooden ring, 3 in (7.6 cm) outer diameter
– Tapestry needle
– 6 locking stitch markers
– Measuring tape
– Rust-proof pins and a blocking mat
Abbreviations (US Terms)
- ch: chain
- sl st: slip stitch
- sc: single crochet
- dc: double crochet
- dc2tog: double crochet 2 together
- BLO: back loop only
- st(s): stitch(es)
- sp: space
- rnd: round
- rep: repeat
- RS: right side
Special stitches
– Open mesh: dc in the next dc (the “post”), ch 1.
– Block: dc in the next dc, dc in the next ch-1 sp or st. A block fills the mesh.
– Shell: 5 dc in the same st.
Gauge and Checkpoints
- dc gauge: 16 dc × 8 rows = 4 in (10.2 cm)
- Filet gauge: 8 meshes × 8 rows = 4 in (10.2 cm), so 1 mesh = 0.5 in (1.3 cm) square
- sc gauge: 16 sc = 4 in (10.2 cm); 1 sc rnd = 0.25 in (0.6 cm) tall
Make one pocket first. It is the best gauge test because it uses every stitch in the pattern.
Checkpoints:
1. Pocket base after Rnd 5: 4.75 in (12.1 cm) across, lying flat.
2. Pocket after Rnd 14: the mesh walls measure 4 in (10.2 cm) tall from the base ridge.
3. Finished pocket: 4.75 in (12.1 cm) tall, including the shells.
4. Panel after Row 36: 5 in (12.7 cm) wide × 18 in (45.7 cm) long.
If your base is too big or your mesh is wider than 0.5 in (1.3 cm), go down 0.5 mm. If it is too small, or a roll won’t drop in, go up 0.5 mm. Change the hook, not the stitch counts.
Back Panel
The panel is worked in rows, from the bottom up.
Foundation: Ch 24.
Row 1 (RS): Dc in 6th ch from hook. The 5 skipped ch count as the first dc, a ch-1 sp, and a skipped ch. Ch 1, sk 1 ch, dc in next ch; rep from * 8 more times. Turn. (10 meshes; 11 posts)
Rows 2–36: Ch 4 (counts as dc + ch 1), sk the ch-1 sp, dc in next dc. Ch 1, dc in next dc; rep from * across, working the last dc in the 3rd ch of the turning ch. Turn. (10 meshes)
Checkpoint: 5 in (12.7 cm) × 18 in (45.7 cm).
Row 37 (conversion): Ch 3 (counts as dc). Dc in next ch-1 sp, dc in next dc; rep from * across. Turn. (21 dc = 11 worked into the posts + 10 worked into the ch-1 sps)
Shoulder rows: For each row, ch 2 (does not count as a st), dc2tog over the first 2 sts, dc in each st to the last 2 sts, then dc2tog. Turn.
– Row 38: 19 dc
– Row 39: 17 dc
– Row 40: 15 dc
– Row 41: 13 dc
– Row 42: 11 dc
– Row 43: 9 dc
Strap, Rows 44–51: Ch 3 (counts as dc), dc in each st across. Turn. (9 dc)
Fasten off. The panel is now 5 in (12.7 cm) wide × 25.5 in (64.8 cm) long. The 51 rows are 25.5 in tall: 36 mesh rows (18 in), 7 shoulder rows (3.5 in), and 8 strap rows (4 in). The strap is 2.25 in (5.7 cm) wide.
Pocket (Make 3)
Work in joined rounds with the RS always facing. Do not turn. Put the join at the center back of the pocket, because that is the part you sew to the panel.
Base
Rnd 1: Make a magic ring. Ch 3 (counts as dc), 11 dc in ring, sl st to the top of ch-3. (12 dc)
Rnd 2: Ch 3, dc in the same st, 2 dc in each st around, sl st to join. (24 dc)
Rnd 3: Ch 3, 2 dc in the next st, dc in next st, 2 dc in next st; rep around, sl st to join. (36 dc)
Rnd 4: Ch 3, dc in next st, 2 dc in next st, dc in each of next 2 sts, 2 dc in next st; rep around, sl st to join. (48 dc)
Rnd 5: Ch 3, dc in each of next 2 sts, 2 dc in next st, dc in each of next 3 sts, 2 dc in next st; rep around, sl st to join. (60 dc)
Checkpoint: the base is flat and 4.75 in (12.1 cm) across. Its circumference is 15 in (38.1 cm), which is 60 sts at 4 sts per inch.
Solid Band
Rnd 6: Ch 1, sc in BLO of each st around, sl st to the first sc. (60 sc) The unused front loops form the ridge where the wall turns upward.
Rnd 7: Ch 1, sc in each st around, sl st to join. (60 sc)
Filet Walls
Number the meshes 1–30, starting at the join. Mesh 16 is center front, so the heart is worked over meshes 13–19.
Rnd 8: Ch 4 (counts as dc + ch 1), sk next st. Dc in next st, ch 1, sk next st; rep from * 28 more times. Sl st to the 3rd ch of ch-4. (30 meshes)
Rnds 9–14 (heart): Ch 4 to begin (this is mesh 1, open). Work every mesh into the matching mesh below. Each mesh is open (dc in the post, ch 1) or a block (dc in the post, dc in the next ch-1 sp or st). Sl st to join at the end of each rnd. Every rnd has 30 meshes.
- Rnd 9: block on mesh 16 (1 block)
- Rnd 10: blocks on meshes 15–17 (3 blocks)
- Rnd 11: blocks on meshes 14–18 (5 blocks)
- Rnd 12: blocks on meshes 13–19 (7 blocks)
- Rnd 13: blocks on meshes 13–19 (7 blocks)
- Rnd 14: blocks on meshes 14–15 and 17–18 (4 blocks; mesh 16 stays open between the two lobes)
All the other meshes are open. Checkpoint: the walls measure 4 in (10.2 cm) from the ridge. That is 2 sc rnds (0.5 in) plus 7 mesh rnds (3.5 in).
Top Edge
Rnd 15 (conversion): Ch 1, sc in each dc and in each ch-1 sp or block st around, sl st to join. (60 sc = 30 worked into the posts + 30 worked into the spaces or block sts)
Rnd 16 (shells): Ch 1, sc in the first st. Sk 2 sts, shell in next st, sk 2 sts, sc in next st; rep from * around. On the last rep, end after the second sk 2 sts and sl st to the first sc. (10 shells and 10 sc) This works because 60 sts ÷ 6 sts per repeat = 10 repeats exactly.
Fasten off, leaving a 24 in (61.0 cm) tail for sewing. The finished pocket is 4.75 in (12.1 cm) tall: 0.5 in solid band, 3.5 in mesh, 0.25 in sc rnd, and 0.5 in shells.
Make All Pieces
- Pink: 1 back panel + 3 pockets
Layout (front view, top to bottom):
   [ ring ]
   [ strap ]       Rows 44–51
  /shoulders\      Rows 37–43
 | Pocket 3  |     base at Row 25
 | Pocket 2  |     base at Row 13
 | Pocket 1  |     base at Row 1
Joining
Use whipstitch with the pocket tail, working through both loops of each stitch.
Stitch-to-stitch logic: The back of each pocket is meshes 28, 29, 30, 1, 2, and 3. That is 6 meshes, 3 in (7.6 cm) wide. It lines up with panel meshes 3–8, which are also 6 meshes and 3 in wide. This leaves 2 meshes, or 1 in (2.5 cm), free on each side of the panel.
- Bottom seam: Sew the 12 back sts of pocket Rnd 7 to the 12 sts at the base of panel meshes 3–8, one st to one st. Use Row 1 for Pocket 1, Row 13 for Pocket 2, and Row 25 for Pocket 3.
- Top seam: Sew the 12 back sts of pocket Rnd 15 to the 12 sts at the top of panel meshes 3–8, one st to one st. Use the top of Row 9, Row 21, and Row 33.
- Side seams: Tack the left and right edges of the pocket’s back section to the matching panel posts once per mesh rnd. That is 7 tacks per side.
Tension: Sew snugly but not tightly. The seam should lie flat, without puckering the mesh.
Size checkpoint: The pockets sit 6 in (15.2 cm) apart from base to base, with a 1.25 in (3.2 cm) gap between each shell edge and the next base. The panel still measures 5 in (12.7 cm) wide.
Border
Border gauge: 4 sc per inch. Each dc row-end is 0.5 in (1.3 cm) tall, so it takes 2 sc.
Border Rnd 1: With the RS facing, join yarn at the bottom right corner and work around the whole panel:
– Bottom edge: 3 sc in the corner st, sc in each of the next 19 foundation sts, 3 sc in the corner st. (25 sc)
– Left side (going up): 2 sc in each row-end, Rows 1–51. (102 sc)
– Strap top: 3 sc in the corner st, sc in each of the next 7 sts, 3 sc in the corner st. (13 sc)
– Right side (going down): 2 sc in each row-end, Rows 51–1. (102 sc)
Sl st to the first sc. Total: 242 sc (25 + 102 + 13 + 102). Fasten off.
Why the math works: 51 rows × 0.5 in = 25.5 in, and 102 sc ÷ 4 sc per inch = 25.5 in, so the sides lie flat. The bottom edge counts 21 sts in total (19 + 1 corner st at each end). The 2 extra sc in each corner let the edge turn without cupping. The border adds 0.25 in (0.6 cm) on every edge, so the panel ends up 5.5 in (14.0 cm) wide, the strap 2.75 in (7.0 cm) wide, and the length 26 in (66.0 cm).
Hanging loop: Wrap the strap over the wooden ring from front to back. Fold 2 in (5.1 cm) to the back and whipstitch the strap top to the panel through both layers. The holder now hangs 24 in (61.0 cm) long.
Final Blocking
- Weave in all ends along the solid rnds, not through the mesh.
- Spray the whole piece lightly with water until it is damp.
- Lay it flat and pin the panel to 5.5 in (14.0 cm) wide.
- Square the mesh with your fingers so every mesh is 0.5 in (1.3 cm).
- Stand each pocket over a toilet roll wrapped in a plastic bag, so it dries round.
- Open each shell with your fingertips.
- Let it dry completely before unpinning.
Final Quality-Control Checklist
- [ ] Each pocket base is 4.75 in (12.1 cm) across and lies flat
- [ ] Every mesh rnd has 30 meshes
- [ ] The heart is centered on mesh 16, opposite the join
- [ ] Each pocket has 10 shells
- [ ] The panel has 10 meshes in Rows 1–36 and 9 dc in the strap
- [ ] Pocket bases sit at Rows 1, 13, and 25
- [ ] The border has 242 sc
- [ ] The strap seam is secure and the ring turns freely
Troubleshooting
- The base ruffles: Your tension is loose. Go down a hook size or redo Rnd 5.
- The base cups: Check that you increased in every round.
- The heart looks slanted: You skipped a ch-1 sp. Recount to 30 meshes.
- The heart is off-center: Restart the walls with the join at the center back.
- The roll doesn’t fit: Add base Rnd 6 (72 dc) and work 36 meshes, with the heart on meshes 16–22 and 12 shells.
- The pocket sags: Add tacks to the side seams.
- The edges ripple: Use 2 sc per row-end, not 3.
Care
Hand wash in cool water, press out the water in a towel, and dry flat over a roll so the pockets keep their shape. Don’t tumble dry.
Final Notes
Everything follows from a 0.5 in (1.3 cm) mesh. Each pocket has 30 meshes, which gives a 15 in (38.1 cm) circumference and a 4.75 in (12.1 cm) base. The panel has 10 meshes, so it is 5 in (12.7 cm) wide. 12 rows are 6 in (15.2 cm), which is the spacing between pockets. One sc border round brings the panel to 5.5 in (14.0 cm), and with the strap folded the holder hangs 24 in (61.0 cm) long. If each checkpoint matches, the finished holder will match too.
Happy crocheting!