
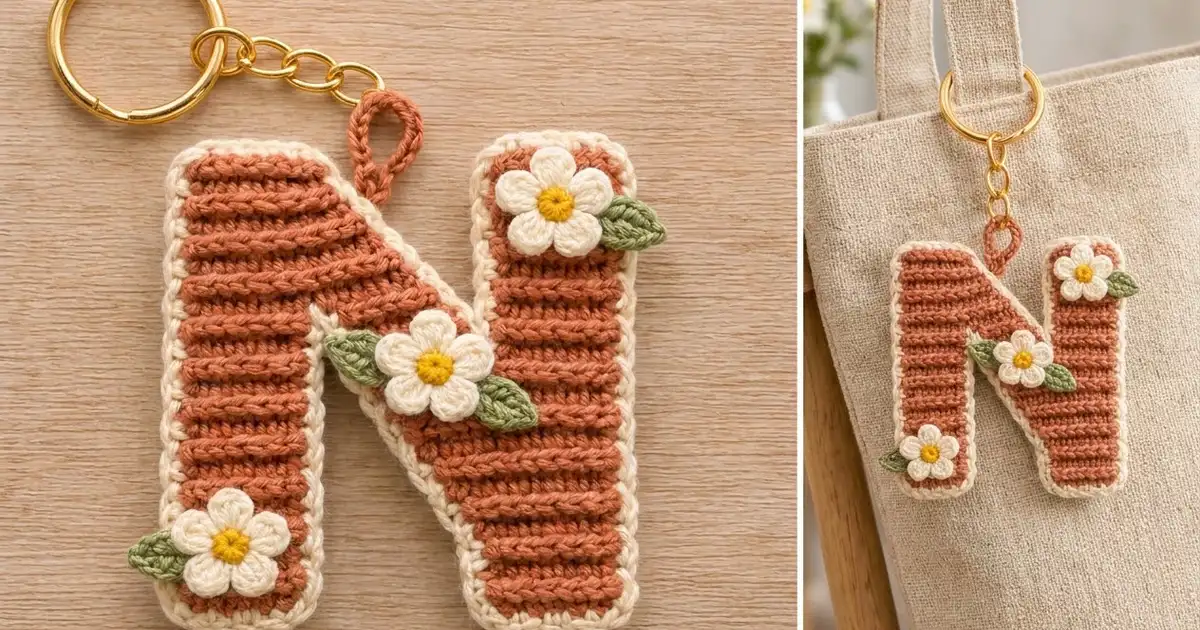
This little letter N keychain turns a simple initial into a small gift. The letter is worked in warm terracotta rows that make neat horizontal ridges, framed with a cream border and finished with three tiny daisies with sage-green leaves.
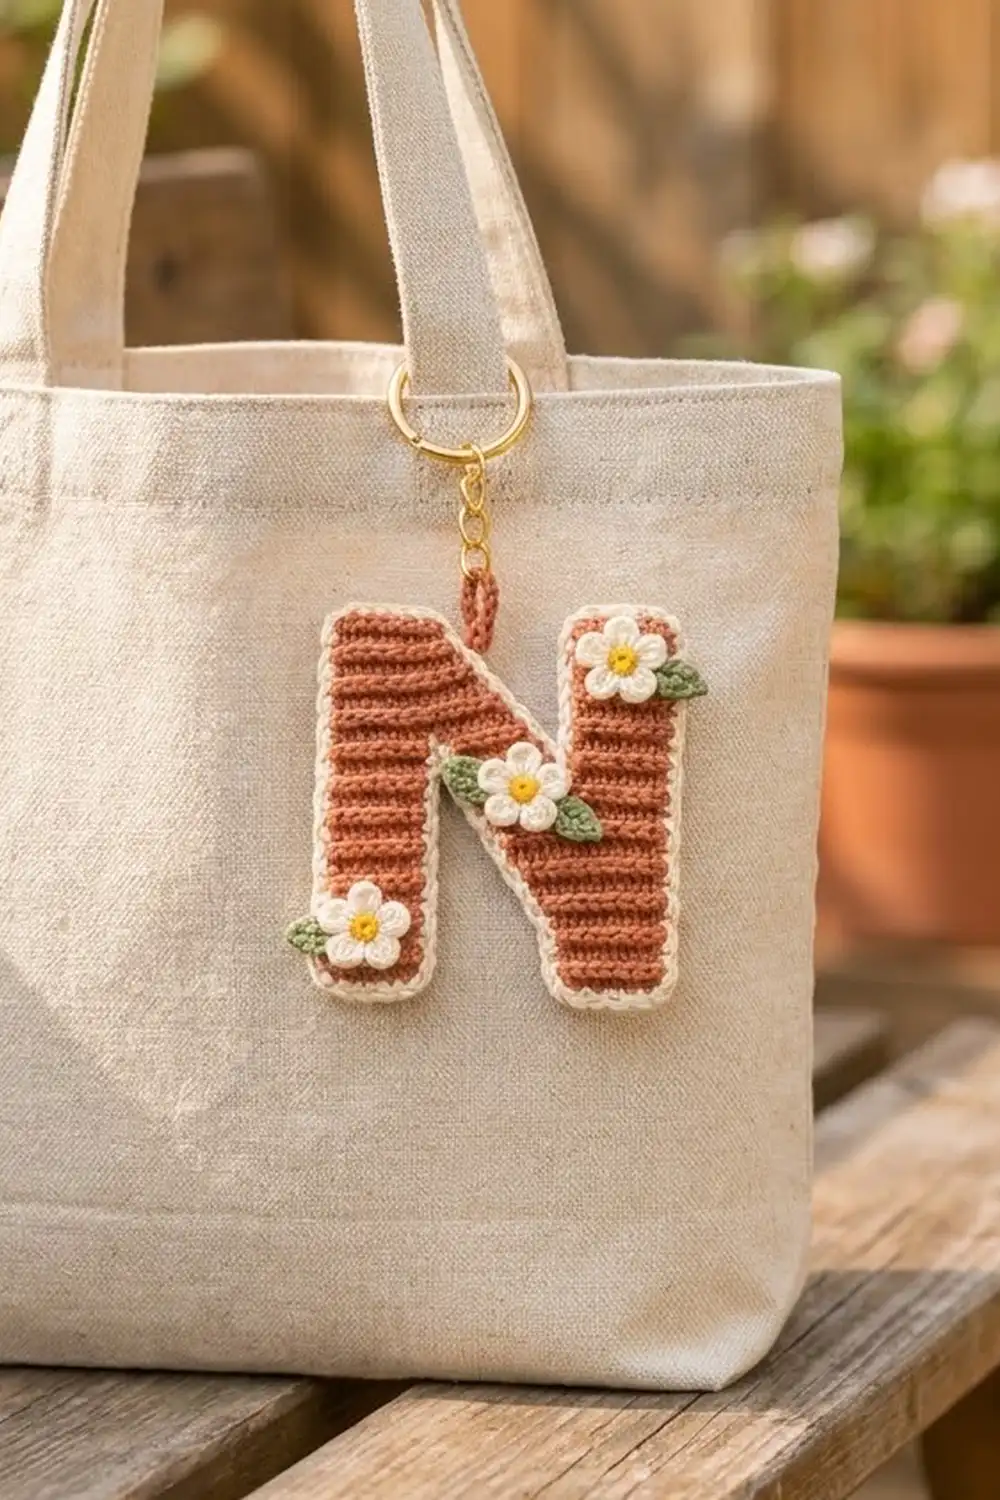
The palette is soft and earthy: terracotta, cream, mustard yellow and sage green, with a gold split ring and chain. It works on a tote bag, backpack zipper or set of house keys, and it makes a good personalized gift.
The pattern uses US crochet terms. The finished keychain is about 3.0 in (7.6 cm) wide and 3.4 in (8.6 cm) tall, not counting the hanging loop.
You make the letter as one flat piece, worked in rows of back-loop single crochet. The bottom halves of the two strokes start as two small sections, which are joined across the middle in one row and then split again for the top. A single cream round outlines the shape. Then you add a terracotta hanging loop and sew on three flowers and four leaves.
Finished Size and Construction
- Finished size: 3.0 in (7.6 cm) wide x 3.4 in (8.6 cm) tall
- Skill level: Easy-intermediate
- Terminology: US crochet terms
- Yarn weight: DK / light worsted (3), cotton or cotton blend
- Hook: 3.0 mm
- Number of pieces: 1 letter, plus 3 flowers and 4 leaves sewn on
- Layout: Single standalone piece; no joining
- Letter body before border: 16 sts x 22 rows = about 2.7 in (6.9 cm) x 3.1 in (7.9 cm)
- Stroke width: 5 sts = about 0.8 in (2.0 cm)
- Border depth: 1 round of sc, about 0.15 in (0.4 cm) on every side
Materials
Cotton or a cotton blend gives the clearest ridges and wears well on a keychain. Choose a smooth, tightly plied DK yarn with an average length of about 2.2 m per gram (about 110 m per 50 g).
- Terracotta (main color, MC): 10 g, about 22 m
- Cream (border and petals, CC1): 5 g, about 11 m
- Mustard yellow (flower centers, CC2): 1 g, about 2 m
- Sage green (leaves, CC3): 2 g, about 4 m
These quantities include a small safety margin.
Tools:
– 3.0 mm crochet hook
– Tapestry needle
– Scissors
– 1 gold split ring, about 1 in (2.5 cm)
– 1 short gold chain (4–5 links) with jump rings
– Small flat-nose pliers
– Stitch markers
– Rustproof pins and a blocking mat
Abbreviations (US Terms)
- ch – chain
- sl st – slip stitch
- sc – single crochet
- hdc – half double crochet
- dc – double crochet
- BLO – back loop only
- sc2tog – single crochet 2 together
- sc3tog – single crochet 3 together
- st(s) – stitch(es)
- RS / WS – right side / wrong side
Special stitch – sc3tog for notch tips: Insert hook in the first spot, yarn over and pull up a loop. Repeat in the second spot and the third spot (4 loops on hook). Yarn over and pull through all 4 loops. In the border, this pulls each inner point of the N in so it lies flat.
Gauge and Checkpoints
Gauge: 12 sts x 14 rows of sc BLO = 2 in (5.1 cm) square. That is 6 sts and 7 rows per inch.
The letter is small, so the letter itself works as your test piece. Measure at each checkpoint below and stop to adjust as soon as a number is off.
- Checkpoint 1 (after Row 10): The left leg (5 sts) is about 0.8 in (2.0 cm) wide and 1.4 in (3.6 cm) tall. The right section (10 sts) is about 1.7 in (4.3 cm) wide.
- Checkpoint 2 (after Row 12): The full row of 16 sts is about 2.7 in (6.9 cm) wide, and the piece is about 1.7 in (4.3 cm) tall.
- Checkpoint 3 (after Row 22): The letter is about 2.7 in (6.9 cm) x 3.1 in (7.9 cm).
- Checkpoint 4 (after border): The letter is about 3.0 in (7.6 cm) x 3.4 in (8.6 cm).
Too big? Go down to a 2.75 mm hook. Too small? Go up to a 3.25 mm hook. Change hooks rather than rows or stitches, because the stitch counts set the shape of the letter.
Letter Body
Use MC (terracotta). After Row 1, every sc is worked in BLO, which makes the horizontal ridges. Turning ch-1 never counts as a stitch.
Row 1 of every section is the RS. On RS rows you work from right to left with the RS facing you.
Part 1: Left Leg (Bottom)
Ch 6.
Row 1 (RS): Sc in the 2nd ch from hook and in each ch across. (5 sts)
Rows 2–10: Ch 1, turn, sc BLO in each st across. (5 sts)
Fasten off. Set this piece aside RS up, with the foundation edge at the bottom.
Part 2: Right Leg and Diagonal (Bottom)
This section gains 1 stitch on its left edge every second row, which builds the lower half of the diagonal.
Ch 7.
Row 1 (RS): Sc in the 2nd ch from hook and in each ch across. (6 sts)
Row 2: Ch 1, turn, sc BLO in each st. (6 sts)
Row 3: Ch 1, turn, sc BLO in next 5 sts, 2 sc BLO in last st. (7 sts)
Row 4: Ch 1, turn, sc BLO in each st. (7 sts)
Row 5: Ch 1, turn, sc BLO in next 6 sts, 2 sc BLO in last st. (8 sts)
Row 6: Ch 1, turn, sc BLO in each st. (8 sts)
Row 7: Ch 1, turn, sc BLO in next 7 sts, 2 sc BLO in last st. (9 sts)
Row 8: Ch 1, turn, sc BLO in each st. (9 sts)
Row 9: Ch 1, turn, sc BLO in next 8 sts, 2 sc BLO in last st. (10 sts)
Row 10: Ch 1, turn, sc BLO in each st. (10 sts)
Do not fasten off. Your yarn is now at the outer right edge.
Lay both parts RS up with their foundation edges level. The left leg goes on the left, and its top right corner should sit one stitch-width away from the top left corner of Part 2. At the bottom, the gap between them is 5 sts wide.
Part 3: Joining Rows
Row 11 (RS): Ch 1, turn. Sc BLO in each of the 10 sts of Part 2. Ch 1 to bridge the gap. Sc BLO in each of the 5 sts of the left leg, starting at its right edge. (16 sts: 10 + 1 ch + 5)
Row 12 (WS): Ch 1, turn, sc BLO in each st across, including the ch. (16 sts)
Check Checkpoint 2 now.
Part 4: Right Leg (Top)
Row 13 (RS): Ch 1, turn, sc BLO in the first 5 sts only. (5 sts) Leave the other 11 sts unworked.
Rows 14–22: Ch 1, turn, sc BLO in each st. (5 sts)
Fasten off.
Part 5: Left Leg and Diagonal (Top)
This section loses 1 stitch on its right edge every second row, which builds the upper half of the diagonal.
Row 13 (RS): Skip the next unworked st of Row 12 next to the right leg. Leave it empty, because it becomes the point of the top notch. Join MC in the following st. Ch 1, sc BLO in the same st and in the next 9 sts. (10 sts)
Row 14: Ch 1, turn, sc BLO in each st. (10 sts)
Row 15: Ch 1, turn, sc2tog BLO, sc BLO in next 8 sts. (9 sts)
Row 16: Ch 1, turn, sc BLO in each st. (9 sts)
Row 17: Ch 1, turn, sc2tog BLO, sc BLO in next 6 sts. (8 sts)
Row 18: Ch 1, turn, sc BLO in each st. (8 sts)
Row 19: Ch 1, turn, sc2tog BLO, sc BLO in next 5 sts. (7 sts)
Row 20: Ch 1, turn, sc BLO in each st. (7 sts)
Row 21: Ch 1, turn, sc2tog BLO, sc BLO in next 4 sts. (6 sts)
Row 22: Ch 1, turn, sc BLO in each st. (6 sts)
Fasten off and weave in all MC ends on the WS. Check Checkpoint 3.
Shape check: The bottom notch is 5 sts wide at Row 1 and narrows to 1 st at Rows 9–10. The top notch mirrors it: 1 st wide at Rows 13–14, widening to 5 sts at Rows 21–22. Both strokes are 5 sts wide all the way up, so the letter should look like a clean N, balanced if you turn it upside down.
Border
Border gauge: Work 1 sc in every row end, 1 sc in every stitch, and 3 sc in every outer corner stitch. Each inner notch point gets one sc3tog. Single crochet rows are close to square, so 1 sc per row end lies flat. On the stepped diagonal edges, work only into the row ends and don’t add stitches at the small steps.
Round 1 (CC1, cream): With RS facing, join cream in the Row 1 row end on the outer right edge. Ch 1 and work around as follows:
- Outer right edge: 1 sc in each row end up to Row 22. (22 sts)
- Top of right leg: 3 sc in the first st, sc in the next 3 sts, 3 sc in the last st. (9 sts)
- Inner edge of right leg: 1 sc in each row end from Row 22 down to Row 14. (9 sts)
- Top notch point: Sc3tog worked over the Row 13 row end of the right leg, the skipped st of Row 12, and the Row 13 row end of the left section. (1 st)
- Inner diagonal edge, top: 1 sc in each row end from Row 14 up to Row 22. (9 sts)
- Top of left section: 3 sc in the first st, sc in the next 4 sts, 3 sc in the last st. (10 sts)
- Outer left edge: 1 sc in each row end from Row 22 down to Row 1. (22 sts)
- Bottom of left leg: Working into the underside of the foundation ch: 3 sc in the first ch, sc in the next 3 ch, 3 sc in the last ch. (9 sts)
- Inner edge of left leg: 1 sc in each row end from Row 1 up to Row 9. (9 sts)
- Bottom notch point: Sc3tog worked over the Row 10 row end of the left leg, the underside of the bridging ch-1, and the Row 10 row end of Part 2. (1 st)
- Inner diagonal edge, bottom: 1 sc in each row end from Row 9 down to Row 1. (9 sts)
- Bottom of right section: Working into the underside of the foundation ch: 3 sc in the first ch, sc in the next 4 ch, 3 sc in the last ch. (10 sts)
Sl st to the first sc. Total: 120 sts.
Why the math works:
– The two outer edges each have 22 row ends, and 22 rows ÷ 7 rows per inch matches the 3.1 in (7.9 cm) body height.
– The four short end edges match their stitch counts (5, 6, 6 and 5) plus 2 extra sc at each outer corner. That gives 9 + 10 + 10 + 9 = 38.
– The four inner edges each have 10 row ends. At each notch, the row end next to the point is used up by that notch’s sc3tog, so each inner edge gives 9 sc, plus 1 sc3tog per notch: (9 + 9 + 1) x 2 = 38.
– Total: 44 + 38 + 38 = 120.
The round adds about 0.15 in (0.4 cm) on each side, taking the letter from 2.7 in (6.9 cm) to 3.0 in (7.6 cm) wide and from 3.1 in (7.9 cm) to 3.4 in (8.6 cm) tall. Fasten off and weave in the ends.
Hanging Loop
With RS facing, join MC in the 7th sc of the 10-sc top edge of the left section, counting from the left. This puts the loop slightly right of center, just above where the diagonal starts.
Ch 12, then sl st in the same sc. Turn, work 16 sc into the ch-12 loop, and sl st into the base. The finished loop stands about 0.6 in (1.5 cm) tall.
Fasten off and weave in the ends. Use pliers to open a jump ring, pass it through the loop and the end link of the gold chain, and close it. Attach the split ring to the other end of the chain.
Flowers (Make 3)
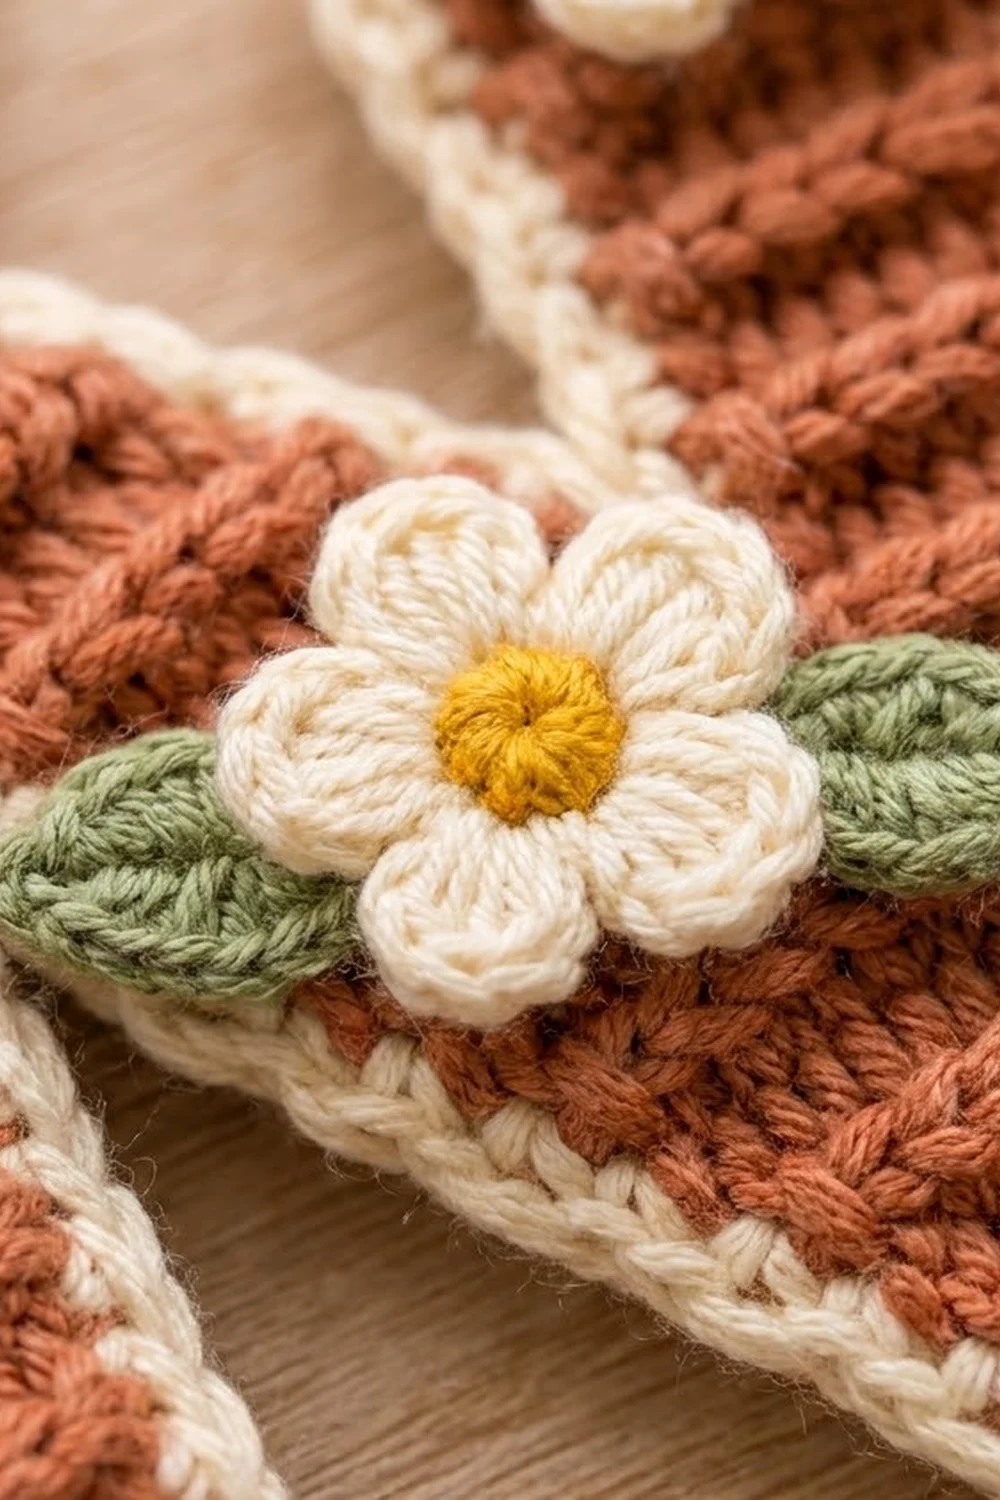
Round 1 (CC2, yellow): Make a magic ring and work 5 sc into it. Pull the ring closed and sl st to the first sc. (5 sts) Fasten off.
Round 2 (CC1, cream): Join cream in any sc. In each st, work (sl st, ch 2, 2 dc, ch 2, sl st). (5 petals)
Fasten off and leave a 6 in (15.2 cm) tail for sewing. Each flower measures about 0.75 in (1.9 cm) across.
Leaves (Make 4)
CC3 (sage green): Ch 6. Working along one side of the chain: sl st in the 2nd ch from hook, then sc, hdc, sc and sl st in the next 4 ch. Turn your work so you are along the other side of the chain, and repeat: sc, hdc, sc and sl st in the next 4 ch. Sl st to the tip.
Fasten off and leave a 6 in (15.2 cm) tail. Each leaf is about 0.6 in (1.5 cm) long.
Sewing On the Flowers
Sew the appliqués on after blocking (see below). Use the tails and a tapestry needle, and stitch through the center and the base of each petal.
- Flower 1: On the top of the right leg, centered. Add 1 leaf to its right, angled slightly upward.
- Flower 2: On the middle of the diagonal. Add 2 leaves underneath, one pointing left and one pointing right.
- Flower 3: On the bottom of the left leg, centered. Add 1 leaf to its left, angled slightly downward.
Final Blocking
- Weave in every end except the flower and leaf sewing tails.
- Pin the letter RS up to 3.0 in (7.6 cm) x 3.4 in (8.6 cm). Pin each outer corner first, then the two notch points.
- Check that both strokes are the same width and both notches are the same depth.
- Hover a steam iron about 1 in (2.5 cm) above the piece, or mist it lightly with water. Do not press it flat, because that crushes the ridges.
- Let it dry completely while still pinned.
- Unpin it, sew on the flowers and leaves, and attach the hardware.
Final Quality-Control Checklist
- Letter body measured 2.7 in (6.9 cm) x 3.1 in (7.9 cm) before the border
- Final size is 3.0 in (7.6 cm) x 3.4 in (8.6 cm)
- Ridges run straight and horizontal across both strokes and the diagonal
- Both notches have sharp points with no holes
- The border has exactly 120 sts and lies flat without ruffling
- The hanging loop is firmly attached and the jump ring is fully closed
- The 3 flowers and 4 leaves are secure, with no loose petal tips
- All ends are hidden on the WS
Troubleshooting
Diagonal looks jagged. You may have put the increases or decreases on the wrong edge. On RS rows, increases go at the end of the row and decreases at the beginning.
Gap at the bottom notch. Pull the bridging ch-1 snug in Row 11, and make sure the border sc3tog picks up the underside of that ch.
Border ruffles. Go down one hook size for the border only, or check that you haven’t added stitches at the steps of the diagonal.
Border pulls the letter inward. Use one hook size larger for the border, or make sure you worked 3 sc in every outer corner.
Ridges are faint. Make sure you are working in the back loop only on every row after Row 1.
Letter curls. Block again with steam and leave it pinned until completely dry.
Care
Hand wash in cool water and lay flat to dry. Remove the metal hardware before washing to protect the gold finish.
Final Notes
The measurement chain is short and easy to check:
– Gauge: 6 sts and 7 rows per inch
– Rows 1–10: two sections, 5 sts and 10 sts wide
– Row 12: 16 sts, about 2.7 in (6.9 cm) wide
– Row 22: body measures 2.7 in (6.9 cm) x 3.1 in (7.9 cm)
– A 120-st border brings it to 3.0 in (7.6 cm) x 3.4 in (8.6 cm)
If each checkpoint is right, the finished letter will be too. Then add the daisies and the gold ring.
Happy crocheting!