

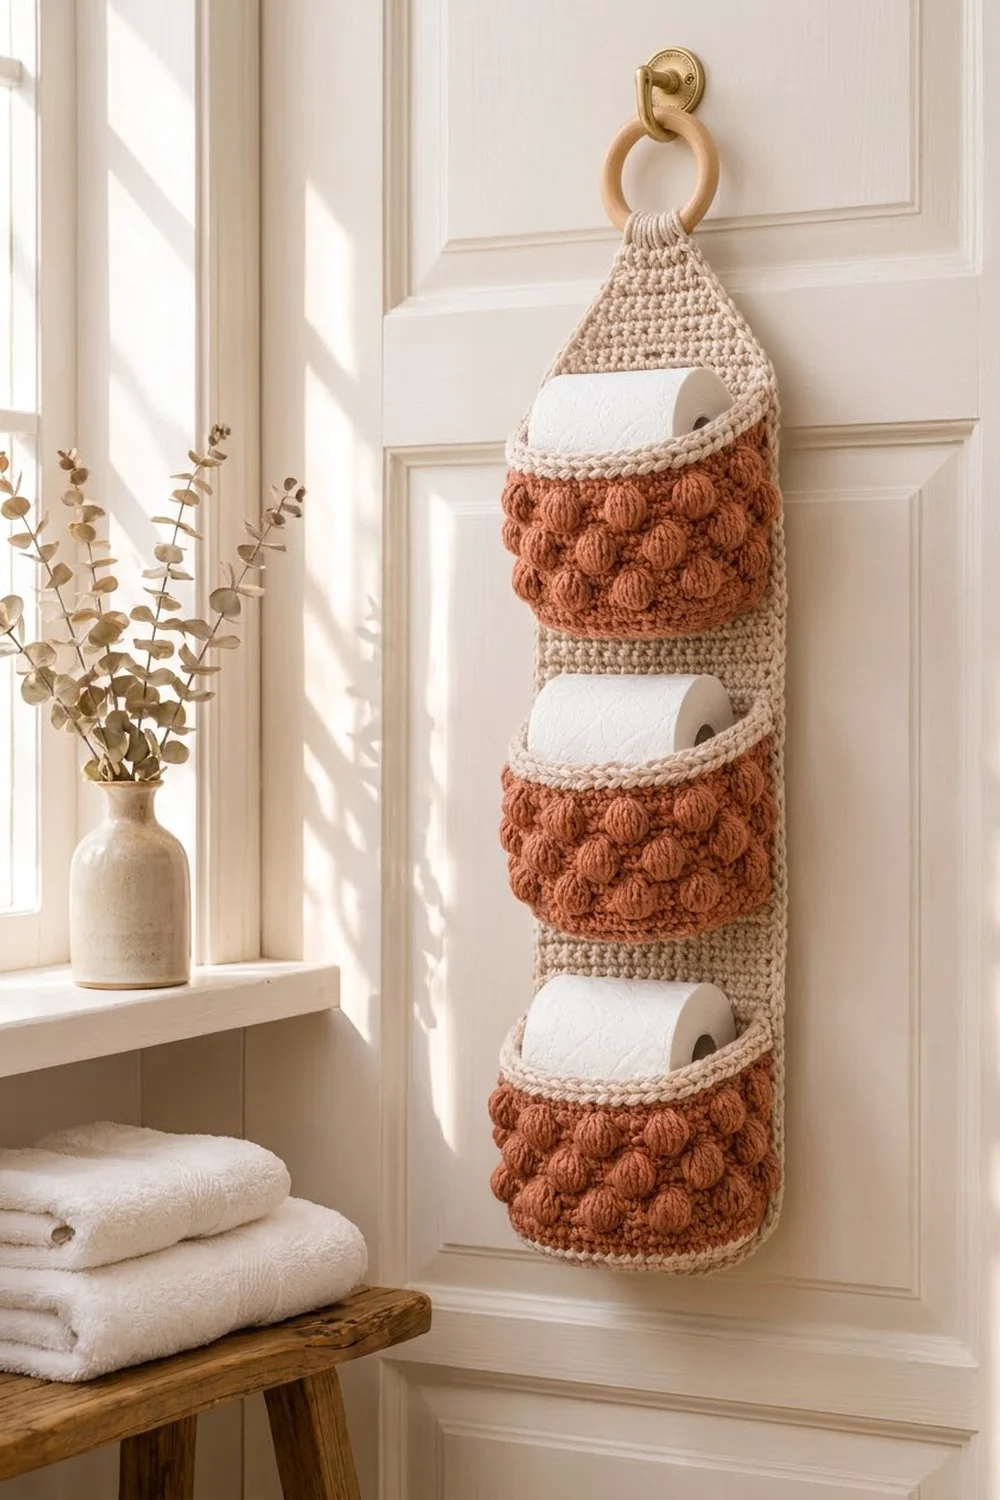
This hanging holder stores three spare toilet rolls on the back of a door or on a bathroom wall. A long cream panel hangs from a wooden ring, and three chunky terracotta pockets are stacked down its front. Each pocket is covered in rounded bobbles and trimmed in cream at both the base and the rim.
The palette is warm and simple: cream for the panel and the trims, terracotta for the pocket walls. The style is cozy farmhouse, and the bobble texture is the main feature.
The pattern uses US crochet terms. The finished panel is 6.5 in (16.5 cm) wide and 26.25 in (66.7 cm) long from the bottom edge to the base of the tab. The total hanging length is about 30 in (76.2 cm) including the ring. Each pocket is 7.5 in (19.1 cm) wide when flattened and 3.5 in (8.9 cm) tall.
To build it, you work the panel in rows of single crochet, taper it, and finish with a narrow tab. Each pocket starts with an oval base and is worked upward in joined rounds. You then add a border to the panel, sew on the pockets, and wrap the tab around the ring.
Finished Size and Construction
- Finished panel: 6.5 in x 26.25 in (16.5 cm x 66.7 cm), not counting the tab
- Hanging length: about 30 in (76.2 cm) including the ring
- Skill level: Easy-intermediate
- Terminology: US
- Yarn weight: Worsted (#4), cotton or cotton blend
- Hook: 5.0 mm (H-8)
- Number of pieces: 4 (1 panel and 3 pockets)
- Layout: 1 column of 3 pockets, stacked vertically on the panel
- Pocket size: 7.5 in (19.1 cm) wide when flattened x 3.5 in (8.9 cm) tall
- Panel size before border: 6 in x 26 in (15.2 cm x 66.0 cm), plus a 3.1 in (7.9 cm) tab
- Border depth: 0.25 in (0.6 cm) on each side
Materials
Use a smooth worsted cotton or cotton blend. Cotton holds its shape well, which keeps the pockets standing up and the bobbles round. Avoid stretchy acrylic, because the panel would lengthen under the weight of the rolls.
- Cream (Color A): 140 g, about 220 m, for the panel, the pocket bases, and the rims
- Terracotta (Color B): 80 g, about 130 m, for the pocket walls
Tools:
- 5.0 mm (H-8) crochet hook
- 1 unfinished wooden ring, 3 in (7.6 cm) across
- Tapestry needle
- 6 locking stitch markers
- Rust-proof pins, a measuring tape, a spray bottle, and a blocking mat
These quantities include a margin of about 20% for your gauge swatch and for differences in tension.
Abbreviations (US Terms)
- ch: chain
- sl st: slip stitch
- sc: single crochet
- sc2tog: single crochet 2 together
- BLO: back loop only
- rev sc: reverse single crochet (crab stitch)
- st(s): stitch(es)
- rnd(s): round(s)
- RS / WS: right side / wrong side
Bobble: *Yarn over, insert the hook in the stitch, yarn over and pull up a loop, yarn over and draw through 2 loops; repeat from * 4 more times in the same stitch (6 loops on the hook), yarn over and draw through all 6 loops. Do not chain to close. A bobble counts as 1 stitch.
Bobbles push out toward the side of the fabric facing away from you. That is why every bobble round in this pattern is worked with the WS facing, so the bobbles pop out on the RS.
Gauge and Checkpoints
Gauge: 16 sc and 18 rows = 4 in (10.2 cm) in sc worked in rows. That works out to 4 sts and 4.5 rows per inch.
Make one pocket before you start the panel. It’s a small project and will show your gauge in the round.
Checkpoints:
- After pocket Rnd 4: The oval base measures about 6 in x 2 in (15.2 cm x 5.1 cm).
- After pocket Rnd 18: The pocket measures 7.5 in (19.1 cm) across when flattened, and a standard roll fits inside with gentle stretch.
- Panel after Row 20: The panel is 6 in (15.2 cm) wide and about 4.4 in (11.2 cm) tall.
- Panel after Row 99: The straight section measures 22 in (55.9 cm).
If your work is too big, go down 0.5 mm in hook size. If it is too small, go up 0.5 mm. Get the width right first. If the width is right but the panel is too long or too short, add or remove straight rows until that section measures 22 in (55.9 cm).
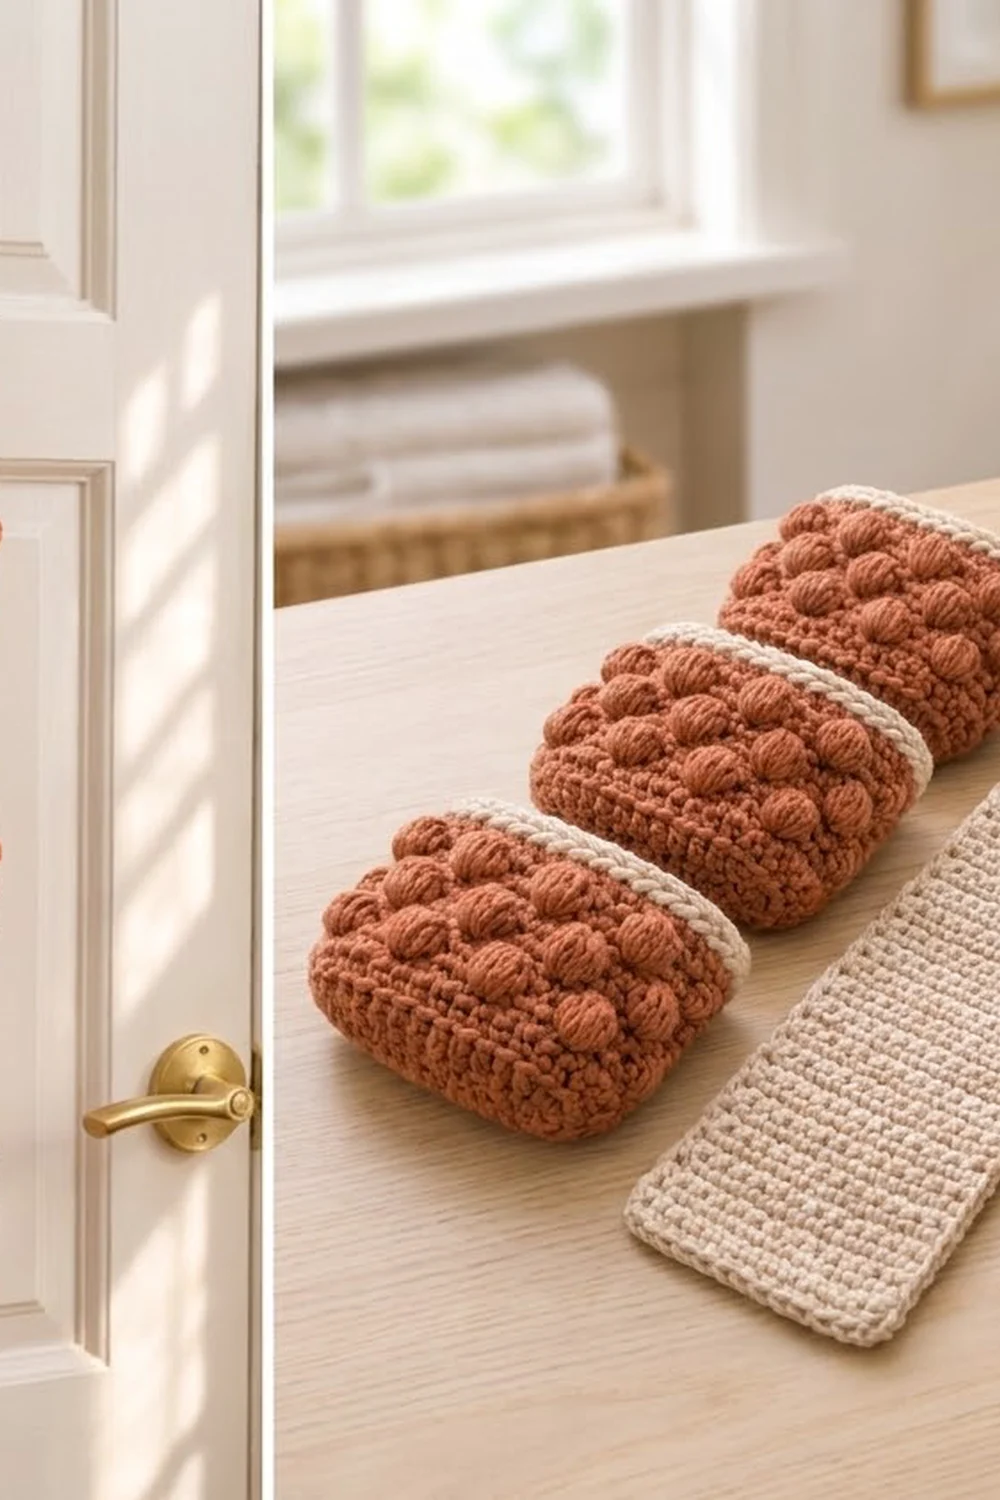
Pocket (Make 3)
Every round is joined with a sl st to the first st. The beginning ch 1 does not count as a stitch. The join sits at one narrow end of the oval, which becomes the side of the pocket, so it stays hidden.
Base (Color A, RS facing, do not turn):
Ch 17.
Rnd 1: Sc in 2nd ch from hook, sc in next 14 ch, 4 sc in last ch. Working along the opposite side of the foundation chain, sc in next 14 ch, 3 sc in last ch (the same ch as the first sc). Join. (36 sts)
Rnd 2: Ch 1, 2 sc in first st, sc in next 14 sts, 2 sc in each of next 4 sts, sc in next 14 sts, 2 sc in each of last 3 sts. Join. (44 sts)
Rnd 3: Ch 1, sc in first st, 2 sc in next st, sc in next 14 sts, [sc in next st, 2 sc in next st] 4 times, sc in next 14 sts, [sc in next st, 2 sc in next st] 3 times. Join. (52 sts)
Rnd 4: Ch 1, sc in next 2 sts, 2 sc in next st, sc in next 14 sts, [sc in next 2 sts, 2 sc in next st] 4 times, sc in next 14 sts, [sc in next 2 sts, 2 sc in next st] 3 times. Join. (60 sts)
Rnd 5 (turning round): Ch 1, sc in BLO of each st around. Join. (60 sts)
The unworked front loops form the cream line at the bottom of the pocket. When you make the final join of Rnd 5, change to Color B. Cut Color A.
Walls (Color B, turned rounds):
From here on, end every round with: join, ch 1, turn.
Rnd 6 (WS): Sc in each st around. (60 sts)
Rnd 7 (RS): Sc in each st around. (60 sts)
Rnd 8 (WS, Bobble Round A): [Bobble in next st, sc in next 5 sts] 10 times. (60 sts: 10 bobbles + 50 sc)
Rnd 9 (RS): Sc in each st around, working into the top of each bobble. (60 sts)
Rnd 10 (WS, Bobble Round B): [Sc in next 3 sts, bobble in next st, sc in next 2 sts] 10 times. (60 sts: 10 bobbles + 50 sc)
Rnd 11 (RS): Sc in each st around. (60 sts)
Rnd 12 (WS, Bobble Round A): Repeat Rnd 8. (60 sts)
Rnds 13 to 16: Sc in each st around. Rnds 13 and 15 are RS rounds and Rnds 14 and 16 are WS rounds. (60 sts)
When you make the final join of Rnd 16, change to Color A. Cut Color B.
Rnds 8, 10, and 12 are all WS rounds and all start at the side join, so they are worked in the same direction. Because of that, the bobbles in Round B sit exactly halfway between the bobbles in Round A. Each half of the pocket shows 5 bobbles per row.
Rim (Color A):
Rnd 17 (RS): Sc in each st around. Join and ch 1, but do not turn. (60 sts)
Rnd 18 (RS): Rev sc in each st around. Join. (60 sts) Fasten off and weave in the ends.
Pocket check: The pocket is 7.5 in (19.1 cm) wide when flattened and 3.5 in (8.9 cm) tall, and the rim is 15 in (38.1 cm) around.
Backing Panel (Make 1)
Use Color A. At the end of every row, ch 1 and turn. The ch 1 does not count as a stitch.
Row 1: Ch 25, sc in 2nd ch from hook and in each ch across. (24 sts)
Rows 2 to 99: Sc in each st across. (24 sts)
Checkpoint: 6 in x 22 in (15.2 cm x 55.9 cm).
Taper:
Row 100 (decrease row): Sc2tog, sc across to the last 2 sts, sc2tog. (22 sts)
Row 101: Sc in each st across. (22 sts)
Rows 102 to 117: Repeat Rows 100 and 101 eight more times. The stitch count drops by 2 on every even row: 20, 18, 16, 14, 12, 10, 8, 6. (6 sts after Row 117)
The taper is 18 rows, or 4 in (10.2 cm), tall. It narrows by 2.25 in (5.7 cm) on each side.
Tab:
Rows 118 to 131: Sc in each st across. (6 sts) Fasten off.
The tab is 14 rows, or 3.1 in (7.9 cm), tall and 1.5 in (3.8 cm) wide.
Panel check before the border: 6 in x 26 in (15.2 cm x 66.0 cm) up to the base of the tab, and 29.1 in (73.9 cm) including the tab.
Make All Pieces
- Panel: 1, in Color A only
- Pockets: 3, each with Rnds 1 to 5 and 17 to 18 in Color A and Rnds 6 to 16 in Color B
Layout, as seen from the front:
      ( ring )
        |tab|
       /     \      taper
      |       |     rows 86-99 plain
      |[ P3  ]|     base row 69, rim row 85
      |       |
      |[ P2  ]|     base row 37, rim row 53
      |       |
      |[ P1  ]|     base row 5,  rim row 21
      |_______|     bottom edge
Joining
Work the panel border first (see Border below). Sewing is easier on a finished edge. The pockets are not included in the border stitch count.
Mark the rows. Lay the panel RS up with Row 1 at the bottom. Place markers at the row ends of Rows 5, 21, 37, 53, 69, and 85. Each base row is 32 rows, or about 7.1 in (18.0 cm), above the one below it.
Find the back of each pocket. Flatten the pocket so the side join sits at one fold. The 30 sts on one side of the fold are the back and the other 30 are the front. On the back half, skip 3 sts at each end and mark the 24 sts in the middle, on both Rnd 5 and Rnd 17.
Stitch-to-stitch logic. The panel has 24 sts per row and the middle of the pocket back has 24 sts, so you sew them 1 to 1. With a length of Color A, whipstitch the 24 marked sts of Rnd 5 to the 24 sts of the base row (Row 5 for Pocket 1). Then whipstitch the 24 marked sts of Rnd 17 to the rim row (Row 21). The 3 sts at each end of the pocket back curve around the panel edges, which keeps the pocket’s oval shape.
Tension. Pull each whipstitch just snug. If you pull too hard, the panel puckers. If you sew too loosely, the pocket sags when it’s filled.
Repeat for Pocket 2 (Rows 37 and 53) and Pocket 3 (Rows 69 and 85).
Ring. Fold the tab over the wooden ring toward the back. Sew its top edge across Row 117 with 6 whipstitches, 1 per st.
Size checkpoint: The panel is still 6.5 in (16.5 cm) wide. The top rim sits 18.9 in (48.0 cm) above the bottom edge of the panel, and 3.1 in (7.9 cm) of plain panel shows below the taper.
Border
Border gauge: Use the same gauge as the panel, 4 sc per inch. The rows run 4.5 per inch, so along the row-end edges you work 8 sc for every 9 rows.
With Color A and the RS facing, join at the bottom-right corner.
Rnd 1:
- Bottom edge: 3 sc in the first ch, sc in next 22 ch, 3 sc in the last ch. (28 sc: 22 + 3 + 3)
- Straight side (Rows 1 to 99): [Sc in each of next 8 row ends, skip 1 row end] 11 times. (88 sc)
- Taper side (Rows 100 to 117): Sc in each row end. (18 sc)
- Tab side (Rows 118 to 131): Sc in each row end. (14 sc)
- Tab top: 3 sc in the first st, sc in next 4 sts, 3 sc in the last st. (10 sc: 4 + 3 + 3)
- Other side: Work the tab side, taper side, and straight side the same way. (14 sc, 18 sc, 88 sc)
Join. (278 sts: 28 + 88 + 18 + 14 + 10 + 14 + 18 + 88)
Rnd 2: Ch 1, sl st loosely in each st around. Join. (278 sl sts) Fasten off.
Why the math works:
- The straight section has 99 rows. Skipping 1 row end in every 9 gives 11 x 8 = 88 sc, and 88 sc at 4 per inch is 22 in (55.9 cm). That matches the length of the rows, so the edge lies flat.
- The bottom edge uses each of the 24 foundation stitches once: 22 single stitches plus 2 corner stitches worked 3 times each. The corners are counted only on the bottom edge, not again on the sides.
- The taper is on a slant, so its edge is longer than its height. Working 1 sc in every row end gives it the extra length it needs.
- The border adds 1 sc on each side, so the width becomes 24 + 2 = 26 sts. At 4 per inch, that is 6.5 in (16.5 cm).
Final Blocking
- Before you sew on the pockets, mist the bordered panel until it is damp.
- Pin it flat to 6.5 in x 26.25 in (16.5 cm x 66.7 cm), keeping the long edges straight.
- Put a toilet roll wrapped in a plastic bag inside each pocket, then mist the pockets lightly.
- Use your fingers to round any flattened bobbles.
- Let everything dry completely, which takes 12 to 24 hours.
- Sew on the pockets and attach the ring as described in Joining.
Final Quality-Control Checklist
- [ ] The panel is 6.5 in (16.5 cm) wide along its whole length.
- [ ] The border has 278 sts, and the long edges neither ripple nor pull in.
- [ ] Each pocket has 60 sts and 30 bobbles in three staggered rows.
- [ ] Every bobble pops out on the RS.
- [ ] The cream line shows at the base of every pocket.
- [ ] The rev sc rims are even.
- [ ] The pockets are evenly spaced and centered.
- [ ] The tab is sewn securely and the ring hangs straight.
- [ ] All ends are woven in on the WS.
Troubleshooting
- The bobbles sink inward: They were worked with the RS facing. Make sure you turn after every wall round so that each bobble round is a WS round.
- The bobbles are not staggered: Round B must start with sc in next 3 sts, not with a bobble.
- The pocket is too tight for a roll: Your gauge is too tight. Make the pocket again with a hook 0.5 mm larger.
- The panel edges ripple: You worked too many border stitches. Skip 1 row end in every 9.
- The panel stretches when the pockets are full: Use cotton yarn, sew both the base seam and the rim seam of each pocket, and block the panel flat.
- The ring tilts: The tab was sewn off-center. Remove the stitching and sew it again, 1 st to 1 st.
Care
Spot clean when you can. If the holder needs a full wash, hand wash it in cool water, press out the water in a towel, and dry it flat with a roll in each pocket so they keep their shape.
Final Notes
The measurements in this pattern build on each other in this order:
- Gauge: 4 sts and 4.5 rows per inch
- Panel width: 24 sts, or 6 in (15.2 cm)
- Straight section: 99 rows, or 22 in (55.9 cm)
- Taper: 18 rows, or 4 in (10.2 cm)
- Border: 278 sts, which brings the panel to 6.5 in x 26.25 in (16.5 cm x 66.7 cm)
- Pockets: 60 sts, or 15 in (38.1 cm) around, each sewn on 1 to 1 across 24 sts
If you match each checkpoint, the holder will hang straight with three neat pockets.
Happy crocheting!