

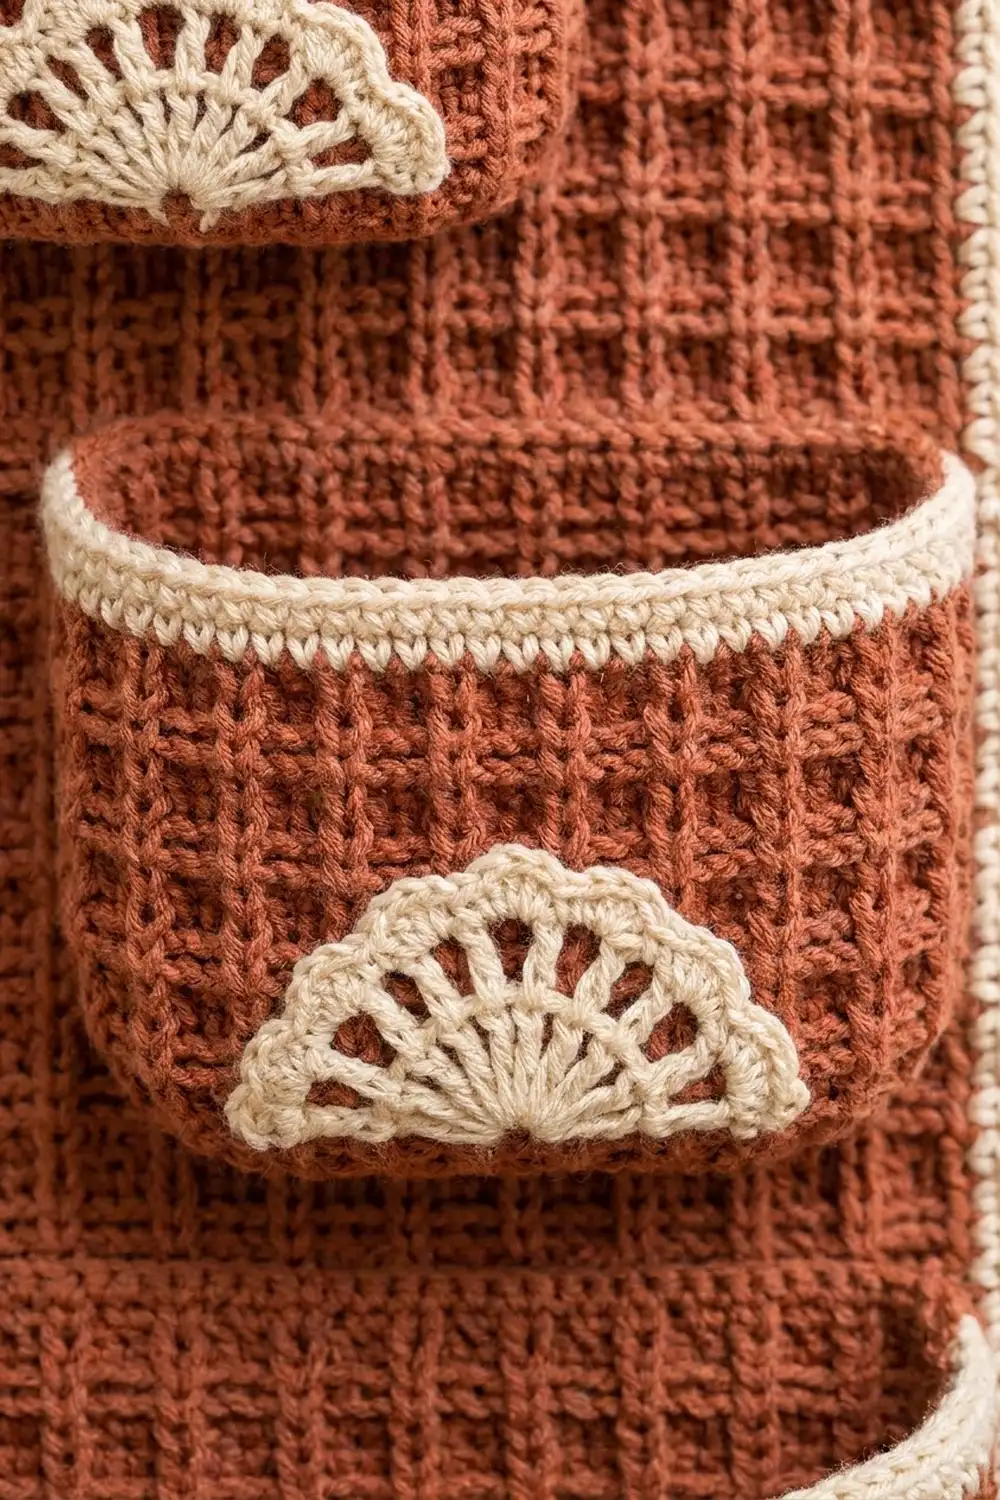
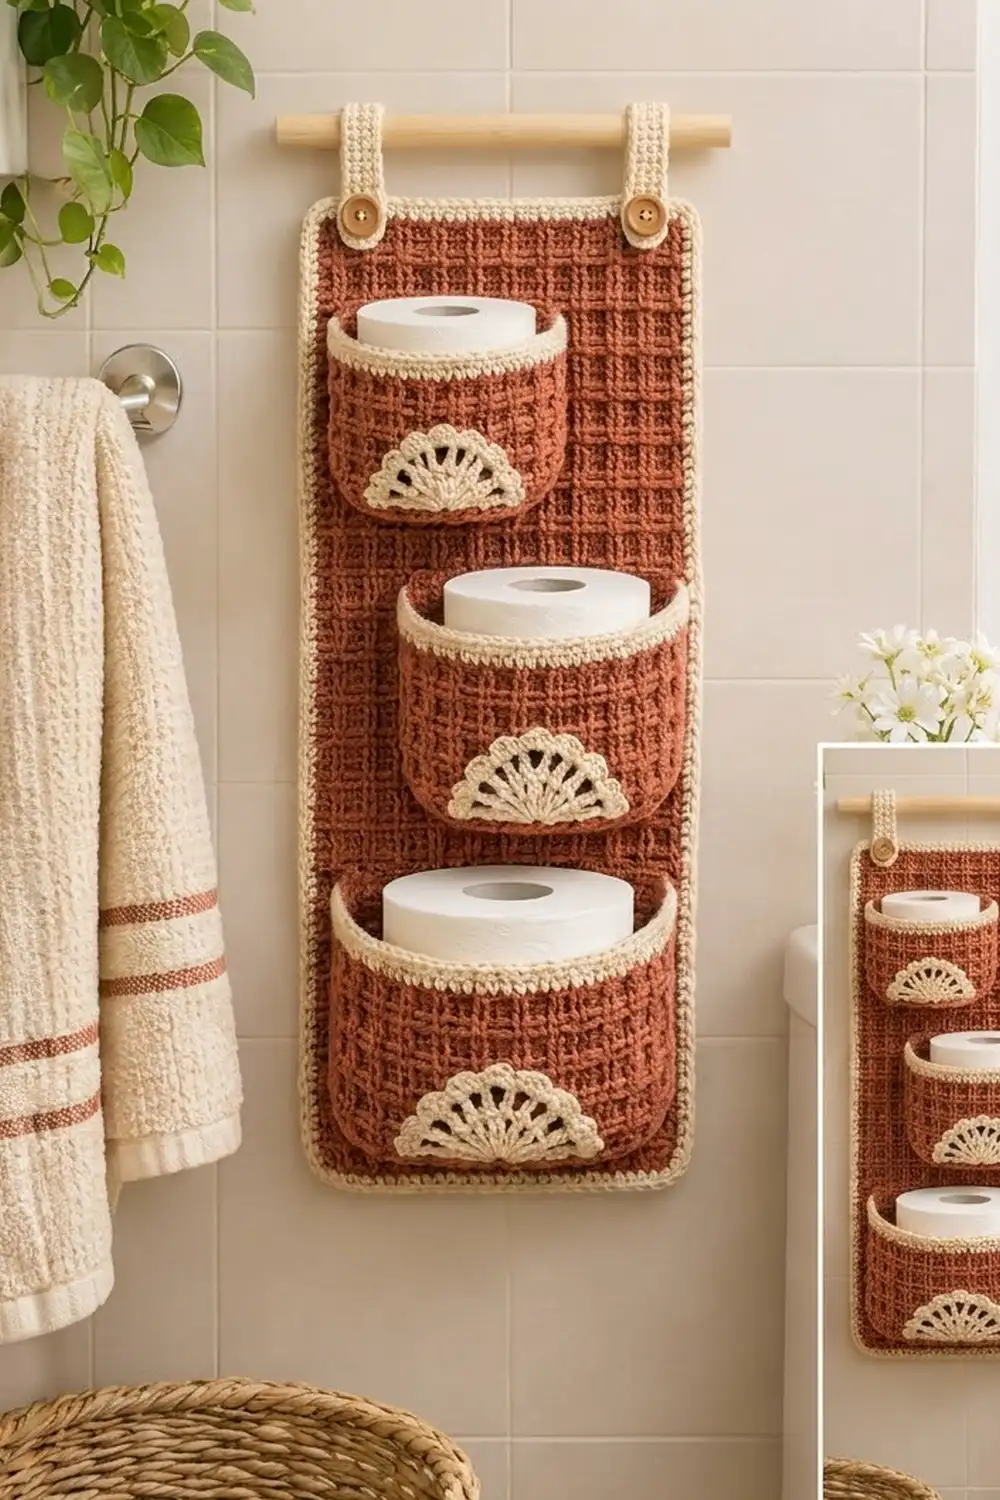
This hanging wall organizer is made from a tall terracotta panel with three pockets stacked on the front. The pockets get bigger from top to bottom. The whole piece is worked in a deep waffle stitch, which gives a grid texture and a fabric firm enough to hold toilet paper rolls, washcloths, or small bathroom items.
Cream yarn gives the design its contrast. A twisted cream edge frames the back panel, a matching rim finishes each pocket, and a small cream fan sits at the bottom center of every pocket front. Two cream tabs with wooden buttons hang the panel from a plain wooden dowel.
The pattern uses US crochet terms. The finished panel measures 11.1 in wide x 25 in tall (28.2 x 63.5 cm) including the border. The pockets are 4.75 in (12.1 cm) deep, which is room for a standard roll.
Construction is simple. You work the back panel flat in rows. Each pocket starts with a flat single crochet base, and the waffle walls are worked up from it in rounds. The fans and tabs are small flat pieces. You sew the fans to the pockets and the pockets to the panel. Then you add the border, attach the tabs, and slide in the dowel.
Finished Size and Construction
- Finished panel size: 11.1 x 25 in (28.2 x 63.5 cm)
- Skill level: Intermediate (front post stitches, working in rounds, sewing)
- Terminology: US crochet terms
- Yarn weight: Worsted (#4), cotton or cotton blend
- Hook: 5.0 mm (H-8)
- Number of pieces: 9 (1 back panel, 3 pockets, 3 fans, 2 tabs), plus a dowel
- Layout: 3 pockets centered in one vertical column on the panel, smallest at the top
- Panel size before border: 10.1 x 24 in (25.7 x 61.0 cm), 38 sts x 54 rows
- Pocket sizes (base width x depth x height): small 5.6 x 4.75 x 4.5 in (14.2 x 12.1 x 11.4 cm); medium 7.2 x 4.75 x 4.9 in (18.3 x 12.1 x 12.4 cm); large 8.8 x 4.75 x 5.4 in (22.4 x 12.1 x 13.7 cm)
- Border depth: 0.5 in (1.3 cm), 2 rounds
Materials
Cotton or a cotton blend is the best choice for a bathroom. It holds its shape, does not get fuzzy, and the waffle texture stands out clearly. Smooth acrylic works too, but the pockets will be a bit softer.
- Terracotta (main color): 450 g, about 765 m
- Cream (contrast): 100 g, about 170 m
These amounts assume worsted cotton at about 170 m per 100 g and include a margin of roughly 10-15%. Waffle stitch uses much more yarn than plain double crochet, so don’t cut the margin.
Tools:
- 5.0 mm (H-8) crochet hook
- Tapestry needle
- Locking stitch markers
- Straight pins or clips
- 2 wooden buttons, 7/8 in (2.2 cm)
- Sewing thread and needle for the buttons
- Wooden dowel, 14 in (35.6 cm) long, 3/8 to 1/2 in (1.0 to 1.3 cm) thick
- Measuring tape, blocking mat, spray bottle
Abbreviations (US Terms)
- ch – chain
- sl st – slip stitch
- sc – single crochet
- hdc – half double crochet
- dc – double crochet
- tr – treble crochet
- FPdc – front post double crochet: yarn over, insert the hook from front to back to front around the post of the stitch, then complete as a dc
- BLO – back loop only
- st(s) – stitch(es)
- sp – space
- tch – turning chain
- rev sc – reverse single crochet (crab stitch): working left to right (right-handed), insert the hook into the next stitch to the right, pull up a loop, yarn over, and pull through both loops
Waffle stitch (special stitch pattern): Each FPdc sits over a pair of dc, and each pair of FPdc sits over a single dc. This makes raised squares with sunken centers. Flat pieces need a multiple of 3 + 2 sts. Pieces worked in the round need a multiple of 3.
Gauge and Checkpoints
Waffle gauge: 15 sts x 9 rows = 4 in (10.2 cm)
Single crochet gauge: 15 sc x 16 rows = 4 in (10.2 cm)
Make a waffle swatch before you start. Ch 25, then work Row 1 as given for the panel (23 dc). Repeat Rows 2-3 until you have 12 rows. Measure 15 sts and 9 rows in the center of the swatch.
If your swatch is too big, go down half a hook size. If it is too small, go up half a size. Waffle stitch pulls in widthwise, so measure without stretching.
Make the small pocket first as a test. It’s quick and checks both gauges at once. The base should measure 5.6 x 4.75 in (14.2 x 12.1 cm) before you start the walls.
Checkpoints:
- Panel after Row 9: 10.1 in (25.7 cm) wide, 4 in (10.2 cm) tall
- Panel after Row 27: 12 in (30.5 cm) tall
- Panel after Row 54: 24 in (61.0 cm) tall
- Each pocket base: width as listed above, 4.75 in (12.1 cm) deep
- Each pocket wall before the trim: small 4.0 in (10.2 cm), medium 4.4 in (11.2 cm), large 4.9 in (12.4 cm)
Back Panel
Use terracotta.
Foundation: Ch 40.
Row 1 (RS): Dc in 3rd ch from hook and in each ch across. Turn. (38 dc; the skipped 2 ch do not count.)
Row 2: Ch 3 (counts as dc), FPdc around next st, dc in next 2 sts; rep from * 11 more times, dc in last st. Turn. (38 sts: 2 edge dc + 12 FPdc + 24 dc)*
Row 3: Ch 3 (counts as dc), FPdc around next 2 sts, dc in next st; rep from * 11 more times, dc in top of tch. Turn. (38 sts: 2 edge dc + 24 FPdc + 12 dc)*
On Row 3, every FPdc lands on a dc from Row 2 and every dc lands on an FPdc. That’s what makes the grid.
Rows 4-54: Repeat Rows 2-3, ending with a Row 2 repeat (Row 54). For Row 2 repeats, work the last dc in the top of the tch. Fasten off. (38 sts per row, 54 rows)
Checkpoint: 10.1 x 24 in (25.7 x 61.0 cm).
Pockets
All three pockets are made the same way. Only the counts change.
| Small | Medium | Large | |
|---|---|---|---|
| Foundation ch | 22 | 28 | 34 |
| Base sts (N) | 21 | 27 | 33 |
| Base rows | 19 | 19 | 19 |
| Edge round total | 84 | 96 | 108 |
| Waffle repeats per round | 28 | 32 | 36 |
| Wall rounds | 9 | 10 | 11 |
Base
Use terracotta.
Row 1: Ch N + 1. Sc in 2nd ch from hook and in each ch across. Turn. (N sc)
Rows 2-19: Ch 1, sc in each st across. Turn. (N sc)
Checkpoint: small 5.6 in, medium 7.2 in, large 8.8 in wide (14.2 / 18.3 / 22.4 cm). All three are 4.75 in (12.1 cm) deep.
Edge Round: Do not turn. Ch 1 and work around the base:
- Last row: 2 sc in first st, sc in next N – 2 sts, 2 sc in last st (N + 2 sc)
- Side: 1 sc in each row end (19 sc)
- Foundation: 2 sc in first ch, sc in next N – 2 ch, 2 sc in last ch (N + 2 sc)
- Other side: 1 sc in each row end (19 sc)
Join with sl st to first sc.
Totals: small (23 + 19 + 23 + 19) = 84; medium (29 + 19 + 29 + 19) = 96; large (35 + 19 + 35 + 19) = 108. Each total is a multiple of 3, so the waffle repeat fits without adding stitches. The foundation side is the back of the pocket and the last-row side is the front.
Walls
Wall Rnd 1: Ch 2 (does not count), dc in BLO of each st around. Join with sl st to first dc. (84 / 96 / 108) The unworked front loops form a crisp fold, so the walls stand straight up from the base.
Wall Rnd 2 (Round A): Ch 2 (does not count), FPdc around next st, dc in next 2 sts; rep from * around. Join. (84 / 96 / 108, including 28 / 32 / 36 FPdc)*
Wall Rnd 3 (Round B): Ch 2 (does not count), dc in next st, FPdc around next 2 sts; rep from * around. Join. (84 / 96 / 108)*
Keep alternating, with Round A on even rounds and Round B on odd rounds:
- Small: work through Rnd 9 (a Round B). Wall height is 4.0 in (10.2 cm).
- Medium: work through Rnd 10 (a Round A). Wall height is 4.4 in (11.2 cm).
- Large: work through Rnd 11 (a Round B). Wall height is 4.9 in (12.4 cm).
Fasten off terracotta.
Cream Rim
Trim Rnd 1: Join cream in any st on the back wall. Ch 1, sc in each st around, join. (84 / 96 / 108 = all sts worked 1 per st + 0 added)
Trim Rnd 2: Ch 1, rev sc in each st around, join. (84 / 96 / 108 = all sts worked 1 per st + 0 added) Fasten off.
The rim adds about 0.5 in (1.3 cm). That makes the finished heights 4.5 / 4.9 / 5.4 in (11.4 / 12.4 / 13.7 cm).
Fan Appliqué (make 3)
Use cream.
Row 1 (RS): Make a magic ring. Ch 3 (counts as dc), 8 dc in ring. Pull the ring closed so the stitches form a half circle. Turn. (9 dc)
Row 2: Ch 6 (counts as tr + ch 2), tr in next st, ch 2; rep from * 6 more times, tr in top of tch. Turn. (9 tr spokes, 8 ch-2 sps)*
Row 3: Ch 1, sc in first tr, (hdc, dc, hdc) in next ch-2 sp, sl st in next tr; rep from * 7 more times, working the last sl st in the 4th ch of the tch. Fasten off. (8 shells)*
Checkpoint: about 3 in (7.6 cm) across the straight edge and 1.5 in (3.8 cm) tall. Leave a long tail for sewing.
Hanging Tabs (make 2)
Use cream.
Row 1: Ch 8. Sc in 2nd ch from hook and in each ch across. Turn. (7 sc)
Rows 2-20: Ch 1, sc in each st across. Turn. (7 sc)
Row 21 (buttonhole): Ch 1, sc in next 2 sts, ch 3, skip 3 sts, sc in last 2 sts. Turn. (4 sc + ch-3 sp)
Row 22: Ch 1, sc in next 2 sts, 3 sc in ch-3 sp, sc in last 2 sts. Turn. (7 sc)
Rows 23-24: Ch 1, sc in each st across. Turn. Fasten off after Row 24. (7 sc)
Checkpoint: 1.9 x 6 in (4.8 x 15.2 cm).
Make All Pieces
- Terracotta: 1 back panel, 3 pocket bodies (1 small, 1 medium, 1 large)
- Cream: 3 pocket rims (worked onto the pockets), 3 fans, 2 tabs, and later the panel border
Layout (front view):
   [tab]                    [tab]
+--------------------------------+
|                                |
|         [ SMALL POCKET ]       |
|                                |
|       [  MEDIUM POCKET  ]      |
|                                |
|     [    LARGE POCKET     ]    |
|                                |
+--------------------------------+
Joining
Fans to pockets: Pin each fan to a pocket’s front wall with the straight edge right on the base fold and the shells pointing up. Center it between the front corners. Whipstitch around the outer edge and along the straight edge with the cream tail. Put a piece of cardboard inside the pocket so you don’t sew through to the back wall.
Pockets to panel: Measure from the bottom edge of the panel (Row 1, before the border) to each pocket’s base fold:
- Large: 1 in (2.5 cm)
- Medium: 8.4 in (21.3 cm)
- Small: 15.3 in (38.9 cm)
This leaves 2 in (5.1 cm) between the top of each rim and the bottom of the pocket above it, and 4.2 in (10.7 cm) above the small pocket.
Stitch-to-stitch logic: The panel and the pocket bases have the same 15 sts per 4 in gauge, so each stitch on a pocket’s back edge covers one panel stitch. The large pocket’s back edge (35 sc) covers 35 of the panel’s 38 sts. Center it so about 1.5 sts (0.4 in / 1.0 cm) are left on each side. The medium (29) and small (23) pockets leave 4.5 and 7.5 sts on each side.
Using terracotta, whipstitch along the back base fold, up both back corners, and across the top of the back wall through the cream rim. Catch one strand of the panel for each pocket stitch. Keep the tension snug but not tight, so the panel doesn’t pucker behind the pocket.
Size checkpoint: The panel should still measure 10.1 x 24 in (25.7 x 61.0 cm) and lie flat.
Border
Border gauge: 15 sc = 4 in (10.2 cm), the same as the panel width.
Rnd 1: With RS facing, join cream in the first st of Row 54 (top right corner). Ch 1.
- Top: 3 sc in first st, sc in next 36 sts, 3 sc in last st. (42 sc = 38 worked 1 per st + 4 extra at corners)
- Left side: work 5 sc over every 3 rows (2 sc, 2 sc, 1 sc) down the row ends. (54 rows ÷ 3 x 5 = 90 sc)
- Bottom: 3 sc in first foundation ch, sc in next 36 ch, 3 sc in last ch. (42 sc)
- Right side: 90 sc, worked the same way.
Join. (264 sc = 42 + 90 + 42 + 90) The corner stitches are counted in the top and bottom totals, not in the side totals.
Rnd 2: Ch 1, rev sc in each st around. Join and fasten off. (264 = 264 worked 1 per st + 0 added)
Why the math works: At 15 sc per 4 in, 90 sc is exactly 24 in, the height of the 54 panel rows. Across the top, 38 sts at the same gauge is the 10.1 in width. The border uses the panel’s own gauge, so the edges stay flat without ruffling or cupping. The two rounds add 0.5 in (1.3 cm) on every side, for a finished panel of 11.1 x 25 in (28.2 x 63.5 cm).
Attaching the tabs: Place each tab 1.5 in (3.8 cm) in from a side edge. Sew the first 1 in (2.5 cm) of the Row 1 end firmly to the back of the top border. Sew a button to the front of the top border directly below each tab. Loop the tab over the dowel and push the button through the buttonhole.
Final Blocking
- Unbutton the tabs and remove the dowel.
- Lay the organizer face up on a blocking mat.
- Pin the panel to 11.1 x 25 in (28.2 x 63.5 cm), keeping the edges straight.
- Stuff each pocket lightly with a folded towel so it holds its D shape.
- Spray until damp. Press the fans flat with your fingers.
- Let it dry completely, at least 24 hours.
- Unpin, put the dowel back in, and button the tabs.
Final Quality-Control Checklist
- Panel is 38 sts x 54 rows and measures 10.1 x 24 in (25.7 x 61.0 cm) before the border.
- Border Rnd 1 has 264 sc (42 / 90 / 42 / 90).
- Pocket edge rounds have 84 / 96 / 108 sts.
- Waffle squares line up in straight columns.
- Fans sit centered on the base folds.
- Pockets are centered and level, with 2 in (5.1 cm) gaps.
- Both tabs are the same length and the buttons are sewn on firmly.
Troubleshooting
- Waffle grid looks diagonal: Rounds A and B got swapped. Each FPdc must land on a dc.
- Pocket walls flare: Use a hook half a size smaller for the walls only.
- Pocket walls lean in: Check that Wall Rnd 1 was worked in BLO.
- Panel edges wave: The sc count along the row ends is off. Rework it at 5 sc per 3 rows.
- Pocket sags away from the panel: Sew a second line of stitches along the back base fold.
- Buttonhole too tight: Switch to a 3/4 in (1.9 cm) button.
Care
Hand wash in cool water and lay flat to dry, reshaping the pockets while damp. Don’t hang the organizer to dry with heavy items in the pockets.
Final Notes
Everything here depends on one gauge: 15 sts per 4 in. At that gauge, the 38-st panel is 10.1 in (25.7 cm) wide and the 54 rows are 24 in (61.0 cm) tall. The 90-sc sides and 42-sc top and bottom keep the border flat. Pocket bases of 21, 27, and 33 sts give edge rounds of 84, 96, and 108, which all divide evenly by 3. Check each stage against these numbers and the finished organizer will hang straight and keep its shape.
Happy crocheting!