
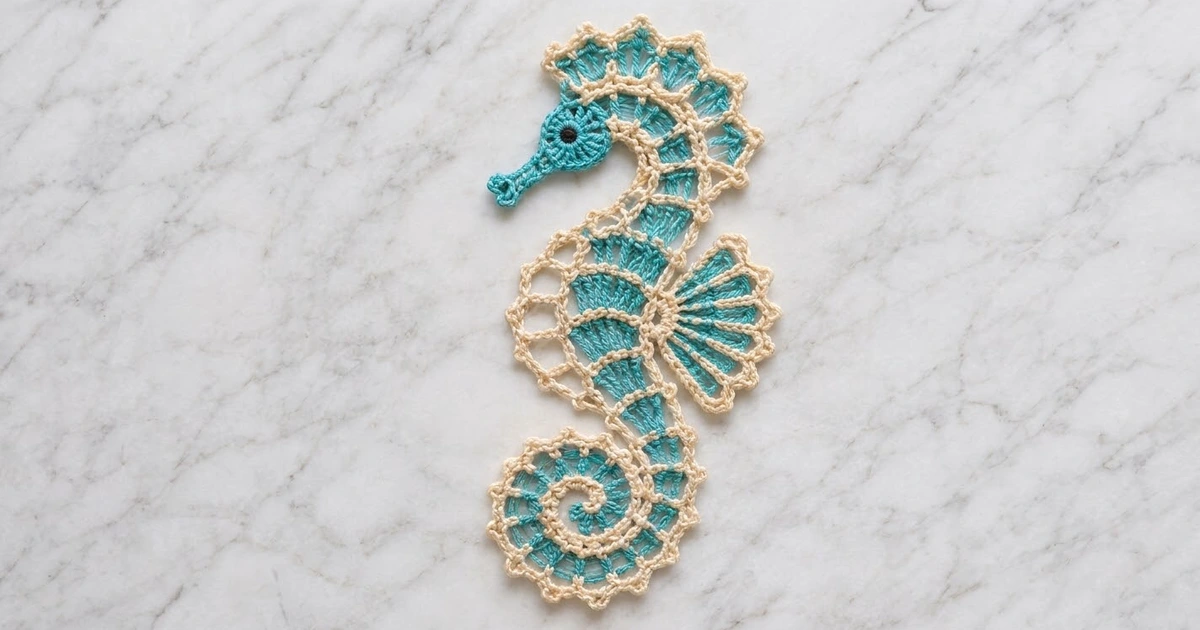
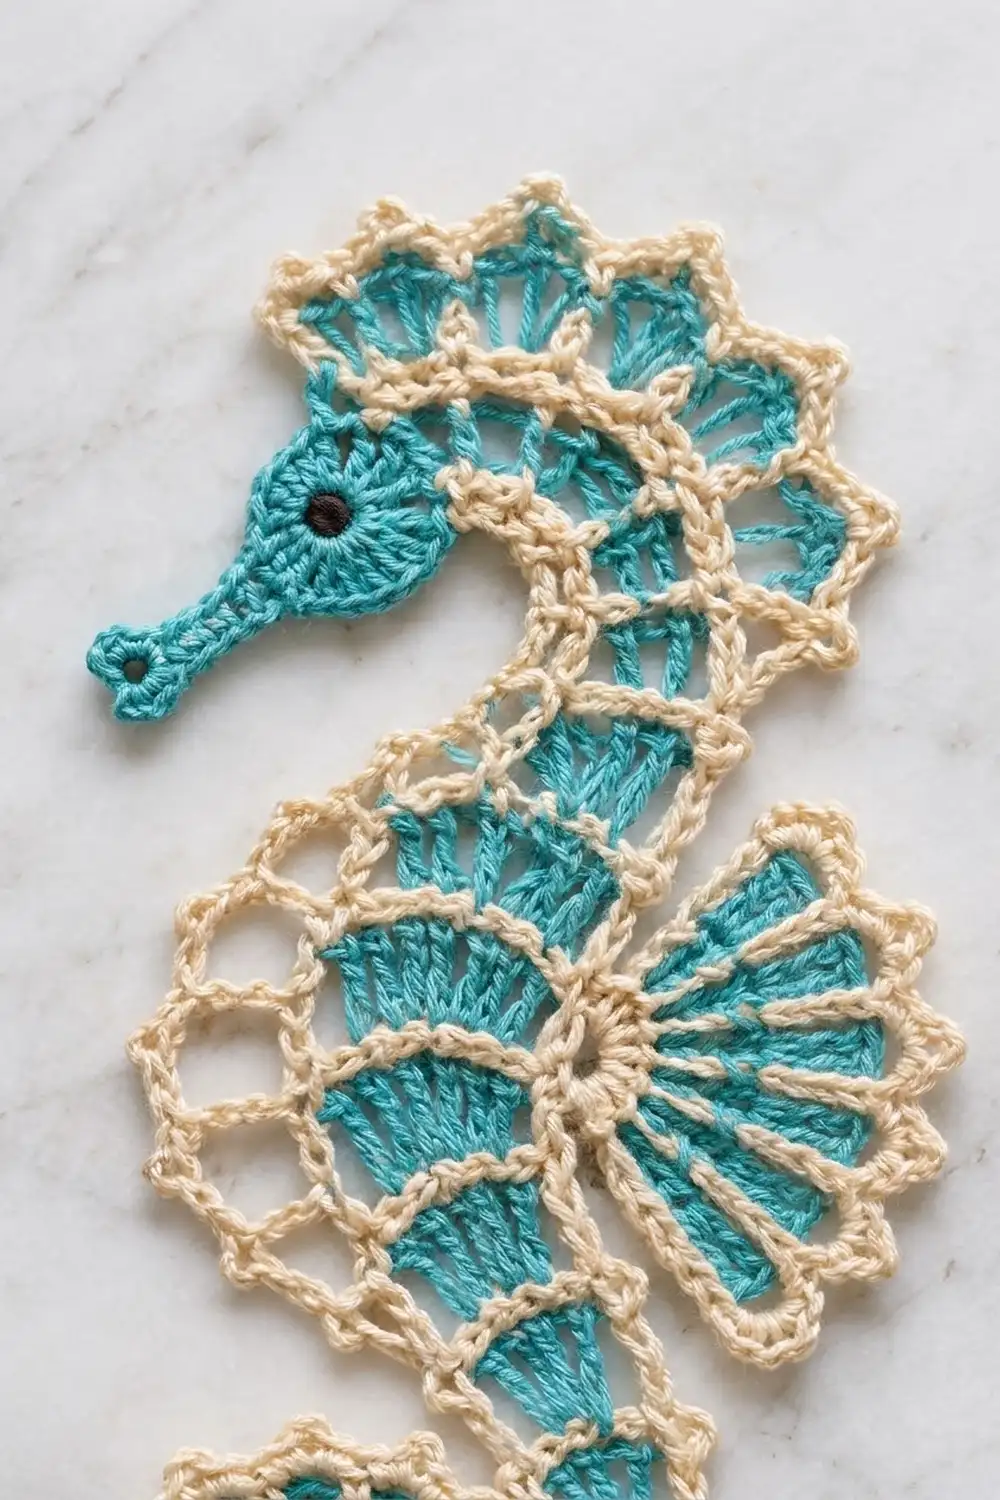
The Tidewater Seahorse is a lacy, one-piece motif with a curled tail, a ribbed body, a fan-shaped fin and a crest of scalloped shells. It looks like Irish-style lace, but it is made with ordinary rows and simple edging rounds.
The colors are turquoise-teal for the solid fill and cream for every outline, bar, loop and picot. A small black bead or French knot makes the eye. The contrast keeps the shape clear even from a distance.
This pattern uses US crochet terms. The finished motif measures about 9 in (22.9 cm) tall and 5.5 in (14.0 cm) wide, including the fin.
Here is the construction. You crochet one teal strip in rows from the tail tip to the top of the head. Taller stitches on one edge make the strip curl into the tail and bend at the neck. Next you add a teal snout, then cream surface slip-stitch bars and a three-round cream outline. Last, you work a teal-and-cream fin straight onto the body and add the eye.
Finished Size and Construction
- Finished size: about 9 in (22.9 cm) tall × 5.5 in (14.0 cm) wide
- Skill level: Intermediate
- Terminology: US
- Yarn weight: Super fine (#1), fingering-weight mercerized cotton
- Hook: 2.5 mm
- Number of pieces: 1 (the fin is worked onto the body)
- Layout: single standalone motif
- Piece size: 9 in × 5.5 in (22.9 cm × 14.0 cm)
- Size before border: about 8 in × 3.5 in (20.3 cm × 8.9 cm), without the fin
- Border depth: about 0.5 in (1.3 cm) all around
Materials
Yarn: Use a smooth, mercerized fingering-weight cotton. It shows stitch definition clearly and blocks crisply. Avoid fuzzy or very stretchy yarns, because the curl depends on firm stitches.
- Teal (Color A): 10 g, about 34 m
- Cream (Color B): 12 g, about 41 m
- Black: a 20 in (50.8 cm) scrap, or one 6 mm black bead
These quantities include a margin of about 20% for swatching and tails.
Tools:
– 2.5 mm crochet hook
– Tapestry needle
– 2 locking stitch markers
– Rustproof pins and a blocking board
– Spray bottle
– Small scissors
Abbreviations (US Terms)
- ch – chain
- sl st – slip stitch
- sc – single crochet
- hdc – half double crochet
- dc – double crochet
- tr – treble crochet
- sc2tog – single crochet 2 together
- st(s) – stitch(es)
- sp – space
- RS – right side
Special stitches:
– Surface slip stitch (surface sl st): Hold the yarn under the work. Insert the hook from front to back between stitches, pull up a loop, and draw it through the loop on the hook. Repeating this makes a raised chain-like line.
– Picot: Ch 3, then sl st in the 3rd ch from the hook.
Gauge and Checkpoints
Gauge: 24 dc and 10 rows = 4 in (10.2 cm) in teal. Each dc row is about 0.4 in (1.0 cm) tall.
Make one complete motif before you plan any more. The curl is very sensitive to tension, so the first motif is your real gauge test.
Checkpoints:
– After Row 13: the tail coils on its own into a spiral about 2.5 in (6.4 cm) across, unblocked.
– After Row 21: the straight body is about 1.7 in (4.3 cm) wide, and Rows 14–21 measure about 3.2 in (8.1 cm) long.
– After Row 30: the strip stands about 8 in (20.3 cm) tall with the tail curled.
– After the border: about 9 in (22.9 cm) tall.
If your motif is too big, go down 0.25 mm in hook size. If it is too small, go up 0.25 mm. If the tail does not curl, your tall stitches are too short: pull up a taller loop on every tr.
Body Strip (Teal)
Place a marker on the edge where Row 1 begins. This is the front (belly) edge, which is the inner edge of the tail curl. The opposite edge is the back edge. Turn at the end of every row.
Row 1: Ch 4. Sc in the 2nd ch from the hook, hdc in the next ch, tr in the last ch. Turn. (3 sts)
Wedge rows: Short stitches on the front edge and tall stitches on the back edge make the strip curl.
– Even rows (back to front), increase: Ch 4 (counts as tr), tr in the first st, dc in each st to the last 2 sts, hdc in the next st, sc in the last st.
– Odd rows (front to back): Ch 1, sc in the first st, hdc in the next st, dc in each st to the last st, tr in the last st.
Rows 2–13: Alternate the even and odd wedge rows.
– Row 2: 4 sts
– Row 3: 4 sts
– Row 4: 5 sts
– Row 5: 5 sts
– Row 6: 6 sts
– Row 7: 6 sts
– Row 8: 7 sts
– Row 9: 7 sts
– Row 10: 8 sts
– Row 11: 8 sts
– Row 12: 9 sts
– Row 13: 9 sts
The tail is now a coil.
Row 14: Ch 3 (counts as dc), dc in the first st, dc in each st across. Turn. (10 sts)
Rows 15–21: Ch 3 (counts as dc), dc in each st across. Turn. (10 sts each row)
Neck rows: These rows bend the neck forward and narrow it.
Row 22 (back to front): Ch 4 (counts as tr), dc in the next 6 sts, hdc in the next st, sc2tog. Turn. (9 sts)
Row 23: Ch 1, sc2tog, hdc in the next st, dc in the next 5 sts, tr in the last st. Turn. (8 sts)
Row 24: Ch 4 (counts as tr), dc in the next 4 sts, hdc in the next st, sc2tog. Turn. (7 sts)
Row 25: Ch 1, sc in the first st, hdc in the next st, dc in the next 4 sts, tr in the last st. Turn. (7 sts)
Row 26: Ch 4 (counts as tr), dc in the next 4 sts, hdc in the next st, sc in the last st. Turn. (7 sts)
Head rows:
Row 27: Ch 1, sc in the first st, hdc in the next st, dc in the next 4 sts, 2 tr in the last st. Turn. (8 sts)
Rows 28–29: Ch 3 (counts as dc), dc in each st across. Turn. (8 sts each row)
Row 30: Ch 1, sc2tog, sc in the next 4 sts, sc2tog. Do not turn. (6 sts) You are now at the front edge.
Snout:
1. Ch 12, then sl st in the 4th ch from the hook to make the tip ring.
2. Hdc in each of the next 8 ch.
3. Sl st into the front row-end of Row 28 to anchor the snout.
4. Turn. Sc in each of the 8 hdc, then sl st into the tip ring.
5. Fasten off and weave in the ends.
(Snout: 8 hdc + 8 sc, plus the ring)
Cream Bars (Surface Slip Stitch)
Work these bars on the RS with cream, in one continuous zigzag.
- Join cream at the back edge on the top of Row 2.
- Surface sl st along the top of Row 2 to the front edge, with 1 surface sl st per stitch.
- Surface sl st up the front edge over the row-ends of Rows 3–4.
- Work back along the top of Row 4.
- Keep going the same way along the tops of every even row through Row 28. That makes 14 bars.
- Fasten off.
The edge travel lines will be covered by the outline. The bars divide the teal into 2-row bands, which gives the ribbed look.
Border (Cream Outline)
Border gauge: Work 1 sc per sc-height row-end, 2 sc per dc-height row-end, and 3 sc per tr-height row-end.
Round 1: With the RS facing, join cream in the first st of Row 30 at the back corner. Sc around the whole strip as follows.
- Back edge, Rows 30 to 1: 78 sc
- Row 30: 1
- Rows 29–28: 2 each
- Row 27: 3
- Rows 26–22: 3 each (15)
- Rows 21–14: 2 each (16)
- Rows 13–1: 3 each (39)
- Bottom (Row 1 foundation ch): 3 sc
- Front edge, Rows 1 to 28: 37 sc
- Rows 1–13: 1 each (13)
- Rows 14–21: 2 each (16)
- Rows 22–27: 1 each (6)
- Row 28: 2
- Snout: 22 sc (8 along the sc side, 6 inside the tip ring, 8 along the hdc side)
- Top of Row 30: 6 sc
Join with a sl st to the first sc. (146 sc)
Round 2: Ch 1, sc in the first sc, ch 3, skip 1 sc, sc in the next sc. Repeat from * around, ending with ch 3, skip the last sc, and join to the first sc. (73 ch-3 loops)
Loop 1 sits between sc 1 and 3, and loop 11 sits between sc 21 and 23. So loops 1–11 cover exactly the 23 sc along the back of the head and neck (Rows 30–22).
Round 3:
– Crest: In each of loops 1–11, work 6 dc, then sl st in the next sc. (11 shells)
– Rest of the edge: In each of loops 12–73, work (2 sc, picot, 2 sc), then sl st in the next sc. (62 picot scallops)
Join and fasten off.
Why the math works: Round 1 has 146 sc, which is an even number, so the ch-3 loop repeat (2 sc per loop) closes without a leftover stitch: 146 ÷ 2 = 73 loops. Because Round 1 starts at the top of the back, the crest loops fall exactly on the neck. The border adds about 0.5 in (1.3 cm) on each side, so the 8 in (20.3 cm) strip becomes 9 in (22.9 cm) tall.
Fin
Row 1: With the RS facing, join teal with a sl st around the post of the last back-edge st of Row 17. Ch 4 (counts as tr), then work 10 tr around the same post. Turn. (11 tr)
Row 2: Ch 4 (counts as dc + ch 1), dc in the next tr, ch 1. Repeat from * 8 more times, then dc in the last tr. Fasten off. (11 dc, 10 ch-1 sps)
Row 3: Join cream in the first dc. Sc in the first dc, 2 hdc in the next ch-1 sp, sc in the next dc. Repeat from * 9 more times. Turn. (11 sc + 20 hdc = 31 sts)
Row 4: Ch 1, sc in the first st, ch 3, skip 1 st, sc in the next st. Repeat from * 14 more times. Fasten off. (15 loops)
The fin is about 2.6 in (6.6 cm) across. It overlaps the body and sticks out about 1 in (2.5 cm) past the back edge. Tack both fin corners to the body.
Eye: Sew the bead, or work a black French knot, between Rows 28 and 29, about 0.4 in (1.0 cm) in from the front edge.
Final Blocking
- Weave in all the ends along matching colors.
- Wet the motif fully, then gently press out the water in a towel.
- Lay it RS up on the board. Coil the tail inward and pin through the center of the spiral.
- Pin the body curve so it measures 9 in (22.9 cm) from the crest top to the tail bottom.
- Pin out each picot scallop, each crest shell and each fin loop.
- Straighten the snout and pin the tip ring open.
- Mist the piece and let it dry completely, about 24 hours.
Final Quality-Control Checklist
- [ ] The tail forms a smooth spiral with no buckles.
- [ ] There are 14 cream bars, evenly spaced.
- [ ] Round 1 has 146 sc, and Round 2 has 73 loops.
- [ ] There are 11 crest shells and 62 picot scallops.
- [ ] The fin has 11 teal spokes and 15 cream loops.
- [ ] The motif measures 9 in × 5.5 in (22.9 cm × 14.0 cm).
- [ ] The eye is secure, and all ends are hidden.
Troubleshooting
- The tail won’t curl: Your tr stitches are too short, or your sc stitches are too tall. Exaggerate the height difference.
- The tail cups or ruffles: You added extra increases. Recount Rows 2–13 against the list.
- The border ripples: You worked too many sc in Round 1. Follow the row-end rule exactly.
- The border pulls in: Use a looser chain-3, or go up a hook size for the border only.
- The crest is off-center: Round 1 started in the wrong place. It must begin at the back corner of Row 30.
- The fin flops: Tack it at both corners and block it flat.
Care
Hand wash in cool water with mild soap, press out the water in a towel, and dry flat. Re-pin the tail curl while the motif is damp if it needs it.

Final Notes
The measurement chain:
– The tail coils to 2.5 in (6.4 cm).
– The straight body adds 3.2 in (8.1 cm).
– The finished strip stands 8 in (20.3 cm) tall.
– A 0.5 in (1.3 cm) border brings it to 9 in (22.9 cm).
– The fin brings the width to 5.5 in (14.0 cm).
If your checkpoints match, your seahorse will match.
Happy crocheting!