
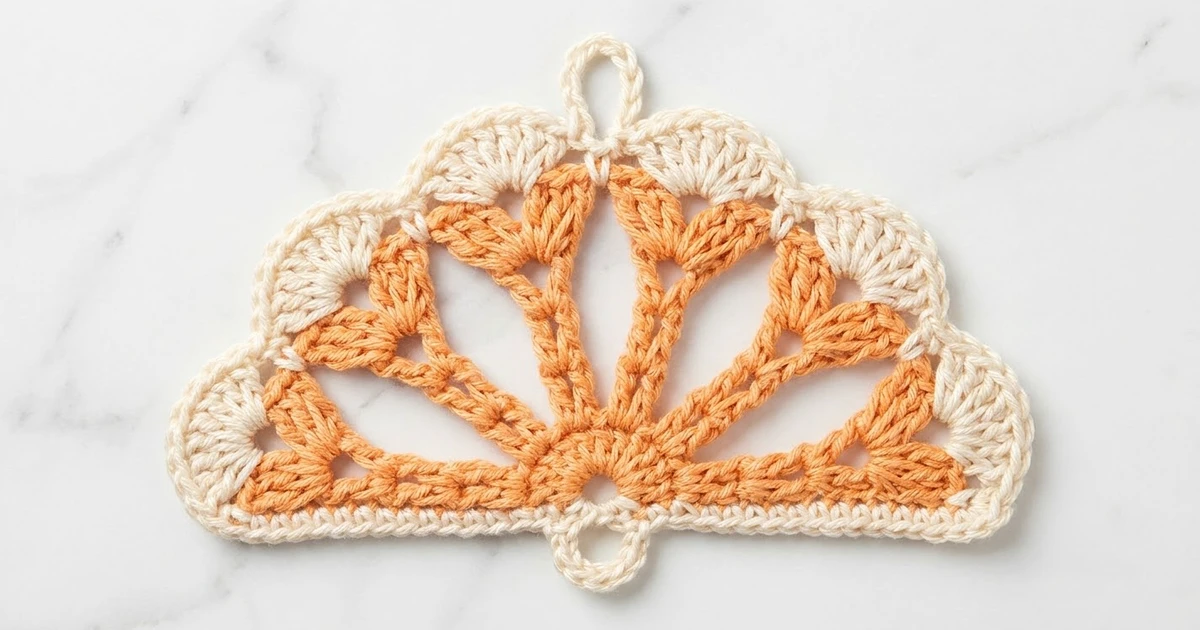
The Apricot Shell Fan is a small, half-round motif with a warm apricot center and a soft cream scalloped edge. Six V-shaped spokes fan out from a tiny base ring. Five plump shells crown the top like the ribs of a folding fan or the curve of a seashell.
Two colors do all the work here: a muted apricot orange for the spokes and an off-white cream for the shell edging and the two hanging loops. The look is gentle and a little vintage. It goes easily with natural wood, linen, and light interiors.
This pattern uses US crochet terms. The finished motif measures about 4.5 in (11.4 cm) wide by 2.25 in (5.7 cm) tall, not counting the loops. With the top and bottom loops included, it is about 4 in (10.2 cm) from end to end.
Construction is quick. You work two short rows in apricot into a small ring. Then one cream border round climbs the sides, crowns the top with shells, and adds a chain loop at the top and the bottom. The loops let you hang the motif on its own or link several with beads, as the photo also shows.
Finished Size and Construction
- Finished size: 4.5 in (11.4 cm) wide x 2.25 in (5.7 cm) tall, plus loops
- Length including loops: about 4 in (10.2 cm)
- Skill level: Easy
- Terminology: US crochet terms
- Yarn weight: Worsted (#4), cotton or cotton blend
- Hook: US H-8 (5.0 mm)
- Number of pieces: 1 single motif
- Layout: One stand-alone half-round fan, no joining
- Piece size before border: 3.5 in (8.9 cm) wide x 1.75 in (4.4 cm) tall
- Border depth: about 0.5 in (1.3 cm) on the top and sides
Materials
Choose a smooth worsted-weight cotton or cotton blend with good stitch definition. Cotton keeps the shells crisp and holds the fan shape after blocking. Acrylic also works, but it may relax and look flatter over time. Avoid fuzzy or brushed yarns: the open gaps between the spokes are a key part of the design, and fuzz tends to fill them in.
- Color A, apricot orange: 6 g, about 10 m
- Color B, cream: 6 g, about 10 m
These amounts are for one motif and include a margin for the join, tails, and a test swatch. If you plan to make several motifs, multiply them by the number of motifs.
Tools:
- US H-8 (5.0 mm) crochet hook
- Tapestry needle
- Scissors
- Stitch marker
- Rust-proof pins and a blocking mat or folded towel
- Spray bottle with water
- Ruler or tape measure
Abbreviations (US Terms)
- ch – chain
- sl st – slip stitch
- sc – single crochet
- dc – double crochet
- tr – treble crochet
- sp – space
- st(s) – stitch(es)
- RS / WS – right side / wrong side
- A / B – Color A (apricot) / Color B (cream)
Special stitches:
- V-spoke: 2 tr worked into the same stitch. Each V-spoke forms one apricot ray of the fan.
- Shell: 7 dc worked into the same space.
- Loop shell: work all of this in the same space: 3 dc, then dc, ch 12, sl st in the top of the dc just made, then 3 dc. It is still 7 dc, with a hanging loop rising from the center dc.
Gauge and Checkpoints
Gauge is not critical for a decorative motif. It does matter if you want several motifs to match, or a strand to hang at a planned length.
Reference gauge: 14 dc x 8 rows = 4 in (10.2 cm) with a 5.0 mm hook.
Make one motif first and measure it at each stage before making more. Measure on a flat surface without stretching the stitches.
- After Row 1: the half circle of dc measures about 1.5 in (3.8 cm) wide x 0.75 in (1.9 cm) tall.
- After Row 2: the fan measures about 3.5 in (8.9 cm) wide x 1.75 in (4.4 cm) tall.
- After the border: the motif measures about 4.5 in (11.4 cm) wide x 2.25 in (5.7 cm) tall, plus loops.
If your motif is too big: go down one hook size to 4.5 mm, or tighten your yarn-overs on the tall stitches.
If your motif is too small: go up one hook size to 5.5 mm. Pulling the ring very tight can also make a motif small, so leave the center slightly open.
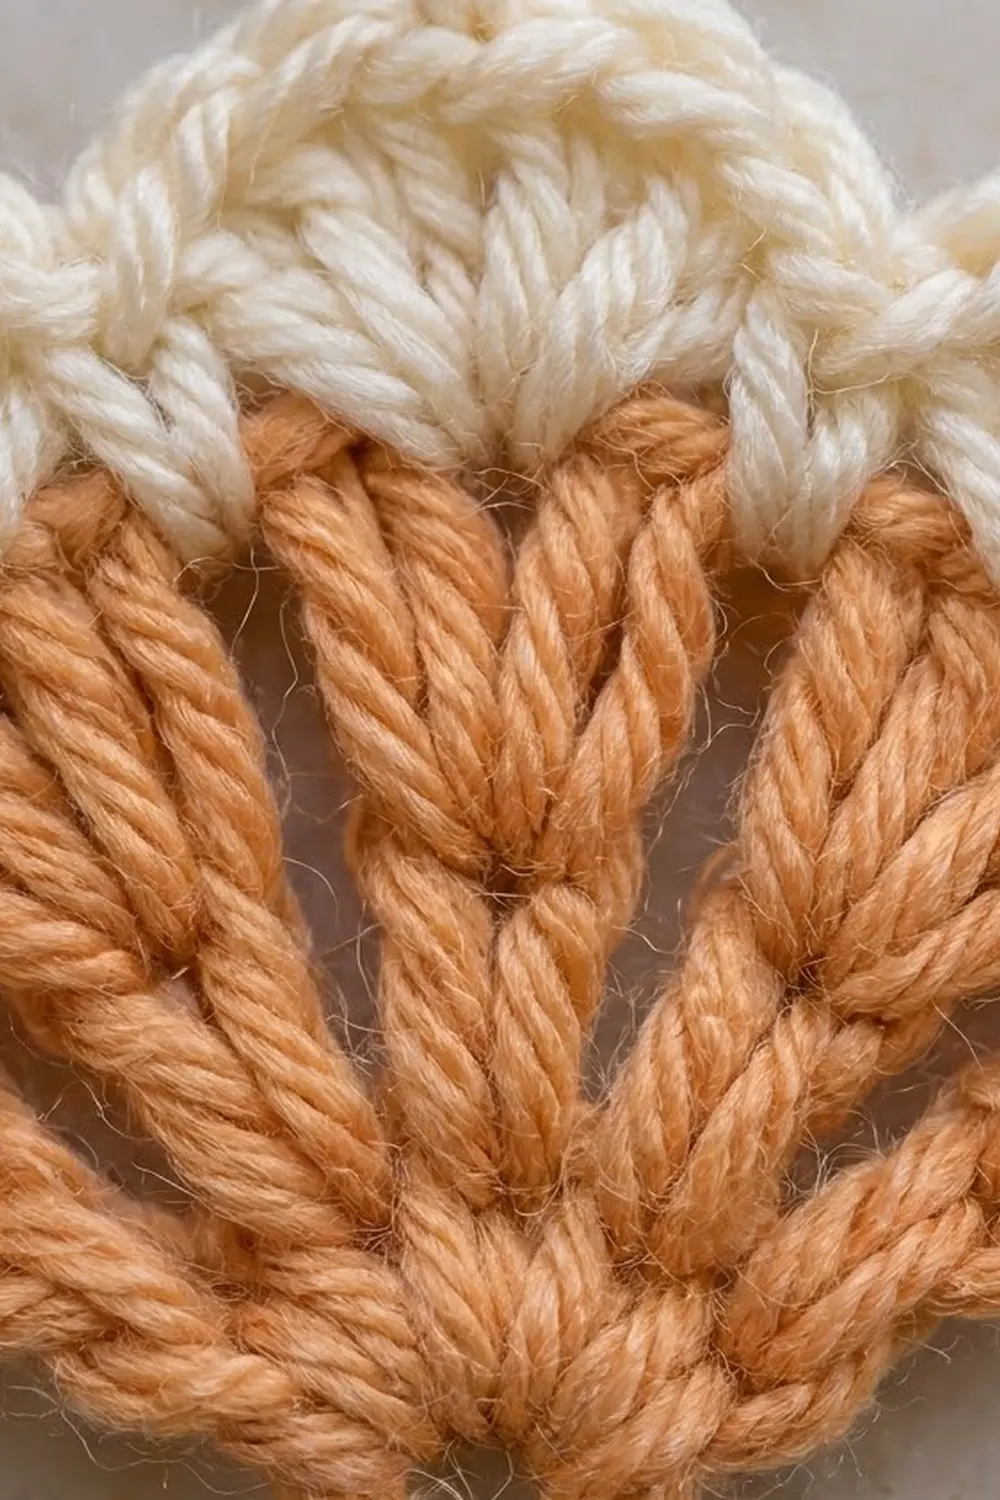
Fan Center (Color A)
With A, ch 4, then sl st in the first ch to form a ring.
Row 1 (RS): Ch 3 (counts as dc), 5 dc in ring. Turn. (6 dc)
The six stitches should sit as a half circle on top of the ring, with the ring forming the base point of the fan. Do not join. This is a row, not a round.
Row 2 (WS): Ch 4 (counts as tr), tr in the first dc (the same st at the base of the ch-4). Ch 1, V-spoke (2 tr) in next dc. Repeat from * 4 more times. (12 tr in 6 V-spokes, 5 ch-1 sps)
Your fan now has six V-shaped apricot spokes. Each ch-1 sp makes the small open gap between two spokes. Fasten off A, leaving a 4 in (10.2 cm) tail.
Checkpoint: 3.5 in (8.9 cm) wide x 1.75 in (4.4 cm) tall. Count the spokes: 6 V-spokes and 5 gaps. The fan should lie flat. If the outer edge ruffles, your tr are too loose. If it cups upward, they are too tight.
Weave in the A tails on the WS now, before the border hides them, or work over them during the border round.
Border (Color B)
The cream border is one single round. It starts at the base point, climbs the right side, crosses the top with five shells, comes down the left side, and closes at the base. It also adds the top and bottom hanging loops.
Border gauge: one 7-dc shell spans about 1.1 in (2.8 cm) along the outer edge and stands about 0.5 in (1.3 cm) tall. Each 5-dc side scallop spans about 0.75 in (1.9 cm).
Turn the motif so the RS (the RS of Row 1) faces you and the ring points down.
Border Round (RS):
- Base and bottom loop: Join B with sc around the ring at the base point, between the two Row 1 end stitches. Ch 10, sl st in the top of the sc just made. (1 sc + bottom loop)
- Right side: Sc around the post of the Row 1 end dc. 5 dc around the post of the Row 2 end tr. (1 sc + 5 dc = 6 sts)
- Top edge: Sc in each of the 2 tr of the first V-spoke. Shell in next ch-1 sp, sc in each of the 2 tr of the next V-spoke. Repeat from * 4 more times, working the third (center) shell as a loop shell. (12 sc + 35 dc = 47 sts)
- Left side: 5 dc around the post of the Row 2 end tr. Sc around the post of the Row 1 end dc. (5 dc + 1 sc = 6 sts)
- Sl st in the first sc to join. Fasten off and weave in ends.
Round total: 60 sts (1 base sc + 6 right side + 47 top + 6 left side), plus the ch-12 top loop and the ch-10 bottom loop.
Why the math works: The two sc on each V-spoke anchor the shells to the spoke tops, so each shell sits over one gap and opens outward from it. Row 2 has 5 gaps, so the top edge gets exactly 5 shells. The third shell falls on the centerline of the fan, which is why the top loop sits straight above the base loop.
The outer arc of Row 2 is about 5.5 in (14.0 cm). Five shells at 1.1 in (2.8 cm) each also add up to 5.5 in (14.0 cm), so they cover the arc without stretching or ruffling. Add the two side scallops at 0.75 in (1.9 cm) each, and the full outer edge measures about 7 in (17.8 cm). That matches the arc of a half circle with a 2.25 in (5.7 cm) radius, so the finished motif lies flat.
The side scallops add 0.5 in (1.3 cm) on each side, taking the width from 3.5 in (8.9 cm) to 4.5 in (11.4 cm). The shells add 0.5 in (1.3 cm) on top, taking the height from 1.75 in (4.4 cm) to 2.25 in (5.7 cm).
Loop check: The top loop (ch 12) stands about 1 in (2.5 cm) tall. The bottom loop (ch 10) hangs about 0.75 in (1.9 cm). Together with the 2.25 in (5.7 cm) body, the motif measures about 4 in (10.2 cm) from end to end.
Tension tip: Keep the sc anchors snug and the dc in each shell relaxed. Snug anchors give a clear dip between the scallops. Relaxed dc let each shell open into a rounded curve instead of bunching.
Final Blocking
- Weave in all tails, then trim them close.
- Lay the motif RS up on a blocking mat or folded towel.
- Spritz it with water until it is evenly damp but not dripping.
- Pin the base point first. Then pin the two lower side corners so the width is 4.5 in (11.4 cm).
- Pin the tip of each shell, easing the shells into an even curve 2.25 in (5.7 cm) above the base.
- Open each of the 5 gaps between the spokes with your fingertip so they look even.
- Straighten both loops and pin them on the centerline.
- Let the motif dry completely, at least 2 to 4 hours, before unpinning.
Final Quality-Control Checklist
- 6 apricot V-spokes, each made of 2 tr
- 5 even gaps between the spokes
- 5 cream shells of 7 dc each across the top
- 2 sc on top of every V-spoke
- One 5-dc scallop on each side
- Top loop centered over the third shell
- Bottom loop centered on the base ring
- Border round total of 60 sts
- Size 4.5 in (11.4 cm) x 2.25 in (5.7 cm), plus loops
- No visible tails on the RS
Troubleshooting
The fan curls up like a bowl. Your Row 2 tr are too tight. Redo Row 2 with looser yarn-overs, or go up a hook size for that row only.
The edge ruffles. Your shells are too loose or your hook is too big. For a flatter edge, try 6 dc per shell, using the same count in all five shells.
The top loop sits off center. You may have worked the loop shell in the wrong gap. Count the gaps from either side. The loop belongs in the third gap.
The gaps between spokes are uneven. Check that each V-spoke goes into one dc of Row 1, with exactly ch 1 between spokes. Blocking also helps.
The side scallops look thin. Work the 5 dc around the whole post of the end tr, not into a single loop.
The base ring has a hole. Gently pull the beginning tail to close the ring before you weave it in.
The loops twist. Chain loosely and check that the chain isn’t twisted before you sl st it closed. A light steam during blocking relaxes a stubborn twist.
Care
Hand wash in cool water with mild soap, press out the water in a towel, and dry flat. If the shells lose their curve, reshape and pin them.

Final Notes
The measurement chain is short and easy to track. Row 1 gives 6 dc at about 1.5 in (3.8 cm) wide. Row 2 turns them into 6 V-spokes and 5 gaps at 3.5 in (8.9 cm) wide x 1.75 in (4.4 cm) tall. The border round adds 60 sts, 5 shells, and two loops. The motif finishes at 4.5 in (11.4 cm) x 2.25 in (5.7 cm), or about 4 in (10.2 cm) long including loops.
Check your first motif at each stage. If all three checkpoints match, the motifs you make after it will match too. One motif makes a sweet ornament, gift tag, or bag charm. Several, linked loop to loop with wooden beads and finished with a tassel, become a hanging strand like the ones in the photo.
Happy crocheting!