

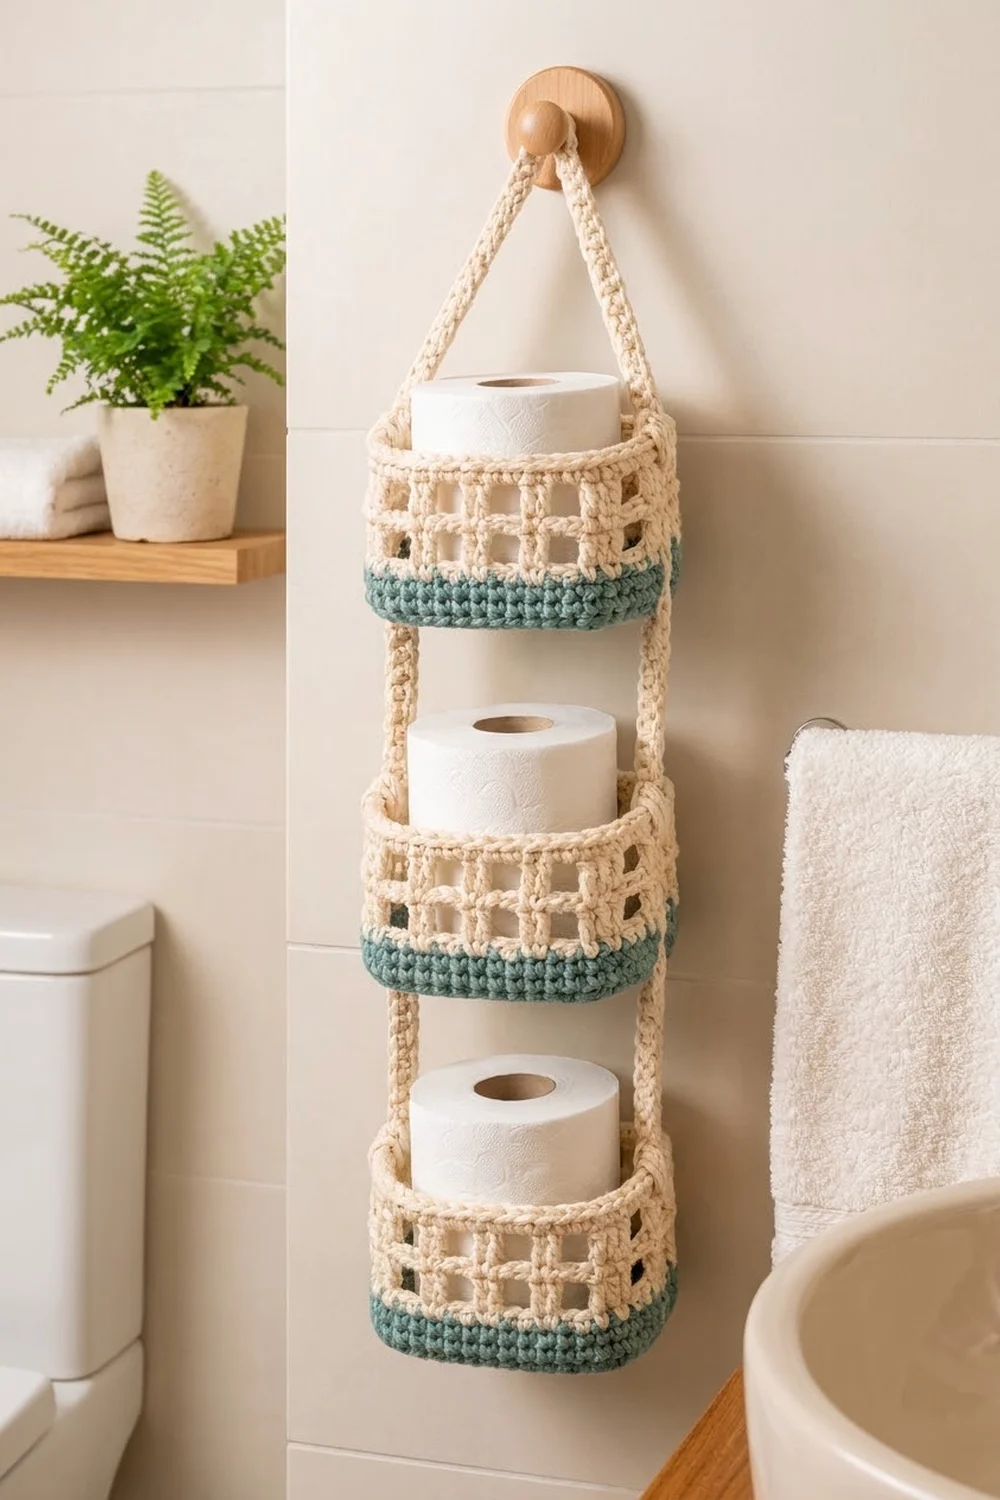
The Tidy Trio is a three-tier hanging organizer made of three small mesh baskets on two cream straps. Each basket holds one standard toilet roll. Spare rolls stay tidy and within reach without taking up any floor space.
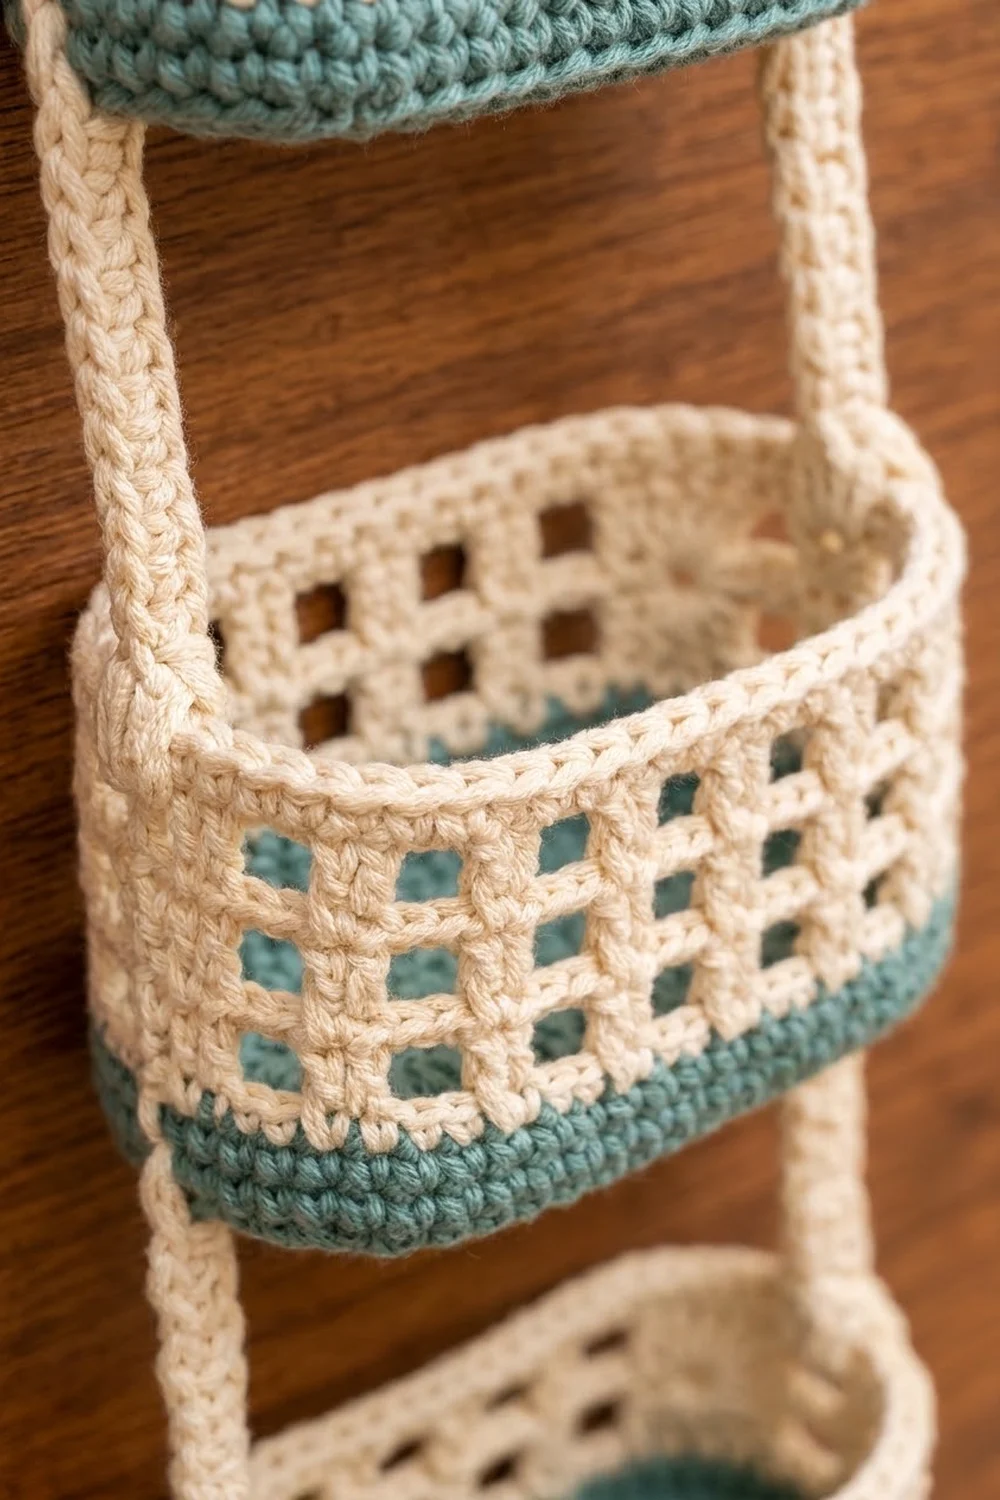
The color plan is simple and calm. The cream bases and upper walls sit on a muted teal band, and two rows of little square windows make the walls look light and airy. Each basket has a firm rolled rim, and the cream straps rise to a small ring that hangs on a hook or knob.
This pattern uses US crochet terms. The finished organizer is about 6 in (15.2 cm) wide, 5.1 in (13.0 cm) deep and 25 in (63.5 cm) long including the ring. Each basket is about 3.5 in (8.9 cm) tall.
Construction is straightforward. You work each base in joined rounds from a foundation chain, turn up the wall with a back-loop round, and work the wall in rounds without turning. Then you make two straps and a ring and sew everything together stitch to stitch.
Finished Size and Construction
- Finished size: 6 in x 5.1 in x 25 in (15.2 cm x 13.0 cm x 63.5 cm)
- Skill level: Easy / advanced beginner
- Terminology: US crochet terms
- Yarn weight: Worsted (#4), cotton
- Hook: 4.5 mm (US 7)
- Number of pieces: 6 (3 baskets, 2 straps, 1 ring)
- Layout: 3 baskets stacked vertically, 1 per tier
- Piece size (one basket): base 6 in x 5.1 in (15.2 cm x 13.0 cm); wall 3.5 in (8.9 cm) tall
- Wall height before border: 3.1 in (7.9 cm)
- Border (rim) depth: 0.4 in (1.0 cm)
Materials
Choose a smooth worsted-weight cotton or cotton blend. Cotton holds its shape well and won’t stretch much under the weight of the rolls. Avoid very soft acrylic, which can sag over time.
- Cream (Color A): 150 g, about 255 m (279 yd)
- Teal (Color B): 50 g, about 85 m (93 yd)
Tools:
- 4.5 mm (US 7) crochet hook
- Tapestry needle
- 4 stitch markers
- Scissors
- Measuring tape
- Rustproof pins and a blocking surface
The yarn amounts include a margin of about 20 percent for your gauge swatch and small differences in tension.
Abbreviations (US Terms)
- ch = chain
- sc = single crochet
- dc = double crochet
- sl st = slip stitch
- st(s) = stitch(es)
- sp = space
- BLO = back loop only
- rev sc = reverse single crochet
- rep = repeat
Special stitch: reverse single crochet (rev sc). Work from left to right if you’re right-handed. Insert the hook into the next stitch to the right, yarn over, pull up a loop, then yarn over and pull through both loops on the hook. This makes the corded, rolled edge on the rim.
Gauge and Checkpoints
Gauge: 14 sc and 14 rounds = 4 in (10.2 cm) in sc worked in joined rounds. That is 3.5 sts per inch and 3.5 rounds per inch.
Gauge matters here because the basket has to fit a roll and the straps have to line up with the walls. Make one complete basket first and check it before you start the others.
Checkpoints:
- After base Round 5 (46 sts): about 3.7 in x 2.9 in (9.4 cm x 7.4 cm).
- After base Round 9 (78 sts): 6 in x 5.1 in (15.2 cm x 13.0 cm).
- After the teal band (Round 13): the band is about 1.1 in (2.8 cm) tall.
- After Round 18: the wall is 3.1 in (7.9 cm) tall.
- After the rim: the wall is 3.5 in (8.9 cm) tall.
If your base is too big, go down half a hook size. If it’s too small, go up half a hook size. If the base cups upward, your increases are too tight; if it ruffles, they are too loose. Fix your gauge before you continue, because the wall uses all 78 base stitches.
Basket (Make 3)
Work in joined rounds with the right side facing, and don’t turn. Begin every round with ch 1 (does not count as a stitch) and work the first stitch into the same stitch as the join, unless stated otherwise. Each round starts at the middle of a short side, so a strap will hide all the joins later.
Base
With Color A, ch 6.
Round 1: 2 sc in 2nd ch from hook, sc in next 3 ch, 4 sc in last ch; working along the opposite side of the chain, sc in next 3 ch, 2 sc in same ch as first sts; join with sl st to first sc. (14 sts)
You now have four corners of 2 sts each. If it helps, place a marker in the first st of each corner pair.
Round 2: 2 sc in each of next 2 sts, sc in next 3, 2 sc in each of next 4 sts, sc in next 3, 2 sc in each of next 2 sts; join. (22 sts)
From here on, each round adds 2 sc in each of the 2 corner sts at all 4 corners, so each round grows by 8 sts.
Rounds 3 to 9: Sc in next X sts, 2 sc in each of next 2 sts, sc in next Y sts, rep * to , sc in next Z sts, rep * to , sc in next Y sts, rep * to *, sc in next X sts; join.
| Round | X | Y | Z | Total |
|---|---|---|---|---|
| 3 | 1 | 5 | 2 | 30 sts |
| 4 | 2 | 7 | 4 | 38 sts |
| 5 | 3 | 9 | 6 | 46 sts |
| 6 | 4 | 11 | 8 | 54 sts |
| 7 | 5 | 13 | 10 | 62 sts |
| 8 | 6 | 15 | 12 | 70 sts |
| 9 | 7 | 17 | 14 | 78 sts |
Count one stitch from each neighboring corner pair as part of each side. The Round 9 base then has 21 sts on each long side and 18 sts on each short side: 21 + 18 + 21 + 18 = 78. The paired corner increases give soft, rounded corners rather than sharp points.
Join Color B with the last sl st of Round 9. Fasten off Color A.
Wall
Round 10 (Color B): Ch 1, sc in BLO of each st around; join. (78 sts) This round makes the turning ridge where the wall rises from the base.
Rounds 11 to 13 (Color B): Ch 1, sc in each st around; join. (78 sts) Change to Color A with the last sl st of Round 13. Fasten off Color B.
Round 14 (Color A): Ch 1, sc in each st around; join. (78 sts)
Round 15 (mesh): Ch 4 (counts as dc and ch 1), skip next st, dc in next st, ch 1, skip next st; rep from * around; join with sl st to 3rd ch of beginning ch-4. (39 dc and 39 ch-1 sps)
Round 16: Ch 1, sc in same st as join, sc in next ch-1 sp, sc in next dc, sc in next ch-1 sp; rep from * around; join. (78 sts: 39 sc in dc + 39 sc in sps)
Round 17 (mesh): Rep Round 15, placing each dc in the sc above a dc from Round 15. (39 dc and 39 ch-1 sps) The windows now stack in straight columns.
Round 18: Rep Round 16. (78 sts)
Check: the wall measures 3.1 in (7.9 cm) from the turning ridge. Now work the rim (see Border) on this basket before you make the next one.
Make All Pieces
Make these with the same hook and gauge:
- Baskets: 3 (each uses about 36 g of Color A and 12 g of Color B)
- Straps: 2 (Color A)
- Ring: 1 (Color A)
Strap (Make 2)
With Color A, ch 85.
Row 1: Sc in back bump of 2nd ch from hook and in back bump of each ch across. Ch 1, turn. (84 sts)
Row 2: Sl st loosely in each st across. (84 sts) Fasten off, leaving a 12 in (30.5 cm) tail.
The strap is 24 in (61.0 cm) long and about 0.5 in (1.3 cm) wide. Count from the end without the long tail and mark these points:
- Sts 1 to 12: bottom basket
- Sts 13 to 21: gap
- Sts 22 to 33: middle basket
- Sts 34 to 42: gap
- Sts 43 to 54: top basket
- Sts 55 to 84: free diagonal to the ring, 8.6 in (21.8 cm)
Each basket section is 12 sts, or 3.4 in (8.6 cm). Each gap is 9 sts, or 2.6 in (6.6 cm).
Ring (Make 1)
With Color A, ch 6 and join with sl st to form a ring.
Round 1: Ch 1, 12 sc in ring; join. (12 sts) Fasten off, leaving a tail.
The ring is about 1.25 in (3.2 cm) across.
Layout
        [ RING ]
        /      \
   strap        strap
      |  TOP   |      <- basket 3
      |  gap   |
      | MIDDLE |      <- basket 2
      |  gap   |
      | BOTTOM |      <- basket 1
Joining
Sew each strap flat against the outside of a short end of each basket. Center it over sts 9 and 10 of that 18-st short side. Because each round starts at the middle of a short side, the strap also hides the round joins.
Stitch-to-stitch logic: The wall has 12 row units from the turning ridge to the top of the rim’s sc round:
- 4 teal rounds
- 3 cream sc rounds
- 2 mesh rounds, which count as 2 units each
- 1 rim sc round
That makes 4 + 3 + 4 + 1 = 12. Each 12-st basket section of the strap matches those 12 units one for one. Strap st 1 sits on the turning ridge (Round 10), and strap st 12 sits on the rim sc (Round 19). Beside each mesh round, sew 2 strap sts to that one round.
Use the long strap tail or a separate length of Color A to whipstitch both long edges of the strap to the wall. Each time, pass the needle through the strap edge and one wall stitch together.
Tension: Pull each stitch snug but not tight. If you pull too hard, the strap puckers and the gaps get shorter. Lay the piece flat and check that each gap measures 2.6 in (6.6 cm) before you move on to the next basket.
Sew the bottom basket first, then the middle and the top. Finally, whipstitch the free end of each strap to the lower edge of the ring, side by side, so the ring sits centered above the baskets.
Size checkpoint: From the bottom of the lowest basket to the top of the top basket, the stack measures 15.4 in (39.1 cm), which is 54 strap sts. With the strap triangle and the ring, the total length is about 25 in (63.5 cm).
Border (Rim)
Work the rim on each basket right after Round 18, before you join the straps. The border gauge is the same as the body: 14 sc = 4 in (10.2 cm).
Round 19 (Color A): Ch 1, sc in each st around; join. (78 sts: 21 per long side, 18 per short side)
Round 20 (Color A): Ch 1, rev sc in each st around; join. (78 sts: 21 per long side, 18 per short side) Fasten off and weave in the ends.
Why the math works: The wall never increases or decreases, so the rim keeps exactly the 78 sts of Round 9. Each long side stays at 21 sts and each short side at 18, with each corner stitch counted only once. Because the rim adds no stitches, the walls stay straight and the top edge doesn’t flare. The rev sc round adds a firm, rolled edge that holds its shape when you pull rolls in and out.
Final Blocking
- Weave in all ends inside the walls, going through 3 to 4 sts in different directions.
- Lightly spray each basket with water, or steam it from about 1 in (2.5 cm) away.
- Fill each basket with a toilet roll or a folded towel so the walls stand straight.
- Press each base flat against the table and shape the corners into even curves.
- Pin the straps out straight and check that each gap is 2.6 in (6.6 cm).
- Let everything dry completely before hanging.
Final Quality-Control Checklist
- Each base measures 6 in x 5.1 in (15.2 cm x 13.0 cm) and lies flat.
- Each wall is 3.5 in (8.9 cm) tall with a crisp turning ridge.
- Each teal band is 4 rounds, about 1.1 in (2.8 cm) tall.
- The mesh windows line up in straight vertical columns.
- Each rim has 78 sts and doesn’t flare.
- Each strap has 84 sts and measures 24 in (61.0 cm).
- The straps are centered on the short ends and cover the round joins.
- The gaps between baskets are equal.
- The ring is centered and both straps hang at the same length.
Troubleshooting
The base cups up. Your corner increases are too tight. Go up half a hook size or work the 2-sc corners more loosely.
The base ruffles. Your tension is loose, or you’ve added extra increases. Recount each round against the table.
The mesh windows slant. You started a mesh round in the wrong st. Begin each mesh round in the st above the previous round’s join.
The rim flares. Your rev sc is too loose. Go down half a hook size for Round 20 only.
The baskets tilt. Either the straps aren’t centered or one side is sewn tighter than the other. Unpick and resew, checking the 12-st sections.
The roll doesn’t fit. Your base is too small. Check your gauge and remake the base at the correct size.
Care
Hand wash in cool water and lay flat to dry, reshaping the baskets while they’re damp. Don’t tumble dry, because cotton can shrink.
Final Notes
The measurement chain is simple. Gauge sets the base at 78 sts and 6 in x 5.1 in (15.2 cm x 13.0 cm). The wall keeps those 78 sts and rises 12 row units to 3.5 in (8.9 cm). Each strap matches those 12 units, adds 9-st gaps and ends with a 30-st diagonal, for 84 sts and 24 in (61.0 cm) in all. If each stage checks out, the finished organizer hangs straight and holds three rolls neatly.
Happy crocheting!