

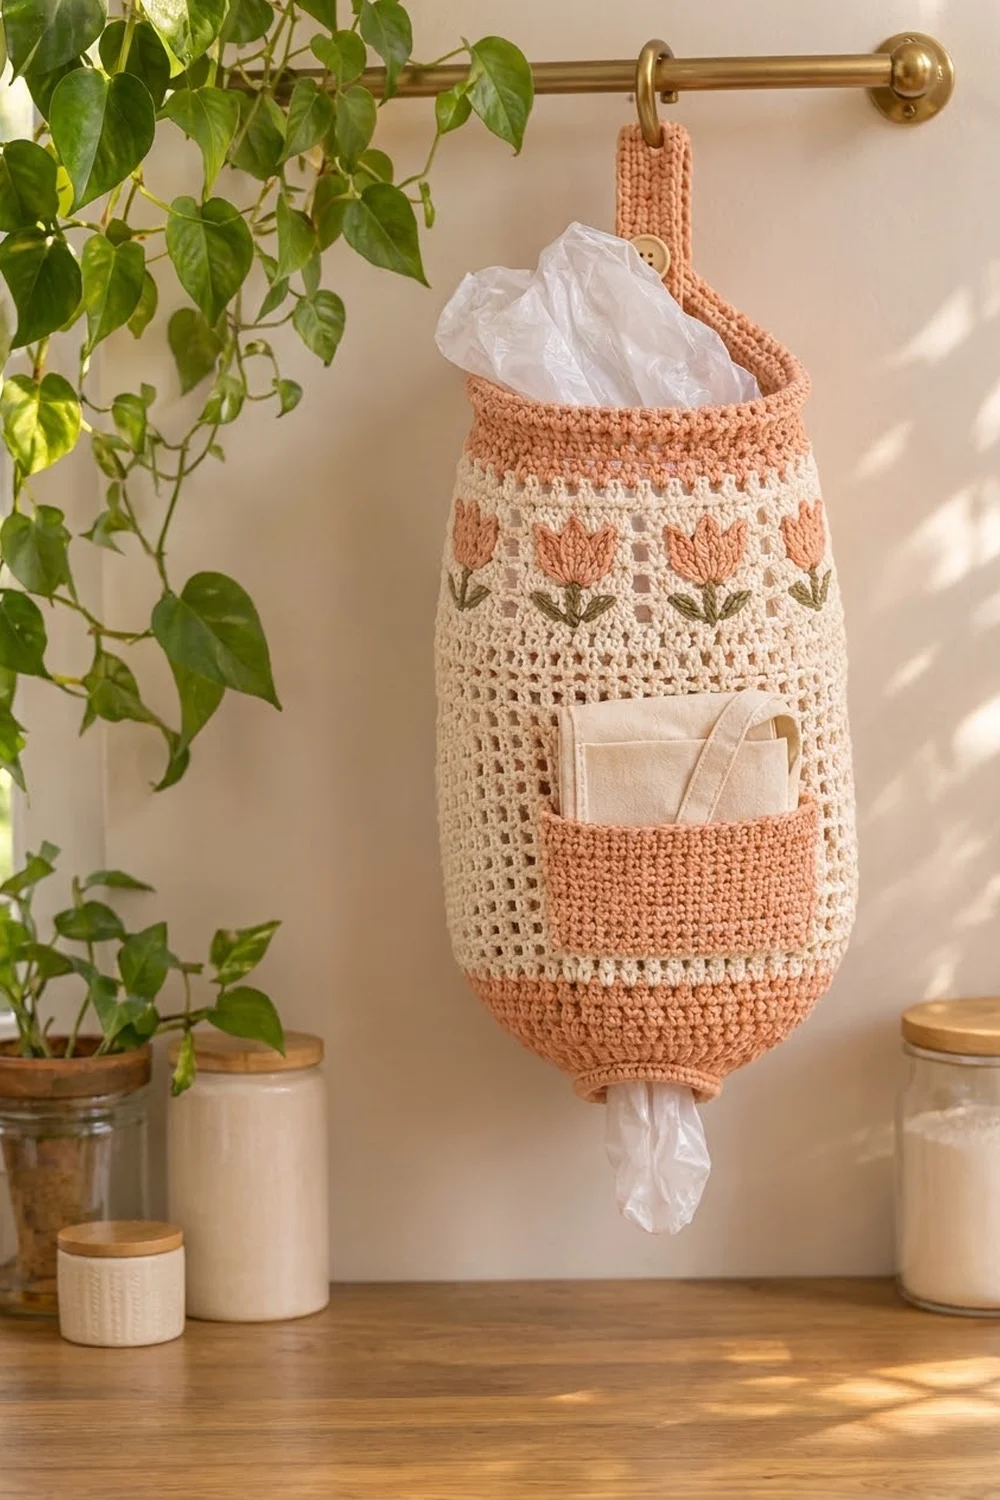
The Tulip Garden Bag Dispenser keeps plastic grocery bags in one place on your kitchen wall. You push bags in through the wide top and pull them out one at a time through the small cuff at the bottom. It hangs from a rod or hook by a buttoned strap, so you can take it down for washing.
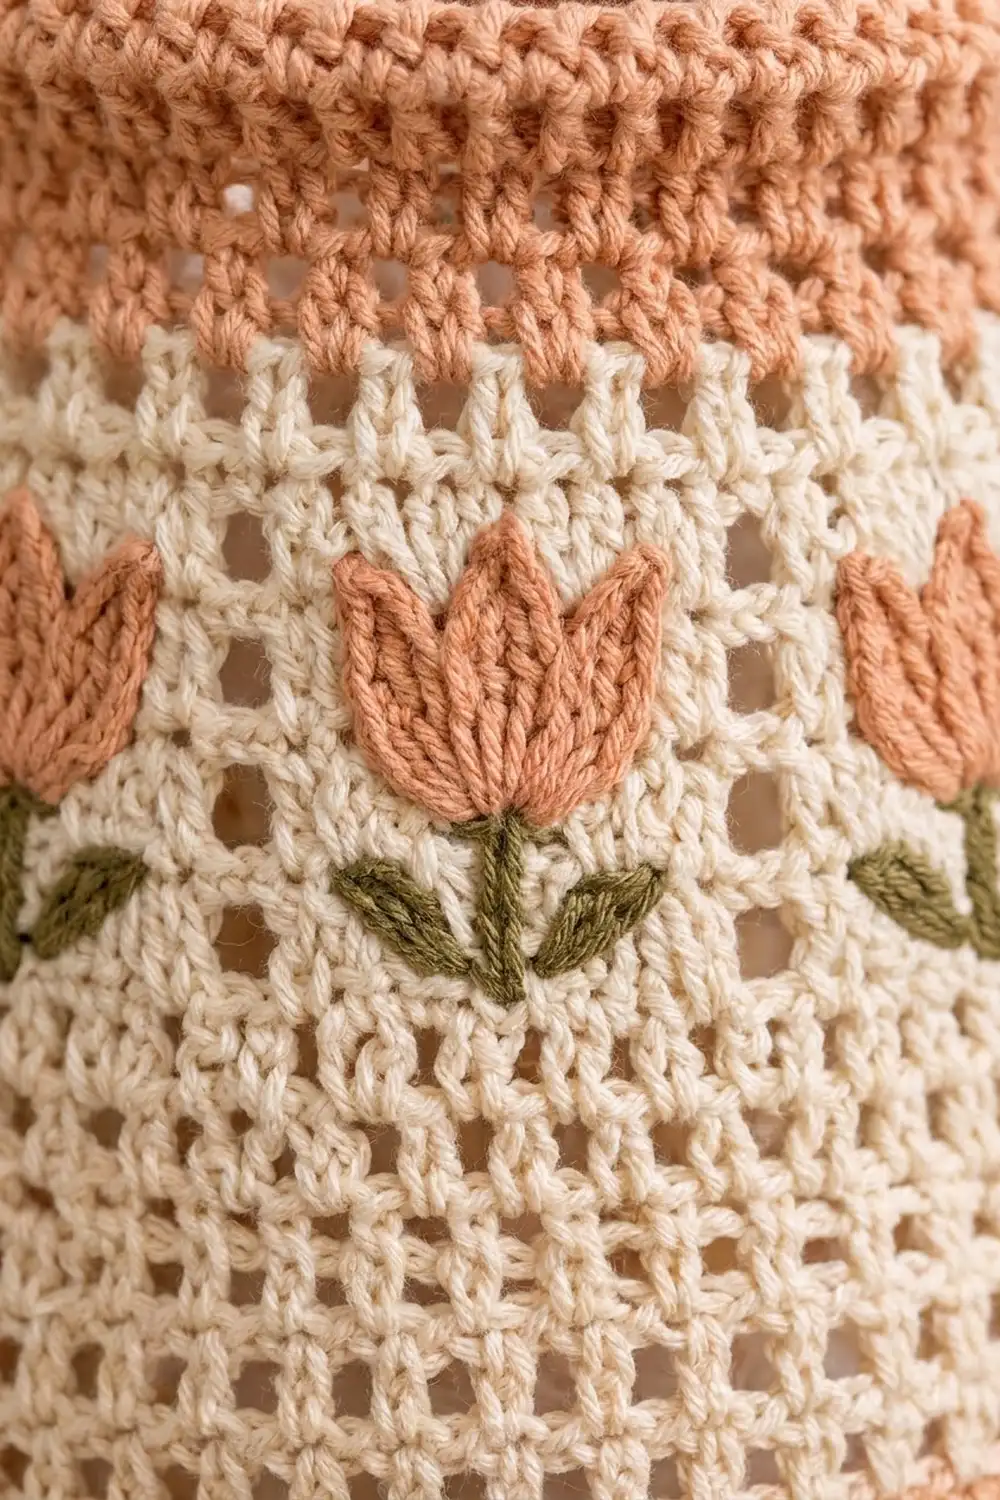
The design uses three colors. Warm peach covers the rounded base, front pocket, top band and hanger. Soft cream covers the open mesh body, and olive green is used for the tulip stems and leaves. A row of small peach tulips circles the upper body, and a flat peach pocket on the front holds cloths, clips or spare liners.
The finished dispenser measures about 8 in (20.3 cm) wide when laid flat and 16 in (40.6 cm) tall, not counting the hanger. The pattern uses US crochet terms throughout.
The body is one piece worked bottom-up in joined rounds. You start with the dispensing cuff, increase into a rounded base, work a tall mesh body, then decrease slightly into a solid top band with a rolled rim. The pocket, eight tulips and two hanger strips are made separately and sewn on.
Finished Size and Construction
- Finished size: 8 in (20.3 cm) wide flat × 16 in (40.6 cm) tall
- Skill level: Intermediate
- Terminology: US crochet terms
- Yarn weight: Worsted (#4), cotton or cotton blend
- Hook: 5.0 mm (H-8)
- Number of pieces: 1 body, 1 pocket, 8 tulips, 1 arm strip, 1 tab strip
- Layout: Tulips spaced evenly around the upper body; pocket centered on the front
- Body circumference: 16 in (40.6 cm) at the widest point; 14 in (35.6 cm) at the rim
- Body height before border: about 15.5 in (39.4 cm)
- Border depth: about 0.5 in (1.3 cm)
- Bottom cuff: 6 in (15.2 cm) around, 3 in (7.6 cm) wide flat
Materials
Use a smooth worsted-weight cotton. It holds its shape, washes well and shows the mesh clearly. Acrylic also works but is more stretchy, so check your gauge.
- Peach (Color A): 100 g, about 190 m
- Cream (Color B): 75 g, about 142 m
- Olive green (Color C): 10 g, about 19 m
Tools:
– 5.0 mm (H-8) crochet hook
– Tapestry needle
– 1 wooden button, 0.75 in (1.9 cm)
– Stitch markers
– Measuring tape
– Pins and a spray bottle for blocking
All quantities include a margin of about 15% for swatching and seaming.
Abbreviations (US Terms)
- ch – chain
- sl st – slip stitch
- sc – single crochet
- hdc – half double crochet
- dc – double crochet
- sc2tog – single crochet 2 together
- BLO – back loop only
- sk – skip
- sp – space
- st(s) – stitch(es)
- rnd – round
- rev sc – reverse single crochet (crab stitch)
Special stitches:
– Picot: Ch 2, sl st in 2nd ch from hook.
– Rev sc: Working left to right (right-handed), insert hook in the next st to the right, yarn over, pull up a loop, yarn over and draw through both loops.
– Mesh: (dc, ch 1) over 2 sts. Each dc plus its ch-1 sp counts as 2 sts.
Gauge and Checkpoints
- Single crochet: 16 sts × 18 rnds = 4 in (10.2 cm)
- Mesh: 8 mesh units (16 sts) × 8 rnds = 4 in (10.2 cm)
Make the pocket first and use it as your gauge test. It should measure 4.5 in (11.4 cm) wide and 4 in (10.2 cm) tall. If it is too big, go down half a hook size. If it is too small, go up half a size.
Body checkpoints:
– After Rnd 4: the cuff is 3 in (7.6 cm) wide flat.
– After Rnd 9: the body is 8 in (20.3 cm) wide flat and 2 in (5.1 cm) tall.
– After Rnd 18: height is 4 in (10.2 cm).
– After Rnd 38: height is 14 in (35.6 cm).
– After Rnd 45: height is 15.5 in (39.4 cm) and width is 7 in (17.8 cm) flat.
If the mesh rounds come out too tall, work the dc more firmly. If they come out too short, add one mesh round. Each mesh round adds about 0.5 in (1.3 cm).
Body
Rounds are joined and not turned. Begin each round with ch 1 (sc rounds) or ch 4 (mesh rounds). The beginning ch 1 does not count as a stitch. The round start marks the left side fold of the dispenser.
Cuff and Rounded Base (Peach)
With Color A, ch 24 and join with a sl st to the first ch, taking care not to twist.
Rnd 1: Ch 1, sc in each ch around, join. (24 sts)
Rnds 2–4: Ch 1, sc in each st around, join. (24 sts)
Rnd 5 (growth): Working in BLO, ch 1, sc 2, 2 sc in next st; rep from * 8 times, join. (32 sts)
Working Rnd 5 in the back loops leaves a front-loop ridge, so the cuff stands out as a separate ring.
Rnd 6 (growth): Ch 1, sc 3, 2 sc in next st; rep 8 times, join. (40 sts)
Rnd 7 (growth): Ch 1, sc 4, 2 sc in next st; rep 8 times, join. (48 sts)
Rnd 8 (growth): Ch 1, sc 5, 2 sc in next st; rep 8 times, join. (56 sts)
Rnd 9 (growth): Ch 1, sc 6, 2 sc in next st; rep 8 times, join. (64 sts)
Checkpoint: The flat width is 8 in (20.3 cm), because 64 sts ÷ 4 sts per in = 16 in around.
Rnds 10–16: Ch 1, sc in each st around, join. (64 sts)
On the last sl st of Rnd 16, change to Color B.
Cream Stripe
Rnds 17–18: With Color B, ch 1, sc in each st around, join. (64 sts)
Checkpoint: The piece is now 4 in (10.2 cm) tall: 18 rnds ÷ 4.5 rnds per in.
Mesh Body (Cream)
Rnd 19 (conversion): Ch 4 (counts as dc + ch 1), sk next st, dc in next st, ch 1, sk next st; rep from * 31 times, join with sl st to 3rd ch of beg ch-4. Count: 32 dc + 32 ch-1 sps = 64 sts.
Rnds 20–38: Ch 4 (counts as dc + ch 1), dc in next dc, ch 1; rep from * 31 times, join with sl st to 3rd ch of beg ch-4. Each round has 32 dc and 32 ch-1 sps, for 64 sts.
Keep the dc stacked straight so the grid squares line up. Rounds 35–38 form the tulip band.
Checkpoint: The mesh is 10 in (25.4 cm) tall, and the total height is 14 in (35.6 cm).
Top Band (Peach)
Rnd 39 (conversion): With Color B, ch 1, sc in each dc and in each ch-1 sp around, join. Count: 32 sc in dc + 32 sc in ch-1 sps = 64 sts.
On the last sl st, change to Color A.
Rnd 40: Ch 1, sc in each st around, join. (64 sts)
Rnd 41 (decrease): Ch 1, sc 6, sc2tog; rep 8 times, join. (56 sts)
Rnds 42–45: Ch 1, sc in each st around, join. (56 sts)
Checkpoint: Height is 15.5 in (39.4 cm), and the rim is 7 in (17.8 cm) wide flat. Do not fasten off; continue to the border.
With Color A, ch 19.
Row 1: Sc in 2nd ch from hook and in each ch across. (18 sts)
Rows 2–18: Ch 1, turn, sc in each st across. (18 sts)
Edging: Ch 1, then work sc evenly around all four sides, putting 3 sc in each corner. Join and fasten off, leaving a 24 in (61.0 cm) tail.
The pocket measures 4.5 in (11.4 cm) wide × 4 in (10.2 cm) tall.
Attach: Flatten the body so the round-start marker sits at the left fold. Center the pocket on the front, with its bottom edge resting on the top of Rnd 18. It will cover mesh Rnds 19–26. Whipstitch the sides and bottom through the dc posts, leaving the top open.
Tulips (Make 8)
With Color A, ch 2.
Row 1: 3 sc in 2nd ch from hook. (3 sts)
Row 2: Ch 1, turn, 2 sc in first st, sc 1, 2 sc in last st. (5 sts)
Rows 3–4: Ch 1, turn, sc in each st. (5 sts)
Row 5 (petal points): Ch 1, turn, sc in st 1, picot, sl st in st 2, (hdc, picot, hdc) in st 3, sl st in st 4, sc in st 5, picot. Fasten off with a 12 in (30.5 cm) tail.
This row makes three points: two short side petals and a taller center petal.
Each tulip is about 1.25 in (3.2 cm) wide and 1.25 in (3.2 cm) tall.
Attach: Space the tulips evenly around the body, centering one over every 4th dc of Rnd 37. That puts them 2 in (5.1 cm) apart center to center. The petal tips should sit just below Rnd 39. Whipstitch around each tulip’s outer edge.
Embroidery: With Color C, chain-stitch a stem straight down from each tulip base for 0.75 in (1.9 cm). Then work one lazy-daisy leaf on each side of the stem, angled upward.
Hanger
Arm Strip
With Color A, ch 6.
Row 1: Sc in 2nd ch from hook and in each ch across. (5 sts)
Rows 2–40: Ch 1, turn, sc 5.
The strip measures 1.25 in (3.2 cm) wide × 8.9 in (22.6 cm) long.
Tab Strip
With Color A, ch 6.
Row 1: Sc in 2nd ch from hook and in each ch across. (5 sts)
Rows 2–32: Ch 1, turn, sc 5.
Row 33 (buttonhole): Ch 1, turn, sc 1, ch 3, sk 3, sc 1.
Row 34: Ch 1, turn, sc 1, 3 sc in ch-3 sp, sc 1. (5 sts)
Rows 35–36: Ch 1, turn, sc 5.
The tab measures 1.25 in (3.2 cm) × 8 in (20.3 cm).
Attach both strips after the border is finished (see Final Blocking).
Border
Border gauge: 16 sc = 4 in (10.2 cm), the same as the body.
Flattened, the rim has 2 sides of 28 sts each: front Sts 1–28 and back Sts 29–56.
Rnd 46: With Color A, ch 1, sc in each st around, join. You now have 56 sts, 28 on each side.
Rnd 47: Ch 1, rev sc in each st around, working left to right, join. You now have 56 sts, 28 on each side. Fasten off and weave in the end.
Why the math works: Rnd 45 ends with 56 sts. Both border rounds work exactly 1 st into each st, so the rim stays 28 sts per side. At 4 sts per in, 28 sts = 7 in (17.8 cm) flat. The rev sc rolls outward into a firm, rounded edge that does not flare. Two rounds add about 0.5 in (1.3 cm), which brings the total height to 16 in (40.6 cm).
Final Blocking
- Weave in all remaining ends, except the tails you need for sewing.
- Lightly mist the whole dispenser.
- Stuff it loosely with a towel to shape the rounded base and straighten the mesh.
- Pin the pocket edges flat and gently ease each tulip into shape.
- Let it dry completely.
- Sew the arm strip ends inside the rim at the two side folds, overlapping each end by 0.75 in (1.9 cm). The center of the strip becomes the peak.
- Lay the first 1 in (2.5 cm) of the tab (the Row 1 end) over the peak and sew it down securely.
- Sew the button to the right side of the tab at Row 14, about 3.1 in (7.9 cm) above the peak.
- Fold the tab over your rod and button it. The loop holds about 4.3 in (10.9 cm) of strap and fits a rod up to 1.4 in (3.6 cm) in diameter.
Final Quality-Control Checklist
- [ ] Cuff is 3 in (7.6 cm) wide flat, with a visible ridge above it.
- [ ] Body is 8 in (20.3 cm) wide at the widest point.
- [ ] Mesh has 32 squares per round, all lined up.
- [ ] Pocket is centered, sewn on 3 sides and open at the top.
- [ ] All 8 tulips are evenly spaced and each has a stem and 2 leaves.
- [ ] Rim is 7 in (17.8 cm) wide flat, and the rolled edge lies evenly.
- [ ] Arm strips sit at opposite sides and the peak is centered.
- [ ] Button fastens without straining.
- [ ] Total height is 16 in (40.6 cm).
Troubleshooting
- Base cups instead of rounding: You are working too tightly. Loosen your tension for Rnds 6–9.
- Mesh leans in a spiral: Make sure each dc goes into the dc below, not into the ch-1 sp.
- Wrong mesh count: Count the dc only. You should have 32.
- Rim flares: Use a hook half a size smaller for Rnd 47.
- Pocket puckers: Sew one stitch per dc post and do not pull the yarn tight.
- Tulip points are flat: Pull each picot snug and pin it while blocking.
- Button slips out: Add a sc stitch at one end of the buttonhole to make it smaller.
- Bags come out too fast: Work one more sc round on the cuff to make it tighter.
Care
Hand wash in cool water, then reshape and lay flat to dry. Unbutton the tab and take the dispenser off the rod before washing.
Final Notes
The measurements build on each other. The 24-stitch cuff measures 6 in (15.2 cm) around. Five growth rounds bring it to 64 stitches, which is 8 in (20.3 cm) wide flat. The base and stripe reach 4 in (10.2 cm) tall. Twenty mesh rounds add 10 in (25.4 cm). The top band decreases to 56 stitches, which is 7 in (17.8 cm) wide flat at 15.5 in (39.4 cm) tall. Finally, the two-round rolled border finishes the dispenser at 16 in (40.6 cm). If you check each of these points as you go, your dispenser will match the photo.
Happy crocheting!