

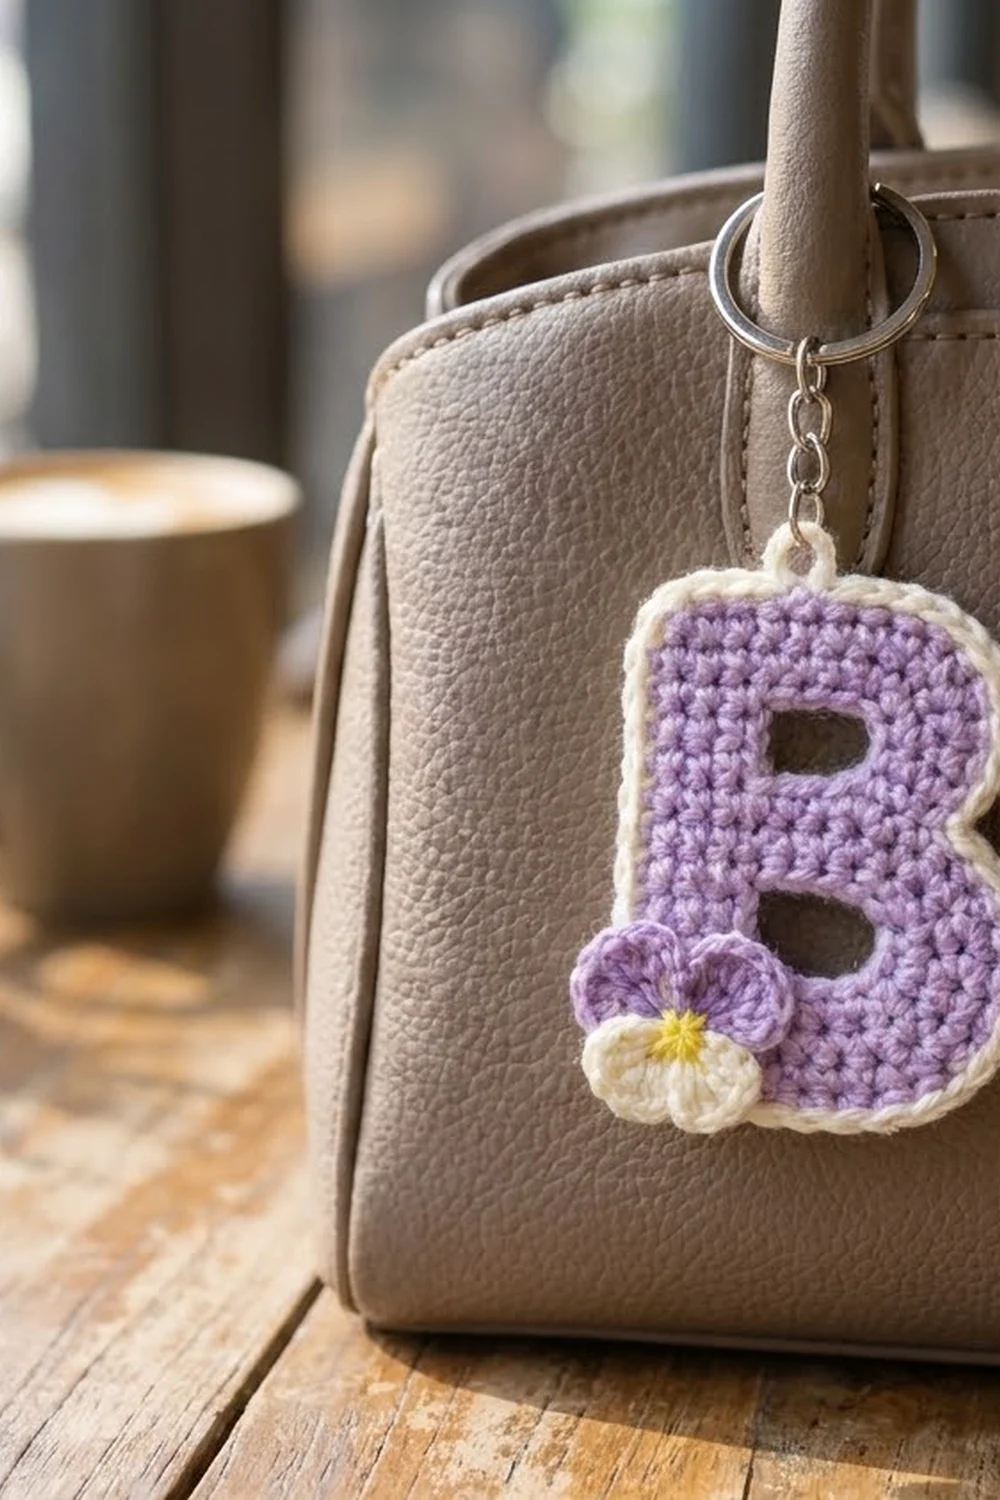
This little charm is a soft lavender capital letter B with a crisp cream outline and a tiny pansy tucked into the lower-left corner. It hangs from a silver split keyring, so you can use it as a bag charm, a key fob or a personalized gift tag.
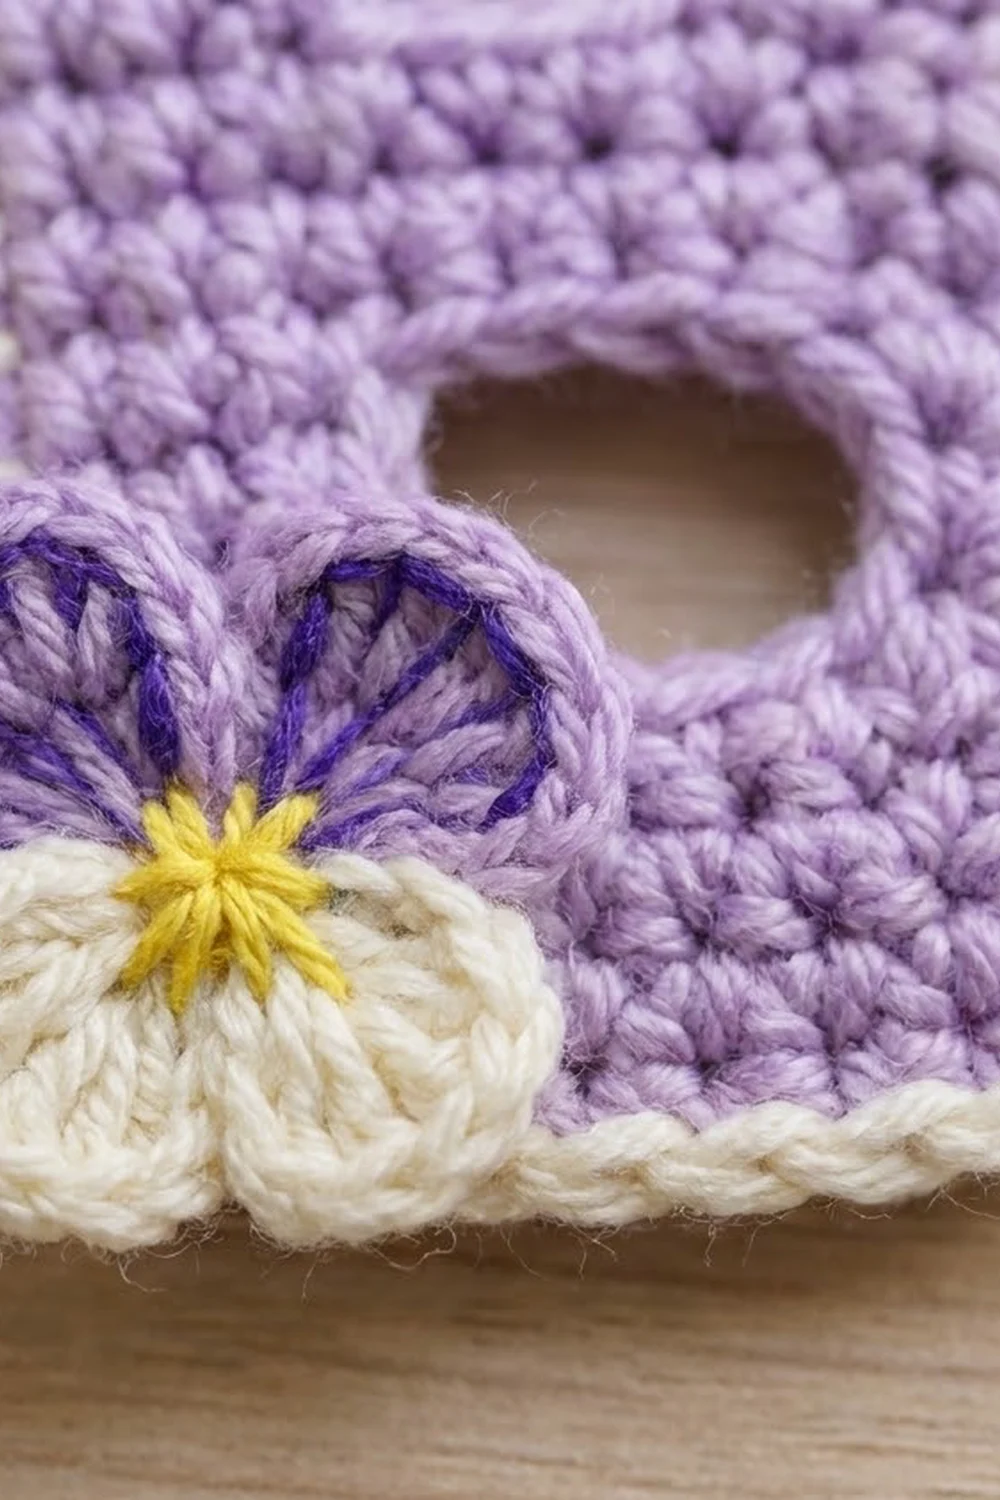
The colors are calm and springlike. Lavender is used for the letter, cream for the outline and lower pansy petals, deep violet to outline the upper petals, and a touch of yellow at the flower’s center. The fabric is tight single crochet, so the letter stays flat and firm.
This pattern uses US crochet terms. The finished letter measures 2.75 in wide x 3.75 in tall (7.0 cm x 9.5 cm), not counting the tab and hardware.
Construction is simple. You work the letter flat in rows from the bottom up, splitting the rows around the two holes. Then you add one cream border round with a hanging tab, make a three-part pansy, sew it on, block and attach the hardware.
Finished Size and Construction
- Finished size: 2.75 in x 3.75 in (7.0 cm x 9.5 cm); about 4.1 in (10.4 cm) tall including the tab
- Skill level: Easy-intermediate (shaping by rows, split sections)
- Terminology: US
- Yarn weight: Sport-weight (#2) cotton
- Hook: 2.5 mm (US B/1 or C/2)
- Number of pieces: 1 letter, plus a 3-part pansy appliqué
- Layout: Single charm, pansy at lower-left
- Letter grid: 15 stitches x 21 rows
- Size before border: 2.5 in x 3.5 in (6.4 cm x 8.9 cm)
- Border depth: 1/8 in (0.3 cm) per side
- Pansy size: about 1 in wide x 0.875 in tall (2.5 cm x 2.2 cm)
Materials
Choose a smooth, mercerized sport-weight cotton. It shows the stitches clearly, doesn’t fuzz much on a keyring and holds its shape. Avoid fluffy acrylics, which blur the outline of the letter.
- Lavender (letter and upper petals): 8 g, about 25 m
- Cream (border, tab, lower petals): 3 g, about 9 m
- Deep violet (petal outline): 1 g, about 3 m
- Yellow (pansy center): 1 g, about 3 m
These amounts include extra yarn for a gauge swatch and for weaving in ends.
Tools:
– 2.5 mm crochet hook
– Tapestry needle
– 2 locking stitch markers
– 1 split keyring, 1 in (2.5 cm), with short chain
– 1 small jump ring and 2 flat-nose pliers
– Rust-proof pins and a blocking mat
– Small scissors
– Optional: fabric stiffener
Abbreviations (US Terms)
- ch – chain
- sl st – slip stitch
- sc – single crochet
- dc – double crochet
- sc2tog – single crochet 2 together: insert hook in next st, pull up a loop, insert hook in following st, pull up a loop, yarn over and draw through all 3 loops
- st(s) – stitch(es)
- RS / WS – right side / wrong side
- MR – magic ring
Special note: The ch 1 at the start of each row does not count as a stitch.
Gauge and Checkpoints
Gauge: 12 sc x 12 rows = 2 in (5.1 cm) in sc worked in rows.
The whole pattern depends on this square gauge (6 sts and 6 rows per inch). It keeps the letter in proportion and lets the border use exactly one sc per row end.
Make a 14-st swatch, work 14 rows and measure the center 12 x 12. Then check your gauge on the letter itself at these points:
- After Row 4: 2.5 in wide x 0.67 in tall (6.4 cm x 1.7 cm)
- After Row 11: about 1.83 in tall (4.6 cm)
- After Row 13: about 2.17 in tall (5.5 cm); upper bowl 2.33 in wide (5.9 cm)
- After Row 17: about 2.83 in tall (7.2 cm)
- After Row 21: 2.5 in x 3.5 in (6.4 cm x 8.9 cm)
If too big: go down 0.25 mm or hold your yarn more tightly. If too small: go up 0.25 mm. If you are off by more than 1/8 in (0.3 cm) at Row 4, restart.
Letter B
Columns are numbered from 1 (left edge) to 15 (right edge) as seen from the RS. Odd rows are RS rows, worked right to left. Even rows are WS rows, worked left to right. The left edge stays straight, and all the curves are on the right.
Bottom Bar
With lavender, ch 14.
Row 1 (RS): Sc in 2nd ch from hook and in each ch across. Turn. (13 sc)
Row 2 (WS): Ch 1, sc in next 12 sts, 2 sc in last st. Turn. (14 sc)
Row 3 (RS): Ch 1, 2 sc in first st, sc in next 13 sts. Turn. (15 sc)
Row 4 (WS): Ch 1, sc in each st across. Turn. (15 sc)
The increases in Rows 2 and 3 shape the rounded bottom-right corner. Your yarn is now at the right edge, in column 15.
Lower Counter (Rows 5–10)
The lower hole is 4 sts wide (columns 7–10) and 6 rows tall: 0.67 in x 1 in (1.7 cm x 2.5 cm).
Right section, Rows 5–10:
Row 5 (RS): Ch 1, sc in next 5 sts (columns 15–11). Turn, leaving remaining sts unworked. (5 sc)
Rows 6–10: Ch 1, sc in each of the 5 sts. Turn after Rows 6–9 only. (5 sc each)
Row 10 is a WS row, so it ends with your loop at the outer right edge. Put a locking marker in the loop and set the piece aside. Do not cut the yarn.
Left section, Rows 5–10:
With RS facing, skip 4 unworked sts of Row 4 (columns 10–7). Join a new strand of lavender in the next st (column 6).
Row 5 (RS): Ch 1, sc in same st and in next 5 sts (columns 6–1). Turn. (6 sc)
Rows 6–10: Ch 1, sc in each of the 6 sts. Turn after Rows 6–9. (6 sc each)
After Row 10, fasten off this strand and leave an 8 in (20.3 cm) tail. It ends at column 6, on the hole side.
Middle Bar
Put the held loop from the right section back on your hook.
Row 11 (RS): Ch 1, sc in 5 sts of right section, ch 4, sc in 6 sts of left section. Turn. (5 sc + 4 ch + 6 sc = 15 sts)
Row 12 (WS): Ch 1, sc in next 6 sc, sc in each of 4 ch, sc in next 3 sc, sc2tog over last 2 sts. Turn. (14 sts)
The sc2tog makes the small notch at the waist between the two bowls.
Row 13 (RS): Ch 1, sc in each st across. Turn. (14 sc)
Your yarn is now at the left edge, in column 1.
Upper Counter (Rows 14–17)
The upper hole is 3 sts wide (columns 7–9) and 4 rows tall: 0.5 in x 0.67 in (1.3 cm x 1.7 cm).
Left section, Rows 14–17:
Row 14 (WS): Ch 1, sc in next 6 sts (columns 1–6). Turn. (6 sc)
Rows 15–17: Ch 1, sc in each of the 6 sts. Turn after Rows 15 and 16. (6 sc each)
After Row 17, your loop is at column 1. Put a marker in the loop. Do not cut the yarn.
Right section, Rows 14–17:
With WS facing, skip the next 3 unworked sts of Row 13 (columns 7–9). Join a new strand in the next st (column 10).
Row 14 (WS): Ch 1, sc in same st and in next 4 sts (columns 10–14). Turn. (5 sc)
Rows 15–17: Ch 1, sc in each of the 5 sts. Turn after Rows 15 and 16. (5 sc each)
Fasten off after Row 17, leaving an 8 in (20.3 cm) tail.
Top Bar
Put the held loop at column 1 back on your hook.
Row 18 (WS): Ch 1, sc in 6 sts of left section, ch 3, sc in 5 sts of right section. Turn. (6 sc + 3 ch + 5 sc = 14 sts)
Row 19 (RS): Ch 1, sc in each sc and each ch across. Turn. (14 sc)
Row 20 (WS): Ch 1, sc in next 12 sts, sc2tog. Turn. (13 sts)
Row 21 (RS): Ch 1, sc2tog, sc in next 11 sts. (12 sts)
Rows 20 and 21 round off the top-right corner. Fasten off lavender at column 1 (top-left). The letter should now measure 2.5 in x 3.5 in (6.4 cm x 8.9 cm). Weave the four tails from the split sections along the hole edges so they are hidden.
Border
Border gauge: Work one sc in each st across the top and bottom, one sc in each row end along the sides, and 3 sc in each of the four corner sts. In the steps below, the side counts are the stitches between the corners. The corners are counted separately.
With RS facing, join cream in the last st of Row 21 (column 1, top-left corner).
Round 1:
– Top-left corner: 3 sc in the joining st.
– Left side: 1 sc in each row end of Rows 20 down to 2. (19 sc)
– Bottom-left corner: 3 sc in the underside of the first foundation ch (column 1).
– Bottom: sc in the next 11 foundation ch (columns 2–12). (11 sc)
– Bottom-right corner: 3 sc in the last foundation ch (column 13).
– Right side: 1 sc in each row end of Rows 2 up to 20. (19 sc)
– Top-right corner: 3 sc in the first st of Row 21 (column 12).
– Top: sc in the next 10 sts (columns 11–2). (10 sc)
– Join with sl st to the first sc.
Round total: 4 corners x 3 sc (12) + 19 + 11 + 19 + 10 = 71 sc.
Why the math works:
– Top: Row 21 has 12 sts. Two of them are corners, leaving 10.
– Bottom: The foundation has 13 ch. Two of them are corners, leaving 11.
– Sides: Each side has 21 rows. The corners cover Rows 1 and 21, leaving 19 row ends.
Because the gauge is square, one sc per row end matches one sc per stitch, so the border doesn’t ruffle or cup. On the right side, the stepped row ends at the curves and the waist each get 1 sc, which smooths them into a rounded shape.
Hanging tab: Sl st into the center sc of the top-left corner. Ch 6, sl st into the same st to form a loop. Work 9 sc into the ch-6 loop, then sl st into the same corner st. Fasten off. The tab sticks up about 3/8 in (1.0 cm) above the corner.
The border adds 1/8 in (0.3 cm) on each side. The finished letter is 2.75 in x 3.75 in (7.0 cm x 9.5 cm).
Pansy Appliqué
The pansy has three parts: two upper petals and one lower piece with two lobes.
Upper Petals (make 2)
With lavender, make a MR.
Round 1: Ch 3 (counts as dc), 6 dc in ring. (7 dc) Do not join. Pull the ring closed so the petal forms a half circle.
Fasten off lavender. Join deep violet in the top of the ch-3. Sl st loosely in each of the 7 sts around the curve. Fasten off. (7 sl st)
Each petal is about 0.6 in (1.5 cm) wide.
Lower Piece (make 1)
With cream, make a MR.
Round 1: Ch 3 (counts as dc), 5 dc in ring, ch 2, sl st in ring. (Lobe 1: 6 dc) Ch 3, 5 dc in ring, ch 2, sl st in ring. (Lobe 2: 6 dc)
Pull the ring tight. The two half-circle lobes sit side by side and form a rounded bottom about 1 in (2.5 cm) wide. Each lobe is about 0.5 in (1.3 cm). Fasten off, leaving a 12 in (30.5 cm) tail.
Assembly
- Lay the two lavender petals with their straight edges down, overlapping by about 1/8 in (0.3 cm) in the middle.
- Place the cream piece on top, with its ring center lined up over the petals’ overlap and the lobes pointing down.
- With the cream tail, tack all the layers together through the center.
- With yellow, work one French knot in the center, then 5 short straight stitches radiating outward.
The finished pansy is about 1 in x 0.875 in (2.5 cm x 2.2 cm).
Attaching the Pansy
Place the pansy over the lower-left corner so the cream lobes slightly overlap the bottom border and the petals rest on the stem. Whipstitch around the outer edges with matching yarn. Catch only the back loops of the letter so the stitches don’t show on the front.
Final Blocking
- Lightly mist the letter (not the pansy) with water.
- Pin it RS up on a blocking mat at 2.75 in x 3.75 in (7.0 cm x 9.5 cm).
- Place pins at the four outer corners and at the waist.
- Gently open both holes with a fingertip so they stay rounded.
- Because it’s cotton, you can also hold a steam iron 1 in (2.5 cm) above the piece. Never press the iron down.
- Let it dry completely, for at least 4 hours.
- Optional: brush a thin coat of fabric stiffener on the back for a firmer charm.
- Once dry, open the jump ring with pliers, thread it through the tab and the keyring chain, and close it fully.
Final Quality-Control Checklist
- Letter measures 2.75 in x 3.75 in (7.0 cm x 9.5 cm).
- Left edge is straight, and the right side shows two smooth bowls with a small waist.
- Lower hole is larger than the upper hole.
- Border round has 71 sc with no gaps at corners.
- Tab is firm and centered on the top-left corner.
- Pansy is tacked securely with no stitches showing.
- Jump ring is fully closed with no gap.
- All ends are woven in and trimmed.
Troubleshooting
Letter looks stretched tall: Your rows are taller than your stitches are wide. Pull each sc loop snug against the hook, then check that 12 rows on your swatch measure 2 in (5.1 cm).
Border ruffles: You may be working 2 sc into some row ends. Recount for 19 sc per side.
Border cups: Your border is too tight. Go up 0.5 mm for the border only.
Holes look stretched or uneven: Chain more loosely across the hole in Rows 11 and 18.
Gaps where the split sections join: Pull the first sc of each new section snug, and use the yarn tail to close any gap as you weave it in.
Pansy petals curl: Steam them lightly and pin them flat to dry before sewing.
Care
Hand wash in cool water with mild soap, roll it in a towel to press out the water, and lay it flat to dry. Remove the metal hardware before washing if you can.
Final Notes
Each measurement builds on the one before. A gauge of 12 sc x 12 rows = 2 in (5.1 cm) gives a 15-st x 21-row letter of 2.5 in x 3.5 in (6.4 cm x 8.9 cm). The 71-st cream border adds 1/8 in (0.3 cm) on each side, for a finished size of 2.75 in x 3.75 in (7.0 cm x 9.5 cm). If you measure at each stage, the letter will finish at the right size.
You can change the colors to match a favorite bag, or chart other initials on a grid of your own. Happy crocheting!