

This scallop shell motif has raised ribs that fan out from a small base and a rounded, scalloped top edge. Nine ribs run from the bottom point to the rim. Between them, plain double crochet valleys get wider as the shell grows. A row of small eyelets sits under the rim, and a short flared foot finishes the bottom, like the hinge of a real seashell.
The sample uses one color, a soft cream cotton. A single color shows off the ribs best, because the texture comes from the post stitches and not from color changes. A smooth, light-colored cotton shows the most stitch detail.
The pattern uses US crochet terms. The finished shell is about 6 in (15.2 cm) wide and 5¼ in (13.3 cm) tall, including the edging and the foot.
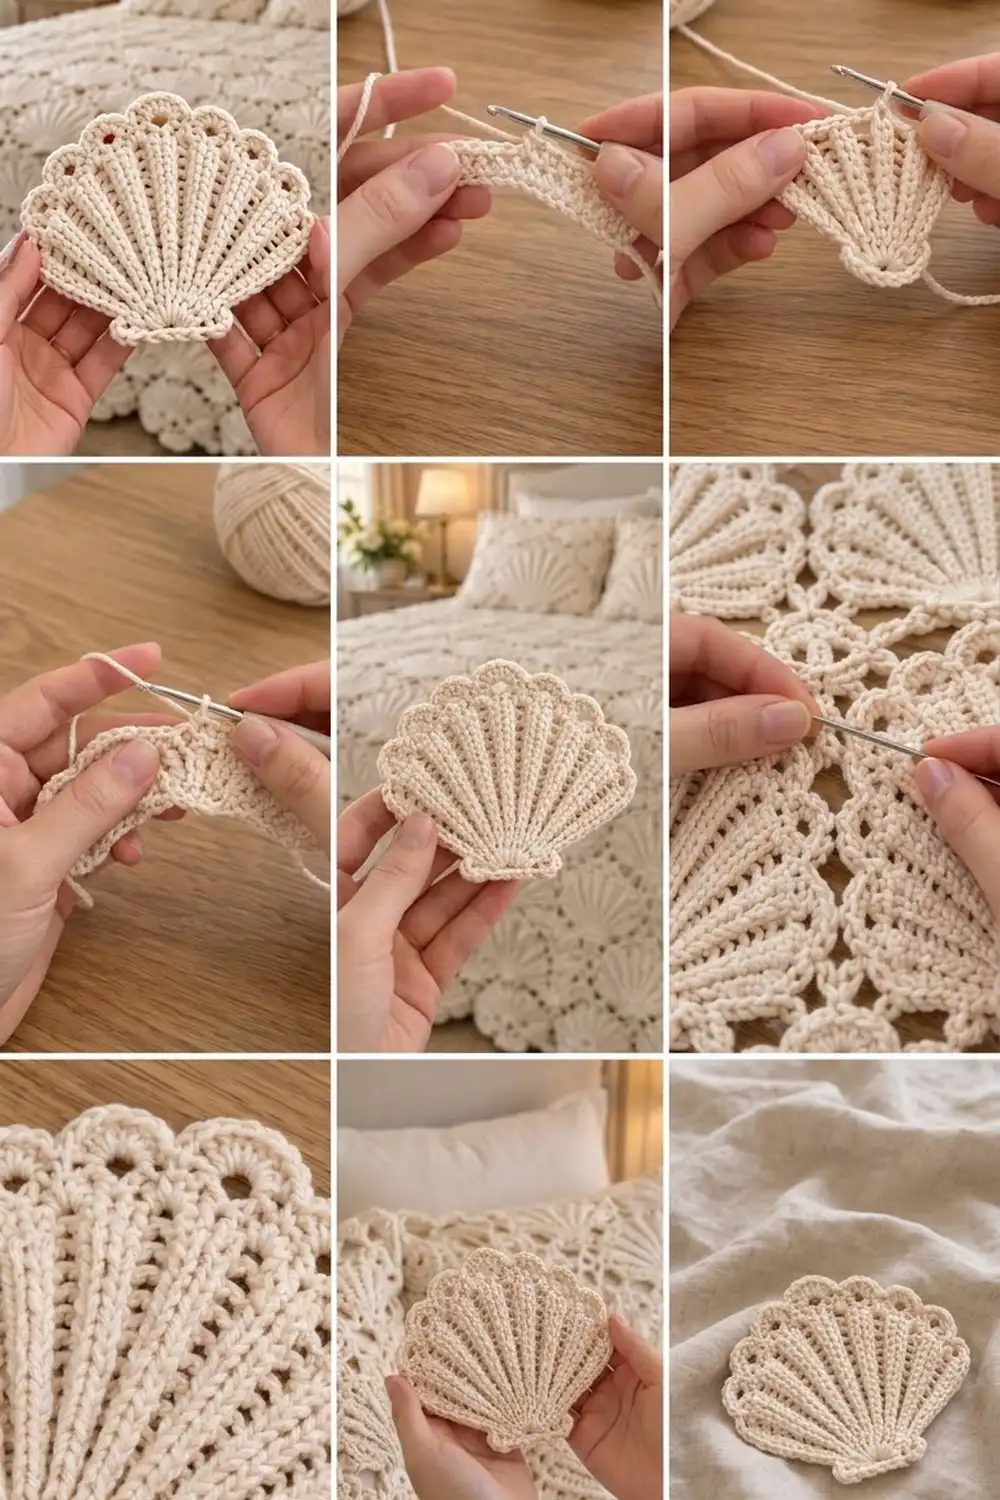
You work the shell flat in turned rows from a small ring. Front post and back post stitches keep the ribs raised on the right side. Next comes an eyelet row and then a scallop row. The piece is finished with one edging round that outlines the sides, adds the foot, and shapes the lobes.
Finished Size and Construction
- Finished size: about 6 in (15.2 cm) wide × 5¼ in (13.3 cm) tall
- Skill level: Intermediate (you need to be comfortable with post stitches)
- Terminology: US crochet terms
- Yarn weight: Sport weight (#2) cotton
- Hook: 3.5 mm (US E-4)
- Number of pieces: 1 (a single motif)
- Layout: One standalone shell, nothing joined
- Piece size after Row 11 (before edging): about 5½ in (14.0 cm) wide × 4¾ in (12.1 cm) tall
- Edging depth: about ¼ in (0.6 cm) on the sides and top, plus a foot about ¼ in (0.6 cm) deep at the base
Materials
Yarn: Choose a smooth, tightly plied sport-weight cotton or cotton blend. Mercerized cotton gives the sharpest ribs. A fuzzy or loosely plied yarn will blur the post stitches.
- Cream / ivory: 15 g, about 48 m (52 yd)
This amount includes a margin of roughly 25% for a gauge swatch and weaving in ends. The motif itself uses about 11–12 g.
Tools:
- 3.5 mm (US E-4) crochet hook
- Tapestry needle
- Scissors
- Stitch marker (optional, for marking the right side)
- Rustproof pins and a blocking mat or folded towel
- Spray bottle with cool water
- Ruler or tape measure
Abbreviations (US Terms)
- ch – chain
- sl st – slip stitch
- sc – single crochet
- hdc – half double crochet
- dc – double crochet
- sk – skip
- sp – space
- st(s) – stitch(es)
- tch – turning chain
- RS / WS – right side / wrong side
- FPdc – front post double crochet
- BPdc – back post double crochet
Special stitches:
- FPdc: Yarn over, insert the hook from front to back to front around the post of the stitch, yarn over and pull up a loop, then (yarn over, pull through 2 loops) twice.
- BPdc: Yarn over, insert the hook from back to front to back around the post of the stitch, then finish as a normal dc.
Rib rule: On RS rows, work ribs as FPdc. On WS rows, work ribs as BPdc. Both push the rib toward the RS, so all 9 ribs stay raised on the front. The two edge ribs are the ch-3 at the start of each row and the dc in the top of the turning chain at the end. They are plain dc in every row.
Gauge and Checkpoints
Gauge: 20 dc and 10 dc rows = 4 in (10.2 cm) in plain dc rows. One dc row is about 0.4 in (1.0 cm) tall.
Make a small square swatch first, then make one full shell and check it against the measurements below before you make any more. Measure the height from the bottom of the ring straight up the center rib.
- After Row 3: about 1½ in (3.8 cm) tall
- After Row 6: about 2.7 in (6.9 cm) tall
- After Row 9: about 3.9 in (9.9 cm) tall and about 5¼ in (13.3 cm) wide across the top
- After Row 11: about 4¾ in (12.1 cm) tall and 5½ in (14.0 cm) wide
- After the edging: about 5¼ in (13.3 cm) tall and 6 in (15.2 cm) wide
If your shell is too big: go down to a 3.25 mm hook, or work the post stitches more firmly. Loose post stitches are the most common reason for extra height.
If your shell is too small: go up to a 3.75 mm hook. Do not add rows, because that changes how the rib spacing lines up with the eyelets.
If the fan ripples: your rows are too short for the increases. Go up a hook size.
If the fan cups: your rows are too tall. Go down a hook size.
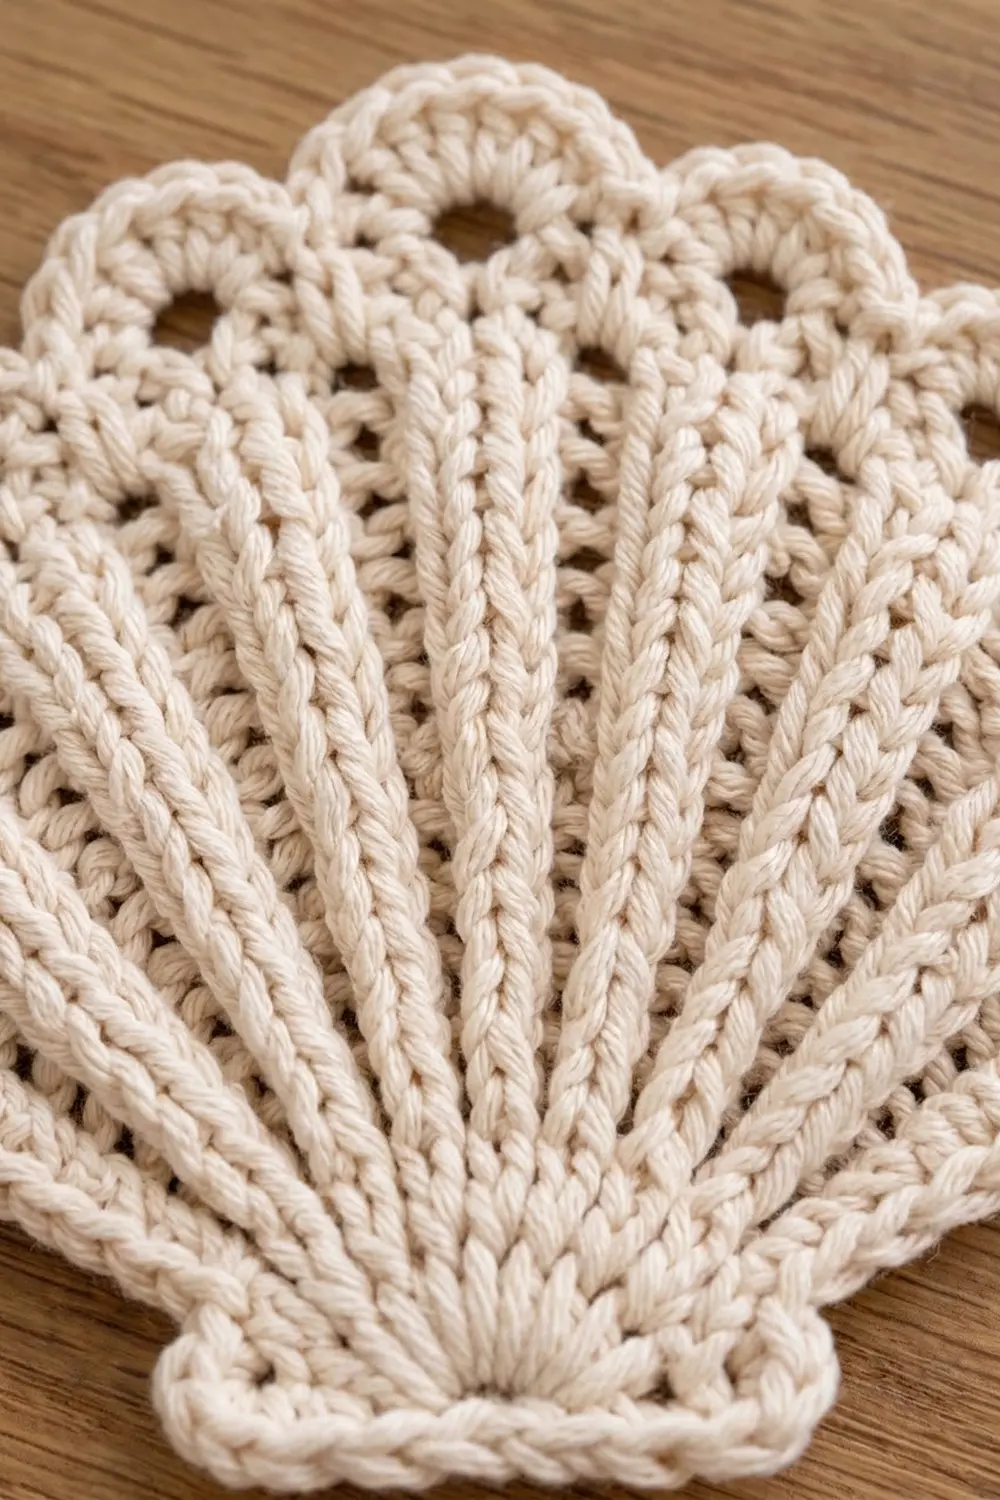
Shell Pattern
The ch-3 at the start of each row counts as a dc and as the first edge rib throughout. Turn at the end of every row.
Foundation: Ch 6, sl st into the first ch to form a ring.
Row 1 (RS): Ch 3 (counts as dc), work 8 dc into the ring. Push the stitches together so they sit over the upper half of the ring, and leave the lower arc of the ring bare (you will work the foot into it later). Turn. (9 sts; these are the 9 ribs)
Mark this side as the RS.
Row 2 (WS): Ch 3, dc in the sp between the st just worked and the next st, BPdc around the next st; repeat from * 7 more times (8 times total). The final BPdc lands on the last st before the turning chain. Then dc in the last sp, dc in the top of the tch. Turn.
Check the count: 2 edge ribs + 7 BPdc ribs = 9 ribs, and 8 valley dc. (17 sts)
Every row from here on has the same shape: an edge rib, then 8 valleys with a post rib between each pair of valleys, then an edge rib. The repeat brackets below cover 7 valley-and-rib pairs, and the eighth valley comes before the final dc.
Row 3 (RS): Ch 3, dc in the next valley st, FPdc around the next rib; repeat from * 6 more times, dc in the next valley st, dc in the top of the tch. Turn. (17 sts: 9 ribs, 8 valleys of 1 st)
Row 4 (WS, growth row): Ch 3, 2 dc in the next valley st, BPdc around the next rib; repeat from * 6 more times, 2 dc in the next valley st, dc in the top of the tch. Turn. (25 sts: 9 ribs, 8 valleys of 2 sts)
Row 5 (RS): Ch 3, dc in each of the next 2 valley sts, FPdc around the next rib; repeat from * 6 more times, dc in each of the next 2 valley sts, dc in the top of the tch. Turn. (25 sts)
Row 6 (WS): Work as Row 5, but use BPdc for the ribs. Turn. (25 sts)
Row 7 (RS, growth row): Ch 3, dc in the next valley st, 2 dc in the next valley st, FPdc around the next rib; repeat from * 6 more times, dc in the next valley st, 2 dc in the next valley st, dc in the top of the tch. Turn. (33 sts: 9 ribs, 8 valleys of 3 sts)
Row 8 (WS): Ch 3, dc in each of the next 3 valley sts, BPdc around the next rib; repeat from * 6 more times, dc in each of the next 3 valley sts, dc in the top of the tch. Turn. (33 sts)
Row 9 (RS): Work as Row 8, but use FPdc for the ribs. Turn. (33 sts)
Checkpoint: the shell should be about 3.9 in (9.9 cm) tall. Spacing the growth rows apart like this keeps the fan open to about 95–100 degrees, which gives the shell its silhouette. It stays narrower than a half circle and does not ripple.
Row 10 (WS, eyelet row): Ch 3, dc in the next valley st, ch 2, sk the next valley st, dc in the next valley st, BPdc around the next rib; repeat from * 6 more times, dc in the next valley st, ch 2, sk the next valley st, dc in the next valley st, dc in the top of the tch. Turn.
(25 sts + 8 ch-2 sps: 9 ribs, 16 valley dc)
Each skipped center valley stitch becomes an eyelet, centered between two ribs.
Row 11 (RS, scallop row): Ch 1, sc in the first st (edge rib), sc in the next dc, 5 dc in the next ch-2 sp, sc in the next dc, sc in the top of the next rib; repeat from * 6 more times, sc in the next dc, 5 dc in the next ch-2 sp, sc in the next dc, sc in the top of the tch.
Count: 9 rib sc + 8 lobes of 7 sts each (sc, 5 dc, sc) = 9 + 56. (65 sts)
Do not fasten off.
Each group of 5 dc fans over its ch-2 space and makes one rounded lobe. The eyelet stays open underneath it. Each rib ends in a sc at the dip between two lobes, so the ribs appear to run up into the scallop edge.
Checkpoint: about 4¾ in (12.1 cm) tall and 5½ in (14.0 cm) wide.
Edging and Foot
Edging gauge: 2 sc fit along the side of 1 dc row, because a dc row (0.4 in / 1.0 cm) is about twice as tall as a sc. Along the top, 1 sc per stitch with 3 sc at each lobe tip keeps the curves rounded without making them flat or tight.
Edging Round (RS): Do not turn. Ch 1, then rotate the piece to work down the side.
- Side B, going down: 1 sc in the side of the last sc of Row 11, then 2 sc around the post of each dc row end from Row 10 down to Row 1 (10 rows). (1 + 20 = 21 sc)
- Foot: Into the bare lower arc of the foundation ring, work (sc, hdc, 5 dc, hdc, sc). (9 sts) This makes the small flared hinge at the bottom of the shell.
- Side A, going up: 2 sc around the post of each dc row end from Row 1 up to Row 10, then 1 sc in the side of the first sc of Row 11. (20 + 1 = 21 sc)
- Top: Work across Row 11. Sc in each st, but work 3 sc in the center (3rd) dc of each 5-dc lobe. (65 sts worked one per stitch + 16 extra sts at the 8 lobe tips = 81 sc)
Join with a sl st to the first sc of Side B.
Round total: 21 + 9 + 21 + 81 = 132 sts.
Fasten off and weave in the ends along the WS of the rib columns.
Why the math works:
- Sides: Each side has 10 dc row ends at 2 sc each, plus 1 sc for the sc row. That adds up to the same 21 sc on both sides, so the shell stays symmetrical.
- Top: The base is 65 sts, one per Row 11 stitch. Each lobe gets exactly 2 extra stitches (the 3-sc group replaces 1 stitch), and 8 lobes × 2 = 16. Ribs get no extra stitches, so the dips between lobes stay sharp.
- Side tops: Row 11 already has its own edge sc at each side top, so no extra corner stitches are added there.
Final Blocking
- Weave in all ends before blocking.
- Lay the shell RS up on a blocking mat or folded towel.
- Spray it evenly until damp, not soaked.
- Pin the bottom point of the foot first. Then pin the two top side corners so the shell is 6 in (15.2 cm) wide.
- Pin the tip of each of the 8 lobes along a smooth arc. The center lobe should sit 5¼ in (13.3 cm) above the bottom of the foot.
- Run a fingertip up each rib to straighten it into a clean radiating line.
- Open each eyelet gently with the hook tip.
- Let the shell dry completely before you unpin it, usually 4–6 hours.
Final Quality-Control Checklist
- [ ] 9 raised ribs, all standing up on the RS
- [ ] 8 eyelets, one between each pair of ribs
- [ ] 8 rounded lobes, each centered over an eyelet
- [ ] Row 11 count: 65 sts
- [ ] Edging count: 21 + 9 + 21 + 81 = 132 sts
- [ ] Both sides look the same length
- [ ] Foot flares evenly and sits centered under the middle rib
- [ ] Size: 6 in (15.2 cm) × 5¼ in (13.3 cm), within ¼ in (0.6 cm)
- [ ] Ends woven in securely and invisible from the RS
Troubleshooting
Ribs sink instead of standing up: You probably mixed up FPdc and BPdc. Use FPdc on odd (RS) rows and BPdc on even (WS) rows.
A row has the wrong count: Count ribs first (always 9), then count the valleys. Most mistakes come from missing the last valley before the final dc.
Shell ripples at the top: The rows are too short. Go up a hook size, or work Rows 8 and 9 a little more loosely.
Shell cups like a bowl: The rows are too tall. Go down a hook size.
Eyelets close up: Make the ch-2 more loosely, and don’t push the 5 dc too tightly into the space.
Lobes look pointed: Check that you worked 3 sc only at the center dc of each lobe, and 1 sc everywhere else.
Foot is crowded: Next time, push the Row 1 stitches higher on the ring to leave more of the lower arc bare.
Sides are different lengths: Count your edging stitches. Each side needs exactly 21 sc.
Care
Hand wash in cool water with a mild soap, press out the water in a towel, and dry flat. Re-pin the lobes and foot while damp if they need it.
Final Notes
Here is the measurement chain:
| Stage | Height | Width |
|---|---|---|
| Gauge (plain dc) | 10 rows = 4 in (10.2 cm) | 20 dc = 4 in (10.2 cm) |
| After Row 3 | 1½ in (3.8 cm) | — |
| After Row 6 | 2.7 in (6.9 cm) | — |
| After Row 9 | 3.9 in (9.9 cm) | 5¼ in (13.3 cm) |
| After Row 11 | 4¾ in (12.1 cm) | 5½ in (14.0 cm) |
| Finished, with edging and foot | 5¼ in (13.3 cm) | 6 in (15.2 cm) |
The stitch counts move from 9 to 17 to 25 to 33 sts. Row 10 has 25 sts plus 8 ch-2 sps, Row 11 has 65 sts, and the edging round finishes at 132 sts. If your gauge and checkpoints match, the shell will come out with nine clean ribs, eight round lobes, and a neat little foot.
Happy crocheting!