

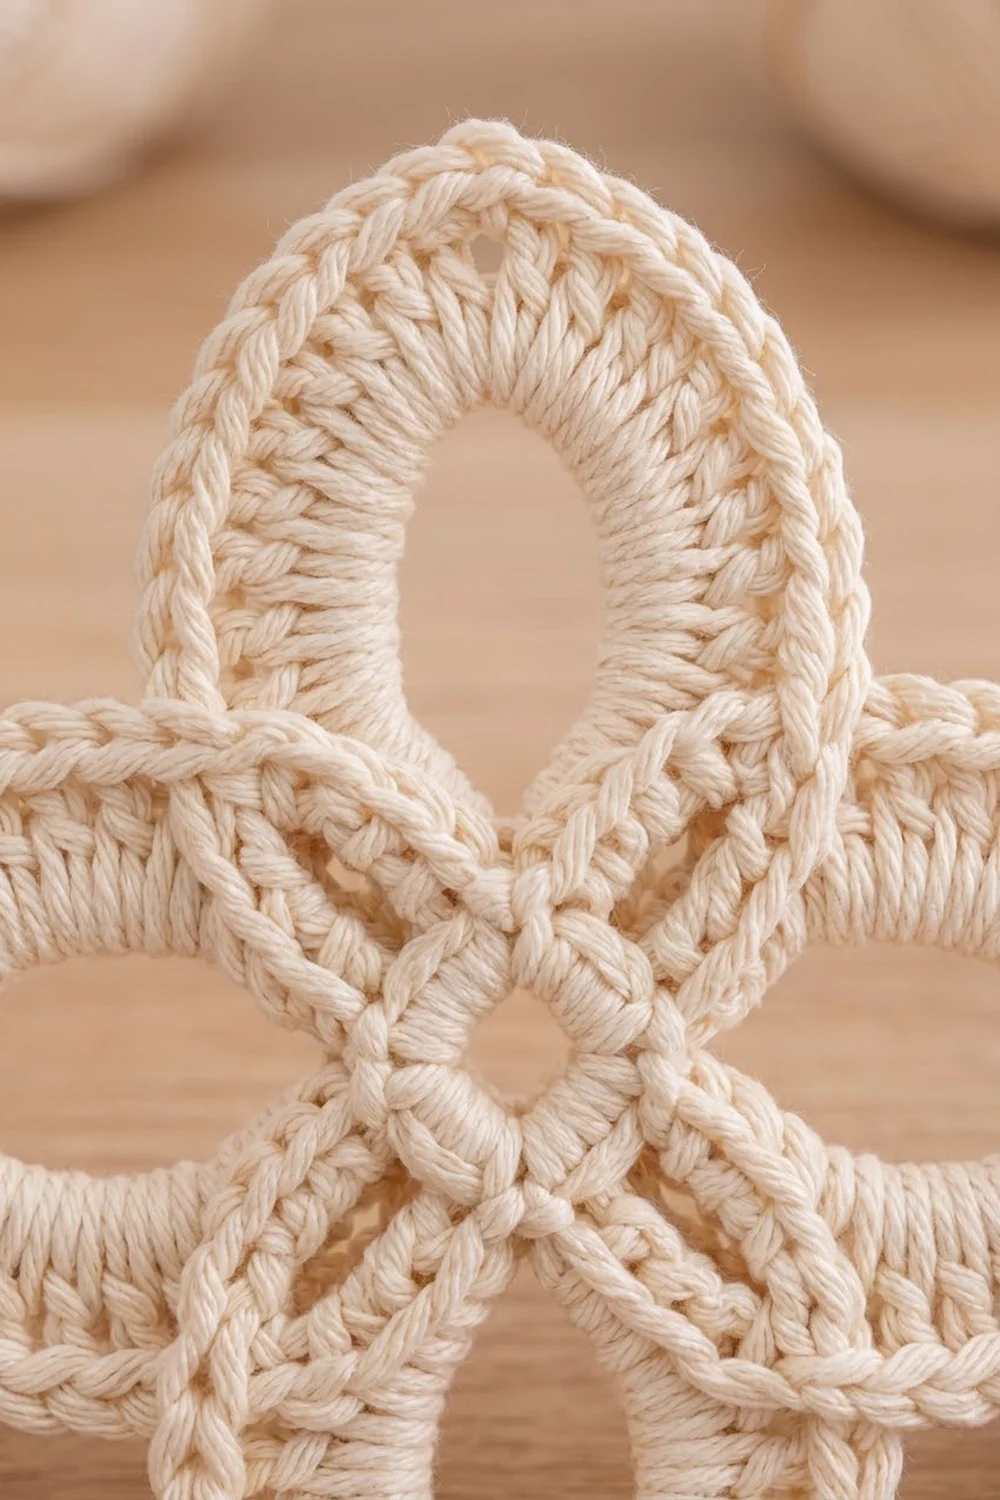
The Celtic Cream Quatrefoil is a single four-petal motif with a sculpted, almost carved look. Each petal is a thick ring of tall stitches around an open almond-shaped window. The four narrow inner ends meet and overlap around a tiny center ring, so the motif looks like a woven knot rather than a flat flower.
It is worked in one soft cream cotton, so the texture does all the talking. A twisted rope edge outlines every petal, which keeps the shape clear even in a single color. The style is classic and heirloom, with a slightly Celtic feel.
This pattern uses US crochet terms. The finished motif measures 5 in (12.7 cm) from one petal tip to the opposite tip, measured diagonally across the X shape.
The construction is simple once you see it. First you make a small center ring. Then you build each petal on a chain loop anchored to that ring, working the stitches around the chain instead of into it. After all four petals are done, two edging rounds outline the whole shape: a single crochet round worked in back loops, then a reverse single crochet round for the rope-like edge.
Finished Size and Construction
- Finished size: 5 in (12.7 cm) tip to tip
- Skill level: Intermediate
- Terminology: US crochet terms
- Yarn weight: Worsted (CYC 4), cotton or cotton blend
- Hook: 4.0 mm (US G-6)
- Number of pieces: 1 (one single motif)
- Layout: four petals arranged in an X, pointing diagonally outward
- Piece size: after the edging, each petal is 2.25 in (5.7 cm) long from the edge of the center ring and 2 in (5.1 cm) wide
- Size before border: 4.5 in (11.4 cm) tip to tip
- Border depth: 0.25 in (0.6 cm) on every edge
Materials
Yarn: Choose a smooth, tightly plied worsted-weight cotton. Mercerized or combed cotton gives the crisp stitch definition this motif needs. Avoid fuzzy or loosely spun yarn, because the rope edge and the open windows depend on clean stitches.
- Cream (main and only color): 15 g, about 26 m (28 yd)
These amounts include a margin of about 25 percent for tension differences and weaving in ends. One motif actually uses about 12 g.
Tools:
- 4.0 mm (US G-6) crochet hook
- Tapestry needle
- Scissors
- 4 locking stitch markers
- Ruler or tape measure
- Blocking mat and rust-proof pins
- Spray bottle with clean water
Abbreviations (US Terms)
- ch – chain
- sl st – slip stitch
- sc – single crochet
- hdc – half double crochet
- dc – double crochet
- BLO – back loop only
- sc2tog – single crochet 2 together
- rev sc – reverse single crochet (crab stitch)
- sp – space
- st(s) – stitch(es)
- MR – magic ring
Special stitches:
- Working into the loop: insert the hook through the center of the chain loop, not into the chains themselves. The stitches wrap around the chain and can slide along it.
- Reverse sc (rev sc): working from left to right (right to left if you are left-handed), insert the hook into the next st to the right, yarn over, pull up a loop, yarn over, and pull through both loops. This makes a twisted, cord-like edge.
- sc2tog: (insert hook into next st, yarn over, pull up a loop) twice, yarn over, pull through all 3 loops.
Gauge and Checkpoints
The motif is small, so you don’t need a separate swatch. Make one complete motif first and use it as your test piece.
Checkpoint 1 – center ring: after Round 1, with the tail pulled snug, the ring measures 0.5 in (1.3 cm) across.
Checkpoint 2 – chain loop: 5 ch = 1 in (2.5 cm). Laid out straight before you join it, the 20-ch loop for each petal measures 4 in (10.2 cm).
Checkpoint 3 – first petal: the finished Petal 1 measures 2 in (5.1 cm) long from the edge of the center ring to the tip, and 1.5 in (3.8 cm) wide. The almond window inside is about 1.25 in (3.2 cm) long and 0.5 in (1.3 cm) wide.
Checkpoint 4 – before edging: after all four petals, the motif measures 4.5 in (11.4 cm) tip to tip.
Checkpoint 5 – finished: after both edging rounds and blocking, the motif measures 5 in (12.7 cm) tip to tip.
If your motif is too big: go down to a 3.75 mm (US F-5) hook, or tighten your chain loop. A loose chain is the most common cause of oversized petals.
If your motif is too small: go up to a 4.5 mm (US 7) hook. If only the windows are closing up, keep your hook but chain more loosely.
For a single motif, being off by up to 0.25 in (0.6 cm) either way is fine.
Center Ring
Round 1: Make a MR. Ch 1 (does not count as a st), then work 8 sc into the ring. Pull the tail to close. Sl st to the first sc. (8 sc)
Number the stitches 1 through 8 in your mind. The petals sit on sc 1, 3, 5, and 7, and sc 2, 4, 6, and 8 are spacers between them. If it helps, place a marker in sc 1, 3, 5, and 7.
Petals
Each petal is built on its own chain loop, with its base in one center sc. That makes the inner end narrow and the outer end pointed, which creates the almond-teardrop shape and the overlapping, knot-like center.
Petal 1:
- You are at sc 1. Ch 20, then sl st into the same sc 1. This forms a loop.
- Working into the loop (around the chain, not into it): 2 sc, 2 hdc, 10 dc.
- Tip: (2 dc, ch 2, 2 dc) into the loop.
- Continue into the loop: 10 dc, 2 hdc, 2 sc.
- Sl st into sc 1 to close the petal.
Stitch count per petal: 16 sts up the first side (2 sc + 2 hdc + 10 dc + 2 tip dc), 16 sts down the second side (2 tip dc + 10 dc + 2 hdc + 2 sc), and one ch-2 tip sp. (32 sts + 1 ch-2 sp)
As you work, push the stitches back toward the base so they pack evenly. The tip group should land at the farthest point of the loop, around the 10th and 11th chains. If it lands off-center, slide the stitches along the chain before you close the petal.
Move to the next petal: sl st into sc 2, then sl st into sc 3.
Petals 2, 3, and 4: Repeat Petal 1 in sc 3, sc 5, and sc 7. After each petal, move forward with 2 sl sts.
After Petal 4, sl st into sc 8, then sl st into sc 1. Fasten off and weave in the ends now so they don’t get trapped in the edging.
Total after petals: 4 petals x 32 sts = 128 petal sts, plus 4 ch-2 tip sps.
Lay the motif flat. The bases of neighboring petals should touch and slightly overlap at the center, framing the small center ring. Now check Checkpoint 4: 4.5 in (11.4 cm) tip to tip.
Border (Edging Rounds)
The border is two rounds that outline every petal. It adds 0.25 in (0.6 cm) to every edge, which takes the motif from 4.5 in (11.4 cm) to 5 in (12.7 cm).
Border gauge: 6 sc = 1 in (2.5 cm) along the outer edge of a petal. The rope edge in Round 2 changes the texture but not the stitch count.
In this border, each side of a petal counts as one “side.” The 2 sc at the base of each petal side are buried at the center, so you skip them. That leaves 14 usable sts per petal side (2 hdc + 10 dc + 2 tip dc).
Round 1 (conversion round): Join the yarn with a standing sc in BLO of the 2nd hdc on the first side of Petal 1.
- Sc in BLO of the next 12 sts (10 dc and 2 tip dc). Counting the standing sc, that is 13 sc on this side.
- 3 sc into the ch-2 tip sp.
- Sc in BLO of the next 13 sts (2 tip dc, 10 dc, 1 hdc).
- Sc2tog over the last hdc of this petal and the first hdc of the next petal, skipping the 2 sc at each petal base.
Next 3 petals: sc in BLO of the next 13 sts (2nd hdc, 10 dc, 2 tip dc), 3 sc in the ch-2 tip sp, sc in BLO of the next 13 sts, then sc2tog over the last hdc of this petal and the first hdc of the next petal. The final sc2tog joins Petal 4 to Petal 1. Sl st to the first sc.
Count per petal: 26 sc worked 1-per-existing-st (13 + 13) + 3 sc added in the tip sp + 1 sc2tog in the valley = 30 sts.
Round 1 total: 4 x 30 = 120 sts
Round 2 (rope edge): Ch 1, then rev sc in each st around. Do not increase at the tips or decrease in the valleys. Sl st to the first st and fasten off. (120 rev sc)
Why the math works: Each petal side has exactly 14 usable sts. Thirteen of them get one sc each. The 14th, the hdc next to the valley, is shared with the neighboring petal in a sc2tog. No stitch is skipped and none is worked twice. The 3 sc in the tip sp turn the point without flattening it, and the sc2tog pulls the valley in so the petals stay separate. Round 2 is worked 1-per-st, so it stays at 120 and lies flat.
Working Round 1 in back loops leaves the front loops showing as a fine chain line just inside the rope edge. That line gives each petal its framed look.
Final Blocking
- Weave in the last tail on the wrong side, through the edging sts only.
- Draw an X on your blocking mat: two lines, each 5 in (12.7 cm) long, crossing at their midpoints.
- Place the center ring where the lines cross. Pin each petal tip at the end of one arm of the X.
- Pin each valley (the sc2tog point) toward the center so the petals stay separate.
- Gently open each almond window with a pin or two. Aim for about 1.25 in (3.2 cm) long and 0.5 in (1.3 cm) wide.
- Mist the motif evenly until it is damp but not soaked.
- Let it dry completely, for at least 6 hours, before you unpin it.
- Measure tip to tip: it should be 5 in (12.7 cm).
Final Quality-Control Checklist
- The center ring is closed tightly, with no hole larger than the ring itself.
- All four petals are the same length: 2.25 in (5.7 cm) from the edge of the center ring.
- Each petal had 32 sts and one ch-2 tip sp before the border.
- Each tip group sits at the farthest point of its petal.
- Border Round 1 has 30 sts per petal and 120 sts total.
- Border Round 2 has 120 rev sc with no gaps.
- The rope edge twists the same way all the way around.
- The almond windows are open and roughly the same shape.
- The motif lies flat and measures 5 in (12.7 cm) tip to tip.
- All ends are woven in securely and can’t be seen from the front.
Troubleshooting
Petals curl or cup. You have too many sts for your chain loop. Chain a little more loosely, or use 22 ch for the loop instead of 20 and keep the same stitch counts.
Petal edges ruffle. Your border sc are too loose. Go down half a hook size for Round 1 only.
The almond window closes up. The stitches are crowding the loop. Push them back toward the base more firmly as you go, and keep the chain loop relaxed.
The tip is off-center. Slide the stitches along the chain before you sl st to close the petal. If the petal is already closed, unravel back to the tip and redo it.
The valleys look gappy. Make sure the sc2tog catches the hdc of both petals, not the buried sc.
The rope edge looks flat. Work the rev sc a little looser than a normal sc, and always move to the right.
The motif is the wrong size overall. Go back to the checkpoints and change hook size as described in the gauge section.
Care
Hand wash in cool water with mild soap, then press the water out in a towel. Dry flat, reshaping the petals while damp, and do not tumble dry.
Final Notes
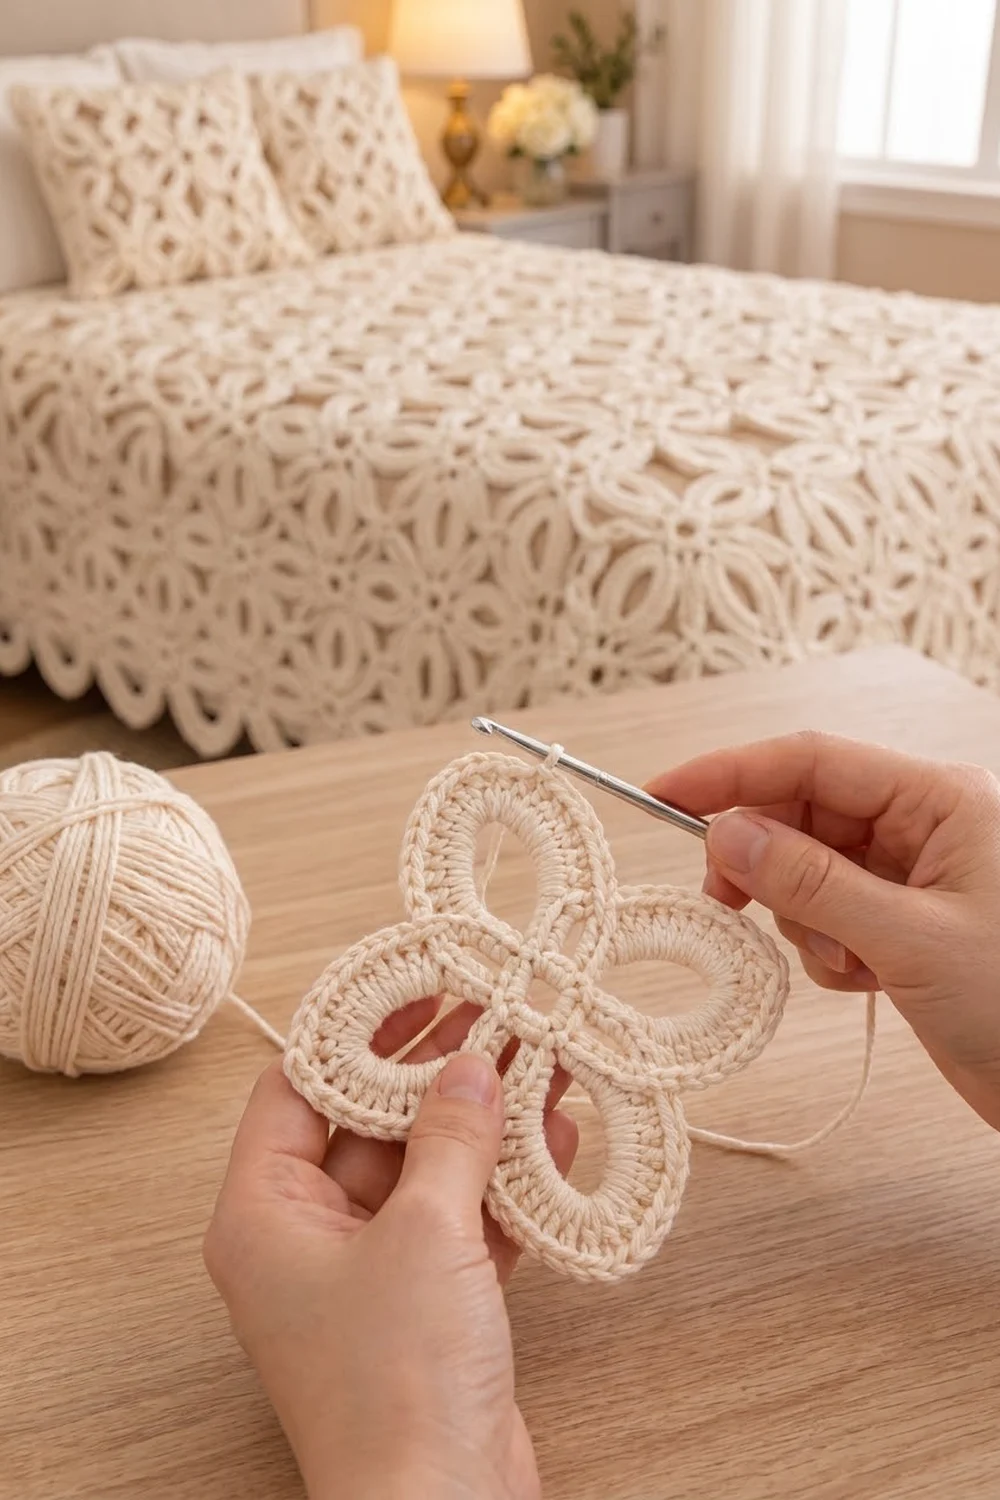
The whole motif follows one measurement chain. The center ring is 0.5 in (1.3 cm). Each petal adds 2 in (5.1 cm) of length, so the motif is 4.5 in (11.4 cm) before the border. The border adds 0.25 in (0.6 cm) at each tip, bringing the motif to 5 in (12.7 cm) tip to tip.
The stitch counts follow a chain too: 8 sc in the center, 32 sts per petal, 30 sts per petal in the first border round, and 120 sts in both border rounds.
Once your first motif matches the checkpoints, your tension is right, and every motif after it will match.
Happy crocheting!