

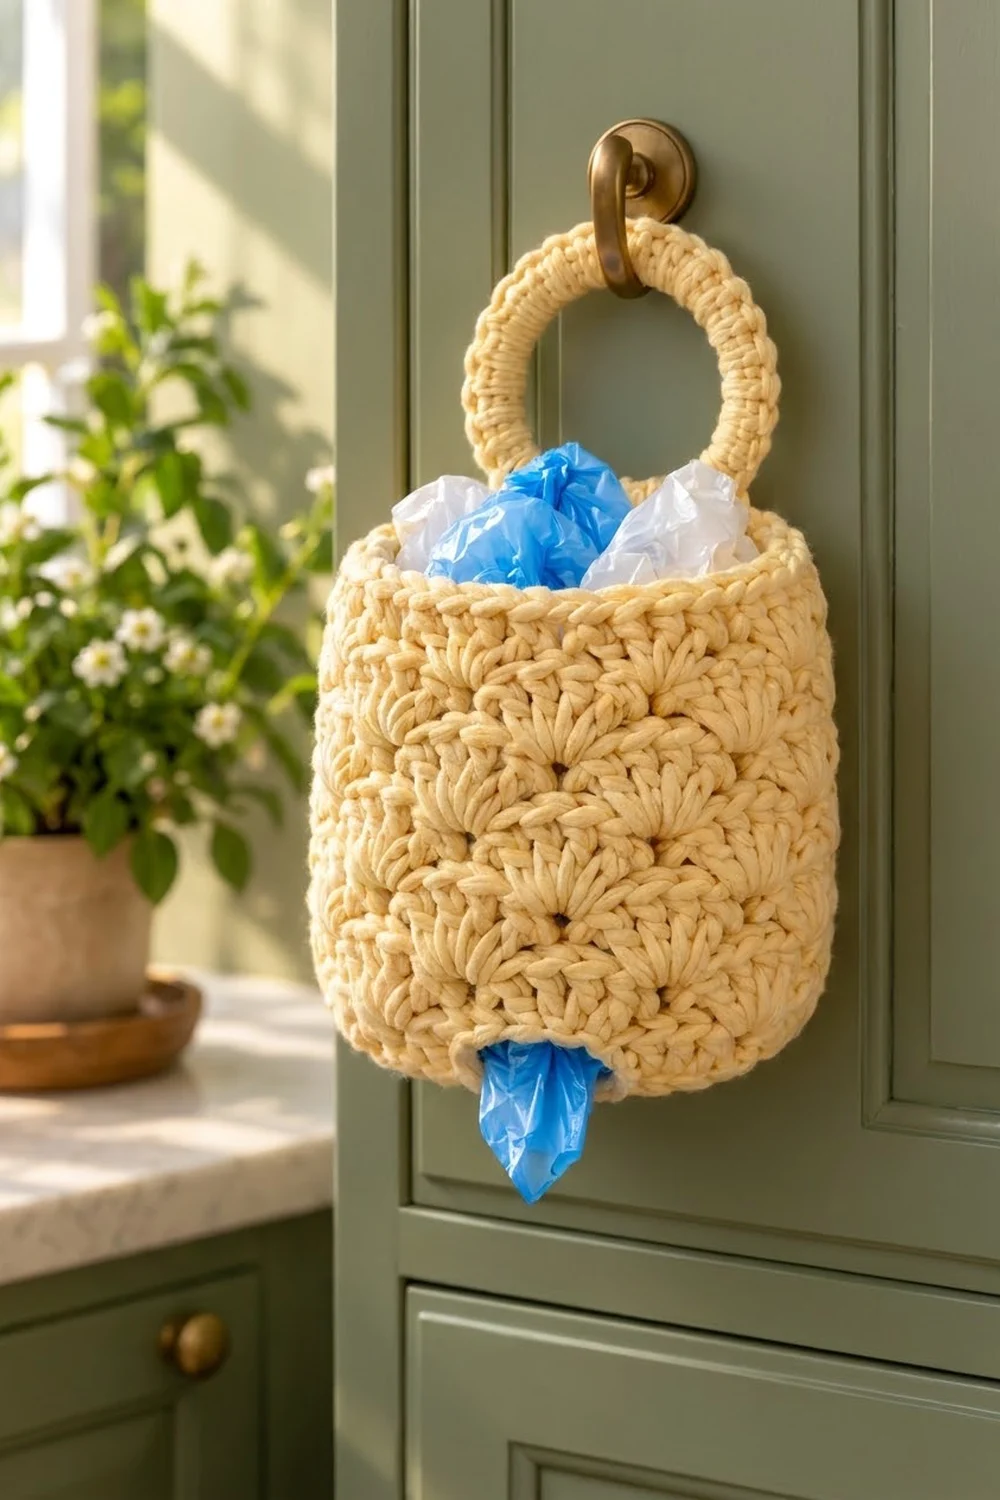
The Buttercup Shell Plastic Bag Holder hangs up to store plastic bags and has a soft, sculpted look. Staggered shell fans cover the whole cylinder, and a firm single crochet rim finishes the top. A thick crocheted ring at the back lets it hang from a door knob or cabinet hook.
It is worked in one solid color, a warm butter yellow, in bulky cotton-blend yarn. The chunky texture hides the bags well, and the rounded base keeps the holder tidy even when it is full.
This pattern uses US crochet terms. The finished body measures about 6.9 in (17.5 cm) across and 8.3 in (21.1 cm) tall. With the ring attached, the full piece is about 11.6 in (29.5 cm) tall.
Construction is simple. You start at the bottom around a small opening and work a flat base outward in single crochet. Then you turn the edge upward and work eight rounds of shells, and three rim rounds close the top. Last, you cover a ring with single crochet and sew it inside the back wall. Bags go in the top and come out one at a time through the bottom opening.
Finished Size and Construction
- Finished size: body 6.9 in (17.5 cm) in diameter x 8.3 in (21.1 cm) tall; 11.6 in (29.5 cm) tall including the ring
- Circumference: 21.8 in (55.4 cm)
- Skill level: Easy-intermediate
- Terminology: US
- Yarn weight: Bulky (#5)
- Hook: 6 mm (US J-10)
- Number of pieces: 2 (body and hanging ring)
- Layout: Ring centered at the back of the rim, rising above the top opening
- Piece size: Body 6.9 in (17.5 cm) x 8.3 in (21.1 cm); ring 4.5 in (11.4 cm) outer diameter
- Size before border: 6.9 in (17.5 cm) in diameter x 7.3 in (18.5 cm) tall
- Border depth: 1 in (2.5 cm), worked as the top rim
Materials
Choose a smooth bulky cotton or cotton-acrylic blend with good stitch definition. Pure acrylic also works, but cotton holds the cylinder shape better. Avoid fuzzy or brushed yarns, because they blur the shells.
- Butter yellow: 220 g, about 310 m (339 yd), based on a yarn of roughly 140 m (153 yd) per 100 g. The body uses about 165 g and the ring about 20 g.
These quantities include a margin of about 35 g for swatching and differences in gauge.
Tools:
- 6 mm (US J-10) hook
- One 3.5 in (8.9 cm) metal, wooden, or plastic ring
- Tapestry needle
- 2 stitch markers
- Scissors
- Measuring tape
- Spray bottle and a small towel for blocking
Abbreviations (US Terms)
- ch – chain
- sl st – slip stitch
- sc – single crochet
- hdc – half double crochet
- dc – double crochet
- sk – skip
- st(s) – stitch(es)
- rnd – round
- rep – repeat
Special stitch – Shell: 5 dc in the same stitch.
Split shell: In Round B, you work ch 3 (counts as 1 dc) and 2 dc into the first stitch at the start of the round. At the end of the round, you work 2 more dc into that same stitch. Together they make one full shell of 5 sts.
Gauge and Checkpoints
Gauge: 11 sc and 12 sc rounds = 4 in (10.2 cm). In shell pattern, one 6-st repeat = 2.2 in (5.6 cm), and 4 shell rounds = 3.5 in (8.9 cm).
Use the base as your test piece. Work Rnds 1–9 before you commit to the whole holder, then measure.
- After Rnd 5 (36 sts): base diameter about 4.2 in (10.7 cm)
- After Rnd 9 (60 sts): base diameter 6.9 in (17.5 cm), lying flat
- After Rnd 14: side height about 3.8 in (9.7 cm), measured from the base edge
- After Rnd 18: side height about 7.3 in (18.5 cm)
- After Rnd 21: side height 8.3 in (21.1 cm)
If your base is larger than 6.9 in (17.5 cm), go down to a 5.5 mm (US I-9) hook. If it is smaller, go up to a 6.5 mm (US K-10.5) hook. Don’t change the stitch counts, because the shell repeat depends on exactly 60 sts.
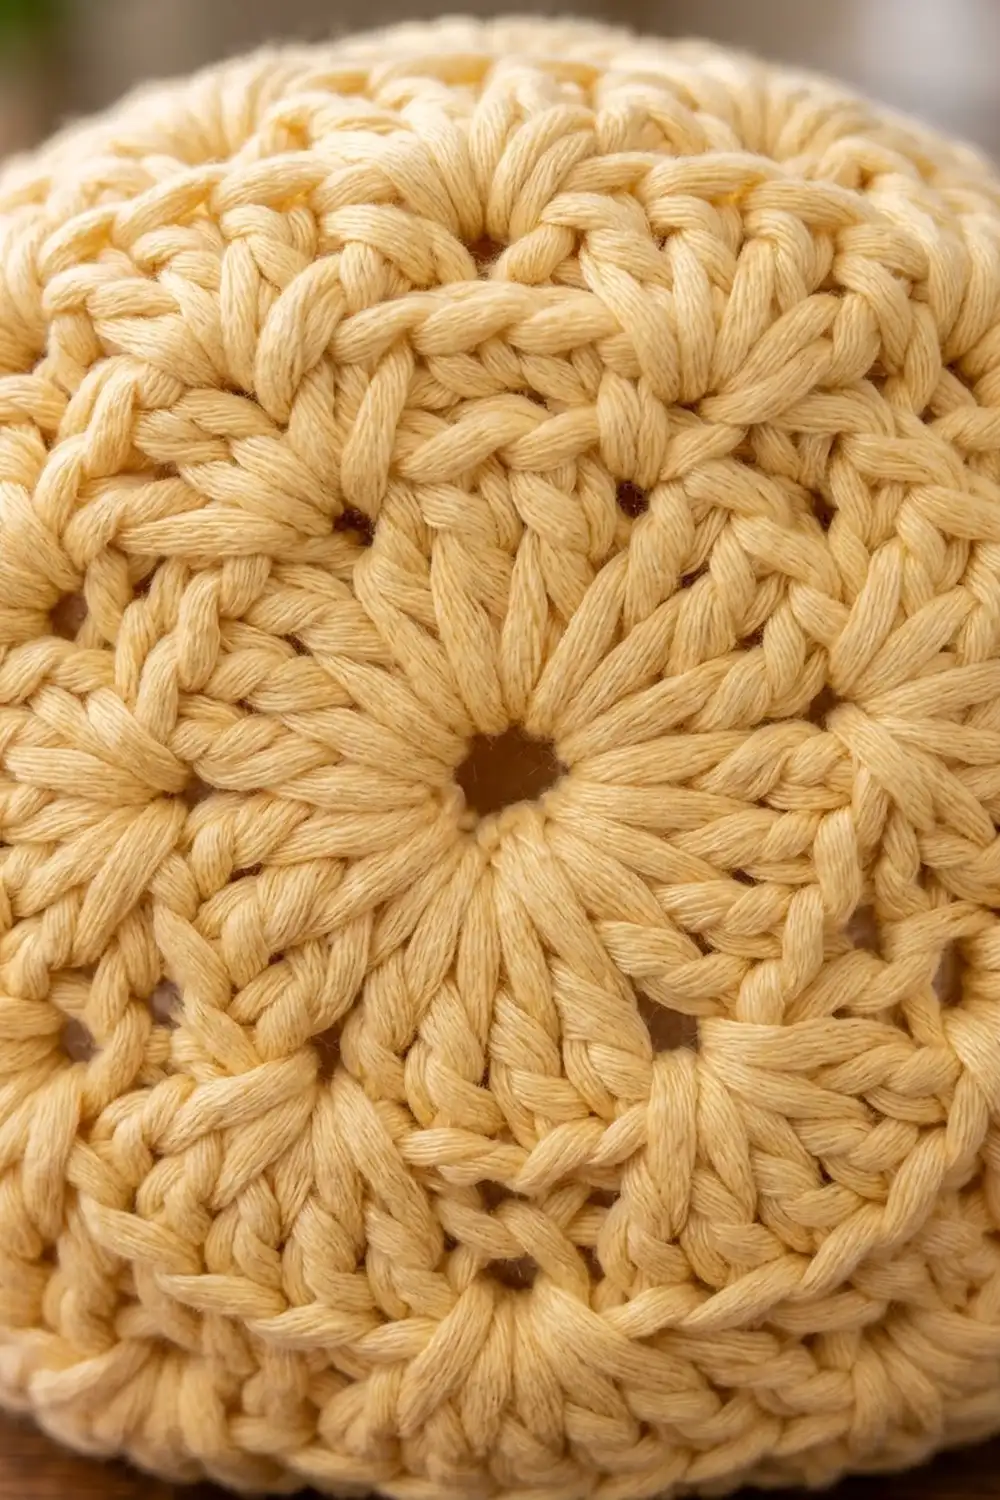
Body
The body is worked in joined rounds with the right side facing you. Place a marker in the first stitch of each round. Keep the round joins lined up, because this line becomes the back of the holder.
Base
Foundation: Ch 12, then sl st in the first ch to form a ring. Don’t twist the chain. This ring becomes the bag opening, about 1.4 in (3.6 cm) across.
Rnd 1: Ch 1, sc in each ch around, sl st to first sc. (12 sts)
Rnd 2: Ch 1, *sc in next st, 2 sc in next st; rep from * around, sl st to first sc. (18 sts)
Rnd 3: Ch 1, *sc in next 2 sts, 2 sc in next st; rep from * around, sl st to first sc. (24 sts)
Rnd 4: Ch 1, *sc in next 3 sts, 2 sc in next st; rep from * around, sl st to first sc. (30 sts)
Rnd 5: Ch 1, *sc in next 4 sts, 2 sc in next st; rep from * around, sl st to first sc. (36 sts)
Rnd 6: Ch 1, *sc in next 5 sts, 2 sc in next st; rep from * around, sl st to first sc. (42 sts)
Rnd 7: Ch 1, *sc in next 6 sts, 2 sc in next st; rep from * around, sl st to first sc. (48 sts)
Rnd 8: Ch 1, *sc in next 7 sts, 2 sc in next st; rep from * around, sl st to first sc. (54 sts)
Rnd 9: Ch 1, *sc in next 8 sts, 2 sc in next st; rep from * around, sl st to first sc. (60 sts)
Checkpoint: the base should lie flat and measure 6.9 in (17.5 cm) across.
Rnd 10: Ch 1, sc in each st around, sl st to first sc. (60 sts)
This round has no increases, so the edge starts to curve upward. That gives a soft, rounded bottom edge instead of a sharp corner. This round adds about 1/3 in (0.8 cm) of height.
Shell Sides
The sides alternate between two rounds, A and B. Each new shell sits on the single crochet between two shells of the round below, so the fans stagger like brickwork.
Rnd 11 (Round A): Ch 1, sc in first st, sk 2 sts, 5 dc in next st, sk 2 sts, *sc in next st, sk 2 sts, 5 dc in next st, sk 2 sts; rep from * 8 more times, sl st to first sc. (10 shells + 10 sc = 60 sts)
Rnd 12 (Round B): Ch 3 (counts as dc), 2 dc in same st as join, sk 2 dc, sc in next dc (center dc of shell), *sk 2 dc, 5 dc in next sc, sk 2 dc, sc in next dc (center dc of shell); rep from * 8 more times, sk 2 dc, 2 dc in same st as beginning ch-3, sl st to top of ch-3. (3 + 1 + [9 x 6] + 2 = 60 sts: 10 shells including the split shell, plus 10 sc)
Rnd 13 (Round A): Ch 1, sc in same st as join (center of the split shell), *sk 2 dc, 5 dc in next sc, sk 2 dc, sc in next dc (center dc of shell); rep from * 8 more times, sk 2 dc, 5 dc in next sc, sk 2 dc, sl st to first sc. (10 shells + 10 sc = 60 sts)
Rnd 14: Rep Rnd 12. (60 sts)
Checkpoint: the side height should be about 3.8 in (9.7 cm).
Rnds 15–18: Rep Rnds 13 and 14 twice more. (60 sts in each round)
You now have 8 shell rounds. Checkpoint: the side height should be about 7.3 in (18.5 cm). Don’t fasten off.
Make All Pieces
This holder needs 2 pieces, both in butter yellow:
- 1 body (Rnds 1–21, including the rim below), about 165 g
- 1 covered hanging ring, about 20 g
Layout, seen from the front:
        (  RING  )
   [ RIM - Rnds 19-21 ]
   [ SHELLS - Rnds 11-18 ]
   [ CURVE - Rnd 10 ]
   [ BASE - Rnds 1-9 + opening ]
Hanging Ring
Join the yarn to the 3.5 in (8.9 cm) ring with a sl st around the ring.
Rnd 1: Ch 1, work 48 sc over the ring, pushing the stitches together so no ring shows, sl st to first sc. (48 sts)
If the ring still shows through, add sc in multiples of 2 until it is covered. If the stitches buckle, remove them 2 at a time. Fasten off and leave a 24 in (61.0 cm) tail for sewing.
Checkpoint: the outer diameter should be about 4.5 in (11.4 cm), with an inner opening of about 2.8 in (7.1 cm).
Border
The rim is the border. Its gauge matches the body gauge: 11 sc = 4 in (10.2 cm), and 3 sc rounds = 1 in (2.5 cm). Because the piece is round, it has no corners or sides, so every count below is for the full round.
Continue from Rnd 18 without fastening off.
Rnd 19 (conversion round): Ch 1, sc in same st as join, sc in each of next 2 dc, hdc in next sc, *sc in each of next 5 dc, hdc in next sc; rep from * 8 more times, sc in each of last 2 dc, sl st to first sc. (60 sts worked 1 per existing stitch + 0 added = 60 sts: 50 sc and 10 hdc)
The hdc fill the dips between the shells so the rim starts out level.
Rnd 20: Ch 1, sc in each st around, sl st to first sc. (60 sts)
Rnd 21: Ch 1, sc in each st around, sl st to first sc. (60 sts)
Fasten off and weave in the end.
Why the math works: The body is 60 sts around. That makes 10 shell repeats of 6 sts each (5 dc + 1 sc), so every shell round closes evenly. The rim keeps the same 60 sts. At 11 sc per 4 in (10.2 cm), that gives 21.8 in (55.4 cm), the same circumference as the base. No stitches are added or lost, so the top doesn’t flare out or pull in.
Joining
Lay the body flat with the line of round joins at the center back.
Method: Whipstitch with the ring’s tail.
Stitch-to-stitch logic: Mark 8 sc in a row at the bottom of the ring. Then mark the 8 center-back sts of Rnd 19 on the inside of the body. Place the ring inside the back wall so its marked arc sits 1.25 in (3.2 cm) below the top edge. Sew each marked ring stitch to one marked Rnd 19 stitch, 8 to 8. Then whipstitch a second line across the same 8 ring sts into the top loops of Rnd 21. This keeps the ring from tipping forward.
Tension: Pull each stitch snug but not tight. The rim should stay round, not dimpled.
Size checkpoint: The ring should rise about 3.25 in (8.3 cm) above the rim, for a total height of about 11.6 in (29.5 cm).
Final Blocking
- Weave in all remaining ends on the inside.
- Roll up a small towel and stuff it into the body so it fills out into a cylinder.
- Mist the outside evenly with water until it is damp but not soaked.
- Shape the base into a round, slightly curved bottom. Keep the bag opening round.
- Gently pull each shell so the fans open and line up vertically.
- Lay the ring flat and pinch it into a round shape.
- Let everything dry fully, about 24 hours, before you remove the towel.
- Measure again: 6.9 in (17.5 cm) in diameter and 8.3 in (21.1 cm) in body height.
Final Quality-Control Checklist
- The base lies flat at 6.9 in (17.5 cm) before the side rounds.
- The bag opening is about 1.4 in (3.6 cm) across, with a clean edge.
- Every shell round has 60 sts: 10 shells and 10 sc.
- The shells stagger evenly, with no doubled or missing fans.
- The rim is level, 3 rounds tall, and 1 in (2.5 cm) deep.
- No ring shows through the covering stitches.
- The ring is centered at the back and stands upright.
- All ends are woven in on the inside.
Troubleshooting
The base cups upward too early: Your tension has tightened. Rework it with a looser hand or one hook size larger.
The base ruffles: The stitches are too loose or there are extra increases. Recount each round and check your gauge.
The shells lean into a spiral: You are joining in the wrong stitch. Always join to the first stitch of the round, not to the ch-1.
The stitch count is off: Count to 60 at the end of each round. A missed skip usually adds stitches.
The ring tips forward: Add the second line of whipstitch into Rnd 21.
Bags slip out of the bottom: Work a round of sl st around the foundation chain to firm up the opening.
The rim flares: Go down one hook size for Rnds 19–21 only.
Care
Hand wash in cool water. Lay it flat to dry, stuffed with a towel so it keeps its shape. Do not tumble dry.
Final Notes
Here is the measurement chain. The base grows to 60 sts and 6.9 in (17.5 cm) across. The same 60 sts carry 10 shell repeats through 8 rounds to a height of 7.3 in (18.5 cm). The 3-round rim keeps 60 sts and brings the body to 8.3 in (21.1 cm). The ring adds 3.25 in (8.3 cm), for a full height of 11.6 in (29.5 cm).
Check your base first, and the rest of the holder will follow.
Happy crocheting!