

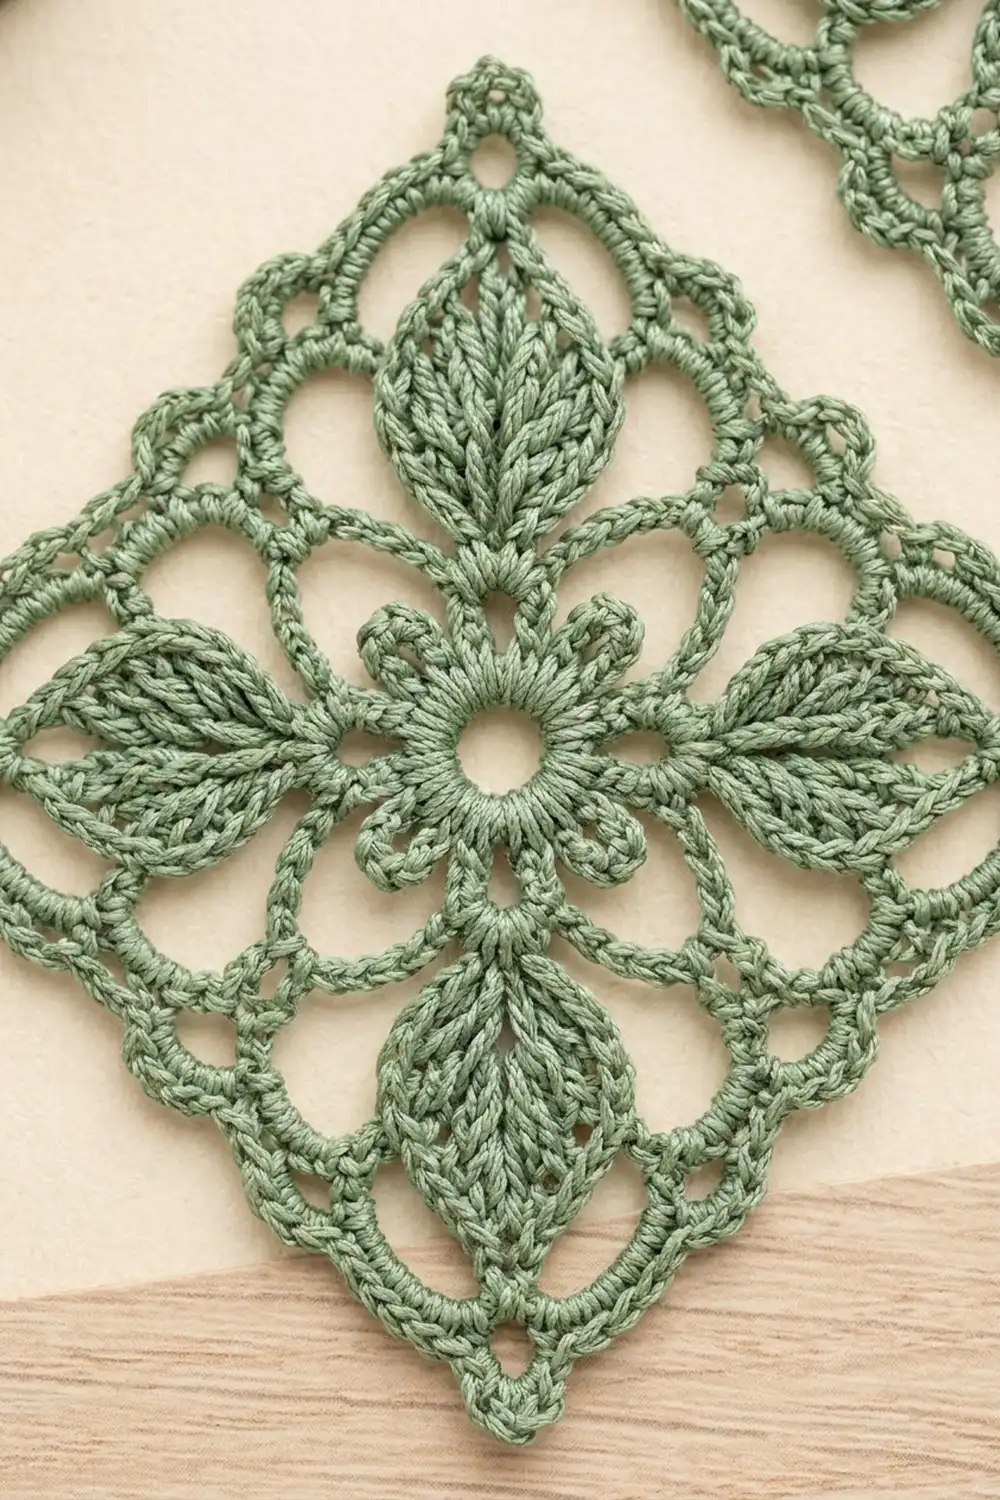
The Sage Leaf Lace Diamond is a single, delicate lace motif in soft sage-green cotton thread. A tiny eight-petal flower sits around an open center ring. Four long pointed leaves stretch toward the corners, and little round loops nestle between them, all framed by open arches and a dainty picot edge.
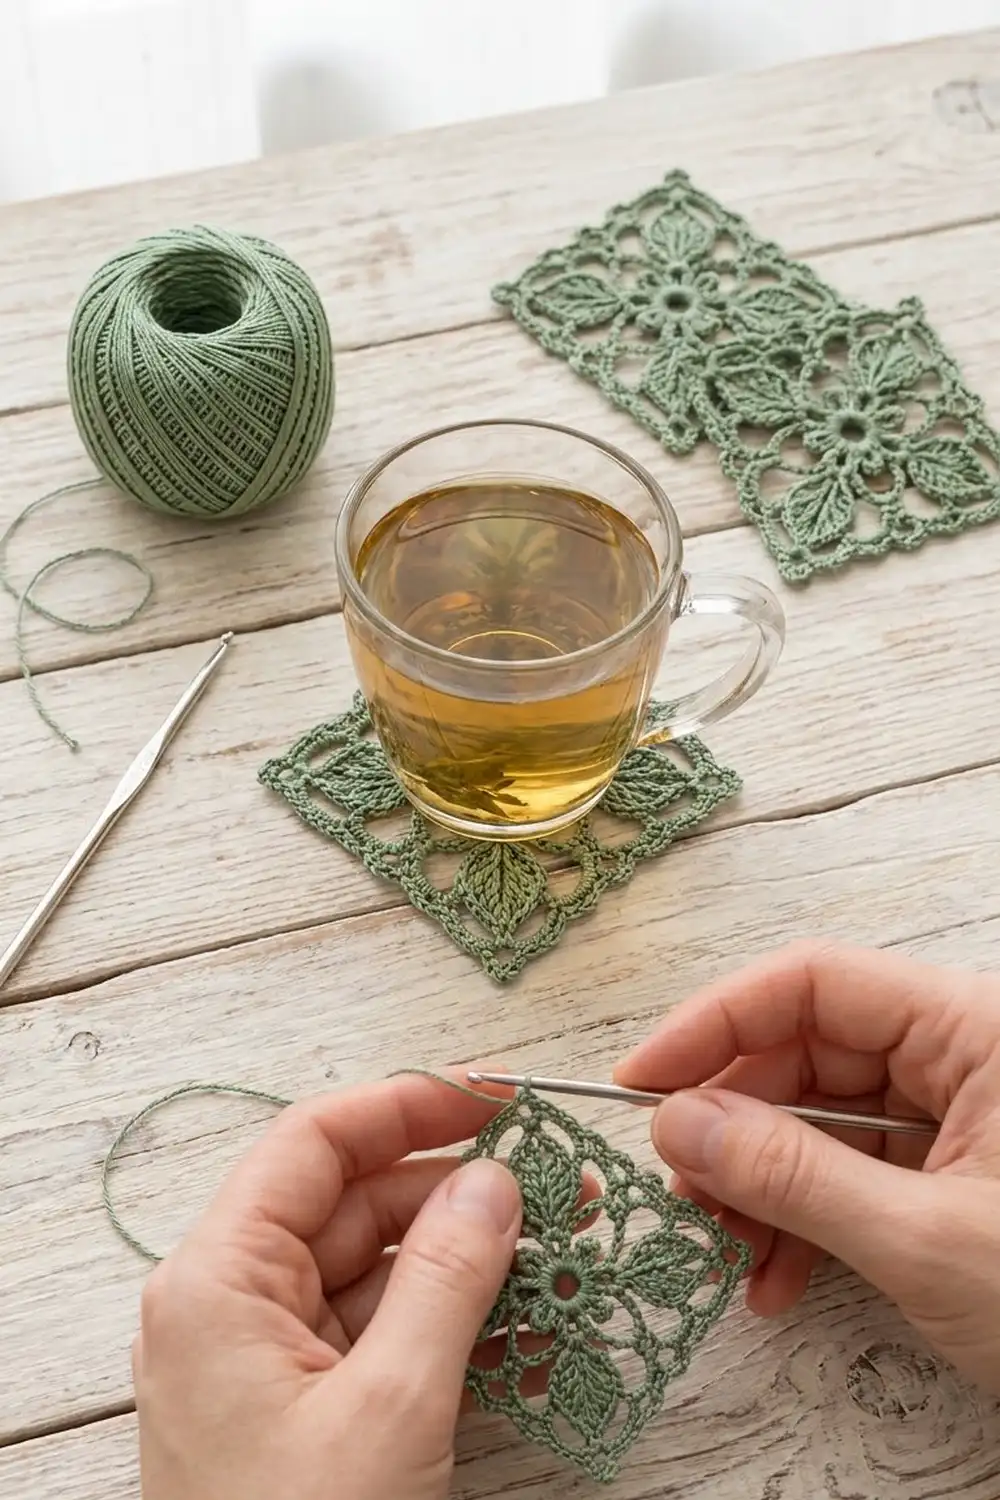
The motif looks best displayed on point, as a diamond. Use it as a coaster, a doily accent, a card or journal embellishment, or a framed piece of thread art. It is worked in one color, so the texture of the leaves and lace carries the design.
This pattern uses US crochet terms. The finished motif measures 4 in (10.2 cm) per side, which is about 5.7 in (14.5 cm) from point to point.
Construction is simple and fully in the round. You work a center ring and flower, a round of chain loops behind the petals, then leaves and circles. Next come a squaring chain frame, a solid single-crochet frame and an arch round, and finally a two-round border that ends with picots. Everything is one piece, so there is no joining.
Finished Size and Construction
- Finished size: 4 in x 4 in (10.2 cm x 10.2 cm); about 5.7 in (14.5 cm) point to point
- Skill level: Intermediate (basic stitches, working around stitch posts, picots)
- Terminology: US crochet terms
- Yarn weight: Size 3 mercerized cotton crochet thread (fingering-weight range)
- Hook: 2.25 mm (US B-1)
- Number of pieces: 1
- Layout: Single motif, displayed on point as a diamond
- Piece size: 4 in (10.2 cm) per side
- Size before border: 3.5 in (8.9 cm) per side after Round 8
- Border depth: 0.25 in (0.6 cm) on each side
Materials
Yarn advice: Choose a smooth mercerized cotton in size 3. It gives crisp stitch definition, holds the leaf points well and blocks flat. Avoid fuzzy or very soft acrylics, because the open lace loses its shape.
- Sage green, size 3 cotton thread: 8 g (about 60 m / 66 yd)
Tools:
– 2.25 mm (US B-1) crochet hook
– Tapestry needle with an eye that fits thread
– Small sharp scissors
– Rustproof pins and a blocking mat or folded towel
– Spray bottle with water
– Ruler or tape measure
The quantity includes a margin for a gauge swatch and weaving in ends. One standard ball is plenty.
Abbreviations (US Terms)
- ch – chain
- sl st – slip stitch
- sc – single crochet
- hdc – half double crochet
- dc – double crochet
- tr – treble crochet (yarn over twice)
- dtr – double treble crochet (yarn over 3 times)
- sk – skip
- sp – space
- st(s) – stitch(es)
- MR – magic ring
Special stitches:
- Back-post sc: Insert the hook from back to front to back around the post of the stated stitch, then complete a sc. This places the stitch behind the petals.
- Picot: Ch 3, sl st in the 3rd ch from hook.
- Corner trefoil: [Ch 3, sl st in 3rd ch from hook] 3 times, giving three picots in a cluster.
Gauge and Checkpoints
Gauge is measured on the motif itself. Make one motif first and check it at each stage. Thread work varies a lot between crocheters, and small changes add up over 10 rounds.
Checkpoints (lightly flattened, before blocking):
– After Round 1: ring diameter 0.5 in (1.3 cm)
– After Round 3: flower diameter 1.5 in (3.8 cm)
– After Round 5: each leaf is about 1 in (2.5 cm) long
– After Round 7: 3 in (7.6 cm) per side
– After Round 8: 3.5 in (8.9 cm) per side
– After Border Round 1: 3.75 in (9.5 cm) per side
– After Border Round 2: 4 in (10.2 cm) per side
Border gauge: 28 sc = 3 in (7.6 cm) along the edge in Border Round 1.
If your motif is too big: Go down to a 2.0 mm hook, or tighten the long chains in Rounds 4 and 6.
If your motif is too small: Go up to a 2.5 mm hook. Also make sure the chain loops are not pulled tight, because they control the overall spread.
Pattern
Round 1 – Center Ring
MR, ch 1, 16 sc in ring. Pull the ring closed until a small open center about 0.25 in (0.6 cm) wide remains. Sl st to first sc. (16 sc)
Round 2 – Petal Base
Ch 1, sc in same st, ch 3, sk 1 st, sc in next st, ch 3, sk 1 st; repeat from * 6 more times. Sl st to first sc. (8 sc, 8 ch-3 sps)
Round 3 – Small Flower
Sl st into the first ch-3 sp. Ch 1, work (sc, hdc, 2 dc, hdc, sc) in each ch-3 sp around. Sl st to first sc. (8 petals, 48 sts: 6 sts per petal)
The petals should cup slightly. That gives the raised look around the center ring.
Round 4 – Back Loops
Fold the petals toward you so you are working behind them. Ch 1. Back-post sc around the first Round 2 sc, then ch 9.
Back-post sc around the next Round 2 sc, ch 5, back-post sc around the next Round 2 sc, ch 9; repeat from * 2 more times.
Back-post sc around the last Round 2 sc, ch 5. Sl st to first sc.
(8 sc, 4 ch-9 loops, 4 ch-5 loops, alternating)
The four ch-9 loops become the leaves, and the four ch-5 loops become the small circles. Lay the work so a ch-9 loop points straight up. This is your top corner.
Round 5 – Leaves and Circles
Sl st into the first ch-9 loop. Ch 1.
In the ch-9 loop work the Leaf: (sc, hdc, 2 dc, 2 tr, dtr, ch 3, dtr, 2 tr, 2 dc, hdc, sc). Then work 7 sc in the next ch-5 loop.
Repeat from * 3 more times. Sl st to first sc.
(4 leaves of 14 sts each plus a ch-3 tip, and 4 circles of 7 sc: 84 sts, 4 ch-3 tips)
Check: 4 x 14 = 56 leaf sts, plus 4 x 7 = 28 circle sts, gives 84.
The 14 stitches packed into the ch-9 loop push the leaf into a long point. The ch-3 tip marks the corner. Each circle of 7 sc closes into a neat round loop between two leaves. Use your fingers to shape each leaf flat and pointed before you move on.
Round 6 – Squaring Frame
Sl st in the next 6 sts (hdc, 2 dc, 2 tr, dtr) and into the first ch-3 leaf tip. Ch 1.
(Sc, ch 5, sc) in the leaf tip, ch 7, sc in the 4th (center) sc of the next circle, ch 7.
Repeat from * 3 more times. Sl st to first sc.
(12 sc, 4 ch-5 corner sps, 8 ch-7 sps)
The motif now turns from round to square. The leaf tips become the corners, and the circles anchor the middle of each side.
Round 7 – Solid Frame
Sl st into the first ch-5 corner sp. Ch 1.
(2 sc, ch 3, 2 sc) in the corner sp, 8 sc in the next ch-7 sp, sc in the next sc, 8 sc in the next ch-7 sp. Do not work into the sc at either side of the corner.
Repeat from * 3 more times. Sl st to first sc.
(84 sc, 4 ch-3 corner sps; 21 sc on each side between corner sps)
Check: 2 + 8 + 1 + 8 + 2 = 21 per side, and 4 x 21 = 84. The motif should now measure 3 in (7.6 cm) per side.
Round 8 – Arch Round
Sl st in the next sc and into the corner ch-3 sp. Ch 1.
(Sc, ch 3, sc) in the corner sp, ch 4, sk 2 sc, sc in next sc, [ch 4, sk 3 sc, sc in next sc] 4 times, ch 4, sk 2 sc.
Repeat from * 3 more times. Sl st to first sc.
(28 sc, 24 ch-4 loops, 4 ch-3 corner sps; per side: 6 ch-4 loops and 5 sc between the corner sc pairs)
Check: the 21 sc of each side are used as 2 skipped + 1 sc + 4 x (3 skipped + 1 sc) + 2 skipped = 21. The motif should now measure 3.5 in (8.9 cm) per side.
Border
The border has two rounds: a sc round that firms the edge, then a picot round. Border gauge is 28 sc = 3 in (7.6 cm).
Border Round 1 – Sc Edge
Sl st into the first corner ch-3 sp. Ch 1.
3 sc in the corner sp, sc in the next sc, [4 sc in the next ch-4 loop, sc in the next sc] 5 times, 4 sc in the last ch-4 loop, sc in the next sc.
Repeat from * 3 more times. Sl st to first sc.
Counts:
– Between corner groups: 1 + 5 x (4 + 1) + 4 + 1 = 31 sc
– Per side, including both corner center sts: 1 + 1 + 31 + 1 + 1 = 35 sc
– Total: 4 x (3 + 31) = 136 sc
The 4 corners are counted only once in the total, so 4 x 35 − 4 shared corners = 136.
The motif should measure 3.75 in (9.5 cm) per side. At border gauge, 35 sts is 3.75 in (9.5 cm), so the edge lies flat without ruffling or cupping.
Border Round 2 – Picot Edge
Sl st into the next sc, which is the corner center st. Ch 1.
(Sc, corner trefoil, sc) in the corner center st, sc in the next st, [picot, sc in the next 2 sts] 16 times.
Repeat from * 3 more times. Sl st to first sc. Fasten off.
Counts:
– Each side between corners: 1 + 16 x 2 = 33 sc, with 16 picots
– Each corner: 2 sc and 1 trefoil (3 picots)
– Total: 4 x 33 + 4 x 2 = 140 sc, 64 side picots and 4 corner trefoils
Why the math works: Each side of Round 8 has 6 loops and 7 sc (5 between the loops plus 2 at the corners). Border Round 1 turns this into 6 x 4 + 7 = 31 sts between the corner groups. Adding the outer corner stitch at each end makes 33 non-corner stitches per side. That divides into 1 + 16 x 2, so the picots spread evenly with no partial repeat. The picots add 0.125 in (0.3 cm) on each side and bring the motif to 4 in (10.2 cm).
Final Blocking
- Weave in all ends along the back of the solid sc frame (Round 7) so they stay hidden.
- Soak the motif in cool water for 10 minutes, then press out the water in a towel. Do not wring it.
- Pin it on point to the mat. Start with the four corner trefoils, placing opposite tips 5.7 in (14.5 cm) apart.
- Check that each side measures 4 in (10.2 cm). Pin the middle of each side, then pin every 4–5 picots.
- Open each ch-4 arch and each circle with a pin so the lace reads clearly.
- Shape each leaf to a sharp point and center it on its diagonal.
- Let it dry completely, at least 12 hours. For a crisp coaster or ornament, mist lightly with spray starch before drying.
Final Quality-Control Checklist
- Center ring is open and round, about 0.25 in (0.6 cm) wide
- 8 petals, all the same size and lying evenly
- 4 leaves, each about 1 in (2.5 cm) long, pointing exactly to the corners
- 4 round circles, each centered on a side
- Round 7 has 21 sc per side, and Round 8 has 6 arches per side
- Border Round 1 has 136 sc, and Border Round 2 has 16 picots per side
- All sides measure 4 in (10.2 cm), and both diagonals measure 5.7 in (14.5 cm)
- No visible tails, and the motif lies flat after blocking
Troubleshooting
Leaves are stubby or rounded. The ch-9 loop is too long or the stitches are too short. Keep the chain snug and make sure the dtr stitches are fully pulled up.
Motif cups in the center. Round 4 chains are too tight. Rework them looser, or chain with a hook one size larger.
Edges ruffle after Border Round 1. You may be working 5 sc into the ch-4 loops. Recount to 4 sc per loop, giving 35 per side.
Sides are uneven lengths. Check that you skipped exactly 2, then 3, 3, 3, 3, then 2 sc in Round 8.
Corners look blunt. Make sure each corner has its ch-3 in Rounds 7 and 8, and pin the trefoils firmly when blocking.
Picots end in the wrong place. Recount Border Round 1. Each side must have exactly 33 non-corner sts.
Care
Hand wash in cool water with a mild soap, press dry in a towel, and lay flat or re-pin to shape. Do not tumble dry, and press with a cool iron through a cloth if needed.
Final Notes
Each stage of the motif builds on the one before:
- The 0.5 in (1.3 cm) ring grows into a 1.5 in (3.8 cm) flower.
- The four 1 in (2.5 cm) leaves and the squaring frame give 3 in (7.6 cm) sides after Round 7.
- The arches bring it to 3.5 in (8.9 cm), and Border Round 1 to 3.75 in (9.5 cm).
- The picot edge finishes it at 4 in (10.2 cm) per side and 5.7 in (14.5 cm) point to point.
If you check each measurement as you go, your motif will block into a crisp, even diamond.
Happy crocheting!