

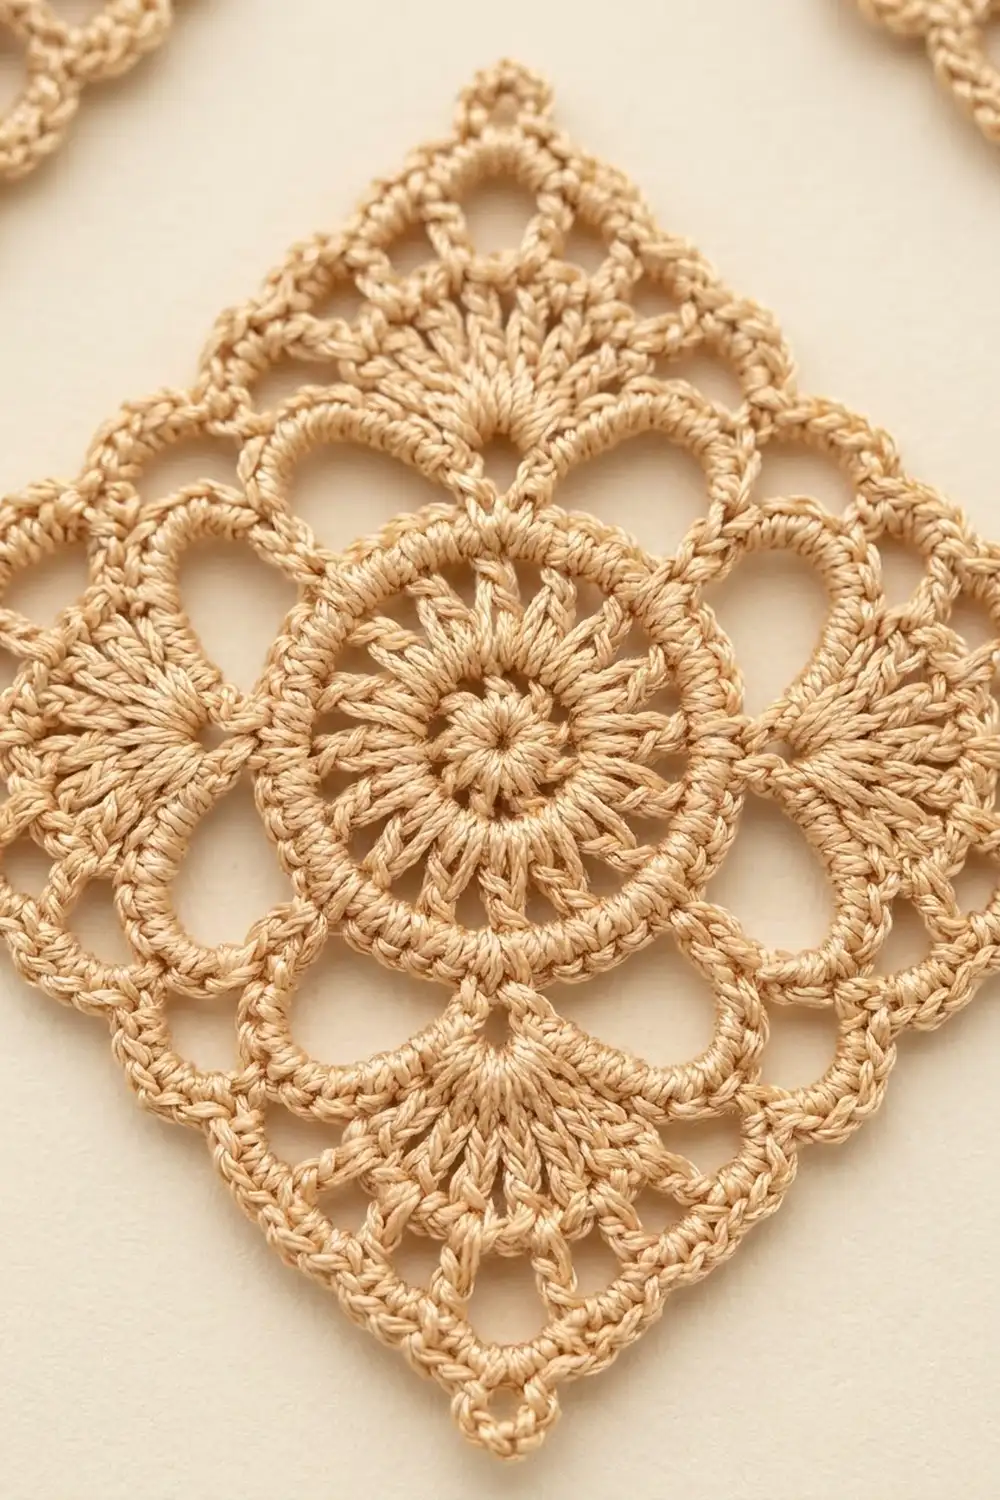
The Sandstone Rosette is a small lace motif in thread, meant to be worked on point so it reads as a diamond. A solid, wheel-like rosette sits in the middle. Eight sc-covered petal arches ring it, and four fans of treble crochet reach out toward the tips. Scalloped edges and a tiny open loop at each point finish it.
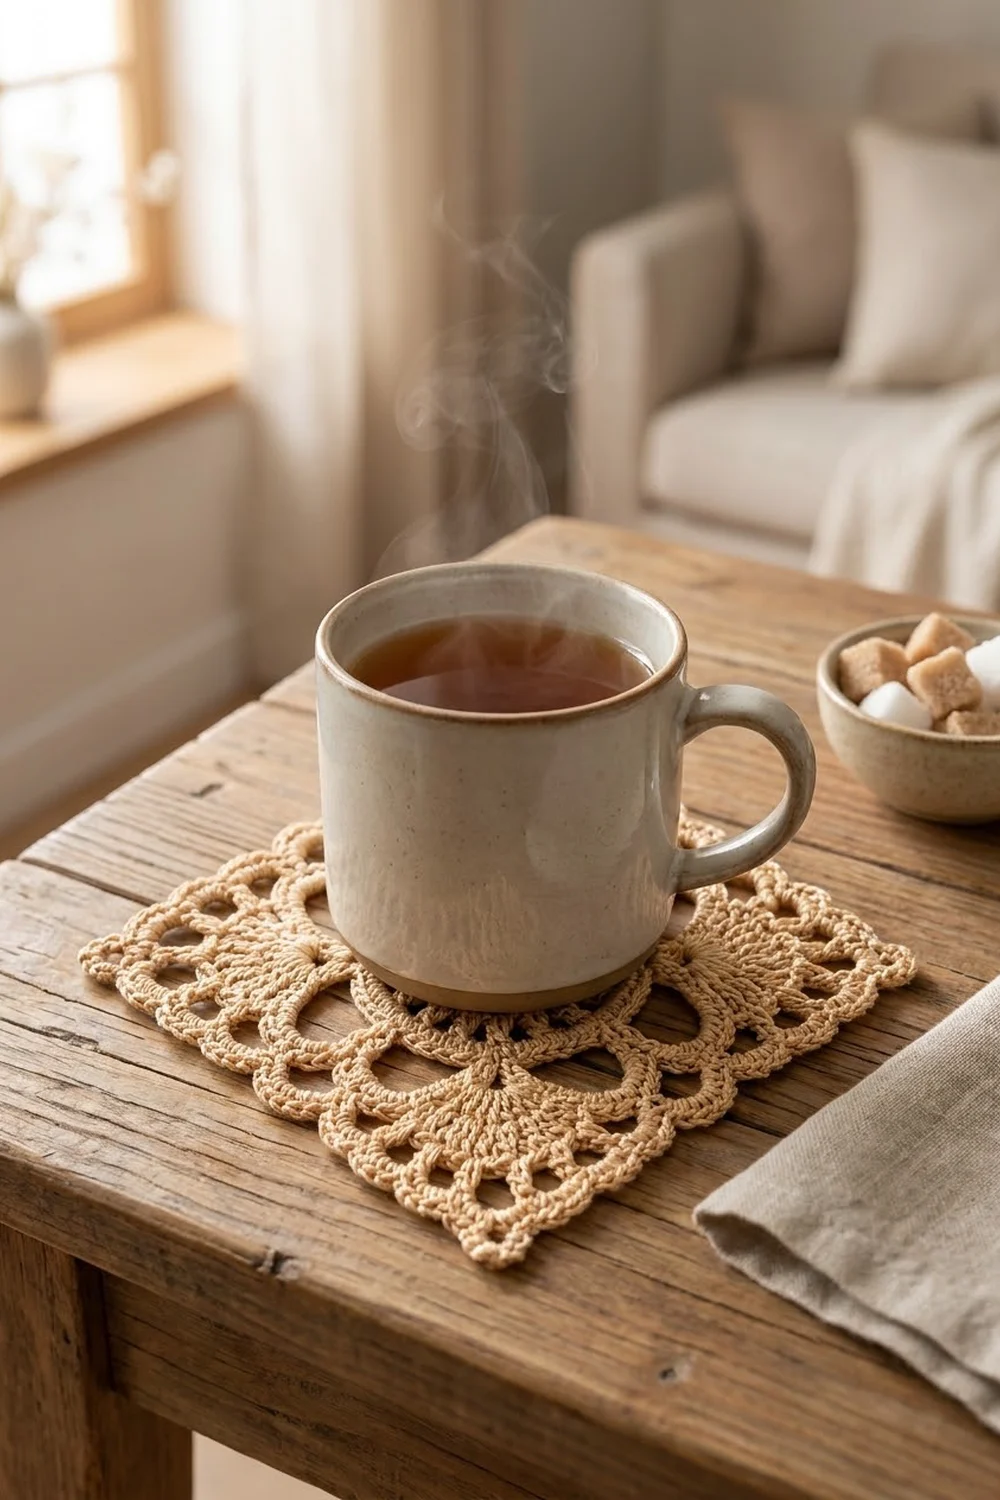
The sample is a single color: a warm sand beige in mercerized cotton. Using one color lets the texture do the work, so the motif looks vintage and calm. It suits doily-style decor, a gift-tag ornament, a sachet topper, or a lace appliqué for a journal cover or tote.
This pattern uses US crochet terms. The finished motif is 3 in (7.6 cm) along each side and about 4.25 in (10.8 cm) from tip to tip after blocking.
You’ll work it in the round from a magic ring as one piece, with no sewing. Rounds 1–4 make the solid rosette. Rounds 5–6 add the petal arches. Round 7 sets up the four corner fans. Round 8 squares the shape, and Round 9 is the picot border.
Finished Size and Construction
- Finished size: 3 in (7.6 cm) per side; about 4.25 in (10.8 cm) tip to tip, measured on point
- Skill level: Intermediate (thread work, counted lace)
- Terminology: US crochet terms
- Yarn weight: Size 10 crochet cotton (Lace / weight 0)
- Hook: 1.75 mm (US steel 6)
- Number of pieces: 1 motif
- Layout: Single square motif, displayed on point as a diamond
- Piece size: 3 in (7.6 cm) per side, bordered
- Size before border (after Round 8): 2.75 in (7.0 cm) per side
- Border depth: 1/8 in (0.3 cm) on each side
Materials
Yarn: Size 10 mercerized cotton thread in a light sand or beige. Mercerized cotton has a soft sheen, holds a crisp edge, and blocks well. Avoid fuzzy or very loosely plied thread because the open arches will blur. If you use a smaller or larger thread, the motif will change size, so read the gauge section first.
- Sand beige: about 6 g / 32 m (35 yd)
This amount includes a margin of roughly 20% for your gauge swatch, tails, and any frogging. One motif needs about 5 g on its own.
Tools:
- 1.75 mm (US steel 6) crochet hook
- Tapestry needle with a small eye, or a fine steel darning needle
- Small sharp scissors
- Rustproof pins
- Blocking mat or folded towel
- Spray bottle, or light starch if you want a stiff finish
- Ruler or tape measure marked in inches and cm
- 1 locking stitch marker
Abbreviations (US Terms)
- ch – chain
- sl st – slip stitch
- sc – single crochet
- dc – double crochet
- tr – treble crochet
- sk – skip
- sp(s) – space(s)
- st(s) – stitch(es)
- rnd – round
Standing sc: Start with a slip knot on the hook. Insert the hook in the stitch or space, yarn over, and pull up a loop. Yarn over and draw through both loops. This joins new thread and works the first sc in one step.
Fan: Nine tr worked into the same stitch. Because they all share a base, the tops spread into the radiating shape you see at each corner.
Gauge and Checkpoints
Gauge isn’t critical for a single motif, but it controls the final size. Make the full motif once as your test piece before you make extras for a project.
Measure flat, without stretching, at each checkpoint:
- After Round 1: 0.6 in (1.5 cm) across
- After Round 4 (solid rosette): 1.5 in (3.8 cm) across
- After Round 6 (petal arches): 2.4 in (6.1 cm) across
- After Round 8 (before border): 2.75 in (7.0 cm) per side
- After Round 9 (finished, blocked): 3 in (7.6 cm) per side
If the rosette measures more than 1.5 in (3.8 cm) after Round 4, go down to a 1.5 mm hook. If it measures less than 1.25 in (3.2 cm), go up to a 2 mm hook. A rosette that cups usually means your tension is tight. One that ruffles means it’s loose or you’ve added extra stitches, so count before changing hooks.
Pattern
The Rosette (Rounds 1–4)
Round 1: Make a magic ring. Ch 3 (counts as first dc), work 15 dc into the ring. Pull the ring snug, leaving a small open center. Sl st to the top of the beginning ch-3. (16 dc)
Round 2: Ch 1, 2 sc in each st around. Sl st to the first sc. (32 sc)
Round 3: Ch 3 (counts as first dc), dc in the same st. Dc in the next st, 2 dc in the next st, dc in the next st; repeat from * to * 14 more times. Sl st to the top of the beginning ch-3. (48 dc)
These dc are what give the rosette its spoked, sunburst look.
Round 4: Ch 1, sc in each st around. Sl st to the first sc. (48 sc)
This round makes the firm, rope-like outline around the rosette. Checkpoint: the rosette is 1.5 in (3.8 cm) across and lies flat.
The Petal Arches (Rounds 5–6)
Round 5: Ch 1, sc in the same st as the join. Ch 7, sk 5 sts, sc in the next st; repeat from * to * 6 more times. Ch 7, sk the last 5 sts, then sl st to the first sc. (8 sc, 8 ch-7 sps)
Each sc anchors one arch, and the 5 skipped stitches under each arch give you 8 × 6 = 48, which matches Round 4.
Round 6: Sl st into the first ch-7 sp. Ch 1, work 9 sc into each ch-7 sp around. Sl st to the first sc. (72 sc: 8 arches of 9 sc)
Pack the sc firmly so each arch looks like a solid, rounded petal with a window behind it. Checkpoint: 2.4 in (6.1 cm) across.
The Corner Fans (Round 7)
Number the arches 1–8, starting with the one where you joined. Arches 1, 3, 5, and 7 are corner arches. Arches 2, 4, 6, and 8 are side arches. The center stitch of each arch is its 5th sc.
Round 7: Sl st in the next 4 sc, ending in the 5th sc of Arch 1.
Ch 4 (counts as first tr), then 8 tr in the same st. That’s the first fan.
Ch 6, sc in the 5th sc of the next arch, ch 6.
Work a fan (9 tr) in the 5th sc of the next arch. Ch 6, sc in the 5th sc of the next arch, ch 6. Repeat from * to * 2 more times. Sl st to the top of the beginning ch-4.
(36 tr in 4 fans of 9; 4 sc; 8 ch-6 sps)
The fans rise straight out of the corner arches toward the four points. Each ch-6 / sc / ch-6 pair forms a deep side loop over a side arch.
Squaring Round (Round 8)
Label the tr in each fan 1–9. Tr 5 is the center and becomes the corner.
Round 8: Ch 1, sc in the same st (tr 1 of the first fan). [Ch 2, sc in the next tr] 3 times (tr 2–4). Ch 2, then (sc, ch 5, sc) in tr 5 for the corner. [Ch 2, sc in the next tr] 4 times (tr 6–9). Work 7 sc in the next ch-6 sp, sc in the next sc, and 7 sc in the next ch-6 sp. Sc in tr 1 of the next fan. Repeat from * to * 3 more times, but on the last repeat skip the final “sc in tr 1” and sl st to the first sc instead. Fasten off.
Stitch counts for Round 8:
- Each fan: 10 sc (tr 5 holds 2), 8 ch-2 sps, and 1 ch-5 corner sp
- Each side section: 7 + 1 + 7 = 15 sc
- Total: 4 × (10 + 15) = 100 sc, 32 ch-2 sps, 4 ch-5 corner sps
Per side, from one corner ch-5 sp to the next:
- 5 sc and 4 ch-2 sps from the first half-fan
- 15 sc across the side arch
- 5 sc and 4 ch-2 sps from the next half-fan
- Total: 25 sc and 8 ch-2 sps
The ch-2 sps open up the fans into a lacy, radiating grid. The 15 sc pack each side loop into a solid scalloped arch. Checkpoint: 2.75 in (7.0 cm) per side.
Border (Round 9)
Border gauge: One border round adds 1/8 in (0.3 cm) on each side, so each side grows from 2.75 in (7.0 cm) to 3 in (7.6 cm). The ch-5 corner loops add a little more length at each tip.
Round 9: Join with a standing sc in any corner ch-5 sp. Work 2 more sc in the same sp, then ch 5 and 3 sc in the same sp. That’s the first corner.
Then work along each side as follows:
- Sk the sc after the corner. Work 3 sc in each of the next 4 ch-2 sps, skipping the single sc between each pair of sps. (12 sc)
- Sk the sc on tr 9.
- Across the 15 sc: sc in the 1st sc, then ch 3, sk 1 sc, sc in the next sc. Repeat from * to * 6 more times, ending in the 15th sc. (8 sc, 7 ch-3 picot loops)
- Sk the sc on tr 1. Work 3 sc in each of the next 4 ch-2 sps, skipping the single sc between them. (12 sc)
- Sk the sc before the corner. In the corner ch-5 sp, work (3 sc, ch 5, 3 sc).
Repeat steps 1–5 around. On the final side, leave out step 5 and sl st to the first sc instead. Fasten off and weave in the ends.
Counts for Round 9:
- Per side, between corner groups: 12 + 8 + 12 = 32 sc and 7 ch-3 loops
- Per side, including the 3 corner sc at each end: 3 + 32 + 3 = 38 sc
- Each corner: 6 sc and 1 ch-5 tip loop. The 3 sc on either side of the loop belong to the sides they face, so they aren’t counted twice.
- Total: 4 × 38 = 152 sc, 28 ch-3 loops, 4 ch-5 tip loops
Why the math works: Every one of the 25 Round 8 sc on a side is used exactly once.
- 4 sc are skipped: the one after the first corner, the one on tr 9, the one on tr 1, and the one before the next corner.
- 6 sc sit under 3-sc groups: these are the single sc between ch-2 sps, which are skipped but covered by the groups.
- 15 sc form the side arch: they become 8 sc plus 7 ch-3 loops (8 + 7 = 15).
That accounts for 4 + 6 + 15 = 25. The 8 ch-2 sps take 3 sc each, which gives 24 sc. Add the 8 arch sc and you get 32 sc per side, with only the planned 3 + 3 added at the corners. Because each ch-2 sp gets 3 sc, the edge has enough length to lie flat around the fans without ruffling.
Final Blocking
- Soak the motif in cool water for 5 minutes, then press out the water in a towel. Don’t wring it.
- Lay it on point on the blocking mat, right side up.
- Pin the four ch-5 tip loops first so that tip-to-tip measures 4.25 in (10.8 cm) both ways.
- Check that each side measures 3 in (7.6 cm). Adjust the tips until all four sides match.
- Pin the center of each ch-3 picot loop so the scalloped arch on each side curves evenly.
- Open the fan spaces and petal windows with a pin tip. Press the rosette flat with your fingers.
- If you want a crisp finish, mist it with light starch.
- Let it dry completely, at least 6 hours, before you unpin it.
Final Quality-Control Checklist
- The rosette has a small, neat center hole and lies flat at 1.5 in (3.8 cm).
- All 8 petal arches have 9 sc and are evenly sized.
- All 4 fans have 9 tr and point straight at the tips.
- Each side has 38 sc and 7 ch-3 loops in Round 9.
- All 4 tip loops are open and the same size.
- Each side measures 3 in (7.6 cm), and both diagonals measure 4.25 in (10.8 cm).
- Ends are woven securely along the backs of solid stitches and trimmed close.
Troubleshooting
- Rosette cups: Your Round 3 tension is tight or you missed increases. Recount to 48 dc, or go up a hook size for Rounds 1–3.
- Petal arches look flat or gappy: Push the 9 sc together along each ch-7, and make sure you didn’t chain fewer than 7.
- Fans lean to one side: Every fan must go in the 5th sc of its arch. Count again from the arch’s first sc.
- Sides pucker after Round 8: You probably worked fewer than 7 sc in a ch-6 sp. Each side arch needs exactly 15 sc.
- Border ruffles: Check that you skipped the single sc between ch-2 sps and the 4 marked sc on each side.
- Tip loops collapse: Chain the ch-5 loosely, and pin it open during blocking.
Care
Hand wash in cool water with a mild detergent, then reshape and dry flat. If you used starch, re-block after each wash.
Final Notes
The measurement chain is short and easy to check. The rosette measures 1.5 in (3.8 cm) after Round 4 and the petal arches 2.4 in (6.1 cm) after Round 6. After Round 8 it’s 2.75 in (7.0 cm) per side. The border adds 1/8 in (0.3 cm) on each side, so it finishes at 3 in (7.6 cm) per side and about 4.25 in (10.8 cm) on point.
If your checkpoints match, the counts will carry you through the rest. Keep your tension steady, count each round, and block it carefully.
Happy crocheting!