

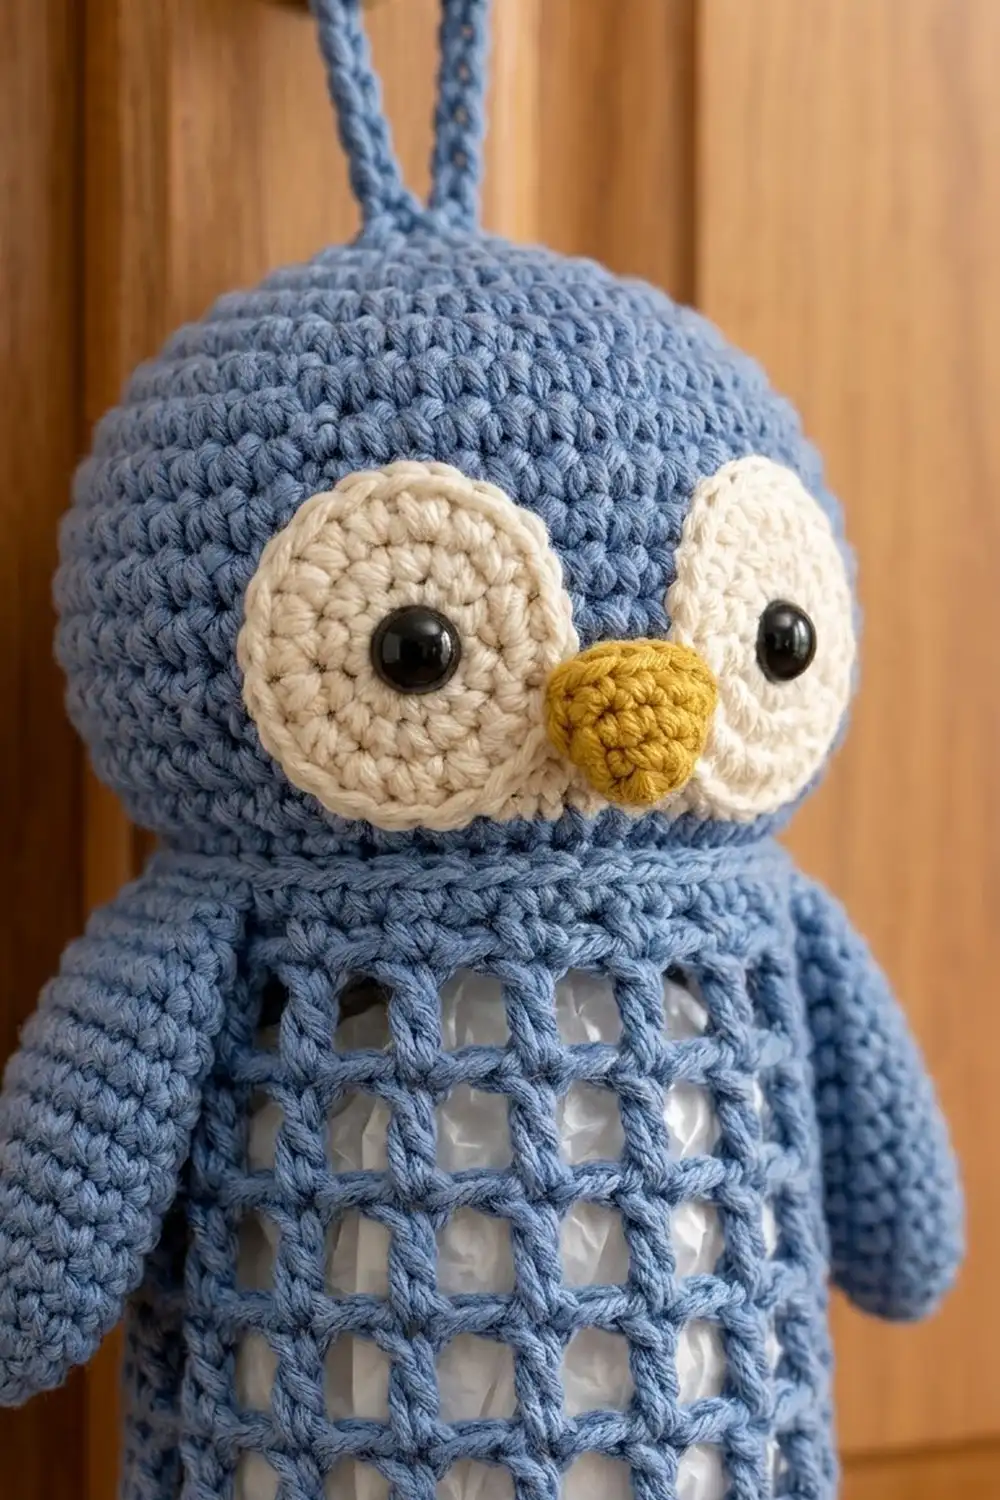
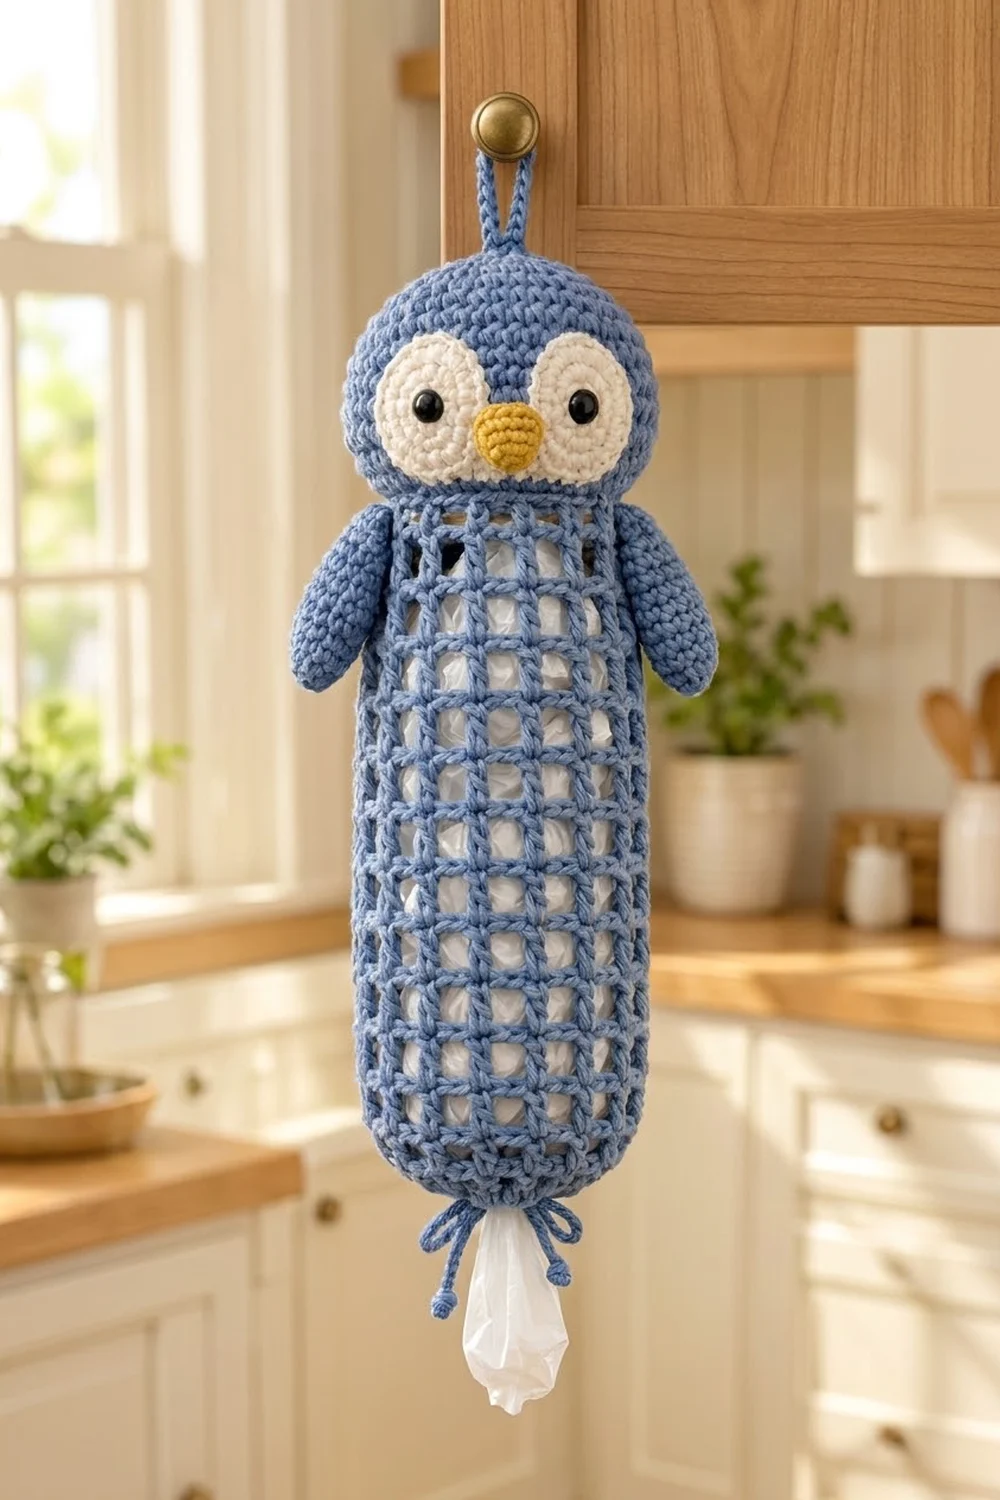
Pip the Penguin is a hanging plastic bag holder with a friendly face. A long open-mesh tube holds a bundle of grocery bags. A round stuffed head sits on the front of the top rim, and two little flippers hang at the sides. Bags go in at the top behind the head and come out one at a time through the cinched bottom.
The main color is a soft denim blue. The eye patches are cream, the beak is mustard gold, and the eyes are 12 mm black safety eyes. White bags show through the mesh like a penguin tummy.
This pattern uses US crochet terms. The body is about 5.6 in (14.2 cm) wide when flat. The holder is about 19.75 in (50.2 cm) from the bottom edge to the top of the head, not counting the 2 in (5.1 cm) hanging loop.
The body is worked from the bottom up in joined rounds: a solid band, a mesh tube and a solid top rim. The head is a stuffed amigurumi ball, and the flippers are flat ovals worked around a chain. You sew everything together and then weave a chain drawstring through the bottom of the mesh.
Finished Size and Construction
- Finished size: 5.6 in (14.2 cm) wide flat x 19.75 in (50.2 cm) tall, plus a 2 in (5.1 cm) loop
- Skill level: Easy
- Terminology: US crochet terms
- Yarn weight: Worsted / medium (#4) cotton
- Hooks: 4.5 mm (US 7) for the head, flippers and face; 5.0 mm (US H-8) for the body
- Number of pieces: 1 body, 1 head, 2 flippers, 2 eye patches, 1 beak, 1 loop, 1 drawstring
- Layout: Head on the front top rim, one flipper on each side below the head
- Body size: 11.2 in (28.4 cm) around, 16.25 in (41.3 cm) long
- Body size before top rim: 15.5 in (39.4 cm) long
- Top rim depth: 0.75 in (1.9 cm), 3 rounds of sc
Materials
Use a smooth, firm cotton. It holds the mesh shape, stretches very little under the weight of the bags and washes well. Acrylic also works, but the tube will get longer over time.
These amounts assume a cotton with about 85 m per 50 g:
- Blue (main color): 120 g, about 204 m
- Cream (eye patches): 10 g, about 17 m
- Mustard gold (beak): 5 g, about 9 m
The quantities include a margin of about 20 percent, which leaves enough for a gauge swatch.
Tools:
- 4.5 mm (US 7) and 5.0 mm (US H-8) crochet hooks
- Two 12 mm black safety eyes
- Polyester fiberfill, about 30 g
- Stitch markers, tapestry needle, scissors
- Measuring tape and pins
Abbreviations (US Terms)
- ch – chain
- sl st – slip stitch
- sc – single crochet
- dc – double crochet
- inc – 2 sc in the same stitch
- dec – sc2tog (invisible decrease recommended)
- MR – magic ring
- sp – space
- sk – skip
- st(s) – stitch(es)
- rnd(s) – round(s)
- rep – repeat
Special stitch – mesh square: 1 dc plus the ch-2 space after it. Each mesh square uses 3 stitches of the round below.
Gauge and Checkpoints
- Head and flippers (4.5 mm hook): 16 sc and 18 rnds = 4 in (10.2 cm)
- Body (5.0 mm hook): 15 sc = 4 in (10.2 cm); 5 mesh squares = 4 in (10.2 cm) wide; 4 mesh rnds = 3 in (7.6 cm) tall
Check the body gauge first, because its size matters most. Work the ring, the bottom band and 4 mesh rounds, then measure.
Checkpoints:
- After Rnd 2: 11.2 in (28.4 cm) around, or 5.6 in (14.2 cm) flat.
- After Rnd 6 (4 mesh rnds): about 3.5 in (8.9 cm) tall.
- After Rnd 10 (8 mesh rnds): about 6.5 in (16.5 cm) tall.
- After Rnd 22: about 15.5 in (39.4 cm) tall.
- Head after Rnd 10: about 4.5 in (11.4 cm) across when laid flat.
Too big? Go down half a hook size. Too small? Go up half a hook size. To change only the length, add or remove mesh rounds; each round is 0.75 in (1.9 cm). Keep the stitch count at 42, because the mesh repeat needs a multiple of 3.
Body
Use blue and the 5.0 mm hook.
Foundation: Ch 42. Make sure the chain isn’t twisted, then sl st to the first ch to form a ring.
Rnd 1: Ch 1, sc in each ch around, sl st to first sc. (42 sc)
Rnd 2: Ch 1, sc in each st around, sl st to first sc. (42 sc)
These 2 rounds make the solid bottom band, about 0.5 in (1.3 cm) deep.
Rnd 3 (mesh setup): Ch 5 (counts as dc + ch 2), sk next 2 sc, dc in next sc, ch 2, sk next 2 sc; rep from * 12 more times, sl st in 3rd ch of beginning ch-5. (14 dc, 14 ch-2 sps = 42 sts)
The dc stitches land in sc 1, 4, 7 and so on up to sc 40, so the round closes neatly at sc 42.
Rnd 4: Ch 5 (counts as dc + ch 2), dc in next dc, ch 2; rep from * 12 more times, sl st in 3rd ch of beginning ch-5. (14 dc, 14 ch-2 sps)
Rnds 5–22: Rep Rnd 4. (14 dc, 14 ch-2 sps each round)
That gives 20 mesh rounds (Rnds 3–22), about 15 in (38.1 cm) of mesh. The body now measures about 15.5 in (39.4 cm). Don’t fasten off; you’ll work the top rim in the Border section.
Work every dc into the top of the dc below it, never into the chain space. This keeps the columns straight and the squares open.
Head
Use blue and the 4.5 mm hook. Work in a continuous spiral and move a marker up each round.
Rnd 1: 6 sc in MR. (6)
Rnd 2: Inc in each st around. (12)
Rnd 3: (Sc 1, inc) 6 times. (18)
Rnd 4: (Sc 2, inc) 6 times. (24)
Rnd 5: (Sc 3, inc) 6 times. (30)
Rnd 6: (Sc 4, inc) 6 times. (36)
Rnd 7: (Sc 5, inc) 6 times. (42)
Rnd 8: (Sc 6, inc) 6 times. (48)
Rnd 9: (Sc 7, inc) 6 times. (54)
Rnd 10: (Sc 8, inc) 6 times. (60)
Rnds 11–20: Sc in each st around. (60)
Rnd 21: (Sc 8, dec) 6 times. (54)
Rnd 22: (Sc 7, dec) 6 times. (48)
Rnd 23: (Sc 6, dec) 6 times. (42)
Rnd 24: (Sc 5, dec) 6 times. (36)
Stop here and add the face (see below).
Rnd 25: (Sc 4, dec) 6 times. (30) Start stuffing firmly.
Rnd 26: (Sc 3, dec) 6 times. (24)
Rnd 27: (Sc 2, dec) 6 times. (18)
Rnd 28: (Sc 1, dec) 6 times. (12) Finish stuffing.
Rnd 29: Dec 6 times. (6)
Fasten off. Weave the tail through the front loops of the last 6 sts, pull it closed and hide the end. The head is about 5 in (12.7 cm) wide and 4.5 in (11.4 cm) tall. The MR is the top of the head.
Eye Patches (make 2)
Use cream and the 4.5 mm hook.
Rnd 1: 6 sc in MR. (6)
Rnd 2: Inc in each st around. (12)
Rnd 3: (Sc 1, inc) 6 times. (18)
Rnd 4: (Sc 2, inc) 6 times. (24)
Sl st in the next st and fasten off, leaving a long tail. Each patch is about 1.75 in (4.4 cm) across.
Beak
Use mustard gold and the 4.5 mm hook.
Rnd 1: 4 sc in MR. (4)
Rnd 2: (Sc 1, inc) 2 times. (6)
Rnd 3: (Sc 2, inc) 2 times. (8)
Rnd 4: (Sc 3, inc) 2 times. (10)
Fasten off, leaving a long tail. Don’t stuff it. Press it flat into a triangle about 1.25 in (3.2 cm) wide and 1 in (2.5 cm) tall.
Adding the Face
Place the eye patches side by side between Rnds 13 and 19 of the head, almost touching at the center front. Push a safety eye through each patch, just inside its center, and into the head, then lock it with its washer. Sew each patch down around its edge. Sew the beak with its open edge up and the point down, just below and between the patches, overlapping both slightly.
Flippers (make 2)
Use blue and the 4.5 mm hook. You’ll work around both sides of a foundation chain.
Foundation: Ch 12.
Rnd 1: Sc in 2nd ch from hook and next 9 ch, 3 sc in last ch. Working along the other side of the chain, sc in next 9 ch, 2 sc in last ch (the same ch as the first sc). Don’t join. (24)
Rnd 2: Inc in next st, sc 9, inc in each of next 3 sts, sc 9, inc in each of next 2 sts. (30)
Rnd 3: Sc 1, inc, sc 9, (sc 1, inc) 3 times, sc 9, (sc 1, inc) 2 times. (36)
Rnd 4: Sc 2, inc, sc 9, (sc 2, inc) 3 times, sc 9, (sc 2, inc) 2 times. (42)
Sl st in the next st and fasten off, leaving a long tail. Each flipper is a flat oval about 4.5 in (11.4 cm) long and 2 in (5.1 cm) wide. Pinch one end as you sew it on to give it a teardrop shape.
Hanging Loop and Drawstring
Loop: Use blue and the 4.5 mm hook. Ch 17, sc in 2nd ch from hook and in each ch across. (16 sc) Fasten off, leaving a long tail. The strip is 4 in (10.2 cm) long and folds into a 2 in (5.1 cm) loop.
Drawstring: Use blue and the 5.0 mm hook. Ch 80, about 20 in (50.8 cm), and fasten off. Tie a double overhand knot at each end to make a small bobble.
Make All Pieces
- Blue: 1 body, 1 head, 2 flippers, 1 loop, 1 drawstring
- Cream: 2 eye patches
- Mustard gold: 1 beak
Assembly layout, front view:
        [ loop ]
     (    HEAD    )
     (  o      o  )
     (     V      )
 [F] |============| [F]   <- top rim, head on front half
 [L] |# # # # # # | [L]
 [I] |# # # # # # | [I]
 [P] |# # # # # # | [P]
     |# # # # # # |
     |# # # # # # |
     |~~~~~~~~~~~~|   <- drawstring in Rnd 3
     \____band____/
          ||
        knots
Joining
Sew every piece with whipstitch, using the matching yarn tails and the tapestry needle.
Loop to head: Fold the loop strip in half. Sew both ends over the MR at the top center of the head, with 4 or 5 passes through each end. This point carries all the weight.
Head to body: Flatten the body with the join seam at the center back. The top rim now has 21 sts on the front and 21 sts on the back. Pin the head so its lower front overlaps the front of the rim by 1 in (2.5 cm). Sew it to all 21 front rim sts, 1 pass per stitch. Leave the 21 back sts free; bags go in through that gap.
Flippers to body: Pin a flipper at each side fold with the narrow end just under the head. Sew the top 1 in (2.5 cm) of each flipper to the side dc posts and leave the rest hanging free.
Tension: Keep the whipstitches snug but not tight. Tight stitches pucker the head and pull the mesh out of square.
Size checkpoint: Hang the holder. It should be about 19.75 in (50.2 cm) from the bottom band to the top of the head, and the body should still be 5.6 in (14.2 cm) wide flat.
Border: Top Rim and Bottom Gather
Border gauge: 15 sc = 4 in (10.2 cm) and 4 sc rnds = 1 in (2.5 cm) with the 5.0 mm hook.
Work the top rim before you sew on the head, continuing from Rnd 22 of the body.
Rnd 23 (conversion round): Ch 1, sc in same st as join, 2 sc in next ch-2 sp, sc in next dc, 2 sc in next ch-2 sp; rep from * 12 more times, sl st to first sc. (14 sc in dc + 28 sc in sps = 42 sc)
Rnds 24–25: Ch 1, sc in each st around, sl st to first sc. (42 sc)
Fasten off and weave in the end. With the body flat, each side has 21 sc (7 mesh squares x 3 sts). A tube has no corners, so you don’t add any stitches at the folds.
Why the math works: Each mesh square is 3 sts wide, and 14 squares x 3 = 42 sts, the same as the foundation and bottom band. At 15 sts per 4 in (10.2 cm), 42 sts is 11.2 in (28.4 cm) around. That matches 14 squares at 0.8 in (2.0 cm) each, so the rim doesn’t flare or pull in.
Bottom gather: Starting at the center front, weave the drawstring in and out through all 14 ch-2 sps of Rnd 3 and come back out at the center front. Pull until the bottom band gathers to an opening about 1.5 in (3.8 cm) across. Tie a bow and let the knotted ends hang.
Final Blocking
- Weave in any remaining ends inside the head or along the solid bands.
- Mist the body and flippers lightly. Keep the head dry.
- Slide the body over a rolled towel or a cardboard tube wrapped in plastic.
- Straighten the dc columns and square up each mesh opening by hand.
- Lay the flippers flat and smooth them.
- Let everything dry completely before you load bags.
Final Quality-Control Checklist
- Every mesh round has 14 dc columns.
- Rnds 1–2 and 23–25 each have 42 sc.
- The body is 5.6 in (14.2 cm) wide flat and 16.25 in (41.3 cm) long.
- The head is firmly stuffed and about 5 in (12.7 cm) wide.
- The safety eyes are locked and don’t wiggle.
- The beak is centered below the eye patches.
- The head is sewn across all 21 front rim sts, and the back rim is open.
- The flippers sit level with each other.
- The drawstring passes through all 14 spaces.
Troubleshooting
The tube spirals. Your joins are drifting. Start each ch-5 directly above the previous join.
The squares are tall and narrow. Your dc stitches are loose. Go down half a hook size.
The top rim ruffles. You have too many stitches. Rework Rnd 23 to exactly 42 sc.
The head tips forward. Lower it so it overlaps the rim by a full 1 in (2.5 cm).
Bags fall out the bottom. Pull the drawstring tighter and double-knot the bow.
Stuffing shows through the head. Use a smaller hook for the head.
Care
Take out the bags and hand wash the holder in cool water with mild soap. Roll it in a towel to press out the water, then dry it flat and reshape the mesh while it’s damp.
Final Notes
At gauge, 42 sts makes the body 11.2 in (28.4 cm) around and 5.6 in (14.2 cm) flat. Twenty mesh rounds at 0.75 in (1.9 cm) each give 15 in (38.1 cm) of mesh. The bands bring the body to 16.25 in (41.3 cm), and with the head the holder is about 19.75 in (50.2 cm) plus the loop. If you check each stage as you go, Pip will hang straight.
Happy crocheting!