

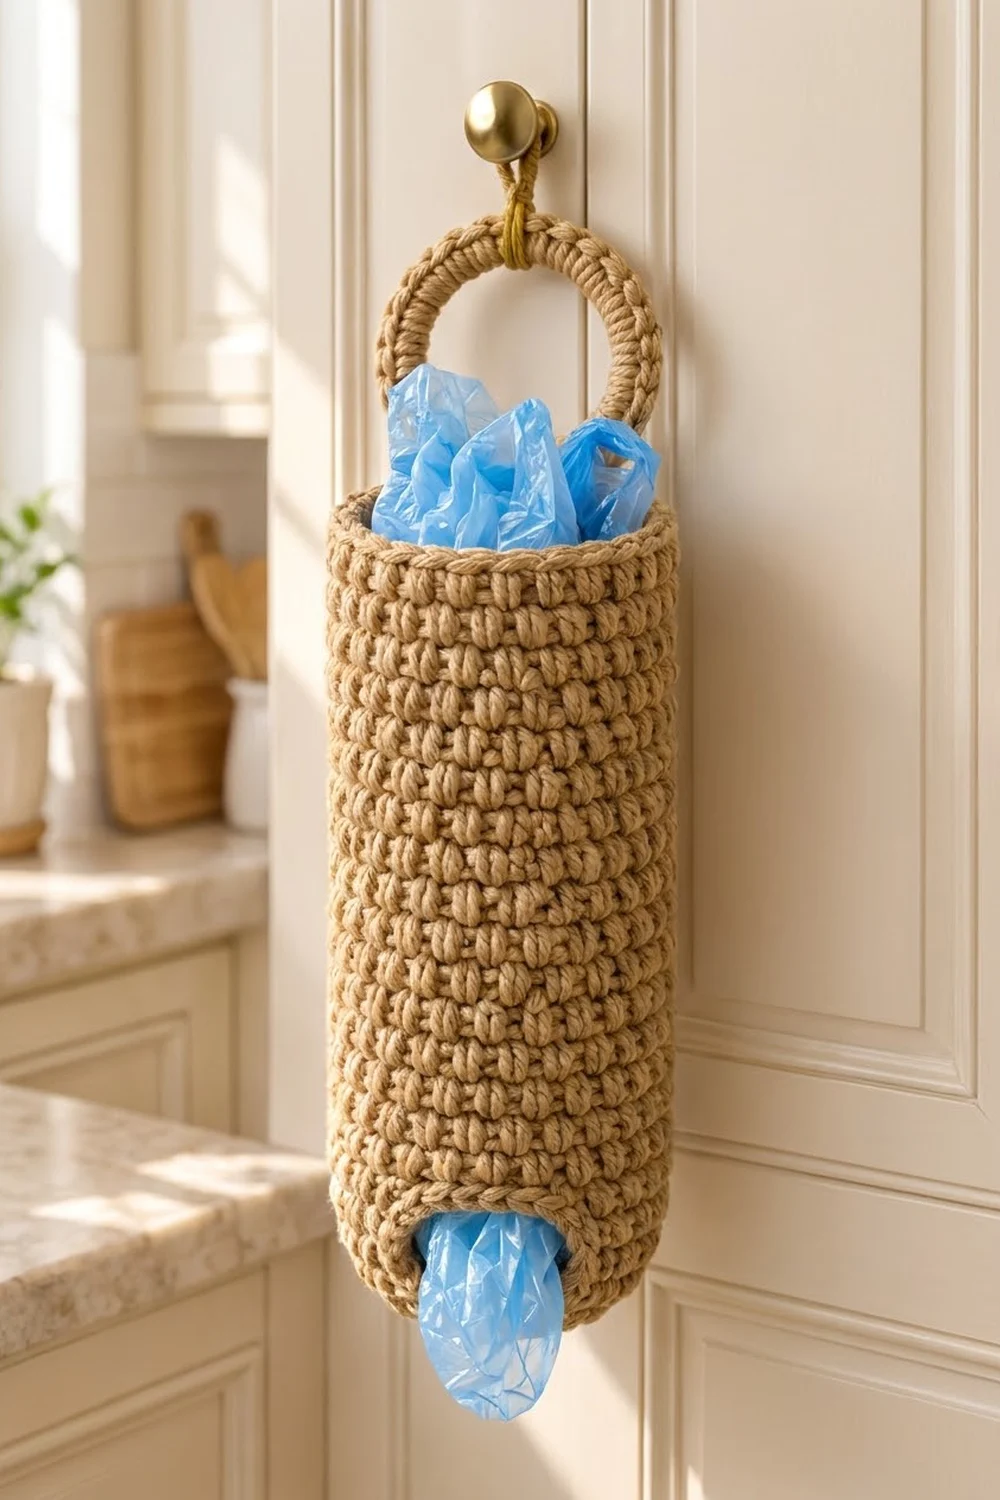
This plastic bag holder keeps grocery bags tidy and gives the kitchen a natural, woven look. It’s a tall tan tube with a pebbly texture. You push bags in through the open top and pull them out one at a time through a hole in the base.
The texture is lemon peel stitch, made by alternating single and double crochet. It gives the tube small, tight bumps that look a bit like jute basketry. The base, top rim and hanging ring are plain single crochet, so they stay firm and keep their shape.
The pattern uses US crochet terms. The body measures about 14 in (35.6 cm) tall and 4.9 in (12.4 cm) across. With the hanging ring attached, it hangs about 17 in (43.2 cm) long.
Construction is simple. You start with a chain ring for the dispensing hole and work the flat base outward. Then a back-loop round turns the work upward, and you crochet the tube in joined rounds. After the top border, you make a separate hanging ring and sew it to the back of the rim.
Finished Size and Construction
- Finished size: 14 in (35.6 cm) tall × 4.9 in (12.4 cm) diameter; 7.7 in (19.6 cm) wide when flattened
- Total hanging length: about 17 in (43.2 cm)
- Skill level: Easy
- Terminology: US
- Yarn weight: Worsted / aran (#4)
- Hook: 5.0 mm (H-8)
- Number of pieces: 2 (body and hanging ring)
- Layout: Single vertical holder, with the ring centered above the back of the rim
- Body circumference: 54 stitches = 15.4 in (39.1 cm)
- Body height before border: 13.25 in (33.7 cm)
- Border depth: 0.75 in (1.9 cm)
- Bottom hole: about 2.2 in (5.6 cm) across
- Hanging ring: about 3.8 in (9.7 cm) across, with a 2.2 in (5.6 cm) center opening
Materials
Yarn: Use a worsted-weight cotton or cotton blend with a matte, rustic finish. A jute-look cotton or a tightly plied cotton/linen works well. Cotton holds its shape and doesn’t stretch out when the holder is packed with bags. Avoid very soft acrylics, which can sag over time.
- Tan / khaki: 120 g, about 200 m (219 yd)
The holder actually uses about 100 m. The quantity above includes a margin for your gauge swatch and small tension differences.
Tools:
– 5.0 mm (H-8) crochet hook
– Tapestry needle
– 2 stitch markers (one for the start of the round, one for sewing placement)
– Scissors
– Measuring tape
– Rust-proof pins and a spray bottle for blocking
Abbreviations (US Terms)
- ch – chain
- sl st – slip stitch
- sc – single crochet
- dc – double crochet
- BLO – back loop only
- rev sc – reverse single crochet (crab stitch)
- st(s) – stitch(es)
- rnd(s) – round(s)
- inc – 2 sc in the same stitch
Lemon peel stitch: This stitch works over an even number of stitches. On Round A, alternate sc, dc. On Round B, work a dc into each sc and an sc into each dc. Each bump stacks onto a flat stitch, which makes the pebbled surface.
Reverse sc: Work single crochet from left to right (right to left if you crochet left-handed). Insert the hook into the next stitch to the right, pull up a loop, yarn over, and draw through both loops.
Gauge and Checkpoints
Gauge in sc: 14 sts × 16 rnds = 4 in (10.2 cm)
Gauge in lemon peel: 14 sts × 12 rnds = 4 in (10.2 cm)
That works out to 3.5 sts per inch across. Vertically, lemon peel gives 3 rnds per inch and sc gives 4 rnds per inch.
Make the base first and use it as your test piece. Check these measurements as you go:
- After Rnd 1: The hole is about 6.9 in (17.5 cm) around, or about 2.2 in (5.6 cm) across.
- After Rnd 6: The base is about 4.9 in (12.4 cm) across when gently flattened.
- After Rnd 19: The 12 lemon peel rnds measure 4 in (10.2 cm) from the Rnd 7 fold.
- After Rnd 46: The tube is 13.25 in (33.7 cm) tall, measured from the base fold.
- After the border: The tube is 14 in (35.6 cm) tall.
If your base is too big: Go down to a 4.5 mm hook. If it’s too small: Go up to a 5.5 mm hook. Height is easier to adjust than width. If your rounds are short, add lemon peel rnds in pairs (one A and one B) until you reach 13.25 in (33.7 cm).
Base
The base is worked in joined rounds. Start each round with ch 1, which does not count as a stitch. Join each round with a sl st to the first sc. Place a marker in the first stitch of each round; this joining line becomes the back of the holder.
Foundation: Ch 24 and sl st to the first ch to form a ring. Don’t twist the chain.
Rnd 1: Ch 1, then sc in each ch around. Join. (24 sts)
Rnd 2: Ch 1, sc in next 3 sts, inc, repeat 6 times. Join. (30 sts)
Rnd 3: Ch 1, sc in next 4 sts, inc, repeat 6 times. Join. (36 sts)
Rnd 4: Ch 1, sc in next 5 sts, inc, repeat 6 times. Join. (42 sts)
Rnd 5: Ch 1, sc in next 6 sts, inc, repeat 6 times. Join. (48 sts)
Rnd 6: Ch 1, sc in next 7 sts, inc, repeat 6 times. Join. (54 sts)
Checkpoint: You now have a flat donut about 4.9 in (12.4 cm) across with a 2.2 in (5.6 cm) hole. A very slight cup is fine, but ruffling is not. If it ruffles, your tension is loose; go down one hook size.
Body
Rnd 7 (turning round): Ch 1, sc in BLO of each st around. Join. (54 sts = 54 worked 1-per-st + 0 added)
The unused front loops make a crisp ridge, and the work starts to turn upward. Keep the right side of the base facing out.
Rnd 8 (Round A): Ch 1, sc in next st, dc in next st, repeat 27 times. Join. (54 sts: 27 sc + 27 dc)
Rnd 9 (Round B): Ch 1, dc in next st (an sc), sc in next st (a dc), repeat 27 times. Join. (54 sts: 27 dc + 27 sc)
The first dc after the ch 1 sits a little low. That’s normal, and it falls on the back joining line.
Rnds 10–46: Keep alternating. Work Round A on the even rnds (10, 12, … 46) and Round B on the odd rnds (11, 13, … 45). (54 sts in every round)
That gives you 39 lemon peel rounds (Rnds 8–46), ending on a Round A. At 3 rnds per inch, they add 13 in (33.0 cm). Rnd 7 adds 0.25 in (0.6 cm), so the body is 13.25 in (33.7 cm) tall.
Checkpoint: The tube is 13.25 in (33.7 cm) tall and 7.7 in (19.6 cm) wide when flattened. Count your stitches every 10 rounds. Missing the dc in the turning chain area is the most common way to lose stitches.
Hanging Ring
Like the base, the ring is worked in joined rounds starting with ch 1, which does not count.
Foundation: Ch 24 and sl st to the first ch to form a ring.
Rnd 1: Ch 1, then sc in each ch around. Join. (24 sts)
Rnd 2: Ch 1, sc in next 3 sts, inc, repeat 6 times. Join. (30 sts)
Rnd 3: Ch 1, sc in next 4 sts, inc, repeat 6 times. Join. (36 sts)
Rnd 4: Ch 1, sc in next 5 sts, inc, repeat 6 times. Join. (42 sts)
Rnd 5 (trim): Sl st loosely in each st around. (42 sts = 42 worked 1-per-st + 0 added)
Fasten off and leave a 16 in (40.6 cm) tail for sewing.
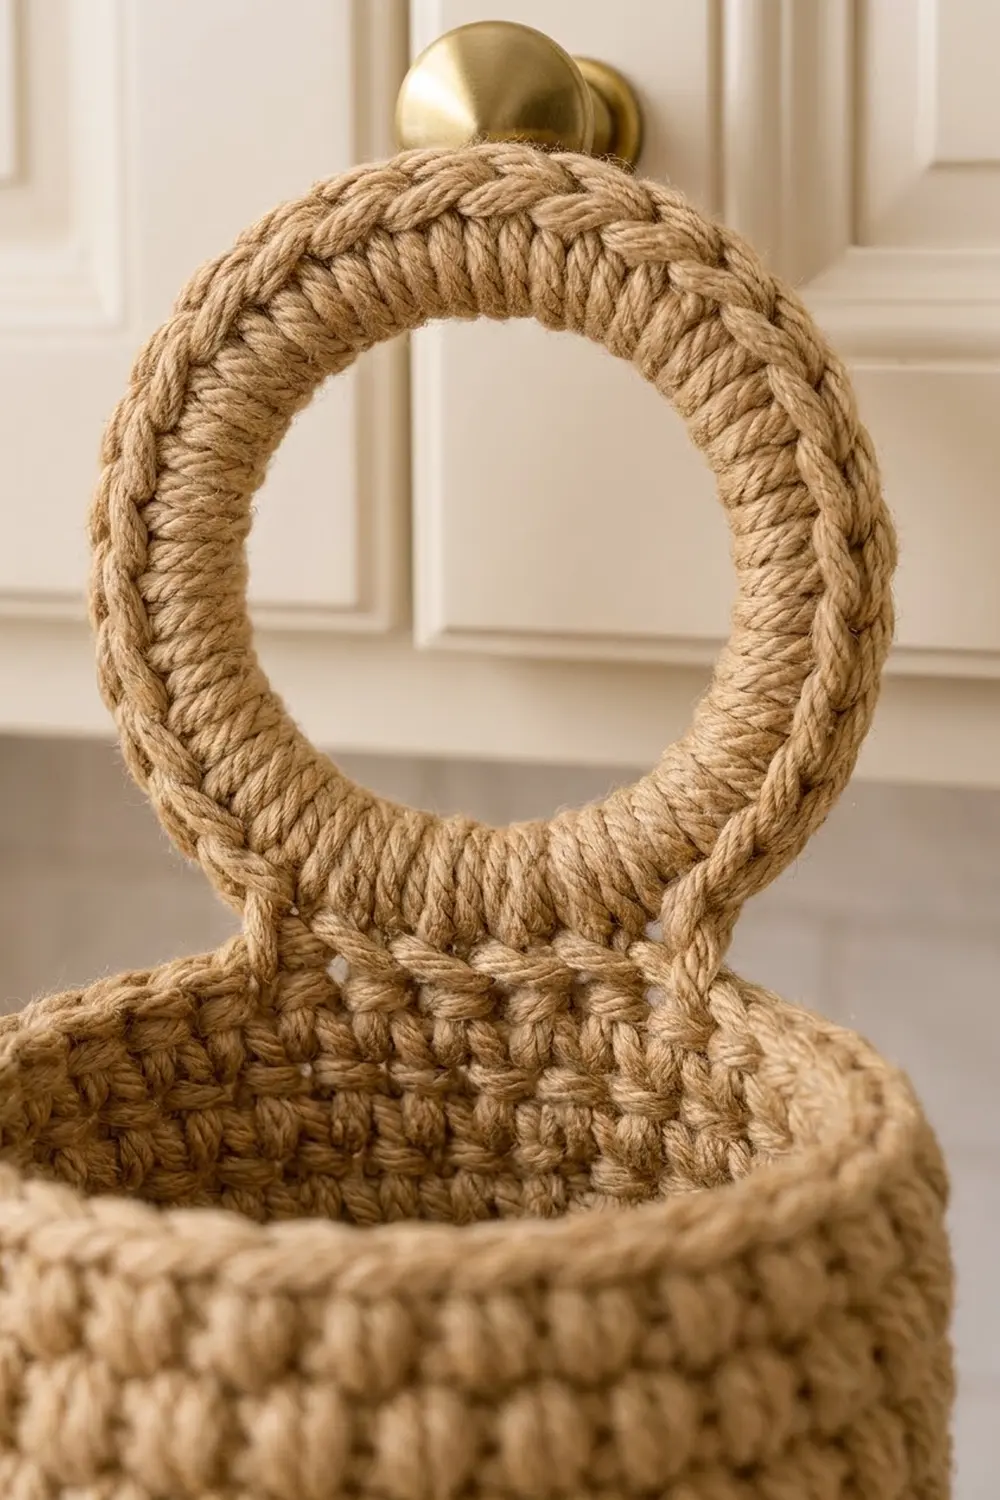
Checkpoint: The ring is about 3.8 in (9.7 cm) across with a 2.2 in (5.6 cm) opening. The opening needs to slip easily over a cabinet knob or hook.
Border
The border is worked in sc, at 3.5 sts per inch across and 4 rnds per inch in height. It has the same 54 sts as the body, so the rim stays the same width as the tube. It doesn’t flare or pull in.
Top rim: Continue from Rnd 46 without fastening off.
Border Rnd 1: Ch 1, sc in each st around. Join. (54 sts)
Border Rnd 2: Ch 1, sc in each st around. Join. (54 sts)
Border Rnd 3: Ch 1, rev sc in each st around. Join. (54 sts)
Fasten off and weave in the end.
Why the math works: All three border rounds use 54 sts. At 3.5 sts per inch, that’s a circumference of 15.4 in (39.1 cm), the same as the body. Each round adds 0.25 in (0.6 cm) of height, so the border is 0.75 in (1.9 cm) deep. That brings the body from 13.25 in (33.7 cm) to exactly 14 in (35.6 cm).
The reverse sc on the last round is short and firm. It gives the opening a rounded, rope-like edge.
Bottom hole edge: Hold the base with the right side facing you. Join the yarn in any free loop of the foundation chain. Sl st in each of the 24 foundation loops. (24 sts)
This firms up the dispensing hole so it grips the bags gently instead of stretching out. Fasten off and weave in the ends.
Assembly
- Flatten the tube so the back joining line is centered. Mark the center 6 sts of the top rim on that back line.
- Place the ring behind the rim so its lower edge overlaps the inside of the tube by 0.75 in (1.9 cm), which is the full border depth.
- Use the tail to whipstitch the 6 lowest sts of the ring to the 6 marked rim sts, one ring stitch to one rim stitch. Sew a second pass through Border Rnd 1 to share the load.
- Pull each stitch snug, but don’t pucker the rim. Check that the ring stands straight up.
Size check: The total hanging length should be 14 in + 3.8 in − 0.75 in ≈ 17 in (43.2 cm).
Final Blocking
- Wet the holder fully in cool water and gently squeeze out the excess. Don’t wring it.
- Roll it in a towel and press to remove more moisture.
- Stuff the tube loosely with a rolled towel or a 4.5–5 in (11.4–12.7 cm) wide bottle so it dries as a straight cylinder.
- Lay the hanging ring flat and pin it to a circle 3.8 in (9.7 cm) across.
- Shape the base so the ridge from Rnd 7 forms a neat bottom edge.
- Let it dry completely, then remove the form.
Final Quality-Control Checklist
- [ ] Every round of the body and border has 54 sts.
- [ ] The base lies flat or cups only slightly, with no ruffle.
- [ ] The bottom hole measures about 2.2 in (5.6 cm) and has the sl st edge.
- [ ] The lemon peel bumps line up evenly with no stray columns.
- [ ] The body is 14 in (35.6 cm) tall.
- [ ] The ring is sewn to the center back, overlapping 0.75 in (1.9 cm).
- [ ] The ring stands upright without twisting the tube.
- [ ] All ends are woven in on the inside.
Troubleshooting
The tube leans or spirals: Joined rounds can drift. Make sure you join into the first st, not the ch 1, and keep the marker moving up each round.
The texture looks flat: You may be working sc into sc. In Round B, always work a dc into the sc below.
The stitch count keeps changing: Count in pairs. You should always have 27 sc/dc pairs.
The hole is too big and bags fall out: Work a second sl st round around the hole edge, or rework the base with ch 22 and adjust Rnd 1 to match.
The hole is too tight: Skip the sl st edge or work it loosely with a larger hook.
The ring droops forward: Add a third sewing pass lower down, through the top lemon peel round.
Care
Hand wash in cool water and lay it flat or hang it to dry. Reshape it over a bottle while damp if needed. Don’t tumble dry.
Final Notes
The measurements build on each other. A 24-st chain gives a 2.2 in (5.6 cm) hole. Six base rounds grow to 54 sts and 4.9 in (12.4 cm) across. Thirty-nine lemon peel rounds plus the turning round reach 13.25 in (33.7 cm). A 0.75 in (1.9 cm) border finishes the body at 14 in (35.6 cm). With the 3.8 in (9.7 cm) ring attached, the holder hangs about 17 in (43.2 cm) long. If you check your gauge at each of these points, the holder will come out the right size.
Happy crocheting!