

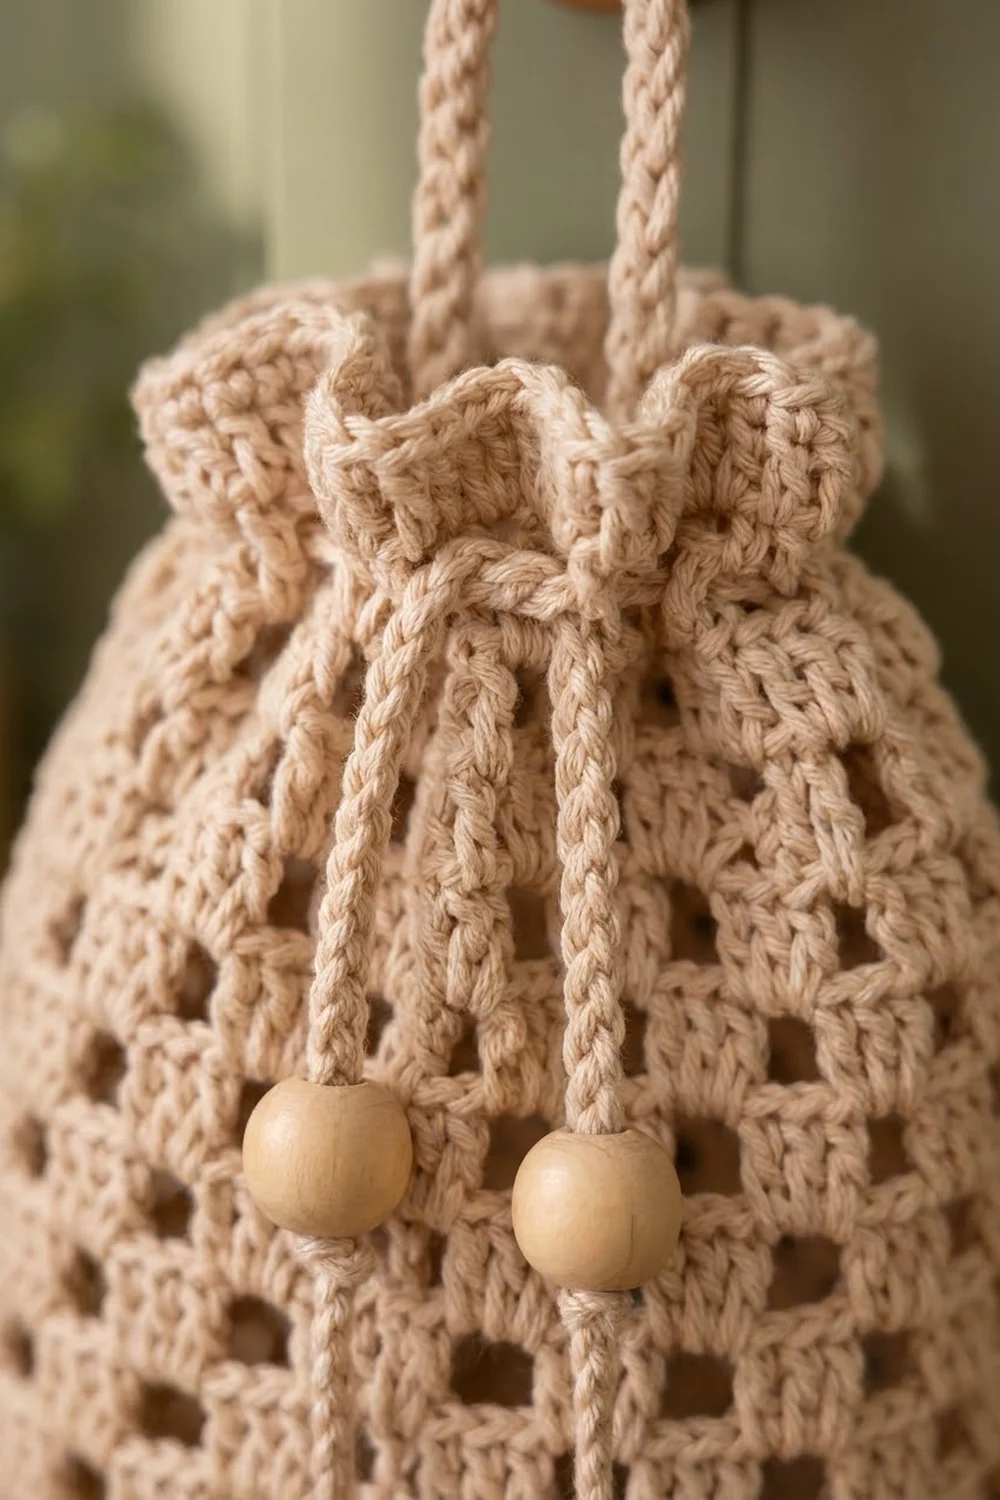
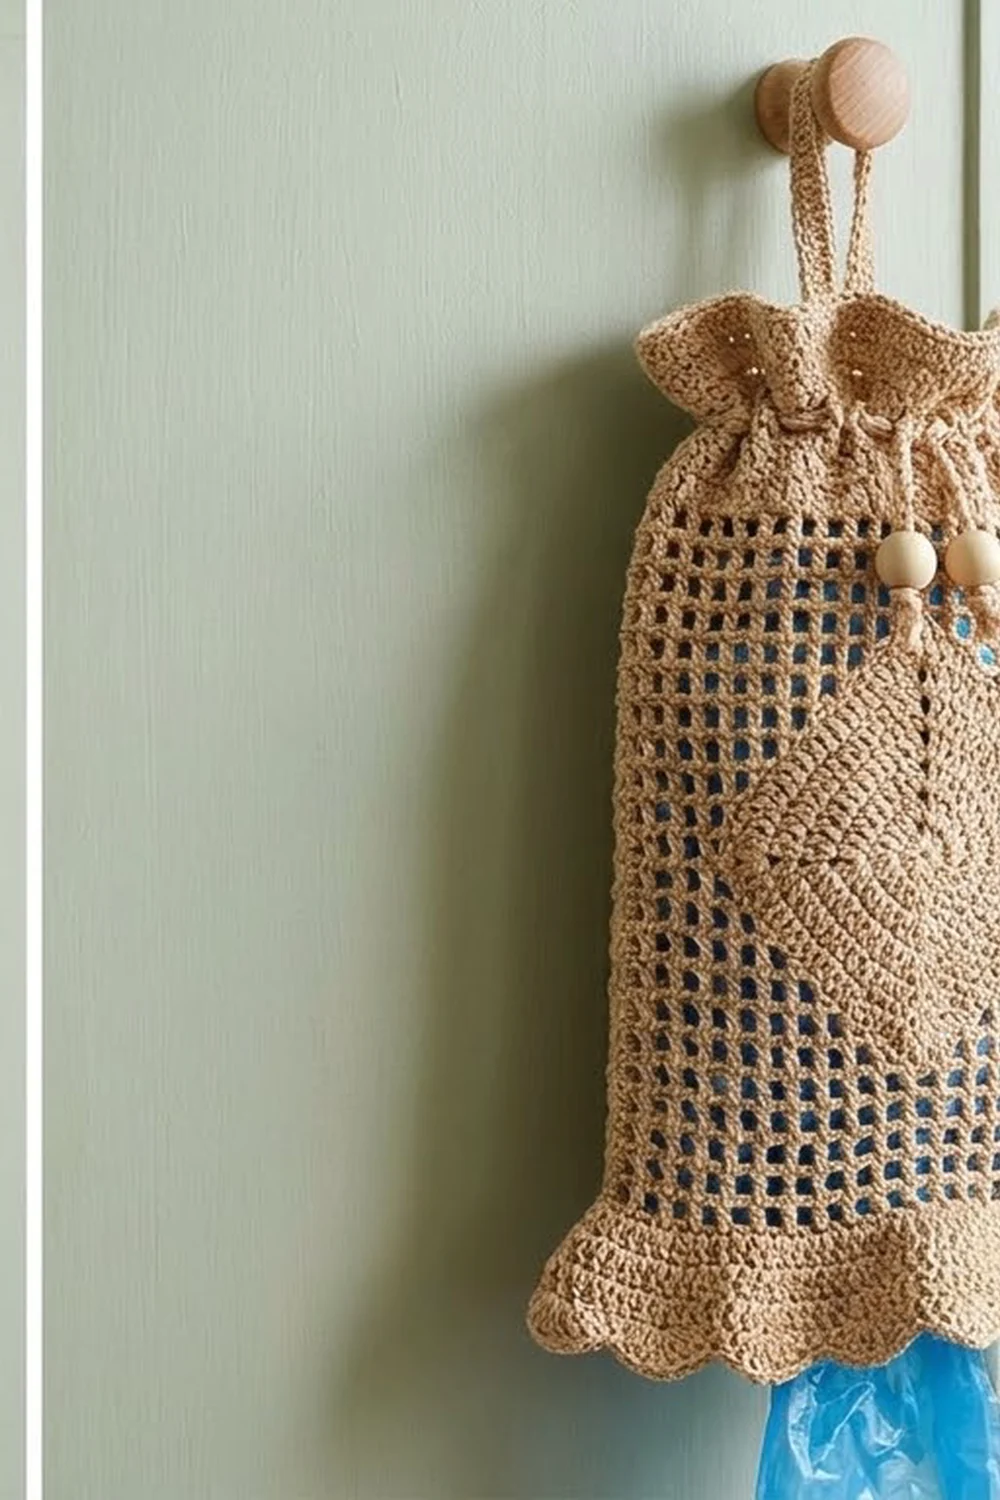
This bag holder is a long filet-mesh tube that hangs from a peg and keeps grocery bags in one place. A large solid diamond sits on the front against an airy grid of open squares. At the top, a wooden-beaded drawstring gathers a soft ruffle. At the bottom, a narrowed opening finished with shell scallops lets you pull out one bag at a time.
The sample is a warm oatmeal beige cotton with natural wood beads. A sage green version uses the same amounts. Both are calm, cottage-kitchen colors, but any smooth cotton works.
The pattern uses US crochet terms. The finished holder is about 7 in (17.8 cm) wide laid flat and about 18 in (45.7 cm) long, not counting the hanging loop.
Construction is simple. You crochet one flat rectangle in rows, seam it into a tube, and work the scalloped bottom edging in rounds. Then you add a drawstring and a hanging loop.
Finished Size and Construction
- Finished size: 7 in (17.8 cm) wide flat x 18 in (45.7 cm) long
- Tube circumference: 14 in (35.6 cm)
- Skill level: Easy-intermediate (basic filet crochet)
- Terminology: US
- Yarn weight: DK / light worsted (#3) cotton
- Hook: 4.0 mm (G-6)
- Number of pieces: 1 body panel, plus 1 drawstring cord and 1 hanging loop
- Layout: Single panel seamed into a tube, seam at center back
- Panel size before seaming: 14 in (35.6 cm) wide x 16.8 in (42.7 cm) tall
- Size before border: 7 in (17.8 cm) flat x 16.8 in (42.7 cm) long
- Border depth: about 1.25 in (3.2 cm) of bottom edging
Materials
Yarn: Use a smooth, firmly twisted cotton or cotton blend. Cotton keeps the mesh squares crisp and holds the diamond’s shape. Avoid fuzzy or very stretchy yarns, because the holder gets heavier as you fill it with bags.
- Main color (Oatmeal Beige): 120 g / about 276 m
- Alternative (Sage Green): same amounts, 120 g / about 276 m
These quantities include a margin of roughly 25% over what the sample used.
Tools:
- 4.0 mm (G-6) crochet hook
- 2 wooden beads, 16–20 mm, with holes at least 5 mm wide
- Tapestry needle
- Stitch markers (2–4)
- Measuring tape
- Blocking mat and rust-proof pins
- Spray bottle
- Scissors
Abbreviations (US Terms)
- ch – chain
- sl st – slip stitch
- sc – single crochet
- sc2tog – single crochet 2 together (decrease)
- dc – double crochet
- sk – skip
- sp – space
- st(s) – stitch(es)
- RS / WS – right side / wrong side
Special stitches:
- Open square (OS): ch 1, sk next st or ch-1 sp, dc in next dc.
- Solid square (SS): dc in next ch-1 sp (or st), dc in next dc.
- Shell: 5 dc in the same st.
Every mesh row starts with ch 3, which counts as the first dc. That is followed by 35 squares of 2 sts each, for 1 + (35 x 2) = 71 sts per row. The last dc of each row goes into the top of the turning ch.
Gauge and Checkpoints
Gauge: 20 sts and 10 rows = 4 in (10.2 cm) in filet mesh. That works out to 10 squares across and 10 rows high per 4 in (10.2 cm). Each square is about 0.4 in (1.0 cm) wide and tall.
Test swatch first: Ch 23. Row 1: dc in 4th ch from hook and in each ch across (21 sts). Rows 2–10: ch 3, work 10 OS. Your swatch should measure 4 in (10.2 cm) wide and 4 in (10.2 cm) tall after a light steam.
Checkpoints during the panel:
- After Row 1: 14 in (35.6 cm) wide
- After Row 6: 2.4 in (6.1 cm) tall
- After Row 32 (diamond complete): 12.8 in (32.5 cm) tall
- After Row 42: 16.8 in (42.7 cm) tall
If your work is too big: go down one hook size, to 3.75 mm (F-5). If it is too small: go up to 4.5 mm (7). Fix the width before you fix the height. Row height can be adjusted later by tightening or loosening the pull-up on your dc, but the stitch count fixes the width.
Body Panel
Work flat in rows, turning at the end of each row. The foundation edge becomes the bottom of the holder.
Bottom Solid Band
Foundation: Ch 73.
Row 1 (RS): Dc in 4th ch from hook (the skipped 3 ch count as 1 dc), then dc in each ch across. Turn. (71 sts)
Row 2: Ch 3 (counts as dc), dc in each st across, ending in top of turning ch. Turn. (71 sts)
Open Mesh Before the Diamond
Rows 3–6: Ch 3, work 35 OS across. Turn. (71 sts: 36 dc + 35 ch-1 sps)
Row 3 is a conversion row. The ch-1 spaces simply replace every other solid dc, so the count stays at 71.
Diamond Section
Every row starts with ch 3 and has exactly 35 squares. The diamond is centered on square 18, which falls at the center front once the tube is seamed. Each width is worked for 2 rows, which gives the tall, slim diamond in the photo.
- Rows 7–8: 17 OS, 1 SS, 17 OS
- Rows 9–10: 16 OS, 3 SS, 16 OS
- Rows 11–12: 15 OS, 5 SS, 15 OS
- Rows 13–14: 14 OS, 7 SS, 14 OS
- Rows 15–16: 13 OS, 9 SS, 13 OS
- Rows 17–18: 12 OS, 11 SS, 12 OS
- Rows 19–20: 11 OS, 13 SS, 11 OS (widest point)
- Rows 21–22: 12 OS, 11 SS, 12 OS
- Rows 23–24: 13 OS, 9 SS, 13 OS
- Rows 25–26: 14 OS, 7 SS, 14 OS
- Rows 27–28: 15 OS, 5 SS, 15 OS
- Rows 29–30: 16 OS, 3 SS, 16 OS
- Rows 31–32: 17 OS, 1 SS, 17 OS
Every row is still 71 sts. For example, in Rows 19–20 you have 11 + 13 + 11 = 35 squares, and 1 + (35 x 2) = 71.
The finished diamond is 13 squares, or 5.2 in (13.2 cm), wide and 26 rows, or 10.4 in (26.4 cm), tall.
Open Mesh After the Diamond
Rows 33–36: Ch 3, work 35 OS across. Turn. (71 sts)
Top Solid Band, Eyelet Row, and Header
Row 37 (conversion): Ch 3, dc in each st and ch-1 sp across. Turn. (36 sts from existing dc + 35 sts worked into ch-1 sps = 71 sts)
Row 38: Ch 3, dc in each st across. Turn. (71 sts)
Row 39 (eyelet row): Ch 3, work 35 OS across. Turn. (71 sts) The drawstring is threaded through these 35 spaces later.
Row 40 (conversion): Ch 3, dc in each st and ch-1 sp across. Turn. (36 + 35 = 71 sts)
Rows 41–42: Ch 3, dc in each st across. Turn. (71 sts)
Fasten off, leaving a 24 in (61.0 cm) tail for seaming.
The panel should now measure 14 in (35.6 cm) wide x 16.8 in (42.7 cm) tall. The 3 solid rows above the eyelets, 1.2 in (3.0 cm) in total, become the ruffled header.
Seaming the Tube
Fold the panel in half with RS together, so the first and last dc of every row line up. Using the tail and a tapestry needle, whipstitch through the outer loops of the edge stitches. Work one stitch per row end, plus one extra stitch at each solid row for strength. That is 42 rows in total.
Keep the seam flat. Pull each stitch snug but not tight, so the seam doesn’t pucker against the mesh. Turn the tube RS out. The seam runs down the center back, and the diamond sits centered on the front.
Checkpoint: The tube lies flat at 7 in (17.8 cm) wide.
Border: Bottom Scallop Edging
The bottom edging is worked in rounds into the foundation chain. It narrows the opening so bags stay inside, then flares into scallops.
Border gauge: 5 sc = 1 in (2.5 cm) in the round. Each sc round adds about 0.25 in (0.6 cm) of height, and the shell round adds about 0.75 in (1.9 cm).
Setup: The bottom edge has 71 foundation sts. At the seam, the first and last sts sit on top of each other. Work through both of them as a single st, which leaves 70 working sts around (35 on the front half and 35 on the back half).
Hold the tube upside down and join yarn at the seam.
Round 1 (decrease): Ch 1, sc in next 3 sts, sc2tog; repeat from * 14 times. Join with sl st to first sc. (56 sc; 28 per half)
Round 2 (decrease): Ch 1, sc in next 5 sts, sc2tog; repeat from * 8 times. Join. (48 sc; 24 per half)
Round 3 (shells): Ch 1, sc in first st, sk 1, shell in next st, sk 1, sc in next st; repeat from * around, ending with sk 1, shell in next st, sk 1, and join with sl st to first sc. (12 shells and 12 sc = 72 sts; 6 scallops per half)
Fasten off and weave in the end.
Why the math works:
- Round 1 turns every 5 sts into 4 sts: 70 ÷ 5 = 14 repeats of 4 sc, or 56.
- Round 2 turns every 7 sts into 6 sts: 56 ÷ 7 = 8 repeats of 6 sc, or 48.
- Round 3 uses 4 sts per repeat (sc, sk, shell, sk): 48 ÷ 4 = 12 repeats exactly, with nothing left over.
The opening ends up at about 9.6 in (24.4 cm) around, roughly 3 in (7.6 cm) across. That is snug enough to hold bags but easy to pull through. Six scallops land on the front, as in the photo.
Drawstring and Hanging Loop
Drawstring
Ch until the chain measures 30 in (76.2 cm). Sl st in the back bump of the 2nd ch from the hook and in each ch across. Fasten off.
Start at the center front. Weave the cord in and out of the Row 39 eyelet spaces, going over one dc post and under the next, all the way around. Bring both ends out through two neighboring spaces at the center front, just above the top point of the diamond.
Slide a wooden bead onto each end and tie an overhand knot below each bead. Trim the tails to 0.5 in (1.3 cm).
Hanging Loop
Ch until the chain measures 9 in (22.9 cm). Sl st in the back bump of each ch as you did for the drawstring, and fasten off with 6 in (15.2 cm) tails.
Fold the cord in half. On the inside of the tube, sew both ends securely to the back seam over Rows 40–42, so the loop rises about 4 in (10.2 cm) above the top edge.
Pull the drawstring to gather the top to about 2 in (5.1 cm) across, and tie a bow or a loose knot. The header ruffles above the gathers.
Final Blocking
- Untie the drawstring and pull it out partway so the top lies open.
- Lay the tube flat with the seam centered at the back and the diamond centered on the front.
- Pin it to 7 in (17.8 cm) wide x 16.8 in (42.7 cm) long, measured from the bottom of Row 1 to the top of Row 42.
- Line up the mesh squares vertically, using a ruler along a column of dc posts.
- Pin each of the 6 front scallops into an even curve.
- Mist the piece until it is damp, not soaked, and let it dry completely.
- Unpin, turn the tube over, and lightly mist and smooth the back scallops.
- Re-thread and cinch the drawstring.
Final Quality-Control Checklist
- Every body row has 71 sts, which is 35 squares.
- The diamond is 13 squares wide at Rows 19–20 and narrows to 1 square at both points.
- The diamond is centered on the front, with 11 open squares on each side at its widest.
- The seam is flat and runs straight down the center back.
- The bottom rounds count 56, then 48, then 12 shells.
- The tube measures 7 in (17.8 cm) flat and about 18 in (45.7 cm) long including the scallops.
- The drawstring ends and beads sit at the center front.
- The hanging loop is sewn securely to the seam and centered at the back.
- All ends are woven in at least 2 in (5.1 cm).
Troubleshooting
Squares look like tall rectangles. Your dc is too tall. Pull up a shorter loop, or go down one hook size.
The diamond leans to one side. You probably miscounted the open squares at the start of a row. Count the OS on both sides of the solid section; they should always match.
The stitch count drifts to 70 or 72. The last dc is going into the wrong place. Make sure it goes into the 3rd ch of the turning ch, not the space next to it.
The bottom opening is too loose and bags fall out. Add another round before the shells: sc in next 4, sc2tog 8 times (40 sc). Then work 10 shells using the same 4-st repeat.
The bottom opening is too tight. Skip Round 2 and work the shells on the 56 sts, for 14 shells.
The seam puckers. Remove it and re-seam with looser tension, one stitch per row end plus one extra at the solid rows.
The beads slide off. Tie a double overhand knot, or choose beads with a smaller hole.
Care
Hand wash in cool water, or machine wash on a gentle cycle in a laundry bag. Reshape and dry flat. Remove the wooden beads before washing, or tie them inside a small cloth.
Final Notes
The measurements build on each other. Gauge is 20 sts and 10 rows = 4 in (10.2 cm). That makes a 71-st panel 14 in (35.6 cm) wide, and 42 rows make it 16.8 in (42.7 cm) tall. Seamed, the tube lies 7 in (17.8 cm) flat. The bottom edging narrows 70 sts to 56, then 48, then 12 shells, which adds about 1.25 in (3.2 cm) for a finished length of about 18 in (45.7 cm).
If you check your gauge at the swatch, the stitch count at Row 1, and the height at Row 32, the diamond, scallops, and drawstring will all fall into place.
Happy crocheting!