

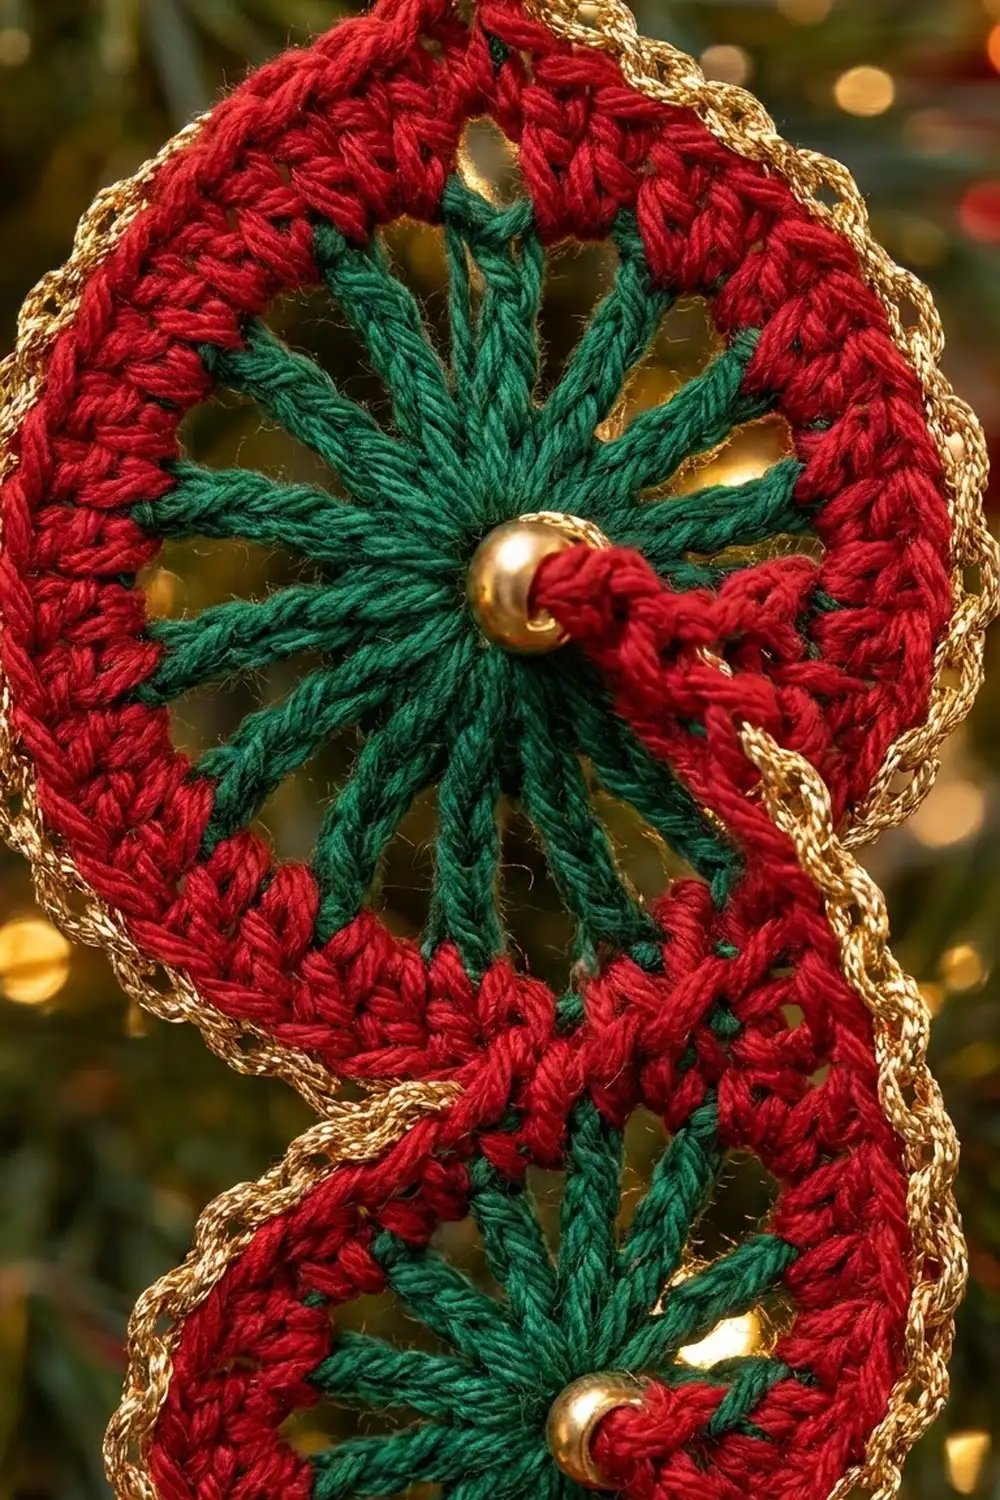
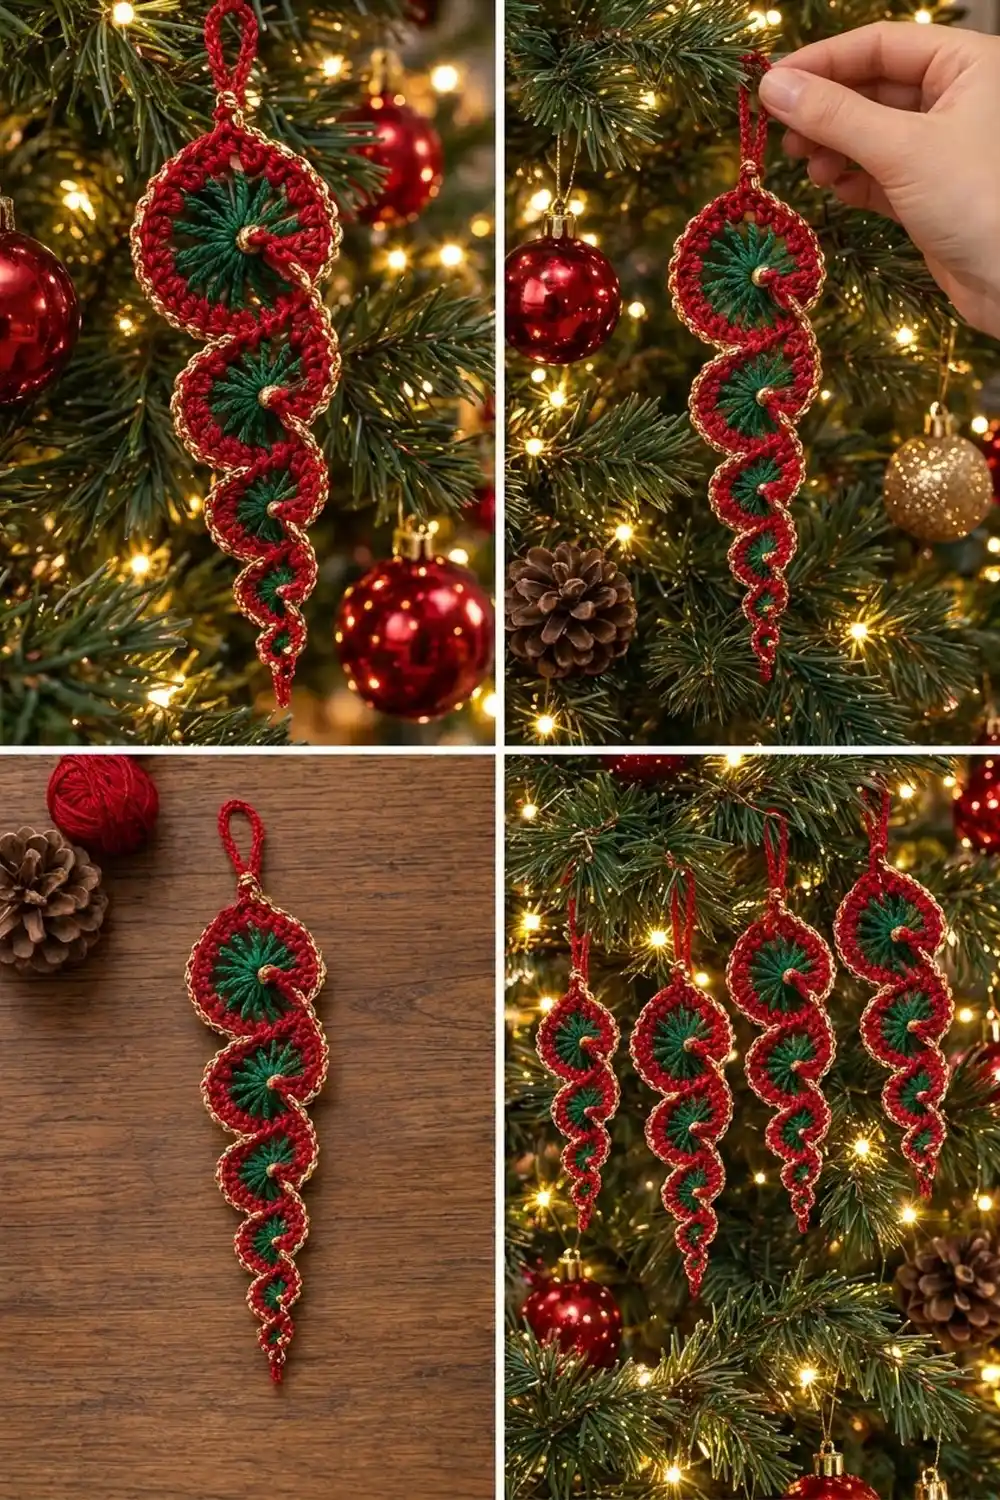
This little icicle ornament is a column of five graduated discs, each with a green starburst center, a red band, and a gold bead at the middle. A slip-stitch outline in metallic gold runs around the whole shape and dips into every seam. On the tree, that line reads as a twisting spiral.
The palette is classic Christmas: deep green, bright red, and shimmering gold. The look is crisp and slightly vintage, like the beaded ornaments made in the 1970s. It works up fast enough to make a whole set in one evening.
This pattern uses US crochet terms. The finished ornament measures about 6.5 in (16.5 cm) long, or 7.75 in (19.7 cm) including the hanging loop. It is 1.75 in (4.4 cm) wide at the top disc.
Construction is simple. You work five small discs in the round, sew them together top to bottom, and then add the gold outline in one pass. The outline also forms the pointed tip and the hanging loop. Last, you sew a gold bead into the center of each disc.
Finished Size and Construction
- Finished size: 6.5 in (16.5 cm) long × 1.75 in (4.4 cm) wide; 7.75 in (19.7 cm) long with the loop
- Skill level: Advanced beginner
- Terminology: US crochet terms
- Yarn weight: Sport weight (#2) mercerized cotton, plus a fine metallic gold thread
- Hook: 3.0 mm (US C/2–D/3)
- Number of pieces: 5 discs (A to E), joined into one ornament
- Layout: 1 column × 5 discs, largest at the top
- Piece sizes: A 1.75 in (4.4 cm), B 1.5 in (3.8 cm), C 1.25 in (3.2 cm), D 1 in (2.5 cm), E 0.75 in (1.9 cm)
- Size before border: 6.25 in (15.9 cm) long × 1.75 in (4.4 cm) wide
- Border depth: The slip stitches sit flat on the last red round and add no width. The picot tip adds 0.25 in (0.6 cm) to the length.
Materials
Yarn: Use a smooth, mercerized sport-weight cotton. It shows stitch definition clearly and holds a crisp circle after blocking. For the outline, use a metallic thread about as thick as the cotton, or slightly thinner. Thick metallic yarn will make the slip-stitch line bulky.
- Color 1, Dark Green (centers): 5 g / 20 m
- Color 2, Red (outer rounds, seams): 10 g / 40 m
- Color 3, Metallic Gold (outline, tip, loop): 4 g / 20 m
These quantities include about a 25% margin for swatching and weaving in ends.
Tools:
– 3.0 mm crochet hook
– 5 round gold beads, 6 mm (0.25 in / 0.6 cm), with holes that fit a beading or fine sewing needle
– Tapestry needle
– Fine sewing needle and gold or red sewing thread, for the beads
– 4 locking stitch markers
– Scissors
– Blocking mat, rustproof pins, and a spray bottle
– Ruler or tape measure
Abbreviations (US Terms)
- ch: chain
- sl st: slip stitch
- sc: single crochet
- hdc: half double crochet
- dc: double crochet
- tr: treble crochet
- st(s): stitch(es)
- MR: magic ring
- rep: repeat
- ( ) ×N: repeat the stitches in brackets N times
Standing sc: Put a slip knot of the new color on your hook. Insert the hook into the stitch, yarn over, pull up a loop, yarn over, and draw through both loops. This counts as the first sc of the round.
Picot: Ch 3, then sl st into the 3rd ch from the hook.
Gauge and Checkpoints
Gauge is measured on Disc A, so make Disc A first and measure it before you go on.
- After Round 1 (green tr): 1.25 in (3.2 cm) across
- After Round 2 (red sc): 1.5 in (3.8 cm) across
- After Round 3 (red sc): 1.75 in (4.4 cm) across, lying flat
If Disc A is too big (over 1.9 in / 4.8 cm), go down to a 2.75 mm hook. If it is too small (under 1.6 in / 4.1 cm), go up to a 3.25 mm hook.
If the disc cups into a bowl, your sc are tighter than your tr. Loosen the red rounds only, or go up 0.25 mm for the red rounds. If it ruffles, tighten the red rounds.
Exact size is not critical for an ornament. What matters is that each disc lies flat and the discs shrink evenly from A to E.
The Discs
All discs are worked in joined rounds with the right side facing. Do not turn. Leave a 6 in (15.2 cm) tail on each red fasten-off to use for joining.
Disc A (largest, make 1)
Round 1 (green): Make a MR. Ch 4 (counts as tr), 15 tr into the ring. Pull the ring snug, leaving a hole about 0.25 in (0.6 cm) wide for the bead. Sl st to the top of ch 4. Fasten off. (16 tr)
Round 2 (red): Make a standing sc in any tr, then sc in the same st. Work 2 sc in each remaining tr around. Sl st to the first sc. (32 sc)
Round 3 (red): Ch 1. (Sc in next st, 2 sc in next st) ×16. Sl st to the first sc. (48 sc) Fasten off, leaving a 6 in (15.2 cm) tail.
Checkpoint: 1.75 in (4.4 cm) across.
Disc B (make 1)
Round 1 (green): MR, ch 3 (counts as dc), 15 dc into the ring. Sl st to the top of ch 3. Fasten off. (16 dc)
Round 2 (red): Standing sc in any dc, sc in the same st, then 2 sc in each remaining st around. Sl st to join. (32 sc)
Round 3 (red): Ch 1. (Sc in each of next 3 sts, 2 sc in next st) ×8. Sl st to join. (40 sc) Fasten off with a tail.
Checkpoints: 1 in (2.5 cm) after Round 1, 1.25 in (3.2 cm) after Round 2, and 1.5 in (3.8 cm) finished.
Disc C (make 1)
Round 1 (green): MR, ch 3 (counts as dc), 11 dc into the ring. Sl st to join. Fasten off. (12 dc)
Round 2 (red): Standing sc in any dc, sc in the same st, then 2 sc in each remaining st around. Sl st to join. (24 sc)
Round 3 (red): Ch 1. (Sc in each of next 2 sts, 2 sc in next st) ×8. Sl st to join. (32 sc) Fasten off with a tail.
Checkpoints: 0.9 in (2.3 cm) after Round 1, 1 in (2.5 cm) after Round 2, and 1.25 in (3.2 cm) finished.
Disc D (make 1)
Round 1 (green): MR, ch 3 (counts as dc), 9 dc into the ring. Sl st to join. Fasten off. (10 dc)
Round 2 (red): Standing sc in any dc, sc in the same st, then 2 sc in each remaining st around. Sl st to join. (20 sc) Fasten off with a tail.
Checkpoints: 0.75 in (1.9 cm) after Round 1, and 1 in (2.5 cm) finished.
Disc E (smallest, make 1)
Round 1 (green): MR, ch 2 (counts as hdc), 7 hdc into the ring. Sl st to join. Fasten off. (8 hdc)
Round 2 (red): Standing sc in any hdc, sc in the same st, then 2 sc in each remaining st around. Sl st to join. (16 sc) Fasten off with a tail.
Checkpoints: 0.5 in (1.3 cm) after Round 1, and 0.75 in (1.9 cm) finished.
Marking Each Disc
On each disc, call the first sc of the last round st 1. With N as that disc’s final count, mark these stitches:
- Top pair: sts 1 and 2
- Bottom pair: sts (N/2 + 1) and (N/2 + 2)
- Side 1: the sts between the top pair and the bottom pair, (N/2 − 2) sts
- Side 2: the sts on the other side, also (N/2 − 2) sts
| Disc | Final sts (N) | Top pair | Bottom pair | Each side |
|---|---|---|---|---|
| A | 48 | 1–2 | 25–26 | 22 |
| B | 40 | 1–2 | 21–22 | 18 |
| C | 32 | 1–2 | 17–18 | 14 |
| D | 20 | 1–2 | 11–12 | 8 |
| E | 16 | 1–2 | 9–10 | 6 |
Check the math: for each disc, 2 + 2 + (2 × side) = N. For Disc A that is 2 + 2 + 44 = 48.
Make All Pieces
You need one disc of each size, five discs in total.
- Green: 5 centers (16 tr, 16 dc, 12 dc, 10 dc, 8 hdc)
- Red: 5 outer bands (48, 40, 32, 20, and 16 sc in the final rounds)
Weave in the green tails now, on the wrong side, under the red Round 2. Keep the red tails for joining.
Layout grid (1 column):
   [ loop ]
   [  A  ]   1.75 in / 4.4 cm
   [  B  ]   1.5 in / 3.8 cm
   [  C  ]   1.25 in / 3.2 cm
   [  D  ]   1 in / 2.5 cm
   [  E  ]   0.75 in / 1.9 cm
   [ tip ]
Joining
Method: Whipstitch with the red tails, working the seams top to bottom.
Stitch-to-stitch logic: Lay Disc A above Disc B, both right side up. Make sure their st 1 markers point the same way, to the top. Line up A’s bottom pair (sts 25–26) against B’s top pair (sts 1–2). The stitches match one to one: A st 25 to B st 2, and A st 26 to B st 1.
Using A’s red tail, whipstitch through both loops of those 2 matched pairs. Go through each pair twice so the seam is firm. Then weave the tail into A’s red band.
Join the rest the same way:
– B sts 21–22 to C sts 1–2
– C sts 17–18 to D sts 1–2
– D sts 11–12 to E sts 1–2
That makes 4 seams, each joining 2 sts to 2 sts. No stitches are added.
Tension: Pull each seam just snug enough that the discs touch without overlapping. If you pull too hard, the discs tilt forward.
Size checkpoint: Measure down the center from A’s top to E’s bottom: 1.75 + 1.5 + 1.25 + 1 + 0.75 = 6.25 in (15.9 cm). Width at Disc A should be 1.75 in (4.4 cm).
Border: Gold Outline, Tip, and Loop
Border gauge: One sl st per sc. The gold should lie flat along the top of the last red round. If it pulls the edge inward, loosen up, or go up to a 3.25 mm hook for this round only.
Work through both loops of each red st, with the right side facing.
Start: Join gold with a sl st in Disc A st 2, at the top. (1 sl st)
Down Side 1:
– 22 sl st along Disc A’s side
– 1 sl st into the seam gap between A and B
– 18 sl st along Disc B
– 1 sl st into the seam
– 14 sl st along Disc C
– 1 sl st into the seam
– 8 sl st along Disc D
– 1 sl st into the seam
– 6 sl st along Disc E
(72 sl st on Side 1: 68 side sts + 4 seam sl sts)
Tip: Sl st in Disc E st 9, picot, sl st in Disc E st 10. (2 sl st + 1 picot)
Up Side 2:
– 6 sl st along Disc E
– 1 sl st into the seam
– 8 along Disc D
– 1 into the seam
– 14 along Disc C
– 1 into the seam
– 18 along Disc B
– 1 into the seam
– 22 along Disc A
(72 sl st on Side 2)
Top and loop: Sl st in Disc A st 1. Hold a strand of red together with the gold and ch 20. Sl st into Disc A st 2, at the starting sl st. Fasten off and weave in the ends. The loop should be about 1.25 in (3.2 cm) long.
Why the math works: Each side covers exactly the side stitches of all five discs: 22 + 18 + 14 + 8 + 6 = 68. Add the 4 seam gaps for 72. The top and bottom pairs on Discs A and E are worked at the loop and the tip. The 8 sts in each seam (16 total) are hidden in the seams.
Count every red stitch: 48 + 40 + 32 + 20 + 16 = 156. Take away the 16 seam sts and you get 140 edge sts, which is 68 + 68 + 2 + 2. Every exposed stitch gets exactly one sl st, and nothing is counted twice. The seam sl sts pull the gold into each gap, and that is what creates the spiral look.
Beads: Use the fine needle and doubled sewing thread. Sew one gold bead into the center hole of each disc. Stitch through the green ring 3 times and knot it on the back.
Final Blocking
- Spray the ornament lightly until it is damp. Do not soak it.
- Lay it right side up on the blocking mat.
- Pin the center line straight and check that it measures 6.5 in (16.5 cm) from the top of A to the tip of the picot.
- Pin each disc into a true circle: 4 pins per disc, at 3, 6, 9, and 12 o’clock.
- Use your fingertip to fan the green spokes evenly.
- Pin the loop straight up.
- Let it dry completely, about 2–3 hours.
- Unpin it and check the width: 1.75 in (4.4 cm) at Disc A.
Final Quality-Control Checklist
- All five discs lie flat, with no cupping or ruffling
- Disc sizes step down evenly: 1.75, 1.5, 1.25, 1, and 0.75 in (4.4, 3.2, 2.5, and 1.9 cm in between)
- The green spokes are evenly spaced and the center holes are snug
- All 4 seams are firm and centered, with no gaps or overlaps
- The gold line is unbroken, with 72 sl st on each side
- The seam sl sts dip neatly into each gap
- The picot tip is centered at the bottom
- The loop is secure and about 1.25 in (3.2 cm) long
- The beads are tight, with no thread showing on the front
- All ends are woven in on the back
Troubleshooting
Disc cups: The red sc are too tight. Redo the last round with looser tension or a hook 0.25 mm larger.
Disc ruffles: You have too many stitches or your tension is too loose. Recount the last round against the pattern.
Ornament leans to one side: One seam is off-center. Recount the marked pairs and re-sew that seam.
Gold line puckers: Your sl sts are too tight. Rework them with a larger hook.
Gold line looks sparse: Your thread is too fine. Hold two strands of gold together.
Bead falls through the ring: The magic ring is too loose. Pull the tail tighter, or choose a 7 mm bead.
Seams show red tails: Weave the tails into the red band, not across the green.
Care
Spot clean only, using cool water and a gentle soap. Store the ornament flat in tissue paper so the loop and discs keep their shape.
Final Notes
The measurement chain is short. Disc A must measure 1.75 in (4.4 cm). Each smaller disc steps down by 0.25 in (0.6 cm). Joined, the discs measure 6.25 in (15.9 cm). The picot tip adds 0.25 in (0.6 cm), for 6.5 in (16.5 cm). The loop brings the total to 7.75 in (19.7 cm).
If every disc lies flat and every count matches, you will get the 72 + 72 gold outline every time. Make one, check it against the checkpoints, and then make a whole set for the tree.
Happy crocheting!