

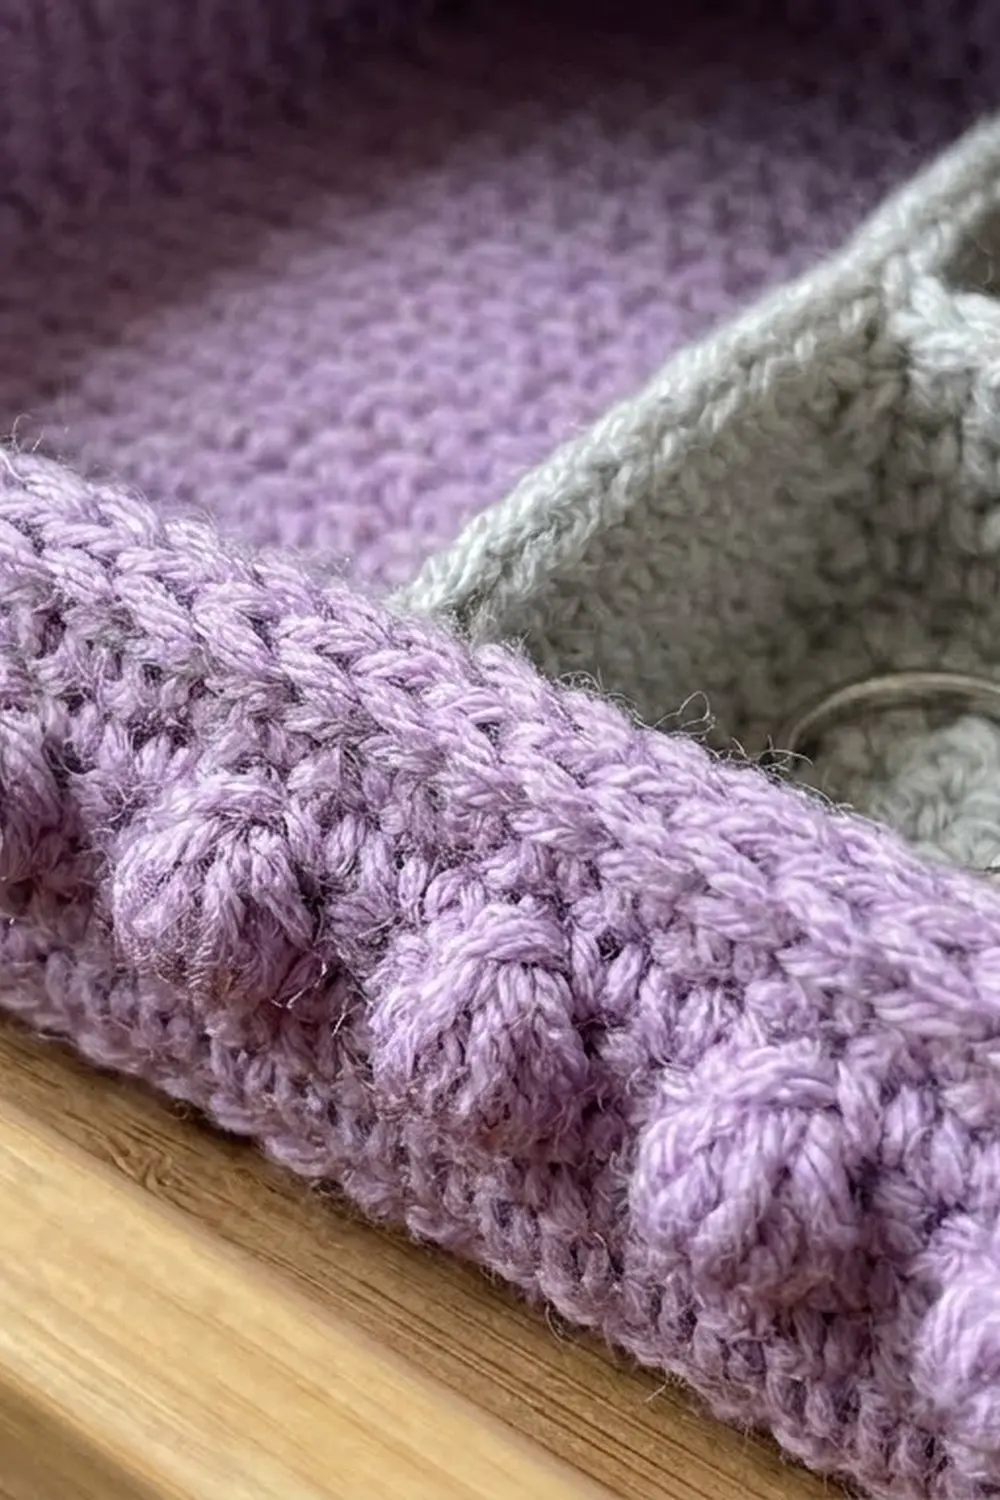
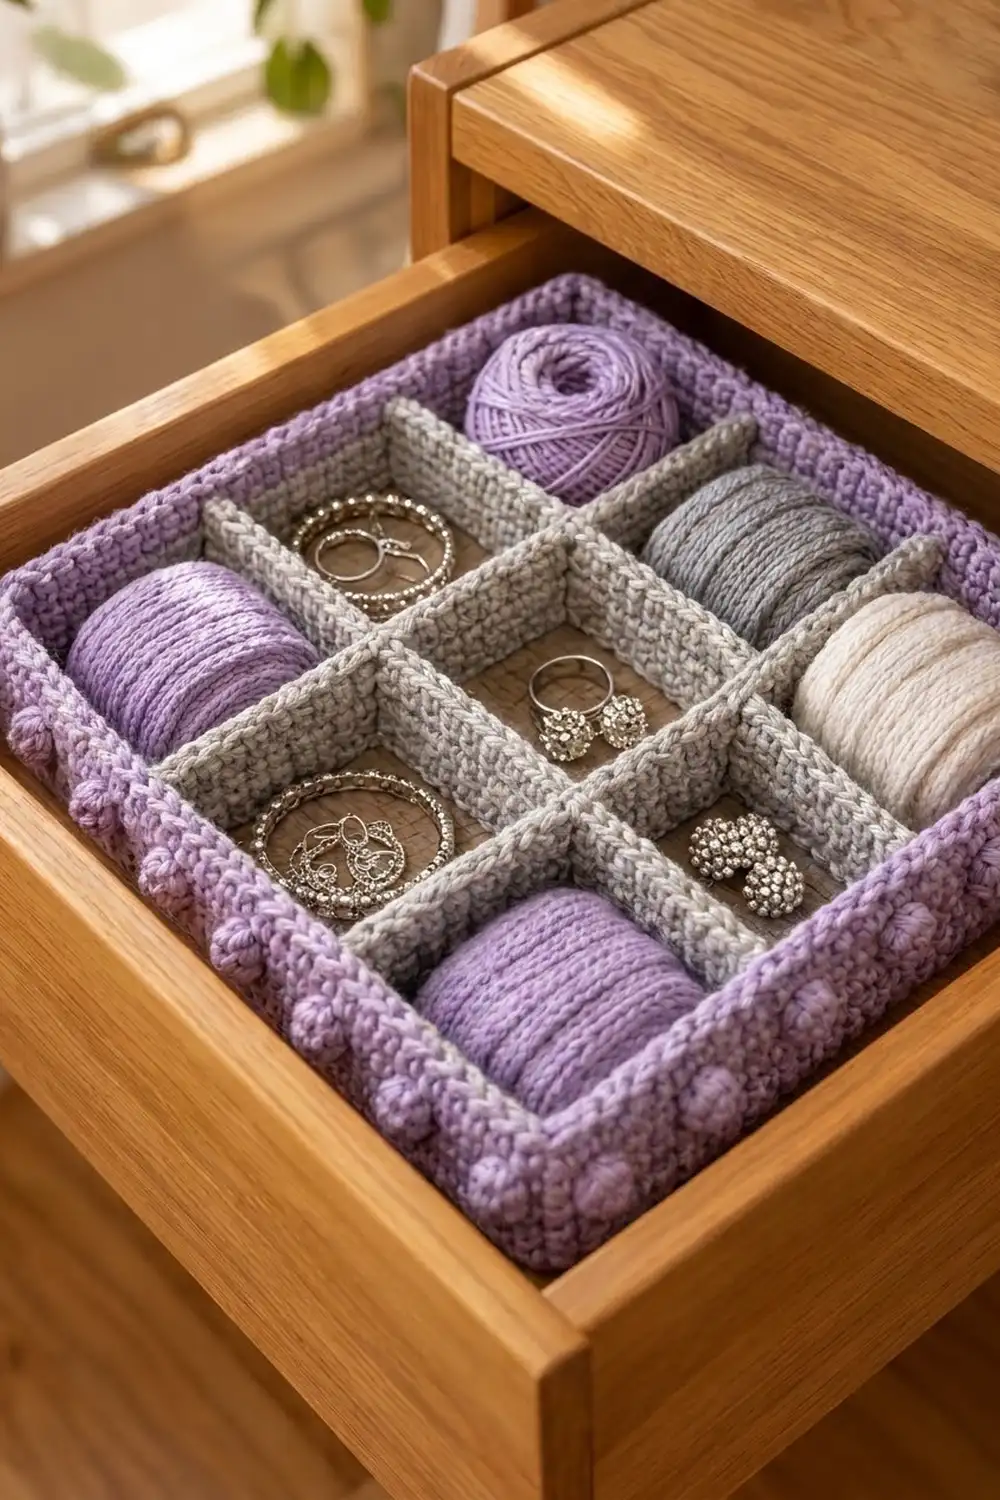
This drawer organizer has two parts: a soft lavender tray and a light-gray grid insert that sits inside it. The tray has a dense single crochet base, straight walls, one round of raised popcorns on the outside and a rolled reverse single crochet rim. The gray insert splits the tray into 9 compartments, which suit rings, bracelets, earrings, rolled scarves or small balls of yarn.
The look is calm and tidy. Lavender and heather gray go well together, and the tight stitches let the piece hold its shape in a drawer without any stiffener. The pattern uses US crochet terms throughout.
The finished tray measures about 11.5 x 8.5 in (29.2 x 21.6 cm) and stands 2.75 in (7.0 cm) tall. The insert measures 10.5 x 7.5 in (26.7 x 19.1 cm) and stands about 2.25 in (5.7 cm) tall. Each compartment is about 3.5 x 2.5 in (8.9 x 6.4 cm).
Construction is simple. First you work the tray base in rows and add an edging round. Then you work the walls upward in rounds, with a popcorn round in the middle and a two-round rim on top. Next you crochet 12 flat gray strips and sew them into a grid. The insert has no bottom; it just drops into the tray.
Finished Size and Construction
- Finished tray size: 11.5 x 8.5 in (29.2 x 21.6 cm), 2.75 in (7.0 cm) tall
- Finished insert size: 10.5 x 7.5 in (26.7 x 19.1 cm), about 2.25 in (5.7 cm) tall
- Skill level: Easy-Intermediate
- Terminology: US crochet terms
- Yarn weight: Worsted (#4)
- Hook: 4.0 mm (G-6), sized down for a firm fabric
- Number of pieces: 13 (1 lavender tray + 12 gray strips)
- Layout: 3 x 3 grid of compartments
- Compartment size: 3.5 x 2.5 in (8.9 x 6.4 cm)
- Base size before edging: 11 x 8 in (27.9 x 20.3 cm)
- Wall height before rim: 2.25 in (5.7 cm)
- Rim (border) depth: 0.5 in (1.3 cm)
Materials
Use a smooth worsted-weight cotton, cotton blend or acrylic. Cotton holds its shape best and doesn’t stretch over time. Avoid fuzzy or very soft yarns, because fine jewelry chains can catch in them.
- Lavender (tray): 150 g, about 300 m (328 yd)
- Light heather gray (insert): 120 g, about 240 m (262 yd)
These amounts include a margin of roughly 20% for the gauge swatch and seaming.
Tools:
- 4.0 mm (G-6) crochet hook
- Tapestry needle
- Stitch markers (at least 6)
- Measuring tape
- Rust-proof pins and a spray bottle for blocking
- A box or folded towels cut to about 11 x 8 in (27.9 x 20.3 cm), to block the tray over
Abbreviations (US Terms)
- ch: chain
- sc: single crochet
- sl st: slip stitch
- dc: double crochet
- BLO: back loop only
- st(s): stitch(es)
- rnd: round
- RS: right side
Popcorn (pc): Work 5 dc in the same st. Drop the loop from your hook. Insert the hook from front to back into the top of the first dc of the group, pick up the dropped loop and pull it through. Ch 1 to close. The ch 1 does not count as a stitch. The popcorn pushes toward the side facing you, so it sits on the outside of the tray.
Reverse single crochet (rev sc): Working from left to right (or right to left if you crochet left-handed), insert the hook into the next st to the right, yarn over, pull up a loop, yarn over and pull through both loops. This makes a corded, rolled edge.
Gauge and Checkpoints
Gauge: 16 sc and 18 rows = 4 in (10.2 cm) in sc worked firmly. That works out to 4 sts and 4.5 rows per inch.
Test one piece first. Make one short gray segment (see Insert Strips below) before you start the tray. It’s a real piece of the project, so the yarn isn’t wasted. The segment should measure 2.5 in (6.4 cm) long by about 2.25 in (5.7 cm) tall.
Checkpoints:
- Short segment: 2.5 x 2.25 in (6.4 x 5.7 cm)
- Tray base after Row 36: 11 x 8 in (27.9 x 20.3 cm)
- Tray base after edging: 11.5 x 8.5 in (29.2 x 21.6 cm)
- Tray wall after Rnd 10: 2.25 in (5.7 cm) tall
- Tray after rim: 2.75 in (7.0 cm) tall
- Long strip: 10.5 in (26.7 cm); short strip: 7.5 in (19.1 cm)
If your swatch is too big, go down a hook size (3.75 mm) or crochet more tightly. Loose fabric makes the walls slump. If it’s too small, go up to 4.5 mm (7). Matching stitch gauge matters most because the insert has to fit the tray. Row gauge can be off slightly; if it is, add or remove one row to match the heights.
Tray Base (Lavender)
Work the base in rows.
Foundation: Ch 45.
Row 1: Sc in 2nd ch from hook and in each ch across, turn. (44 sts)
Rows 2–36: Ch 1 (does not count as a st), sc in each st across, turn. (44 sts)
Checkpoint: The base should measure 11 x 8 in (27.9 x 20.3 cm). Do not fasten off.
Base Edging Round
This is a trim round. It goes once around all four edges and gives the base slightly rounded corners.
Rnd 1 (RS): Ch 1, do not turn.
- Top edge: 3 sc in the first st, sc in next 42 sts, 3 sc in the last st.
- First short side: Work down the row ends: [sc in next 5 row ends, skip next row end] 6 times. (30 sc)
- Bottom edge: Working into the underside of the foundation ch, 3 sc in the first ch, sc in next 42 ch, 3 sc in the last ch.
- Second short side: [Sc in next 5 row ends, skip next row end] 6 times. (30 sc)
- Join with sl st to the first sc.
Count: 4 corners x 3 sc (12) + 2 long edges x 42 sc (84) + 2 short sides x 30 sc (60) = 156 sts.
Place a marker in the center st of each 3-sc corner. Counting both corner sts, each long side has 1 + 1 + 42 + 1 + 1 = 46 sts and each short side has 1 + 1 + 30 + 1 + 1 = 34 sts. Check: 2 x 46 + 2 x 34 − 4 shared corners = 156.
Skipping 1 of every 6 row ends keeps the short sides flat. At 4 sts per inch, 34 sts match the 8.5 in (21.6 cm) short side and 46 sts match the 11.5 in (29.2 cm) long side.
Checkpoint: 11.5 x 8.5 in (29.2 x 21.6 cm), lying flat and not ruffled.
Tray Walls (Lavender)
Work in joined rounds without turning, with the RS (outside) facing you.
Rnd 1: Ch 1, sc in BLO of each st around, join. (156 sts)
Working in the back loops makes a fold line, so the walls stand up straight from the base.
Rnds 2–5: Ch 1, sc in each st around, join. (156 sts)
Rnd 6 (popcorn round): Ch 1, [sc in next 5 sts, pc in next st] 26 times, join. (156 sts: 130 sc + 26 pc)
This places a popcorn every 1.5 in (3.8 cm), on the outside of the wall.
Rnds 7–10: Ch 1, sc in each st around, join. (156 sts) Make sure the sc stitches on top of the popcorns are worked into the closing ch-1 top and not skipped.
Checkpoint: The wall should measure 2.25 in (5.7 cm) from the BLO fold line, and the tray should sit square without flaring. Don’t fasten off. The rim follows in the Border section.
Insert Strips (Gray)
Every strip is worked the same way. Only the starting chain changes.
Foundation: Ch the number given below.
Row 1: Sc in 2nd ch from hook and in each ch across, turn.
Rows 2–10: Ch 1, sc in each st across, turn.
Fasten off and leave a 12 in (30.5 cm) tail for sewing.
- Long strip: Ch 43. (42 sts, 10.5 in / 26.7 cm long)
- Short strip: Ch 31. (30 sts, 7.5 in / 19.1 cm long)
- Short segment: Ch 11. (10 sts, 2.5 in / 6.4 cm long)
All strips are 10 rows tall, about 2.25 in (5.7 cm).
Make All Pieces
- Lavender: 1 tray
- Gray: 4 long strips (2 for the outer frame, 2 for the internal lengthwise walls)
- Gray: 2 short strips (outer frame ends)
- Gray: 6 short segments (internal crosswise walls)
Total: 13 pieces.
Layout grid (top view of insert, long side horizontal):
+---------+---------+---------+
|  14x10  |  14x10  |  14x10  |
+---------+---------+---------+
|  14x10  |  14x10  |  14x10  |
+---------+---------+---------+
|  14x10  |  14x10  |  14x10  |
+---------+---------+---------+
 14 sts    14 sts    14 sts   = 42 sts (long side)
 10 sts per row x 3 rows      = 30 sts (short side)
In the grid, horizontal lines are long strips and vertical lines are short strips at the ends, with short segments inside.
Joining
Sew the pieces with whipstitch, using the gray tails. Hold the pieces with their Row 10 edges at the top so all compartment walls are the same height.
1. Outer frame. Stand one long strip and one short strip at a right angle. Line up their row ends and whipstitch 10 row ends to 10 row ends, with one stitch through each row end. Repeat at all four corners to make a 10.5 x 7.5 in (26.7 x 19.1 cm) rectangle.
2. Internal long walls. On the inside of each short frame strip, count 10 sts in from one corner and mark that stitch column. Then count 10 more and mark again. This divides the 30 sts into thirds of 10, 10 and 10. Sew the 10 row ends of each internal long strip to a marked column at both ends. Both internal long strips span the full 42 sts inside the frame.
3. Crosswise segments. Mark the outer and internal long strips after st 14 and after st 28. This divides the 42 sts into 14, 14 and 14. Set one segment into each of the 6 spaces between neighboring long strips at these marks, and whipstitch the 10 row ends on each end of the segment. Each space between long strips is 10 sts, so each 10-st segment fits exactly.
Tension advice: Pull each whipstitch snug but not tight, so the seams lie flat and don’t pucker the walls. Push the needle through the full row end each time to make a firm, upright seam.
Checkpoint: The insert should measure 10.5 x 7.5 in (26.7 x 19.1 cm) with square corners. Each compartment should be 3.5 x 2.5 in (8.9 x 6.4 cm).
Border (Tray Rim)
The rim keeps the same stitch rate as the walls, 4 sts per inch, so the counts don’t change. Use your corner markers.
Rnd 11: Ch 1, sc in each st around, join. (156 sts: each long side 46, each short side 34, including corner sts)
Rnd 12: Ch 1, rev sc in each st around, join. (156 sts: each long side 46, each short side 34, including corner sts)
Fasten off and weave in the end.
Why the math works: The walls go straight up with no increases or decreases, so every round has the same 156 sts as the base edging. Each long side has 46 sts, which is 11.5 in (29.2 cm) at gauge, and each short side has 34 sts, which is 8.5 in (21.6 cm). Because the rim count matches the base perimeter, the rim doesn’t ruffle or pull in. The rim adds about 0.5 in (1.3 cm), so the wall finishes at 2.75 in (7.0 cm). The 0.25 in (0.6 cm) on each side between the insert and the inside of the walls lets the insert drop in easily.
Insert top edge: No border is needed. Row 10 of each strip is the finished top edge.
Final Blocking
- Weave in all ends on the inside of the tray and along the insert seams.
- Wrap the box or folded towels in a plastic bag and set the tray over it so the walls are supported on all sides.
- Spray the tray until it’s evenly damp but not dripping.
- Push each corner square and press the walls straight up against the form.
- Pinch each popcorn gently so it stands out.
- Set the insert on a flat surface and spray it lightly. Square the corners and pin the frame to a blocking mat if you need to.
- Let both parts dry completely, which takes 24 hours or more.
- Put the dry insert into the tray and check that it fits.
Final Quality-Control Checklist
- The tray base is 11.5 x 8.5 in (29.2 x 21.6 cm) and lies flat.
- The walls are 2.75 in (7.0 cm) tall and stand straight with no flaring.
- There are 26 popcorns, all pushed out to the outside.
- The rim count is 156 sts, and the corded edge is even.
- The insert measures 10.5 x 7.5 in (26.7 x 19.1 cm).
- All 9 compartments are about 3.5 x 2.5 in (8.9 x 6.4 cm).
- All strip tops line up at the same height.
- No ends show inside the compartments.
Troubleshooting
The walls flare outward. Your stitches are too loose, or the walls gained stitches. Recount to 156 and go down a hook size for the walls.
The walls lean inward. You probably missed a stitch next to a popcorn. Recount Rnd 7.
The popcorns face inward. You worked with the inside facing you. Turn the tray so the outside faces you, then redo Rnd 6.
The short sides of the base ruffle. You worked too many sc into the row ends. Redo the edging with exactly 30 sc per short side.
The insert is too tight in the tray. Stretch-block the tray slightly larger, or take 1 row off each short strip and each segment.
The insert sags or leans. Tighten your seam tension, or put strips of plastic canvas between two thin layers of strips.
Care
Hand wash in cool water with mild soap and press out the water without wringing. Reshape the tray over its form and let it air dry flat.
Final Notes
All the measurements follow from the gauge of 4 sts and 4.5 rows per inch:
- The 44-st base is 11 in (27.9 cm) wide, and the edging takes it to 46 by 34 sts per side, or 11.5 x 8.5 in (29.2 x 21.6 cm).
- The walls keep 156 sts in every round and reach 2.25 in (5.7 cm). The rim brings them to 2.75 in (7.0 cm).
- Strips of 42, 30 and 10 sts make an insert of 10.5 x 7.5 in (26.7 x 19.1 cm), split into 3.5 x 2.5 in (8.9 x 6.4 cm) compartments.
If you check your test segment and each checkpoint as you go, the insert will drop neatly into the tray.
Happy crocheting!