

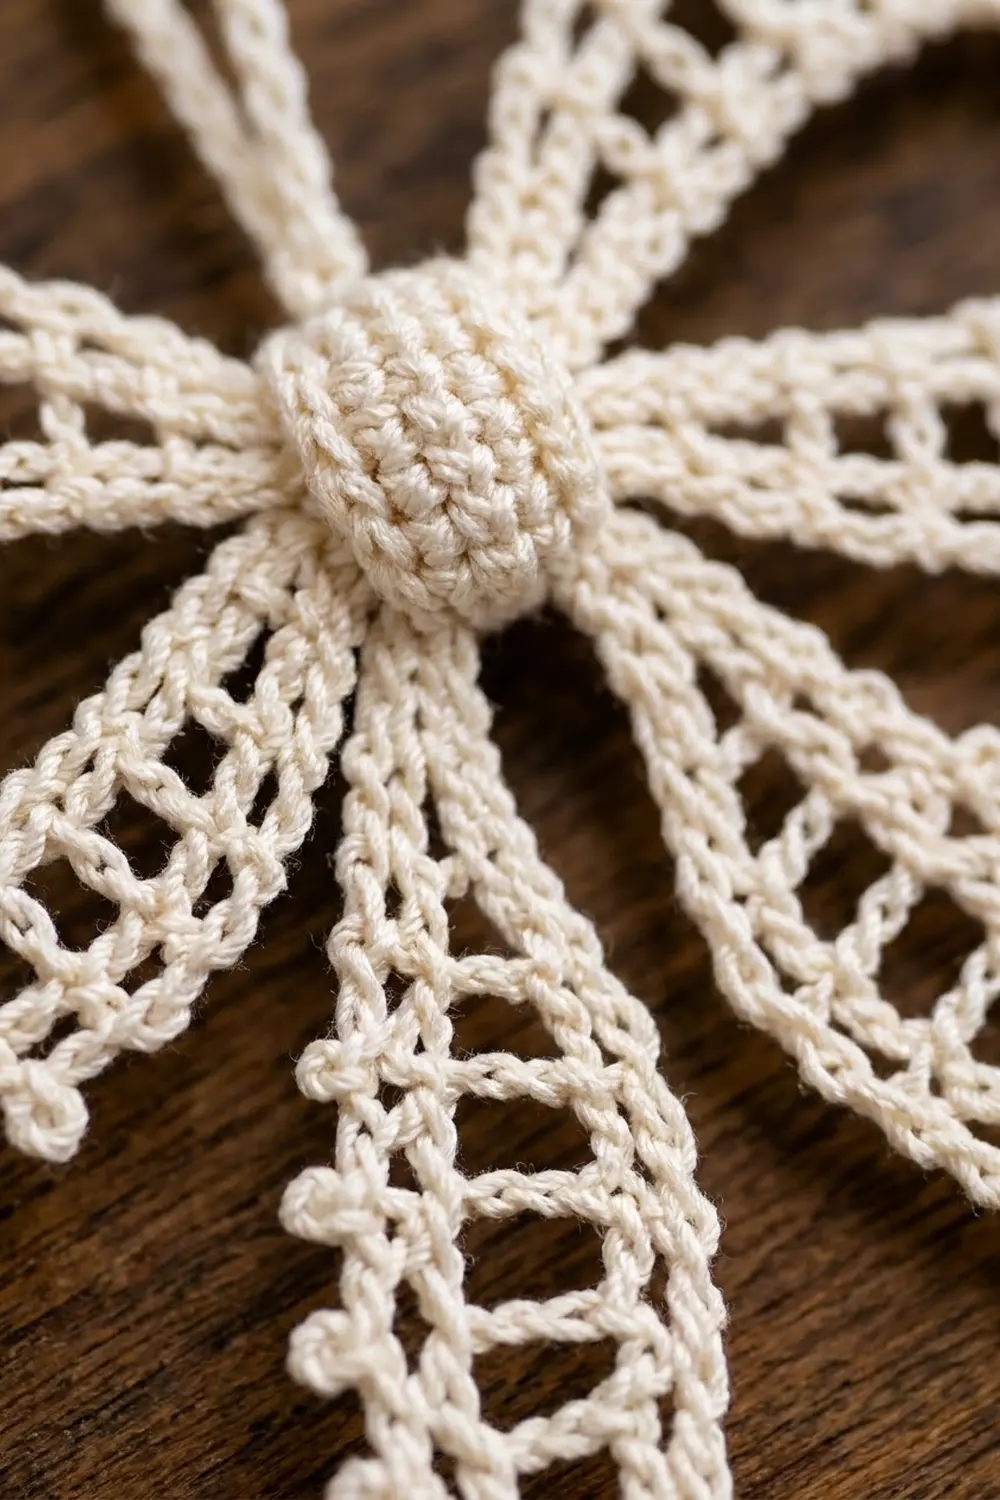
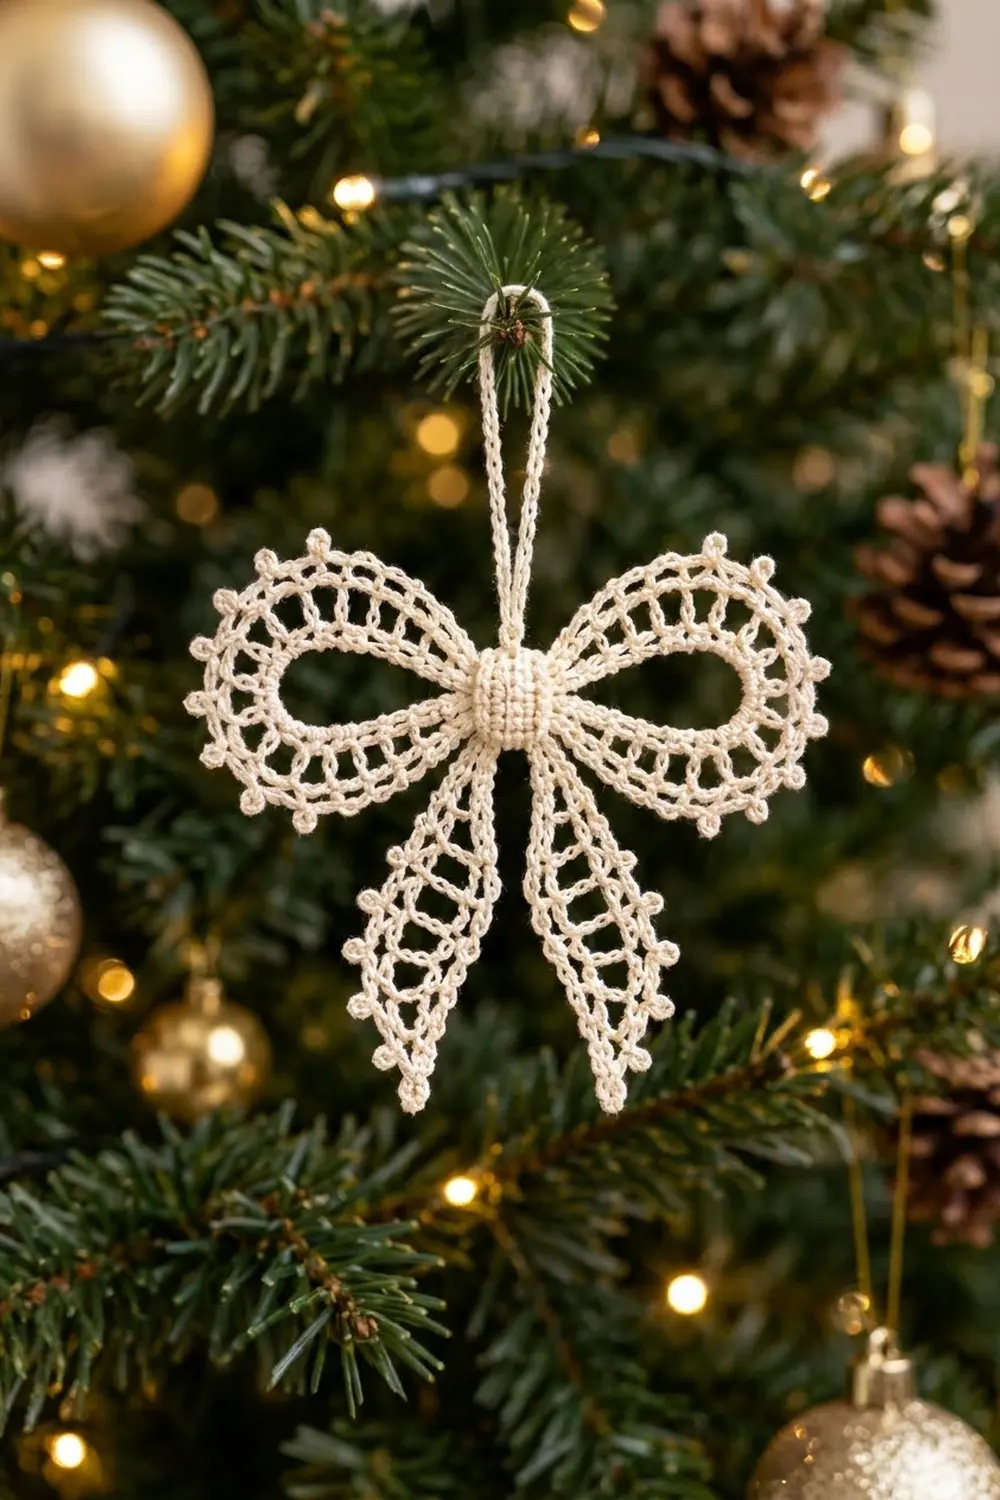
This little bow is pure winter lace. It has two airy, picot-edged wings, a firm padded knot at the center, and two pointed tails with an open ladder down the middle. In cream cotton thread it looks like frosted sugar or antique tatting, and it suits a natural-toned tree or a gift-wrap tie-on.
The design uses one color only, cream size 10 crochet thread. It’s written in US crochet terms. The finished ornament measures about 4 in (10.2 cm) wide and 3.5 in (8.9 cm) tall, with a hanging loop of about 1.5 in (3.8 cm).
The construction is simple and modular. You crochet each wing in the round as a flat lace ring, and each tail in short rows from the top down to a point. The picot edging comes next. After blocking, you pinch the wings, stack them over the tails, and wrap a small single crochet band around the middle to make the knot. Last of all, you sew a slip-stitch cord to the back.
Each component takes only a few minutes, so this is a good pattern for making a whole set of matching ornaments.
Finished Size and Construction
- Finished size: 4 in (10.2 cm) wide x 3.5 in (8.9 cm) tall, plus a 1.5 in (3.8 cm) hanging loop
- Skill level: Intermediate (thread work, small stitches, simple assembly)
- Terminology: US crochet terms
- Yarn weight: Size 10 cotton crochet thread (lace weight, category 0)
- Hook: 1.75 mm steel hook
- Number of pieces: 1 finished ornament, assembled from 6 small components (2 wings, 2 tails, 1 center band, 1 hanging cord)
- Layout: Wings side by side at the top, tails angled into a V below, center band wrapped over the meeting point
- Wing size: 2.25 in (5.7 cm) diameter when flat, before pinching
- Wing size before border: 2.15 in (5.5 cm) diameter
- Tail size: 1 in (2.5 cm) at the widest x 2.6 in (6.6 cm) long
- Tail size before border: 0.9 in (2.3 cm) x 2.5 in (6.4 cm)
- Border depth: about 0.05 in (0.1 cm) per edge, plus the picot points
Materials
Yarn: Use a mercerized size 10 cotton crochet thread. Mercerized cotton holds crisp stitch definition and blocks well, and it keeps the picots sharp. Avoid fuzzy or very soft threads, because they blur the open lace.
- Cream / ivory: 6 g (about 30 m / 33 yd) per ornament
These quantities include a margin of about 25% for your gauge swatch, sewing tails, and small tension differences.
Tools:
– 1.75 mm steel crochet hook
– Fine tapestry needle with a small eye (or a sharp sewing needle)
– Rust-proof pins and a foam blocking board
– Small spray bottle of water
– Optional: fabric stiffener or light spray starch
– Small scissors
Abbreviations (US Terms)
- ch – chain
- sl st – slip stitch
- sc – single crochet
- dc – double crochet
- dc2tog – double crochet 2 together
- sp – space
- st(s) – stitch(es)
- tch – turning chain
- beg – beginning
- rep – repeat
Special stitch: Picot. Ch 3, then sl st in the 3rd ch from hook. You have made one small closed bead of chain sitting on top of the previous stitch.
dc2tog: [Yarn over, insert hook in next st, pull up a loop, yarn over, pull through 2 loops] twice, then yarn over and pull through all 3 loops on hook.
Gauge and Checkpoints
Gauge: 10 dc and 4 dc rows = 1 in (2.5 cm). For sc, about 12 sts and 12 rows = 1 in (2.5 cm).
Gauge matters less here than in a garment, but it decides whether the wings lie flat. Make one wing first and check it against these checkpoints:
- After Wing Round 1: about 1.15 in (2.9 cm) diameter, with an open center of about 0.6 in (1.5 cm)
- After Wing Round 2: about 1.65 in (4.2 cm) diameter
- After Wing Round 3: about 2.15 in (5.5 cm) diameter
- After Wing Round 4 (border): about 2.25 in (5.7 cm) diameter
If your wing is too big (more than 2.4 in / 6.1 cm after Round 4), go down to a 1.5 mm hook. If it is too small (less than 2.1 in / 5.3 cm), go up to a 2.0 mm hook.
If the wing ruffles, your dc stitches are too tall for the stitch count, so tighten your tension or drop one hook size. If it cups, your dc stitches are too short, so loosen up or go up one hook size.
Wings (Make 2)
Each wing is a flat lace ring worked in joined rounds. Do not turn.
Foundation: Ch 20, sl st in first ch to form a ring. Keep the ring loose. It becomes the open oval eye of the wing, about 2 in (5.1 cm) around.
Round 1: Ch 3 (counts as dc). Work 35 dc into the ring, not into the chains. Join with sl st to the top of beg ch-3. (36 dc)
Push the stitches evenly around the ring so the center stays open.
Round 2 (mesh round): Ch 5 (counts as dc + ch 2), skip next dc. Dc in next dc, ch 2, skip next dc; rep from * 16 more times. Join with sl st to the 3rd ch of beg ch-5. (18 dc, 18 ch-2 sps)*
This round forms the open spoke band in the middle of the wing.
Round 3: Sl st into first ch-2 sp. Ch 3 (counts as dc), work 2 dc in the same sp, then dc in next dc. Work 3 dc in next ch-2 sp, dc in next dc; rep from * 16 more times. The final dc of the last repeat goes in the 3rd ch of the beg ch-5. Join with sl st to the top of beg ch-3. (72 dc)*
That is 18 groups of 4 dc, for 72 dc in total. This solid band gives the picot edge a firm base.
Do not fasten off. Continue to Round 4 in the Border section. You can also leave the wing at Round 3 for now and finish both wings and both tails before edging.
Tails (Make 2)
Each tail is worked in turned rows from the top (the narrow end that hides under the knot) down to the point.
Row 1: Ch 6. Dc in the 4th ch from hook and in the next 2 ch. Turn. (4 dc; skipped ch count as 1 dc)
Row 2 (increase): Ch 3 (counts as dc), dc in the first st (the base of the ch-3), ch 2, skip next 2 dc, 2 dc in the top of tch. Turn. (4 dc, 1 ch-2 sp)
Row 3 (increase): Ch 3 (counts as dc), dc in the first st, dc in next dc, ch 3, skip the ch-2 sp, dc in next dc, 2 dc in the top of tch. Turn. (6 dc, 1 ch-3 sp)
Rows 4–7 (even): Ch 3 (counts as dc), dc in next 2 dc, ch 3, skip the ch-3 sp, dc in next 2 dc, dc in the top of tch. Turn. (6 dc, 1 ch-3 sp per row)
These four rows stack the chain-spaces into the open ladder down the center of the tail, with a solid 3-dc bar on each side.
Row 8 (decrease): Ch 3 (counts as dc), dc2tog over next 2 dc, ch 2, skip the ch-3 sp, dc2tog over next 2 dc, dc in the top of tch. Turn. (4 sts, 1 ch-2 sp)
Row 9 (decrease): Ch 2, dc in next st (beg ch-2 and dc count as dc2tog), ch 1, skip the ch-2 sp, dc2tog over the last 2 sts. Turn. (2 sts, 1 ch-1 sp)
Row 10 (point): Ch 2, skip the ch-1 sp, dc in the last st (this counts as dc2tog). (1 st)
Fasten off. The tail measures about 0.9 in (2.3 cm) at its widest and 2.5 in (6.4 cm) long.
Center Band (Make 1)
Row 1: Ch 7. Sc in the 2nd ch from hook and in each ch across. Turn. (6 sc)
Rows 2–10: Ch 1, sc in each sc across. Turn. (6 sc per row)
Fasten off, leaving an 8 in (20.3 cm) tail for sewing. The band measures about 0.5 in (1.3 cm) wide x 0.8 in (2.0 cm) long. Work it tightly. A firm band gives the knot its padded, textured look.
Hanging Cord (Make 1)
Ch 31. Sl st in the 2nd ch from hook and in each ch across. (30 sl st)
Fasten off, leaving a 6 in (15.2 cm) tail at each end. The cord is about 3 in (7.6 cm) long and folds in half into a 1.5 in (3.8 cm) loop.
Border
The border is the picot edging on the wings and tails. Work it with the same 1.75 mm hook. Border gauge: sc worked 1-per-stitch at about 12 sc per inch (2.5 cm), with each picot adding a small point but no width along the edge.
Wing Border (Round 4)
Work this round on each wing, continuing from Round 3.
Round 4: Ch 1, sc in the same st and in the next 3 sts, picot. Sc in next 4 sts, picot; rep from * 16 more times. Join with sl st to the first sc. Fasten off. (72 sc + 18 picots)*
Count check: 72 sc worked 1-per-existing-stitch, plus 18 picots added on top. That is 18 repeats of (4 sc + 1 picot).
Why the math works: The sc count matches the 72 dc below it exactly, so the edge neither stretches nor gathers. The picots sit on top of the sc stitches, so they add depth without adding length to the edge, and the wing stays flat at 2.25 in (5.7 cm).
Tail Border
Work this on each tail. Leave the foundation edge (Row 1) plain, because it is hidden under the knot.
With the right side facing, join thread with a sl st at the right-hand corner of the foundation edge.
Side 1: Ch 1. Work 18 sc evenly down the side, 2 sc in each row-end of Rows 1–9, placing a picot after every 3rd sc except the last group. That is [sc 3, picot] 5 times, sc 3. (18 sc + 5 picots)
Point: Work (sc, picot, sc) in the top of Row 10. (2 sc + 1 picot)
Side 2: Work as for Side 1, going back up toward the foundation edge, 2 sc in each row-end of Rows 9–1. Work sc 3 first, then [picot, sc 3] 5 times, so the picots mirror Side 1. (18 sc + 5 picots)
Fasten off at the left-hand corner of the foundation edge.
Tail border total: 38 sc + 11 picots (18 + 2 + 18 sc; 5 + 1 + 5 picots).
Why the math works: Each dc row is about 0.25 in (0.6 cm) tall, and 2 sc span about 0.2 in (0.5 cm). That slight easing pulls the side edges taut, so the long tails don’t ripple. The single picot at the point sharpens the tip, and the tail ends up about 1 in (2.5 cm) wide and 2.6 in (6.6 cm) long.
Final Blocking and Assembly
Block the components before you assemble them. Flat lace is much easier to shape before it is pinched.
- Dampen. Spray both wings and both tails until they are evenly damp but not dripping.
- Pin the wings. Pin each wing flat as a circle 2.25 in (5.7 cm) across. Put a pin through every picot so it points straight out, and keep the center eye open and round.
- Pin the tails. Pin each tail to 1 in (2.5 cm) x 2.6 in (6.6 cm). Open the ladder spaces and pin the tip into a sharp point.
- Stiffen (optional). Apply a light coat of spray starch or diluted fabric stiffener for a crisper ornament.
- Dry completely. Leave everything pinned until fully dry, usually 2–4 hours.
- Pinch the wings. Flatten each wing into an oval about 2.25 in (5.7 cm) long and 1.75 in (4.4 cm) tall. Turn it so the round’s join seam faces the center of the bow. Pinch the inner 0.25 in (0.6 cm) together and take 2 small stitches through all layers to hold it.
- Stack. Lay the tails in a V with their foundation edges overlapping by about 0.25 in (0.6 cm) and the points spreading apart. Set the pinched ends of the wings on top, side by side, so the bow measures 4 in (10.2 cm) across.
- Wrap the knot. Wrap the center band around the stacked center from front to back. Sew its short ends together at the back, then take 2–3 stitches through all layers to lock the wings and tails in place.
- Attach the cord. Fold the cord in half. Sew both ends to the top back of the center band so the loop stands 1.5 in (3.8 cm) above the knot.
- Weave in ends along solid dc or sc stitches, never through the open mesh.
Final Quality-Control Checklist
- Each wing has 72 sc and 18 evenly spaced picots on its outer edge.
- Each wing’s center eye is open and oval after pinching.
- Both wings match in size: 2.25 in (5.7 cm) before pinching.
- Each tail has 11 picots, with 5 on each side and 1 at the tip.
- The tail ladders are open and straight, and the tips are pointed.
- The tails sit in a symmetrical V.
- The center band covers all pinch stitches and the tail tops.
- The bow measures 4 in (10.2 cm) wide x 3.5 in (8.9 cm) tall.
- The hanging loop is centered and measures 1.5 in (3.8 cm).
- No loose ends show from the front.
Troubleshooting
The wing ruffles after Round 3. Your dc stitches are too loose. Remake the wing with a 1.5 mm hook, or check that Round 3 has exactly 72 dc.
The wing cups into a bowl. Your dc stitches are too short or too tight. Go up to a 2.0 mm hook, or relax your yarn-over tension.
The center eye closes up in Round 1. The foundation ring was pulled too tight. Make the ch-20 more loosely, and spread the 36 dc evenly around the ring.
The tails twist. The rows are uneven. Make sure each row starts with its turning chain counted as a stitch, and block the tails firmly.
The picots flop over. Snug each sl st closing the picot, and pin every picot during blocking.
The knot looks loose. Remake the band with a smaller hook so it fits snugly around the bundle.
The bow is lopsided. Unpick the pinch stitches and re-pinch both wings to the same 0.25 in (0.6 cm) depth before wrapping the band.
Care
Hand wash in cool water with mild soap, roll in a towel, then reshape and pin flat to dry. Store flat or hanging, away from crushing weight, so the picots and loops keep their shape.
Final Notes
Here is the measurement chain in one place. The wings grow from a 1.15 in (2.9 cm) first round, to 1.65 in (4.2 cm) after the mesh round, to 2.15 in (5.5 cm) after the solid round, and to 2.25 in (5.7 cm) with the picot border. The tails are 0.9 in x 2.5 in (2.3 cm x 6.4 cm) before edging and 1 in x 2.6 in (2.5 cm x 6.6 cm) after. Pinch and overlap the wings, wrap the band, and you have a bow 4 in (10.2 cm) wide and 3.5 in (8.9 cm) tall on a 1.5 in (3.8 cm) loop.
If every checkpoint matches, every ornament in your set will match too. Make one, check it, then make as many as your tree needs.
Happy crocheting!