

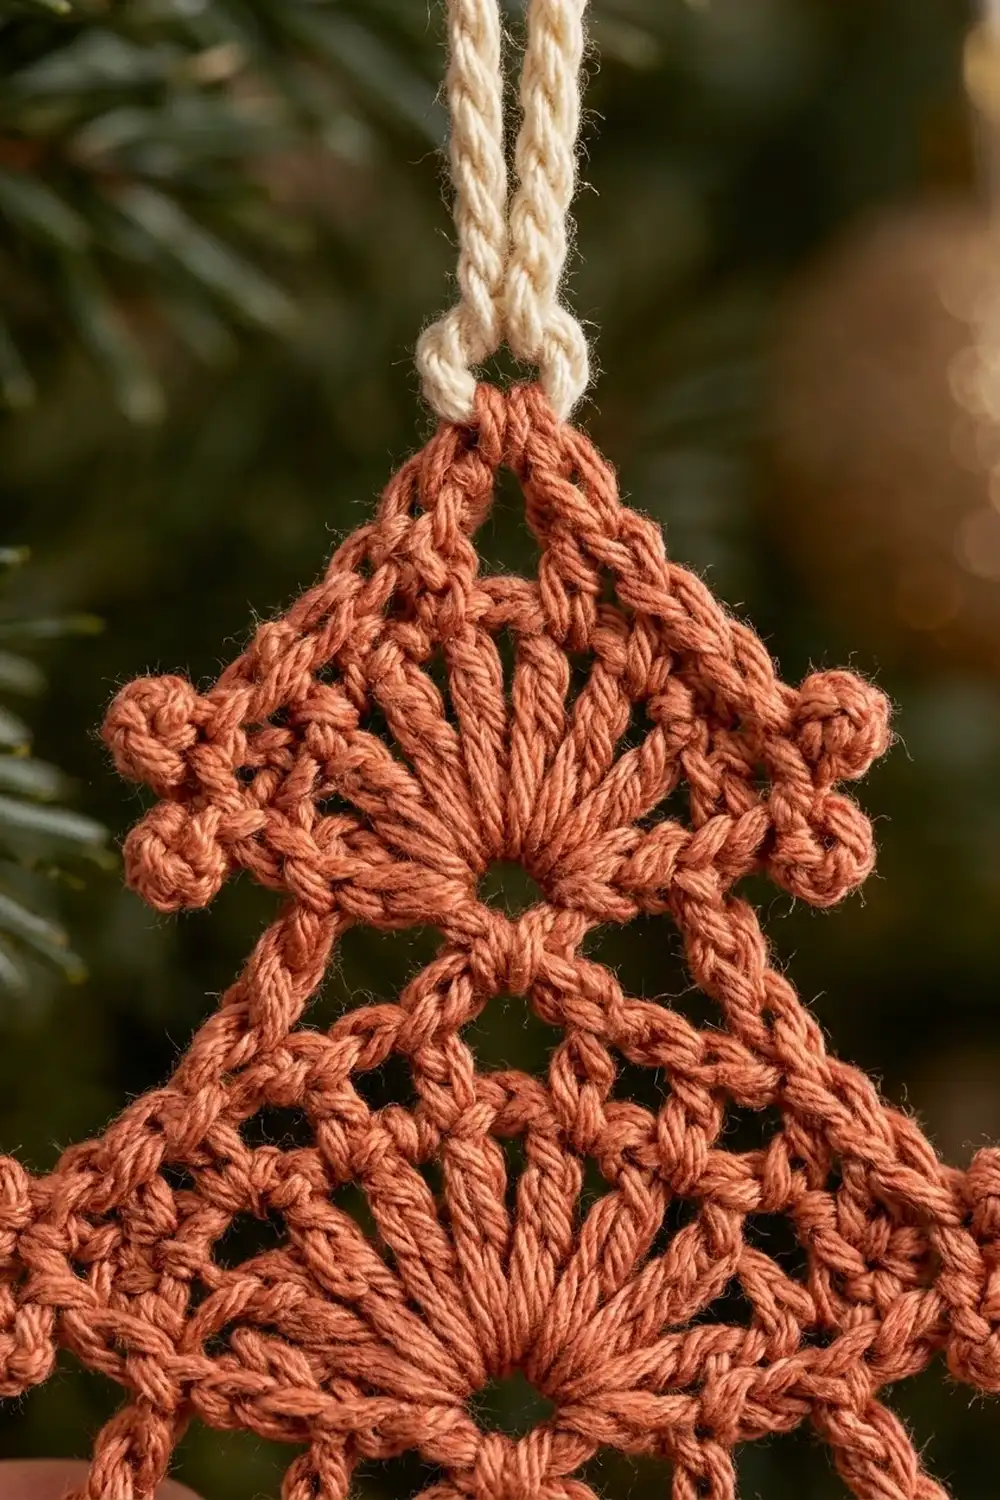
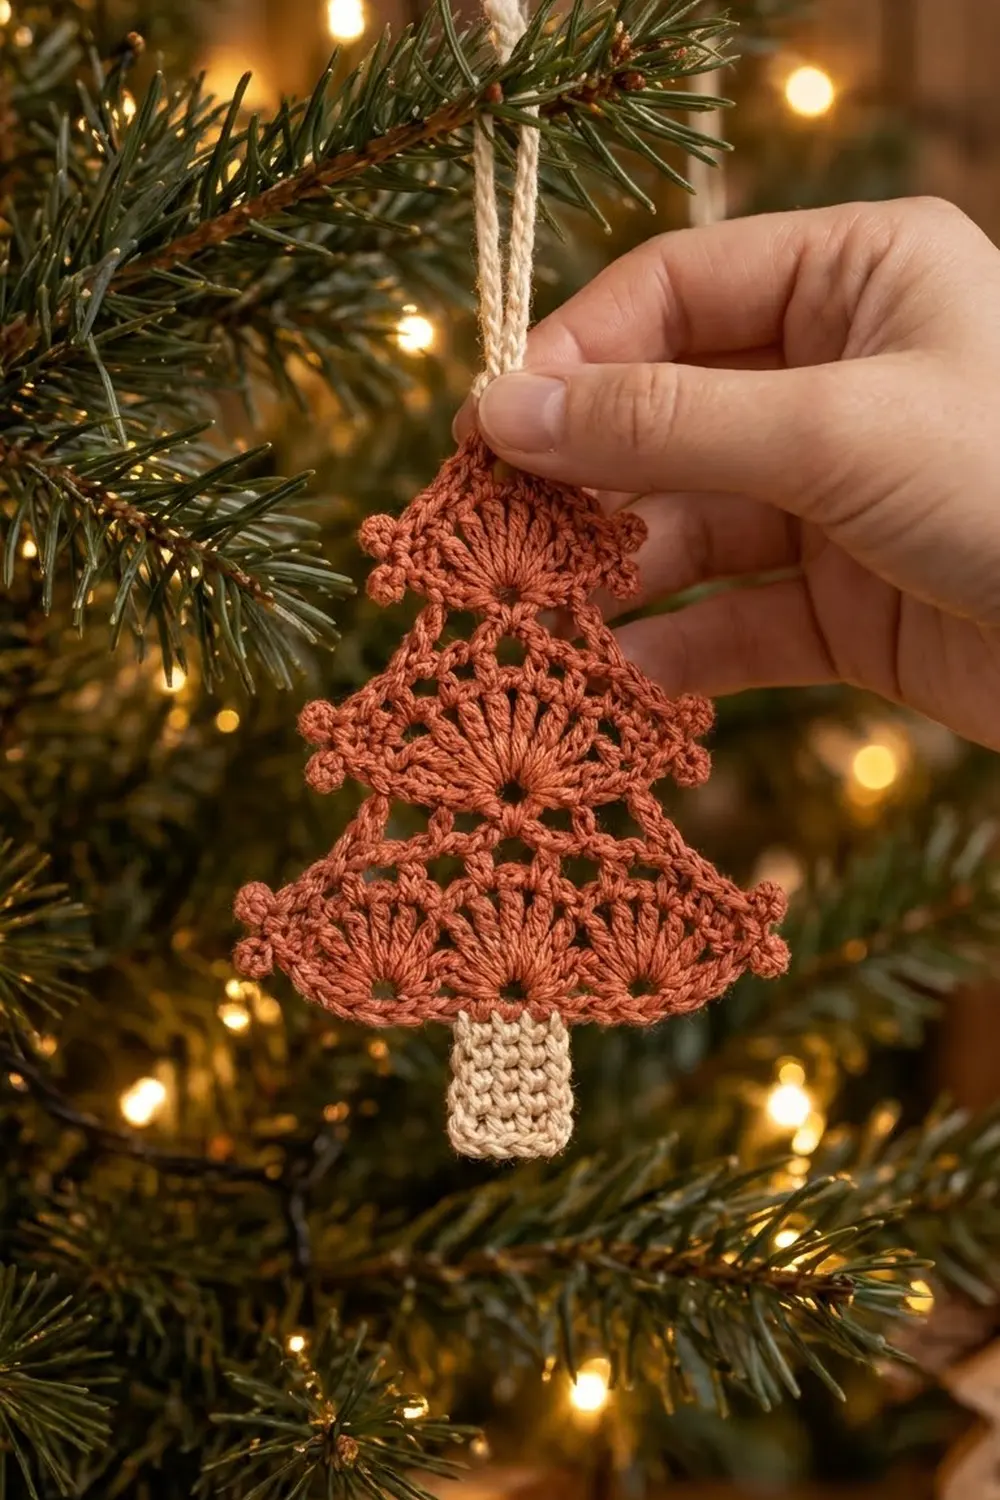
The Ember Spruce is a small, lacy Christmas tree ornament with three stacked tiers of fans. Each tier steps out wider than the one above it. It’s worked in warm rust (terracotta) cotton, with a short cream trunk and a cream hanging loop.
The texture comes from classic fans, which are groups of double crochet worked into one stitch so they spread upward. The bottom tier has three fans. The middle tier has one wide fan with small open spaces near its ends. The top tier has one small fan under a pointed tip. A single-crochet outline finishes the tree, with a tiny picot at each of the six tier tips.
This pattern uses US crochet terms. The finished ornament is 3.75 in (9.5 cm) wide and 3.5 in (8.9 cm) tall from the tip to the bottom of the trunk, plus a 1.5 in (3.8 cm) hanging loop.
You crochet the tree as one piece, in flat rows from the bottom edge up to the tip. Then you work one edging round all the way around without fastening off. Last, you work the cream trunk in rows off the bottom edge and add the cream loop at the top.
Finished Size and Construction
- Finished size: 3.75 in (9.5 cm) wide x 3.5 in (8.9 cm) tall, not counting the loop
- Skill level: Intermediate
- Terminology: US
- Yarn weight: Fingering / super fine (#1) mercerized cotton
- Hook: 2.5 mm
- Number of pieces: 1 (the trunk and loop are worked onto the tree, not sewn on)
- Layout: single ornament, three tiers stacked bottom to top
- Tree body before edging: 3.5 in (8.9 cm) wide x 2.5 in (6.4 cm) tall
- Edging depth: about 1/8 in (0.3 cm) on every side
- Tree body after edging: 3.75 in (9.5 cm) x 2.75 in (7.0 cm)
- Trunk: 0.7 in (1.8 cm) wide x 0.75 in (1.9 cm) tall
- Loop: 1.5 in (3.8 cm) above the tip
Materials
Choose a smooth mercerized cotton. It shows the fan spokes clearly and blocks crisply. Fuzzy yarn blurs the open spaces.
- Rust / terracotta (main color): 6 g, about 20 m
- Cream (trunk and loop): 2 g, about 7 m
These amounts are for one ornament and already include a margin for your gauge check and for weaving in ends.
Tools:
- 2.5 mm crochet hook
- Tapestry needle
- Scissors
- Blocking mat or folded towel, rust-proof pins, spray bottle
- Optional: starch spray or diluted fabric stiffener
Abbreviations (US Terms)
- ch – chain
- sl st – slip stitch
- sc – single crochet
- dc – double crochet
- sc2tog – single crochet 2 together (1 st decreased)
- sc3tog – single crochet 3 together (2 sts decreased)
- sk – skip
- sp(s) – space(s)
- st(s) – stitch(es)
Special stitches:
- Fan: the stated number of dc (9 or 11), all worked into the same stitch.
- Picot: ch 3, sl st in the 3rd ch from the hook.
Gauge and Checkpoints
Row 1 doubles as your gauge swatch. Make one complete tree and measure it before you make a batch.
- Stitch gauge: 25 sc = 3.5 in (8.9 cm)
- Row gauge: 8 sc rows = 1 in (2.5 cm)
Checkpoints:
- After Row 1: 3.5 in (8.9 cm) wide
- After Row 4: about 2.4 in (6.1 cm) wide
- After Row 7: about 1.5 in (3.8 cm) wide
- After Row 12: about 2.5 in (6.4 cm) tall
- After the edging: 3.75 in (9.5 cm) x 2.75 in (7.0 cm)
If your tree is too big, switch to a 2.25 mm hook. If it’s too small, switch to a 2.75 mm hook. If Row 1 is the right width but the fans ruffle, your dc are too tall. Snug each loop down on the hook before you finish the stitch.
Tree Body
Use rust. Work in rows and turn at the end of every row. The ch 1 at the start of a row never counts as a stitch.
Bottom Tier
Row 1: Ch 26. Sc in the 2nd ch from the hook and in each ch across. Turn. (25 sc)
Measure: 3.5 in (8.9 cm).
Row 2 (fan row): Ch 1, sc in the first sc. Sk 3 sc, 9-dc fan in the next sc, sk 3 sc, sc in the next sc. Repeat from * 2 more times. Turn. (3 fans; 27 dc + 4 sc = 31 sts)
The three fans open upward from the bottom edge, and a small hole forms at the base of each one.
Row 3 (mesh row): Sl st in the first sc and in the next 4 dc. Ch 1, sc in the next dc (5th dc, the center of the fan). Ch 3, dc in the next sc between fans, ch 3, sc in the 5th dc of the next fan. Repeat from * once more. Turn. Leave the last 4 dc and the last sc unworked. (3 sc, 2 dc, 4 ch-3 sps)
The outer half of each end fan stays uncovered. That uncovered part makes the sloping “shelf” at each end of the tier.
Middle Tier
Row 4 (conversion row): Ch 1, sc in the first sc. 3 sc in the next ch-3 sp, sc in the next st. Repeat from * 3 more times. Turn. (5 sc worked 1 per existing st + 12 sc in the 4 ch-3 sps = 17 sc)
Measure: about 2.4 in (6.1 cm).
Row 5 (fan row): Ch 1, sc in the first sc, ch 2, sk 2 sc, sc in the next sc (4th st). Sk 4 sc, 11-dc fan in the next sc (9th st, the center). Sk 4 sc, sc in the next sc (14th st), ch 2, sk 2 sc, sc in the last sc (17th st). Turn. (11 dc + 4 sc = 15 sts, plus 2 ch-2 sps)
Row 6 (mesh row): Sl st in the first sc, 2 sl st in the ch-2 sp, then sl st in the next sc and in the next 2 dc. Ch 1, sc in the next dc (3rd dc), ch 3, sk 2 dc, sc in the next dc (6th dc, center), ch 3, sk 2 dc, sc in the next dc (9th dc). Turn. Leave the last 2 dc, sc, ch-2 sp, and sc unworked. (3 sc, 2 ch-3 sps)
Top Tier
Row 7 (conversion row): Ch 1, sc in the first sc, 4 sc in the ch-3 sp, sc in the center sc, 4 sc in the next ch-3 sp, sc in the last sc. Turn. (3 sc worked 1 per existing st + 8 sc in the 2 ch-3 sps = 11 sc)
Measure: about 1.5 in (3.8 cm).
Row 8 (fan row): Ch 1, sc in the first sc, sk 4 sc, 9-dc fan in the next sc (6th st, the center), sk 4 sc, sc in the last sc. Turn. (9 dc + 2 sc = 11 sts)
Row 9: Sl st in the first sc and in the next 2 dc. Ch 1, sc in the next dc (3rd dc), ch 3, sk 3 dc, sc in the next dc (7th dc). Turn. Leave the last 2 dc and the last sc unworked. (2 sc, 1 ch-3 sp)
Row 10 (conversion row): Ch 1, sc in the first sc, 3 sc in the ch-3 sp, sc in the last sc. Turn. (2 sc worked 1 per existing st + 3 sc in the ch-3 sp = 5 sc)
Row 11: Ch 1, sc2tog, sc in the next sc, sc2tog. Turn. (3 sts)
Row 12: Ch 1, sc3tog. (1 st) This stitch is the tip of the tree. Do not fasten off.
Check: the tree is about 2.5 in (6.4 cm) tall. Both sides of each tier should show the same uncovered shelf stitches: 4 dc on the bottom tier, 2 dc + 1 sc + 1 ch-2 sp on the middle tier, and 2 dc on the top tier.
Edging (Border)
The edging is the border. It’s one round of sc with picots, worked down one side, across the bottom, and up the other side.
Border gauge: the edging adds 1/8 in (0.3 cm) on every side. Width: 3.5 + 0.125 + 0.125 = 3.75 in (9.5 cm). Height: 2.5 + 0.125 + 0.125 = 2.75 in (7.0 cm).
Shelf stitches: On one side of the tree, the shelf dc have sl sts sitting on them, so work through both the dc top and the sl st. On the other side the dc tops are bare. Either way you work 1 sc per dc.
Round 1: Ch 1, 3 sc in the top of the sc3tog (the tip). Then work down the first side:
- 1 sc in each row-end of Rows 11, 10, and 9 (3 sc)
- 1 sc in each of the 2 uncovered top-tier dc (2 sc)
- Top-tier tip: (sc, picot, sc) in the end sc of Row 8 (2 sc, 1 picot)
- 1 sc in each row-end of Rows 7 and 6 (2 sc)
- Middle shelf: 1 sc in each of the 2 uncovered dc, 1 sc in the next sc, 2 sc in the ch-2 sp (5 sc)
- Middle-tier tip: (sc, picot, sc) in the end sc of Row 5 (2 sc, 1 picot)
- 1 sc in each row-end of Rows 4 and 3 (2 sc)
- Bottom shelf: 1 sc in each of the 4 uncovered dc (4 sc)
- Bottom-tier tip: (sc, picot, sc) in the end sc of Row 2 (2 sc, 1 picot)
- 1 sc in the row-end of Row 1 (1 sc)
Side total: 25 sc and 3 picots.
Bottom edge: Working in the free loops of the foundation ch: 2 sc in the first loop, 1 sc in each of the next 23 loops, 2 sc in the last loop. (27 sc)
Second side: Work the first-side sequence in reverse, going up toward the tip. On the middle shelf, that means 2 sc in the ch-2 sp first, then the sc, then the 2 dc. (25 sc, 3 picots)
Join with a sl st to the first sc. Fasten off.
Round total: 3 (tip) + 25 (side) + 27 (bottom) + 25 (side) = 80 sc and 6 picots.
Why the math works: Each sc covers exactly one stitch, row-end, or chain loop, so the edge lies flat. The only places with 2 sc are the ch-2 sps, and each of those has 2 chains. The bottom edge is the 25 foundation stitches plus 1 extra sc at each corner (25 + 2 = 27), which turns the corners without cupping. Both sides use the same 25-stitch sequence, so the tree stays symmetrical.
Trunk
Use cream, with the right side facing you. There are 27 sc across the bottom edge, and the 14th is the center stitch. The trunk uses sts 12 through 16, which leaves 11 sc free on each side.
Row 1: Join cream with a sl st in the 12th bottom sc. Ch 1, sc in the same st and in the next 4 sts. Turn. (5 sc)
Rows 2–6: Ch 1, sc in each sc across. Turn. (5 sc)
Fasten off. The trunk measures 0.7 in (1.8 cm) x 0.75 in (1.9 cm). Total height is now 2.75 in + 0.75 in = 3.5 in (8.9 cm).
Hanging Loop
Join cream with a sl st in the center sc of the 3 tip sc. Ch 24, then sl st in the same stitch. Fasten off. Weave the ends through the back of the edging so no cream shows on the front. The loop hangs about 1.5 in (3.8 cm) above the tip.
Final Blocking
- Weave in all the ends, but don’t trim them yet.
- Dampen the ornament with cool water and press it in a towel to remove excess water.
- Pin it right side up to 3.75 in (9.5 cm) wide and 2.75 in (7.0 cm) tall, not counting the trunk.
- Put a pin through each of the six picots and pull each tip slightly outward so the tiers sit level.
- Spread each fan evenly with your fingers. Pin the ch-3 spaces open.
- Pin the trunk straight and square to the bottom edge.
- For a firmer ornament, mist it lightly with starch or stiffener.
- Let it dry completely, then trim the tails.
Final Quality-Control Checklist
- Row 1 measures 3.5 in (8.9 cm), and the blocked tree measures 3.75 in (9.5 cm) across.
- The tiers have 3 fans, then 1 wide fan, then 1 small fan.
- The shelf stitches match on both sides of every tier.
- The edging has 80 sc and 6 picots, with one picot at each tier tip.
- The trunk is 5 sc wide, with 11 bottom sc free on each side.
- The loop is attached at the center tip stitch, so the ornament hangs straight.
- No yarn ends show on the front.
Troubleshooting
The fans ruffle or cup: Your dc are too loose. Work the fan rows with a 2.25 mm hook.
The tree leans to one side: A repositioning row slipped over the wrong number of stitches. Compare the shelf counts on the two sides.
The tiers look narrow or pinched: Your chains are tight. Make the ch-3s a little looser.
The edging ripples: Some row-ends got 2 sc. Work exactly 1 sc per row-end.
The trunk is off-center: Count from the corner again. The trunk starts in the 12th of the 27 bottom sc.
The picots disappear: Pin the picots firmly when you block.
Care
Hand wash in cool water with mild soap, press in a towel, and dry flat, pinning the tips again if they need it. If you used stiffener, reapply it after washing.
Final Notes
Here is the full measurement chain. Row 1 is 25 sc at 3.5 in (8.9 cm). Row 4 narrows to 17 sc, about 2.4 in (6.1 cm). Row 7 narrows to 11 sc, about 1.5 in (3.8 cm). Row 12 closes the tip at 2.5 in (6.4 cm) tall. The 80-sc edging brings the tree to 3.75 in x 2.75 in (9.5 cm x 7.0 cm). The trunk adds 0.75 in (1.9 cm) for a total height of 3.5 in (8.9 cm), plus the 1.5 in (3.8 cm) loop. If you hit every checkpoint, every tree in your batch will match.
Happy crocheting!