

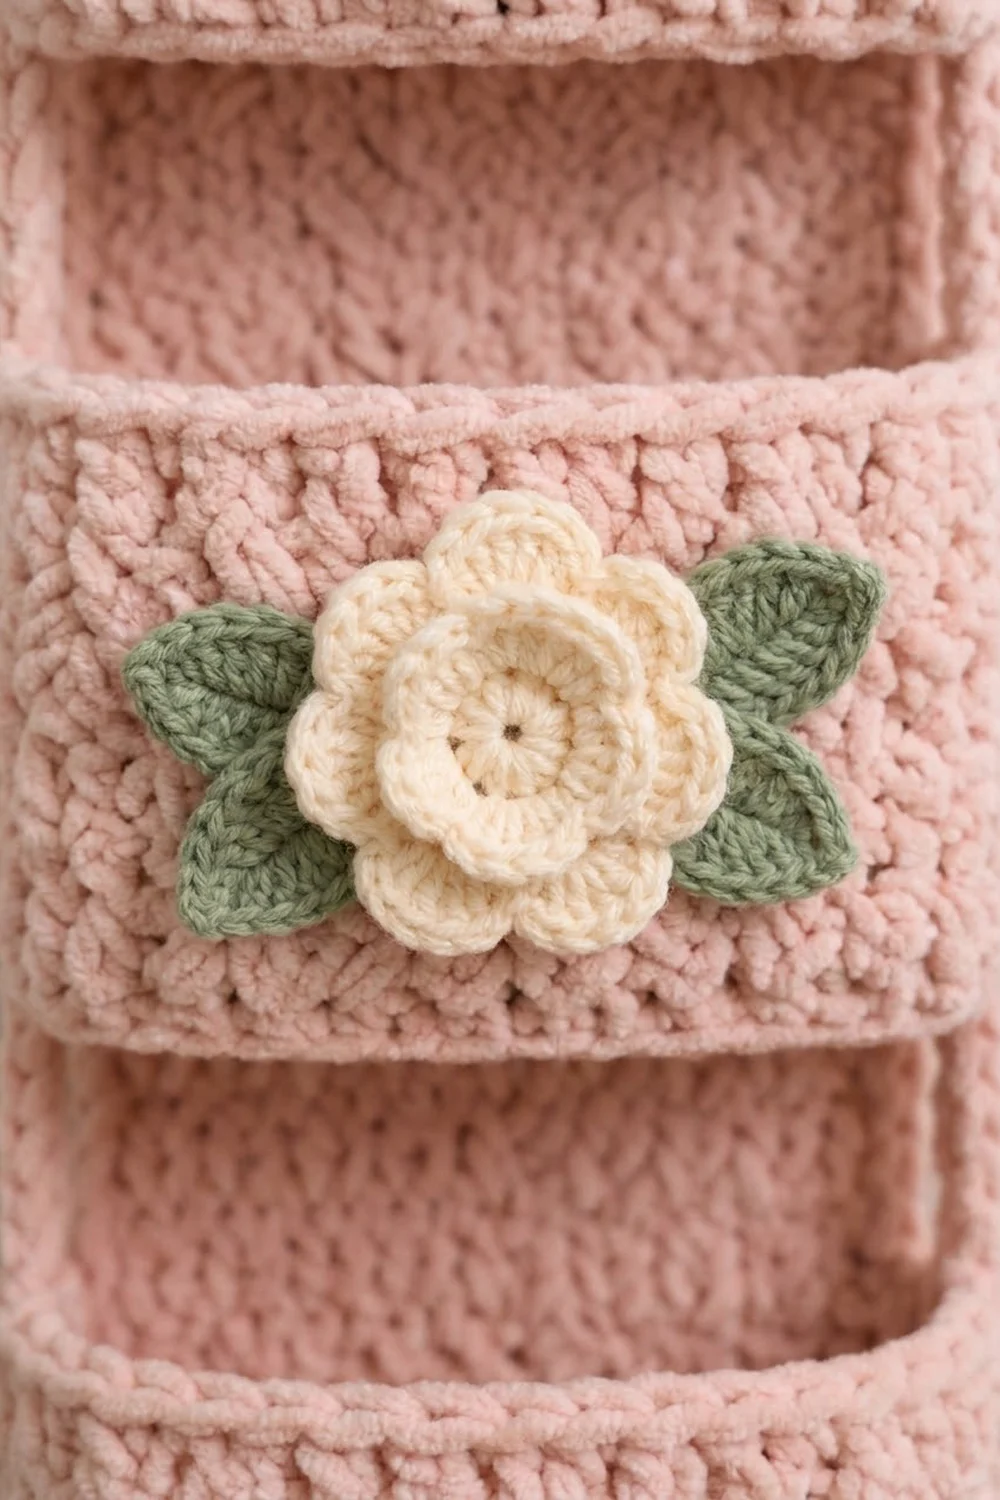
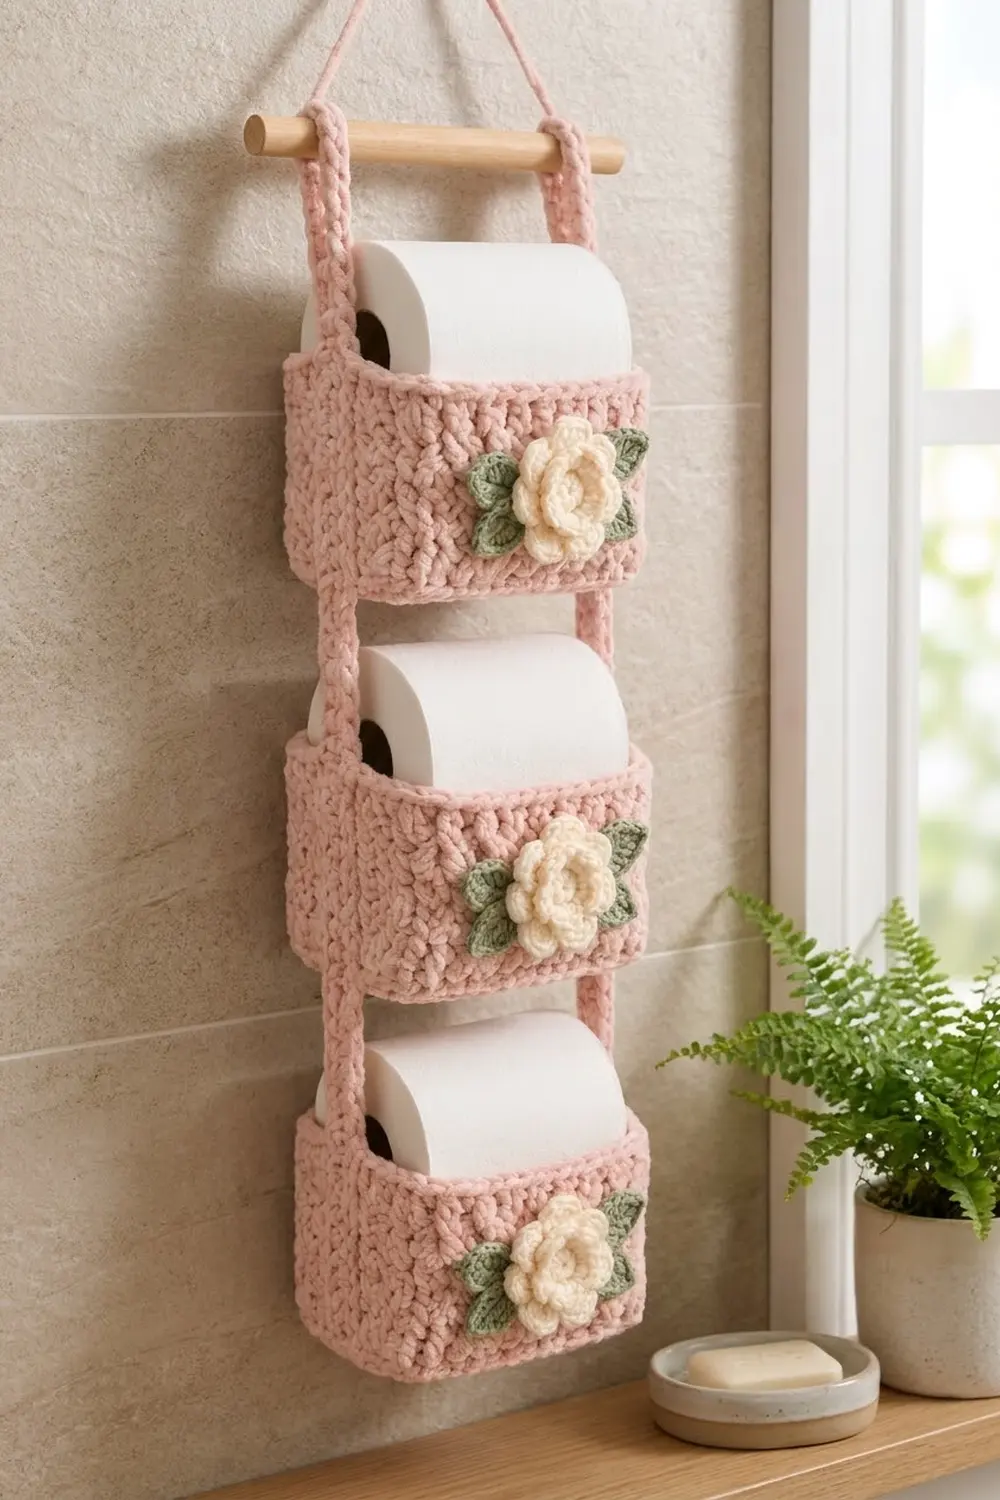
This hanging holder stores three spare rolls in a column of soft pocket boxes. Each pocket is blush pink and has a cream layered rose on the front with two sage leaves tucked under it. The holder hangs from a simple wooden dowel, so it fits on a narrow strip of wall next to the toilet or behind the door.
The style is cottage-calm and a little vintage. Herringbone half double crochet gives the walls a dense, knit-look texture that stands up on its own. A back-loop ridge gives each base a crisp edge, and the top rim is finished in reverse single crochet for a rounded, rope-like look.
This pattern uses US crochet terms throughout. The finished holder is 5 in (12.7 cm) wide and about 23.5 in (59.7 cm) tall from the bottom of the lowest pocket to the top of the hanging loops. Each pocket is 5 in × 4.5 in × 3.5 in (12.7 × 11.4 × 8.9 cm).
Here is how it’s built. Each pocket starts as a flat single crochet base. You then work a round of edging around the base and work the walls upward in joined rounds. Two long cords are crocheted separately and whipstitched to the back corners of all three pockets. The flowers and leaves are made separately and sewn on last.
Finished Size and Construction
- Finished size: 5 in (12.7 cm) wide × 23.5 in (59.7 cm) tall, hanging
- Skill level: Easy+ (confident beginner)
- Terminology: US crochet terms
- Yarn weight: Worsted (#4 medium)
- Hook: 5.0 mm (H-8)
- Number of pieces: 3 pockets, 2 cords, 3 flowers, 6 leaves
- Layout: 1 column of 3 pockets with 2.5 in (6.4 cm) gaps between them
- Pocket size: 5 × 4.5 × 3.5 in (12.7 × 11.4 × 8.9 cm)
- Wall height before rim: 3 in (7.6 cm)
- Rim (border) depth: 0.5 in (1.3 cm)
Materials
Choose a smooth worsted cotton or cotton blend for this project. Cotton holds the box shape well and copes with bathroom humidity. A soft acrylic also works, but its walls will be a little less firm.
- Blush pink (MC): 120 g / about 240 m
- Cream (CC1): 25 g / about 50 m
- Sage green (CC2): 15 g / about 30 m
All quantities include a margin of about 15 percent for your gauge swatch and weaving in ends.
Tools:
– 5.0 mm (H-8) crochet hook
– Tapestry needle
– 4 locking stitch markers
– Wooden dowel, 12 in (30.5 cm) long and 0.75 in (1.9 cm) in diameter
– Scissors and a measuring tape
– Pins and a blocking mat
Abbreviations (US Terms)
- ch – chain
- sl st – slip stitch
- sc – single crochet
- hdc – half double crochet
- dc – double crochet
- BLO – back loop only
- st(s) – stitch(es)
- rnd – round
- rev sc – reverse single crochet (crab stitch): working from left to right, insert the hook into the next stitch to the right, yarn over, pull up a loop, yarn over and pull through both loops.
Special stitch – Herringbone half double crochet (HBhdc): Yarn over, insert the hook into the stitch, pull up a loop and pull it straight through the first loop on the hook. You now have 2 loops on the hook. Yarn over and pull through both loops. Worked in joined rounds, this stitch gives the diagonal, knit-look texture you see on the pocket walls.
Gauge and Checkpoints
Gauge:
– sc: 16 sts × 16 rows = 4 in (10.2 cm)
– HBhdc in rounds: 16 sts × 12 rnds = 4 in (10.2 cm)
This is a firm gauge. Firm fabric is what lets the pockets hold their shape.
Make one complete pocket before starting the others. Check it against these points:
- Base: 5 × 4.5 in (12.7 × 11.4 cm)
- After Rnd 1: 76 sts around, a perimeter of 19 in (48.3 cm)
- Walls after Rnd 10: 3 in (7.6 cm) tall, measured from the base ridge
- After the rim: 3.5 in (8.9 cm) tall
- Flower: 2.75 in (7.0 cm) across
- Leaf: 2 in (5.1 cm) long
- Cord: 25 in (63.5 cm) long
If your piece is too big: go down to a 4.5 mm hook. If it’s too small, go up to a 5.5 mm hook. Don’t change the stitch counts. The joining and cord placement depend on them.
Pocket (make 3 in MC)
Base
Row 1: Ch 21. Sc in the 2nd ch from the hook and in each ch across. (20 sc)
Rows 2–18: Ch 1, turn, sc in each st across. (20 sc)
Checkpoint: The base measures 5 in (12.7 cm) wide and 4.5 in (11.4 cm) tall.
Base Edging
Rnd 1: Don’t turn. Ch 1, then work around the outside of the base:
– 20 sc across the top of Row 18
– 18 sc down the row ends, 1 per row
– 20 sc into the free loops of the foundation ch
– 18 sc up the row ends
Join with a sl st to the first sc. (76 sc)
The 20-st long edges include their own corner sts. Place a marker in the first and last sc of each long edge, for 4 corner markers. The 18-st short edges sit between these corners. There are no corner increases, because this round has to stay the same size as the walls.
Walls
Rnd 2: Ch 1, then sc in the BLO of each st around. Join. (76 sc)
Working into the back loops makes the walls fold upward and leaves the crisp ridge along the base.
Rnds 3–10: Ch 2 (does not count as a stitch), then HBhdc in each st around. Join to the first HBhdc. (76 sts in each round)
Start every round at the same back corner. The joining seam will then sit under a cord and won’t show.
Checkpoint: The walls measure 3 in (7.6 cm) from the base ridge. Move the markers up as you go so the corners stay visible.
Rim (Border)
Border gauge: The rim uses the same 16 sts per 4 in (10.2 cm) as the walls, and 2 rounds add 0.5 in (1.3 cm) of height.
Rnd 11: Ch 1, then sc in each st around. Join. This gives 20 sts on the front, 18 on the right side, 20 on the back and 18 on the left side. (76 sc)
Rnd 12: Ch 1, then rev sc in each st around. Again that’s 20 on the front, 18 on the right, 20 on the back and 18 on the left. Join and fasten off. (76 rev sc)
Why the math works: The rim keeps the 76-stitch count that has carried through from Rnd 1. 76 sts ÷ 4 sts per in = 19 in (48.3 cm), which matches the base perimeter of 2 × (5 + 4.5) in. Because no stitches are added, the rim won’t ruffle. Because none are dropped, it won’t pull in. The reverse sc rolls slightly forward and forms the rounded rope edge.
Checkpoint: The pocket is 3.5 in (8.9 cm) tall.
Flower (make 3 in CC1)
Rnd 1: Make a magic ring and work 10 sc into it. Pull the ring nearly closed, leaving a small eyelet in the middle. Join. (10 sc)
Rnd 2: Ch 3, skip 1 st, sl st in the next st. Repeat from * 4 more times. (5 ch-3 loops)
Rnd 3: In each ch-3 loop, work (sl st, hdc, 3 dc, hdc, sl st). (5 petals, 7 sts each)
Rnd 4: Fold the petals forward. Working behind them, ch 4, sl st around the post of the next Rnd 2 sl st. Repeat from * 4 more times. (5 ch-4 loops)
Rnd 5: In each ch-4 loop, work (sl st, hdc, 5 dc, hdc, sl st). (5 petals, 9 sts each)
Rnd 6: Working behind the petals, ch 5, sl st around the post of the next Rnd 4 sl st. Repeat from * 4 more times. (5 ch-5 loops)
Rnd 7: In each ch-5 loop, work (sl st, hdc, 7 dc, hdc, sl st). (5 petals, 11 sts each)
Fasten off and leave a 12 in (30.5 cm) tail for sewing.
Checkpoint: The flower measures 2.75 in (7.0 cm) across and has 3 stacked tiers of 5 petals each. Each tier is larger than the one in front of it.
Leaf (make 6 in CC2)
Ch 8.
Side 1: Starting in the 2nd ch from the hook, work sl st, sc, hdc, dc, dc, hdc, sc. (7 sts)
Tip: Ch 2, then sl st in the same last ch.
Side 2: Working along the other side of the chain, work sc, hdc, dc, dc, hdc, sc, sl st. (7 sts)
Fasten off and leave an 8 in (20.3 cm) tail.
Checkpoint: The leaf is 2 in (5.1 cm) long and about 1 in (2.5 cm) wide, with a pointed tip.
Cord (make 2 in MC)
Row 1: Ch 101. Sc in the back bump of the 2nd ch from the hook and of each ch across. (100 sc)
Row 2: Ch 1, turn, then sl st loosely in the BLO of each st across. (100 sl sts) Fasten off.
Checkpoint: The cord measures 25 in (63.5 cm) long and about 0.4 in (1.0 cm) wide, with a braided-looking surface.
Make All Pieces
Before you start assembling, check that you have all of these:
- MC: 3 pockets and 2 cords
- CC1: 3 flowers
- CC2: 6 leaves
Layout grid (read from the top down; the numbers are the cord stitch numbers, counted from the bottom end):
        ======== dowel ========
        (loop)          (loop)     sts 89–100 folded down
          |                |       sts 63–88  free cord, 6.5 in
     [   POCKET 1 – top    ]       sts 49–62
          |                |       sts 39–48  gap, 2.5 in
     [   POCKET 2 – middle ]       sts 25–38
          |                |       sts 15–24  gap, 2.5 in
     [   POCKET 3 – bottom ]       sts 1–14
Joining
Method: Whipstitch with MC through both loops of the cord and the outer loops of the pocket corner.
Placement: At 4 sts per inch, each 3.5 in (8.9 cm) pocket covers 14 cord sts. Each 2.5 in (6.4 cm) gap uses 10 cord sts. Mark the cord at sts 14, 24, 38, 48 and 62.
Stitch-to-stitch logic: Each pocket wall has 11 rounds (Rnds 2–12) that need to match 14 cord sts. Sew one cord st to each round, and catch Rnds 2, 6 and 10 twice. That gives 11 + 3 = 14 stitches.
Order:
1. Lay the bottom pocket face down.
2. Line up cord st 1 with the base ridge at one back corner, and line up cord st 14 with the rim.
3. Sew the cord to that corner, then repeat on the other back corner with the second cord.
4. Attach the middle pocket at sts 25–38 and the top pocket at sts 49–62 in the same way.
Tension: Pull each whipstitch snug enough that the cord lies flat against the corner, but not so tight that it puckers. Keep the gaps between pockets straight and untwisted.
Hanging loops: Slide the dowel under both cords at the st 88 marker. Fold sts 89–100 over the dowel and sew the cord end down at st 88. This makes a 3 in (7.6 cm) loop that sits 1.5 in (3.8 cm) above the fold.
Size checkpoint: Lay the holder flat. It should measure 15.5 in (39.4 cm) from the bottom of the lowest pocket to the rim of the top pocket, and 23.5 in (59.7 cm) to the top of the loops. If it measures more than 0.5 in (1.3 cm) off, redo the cord before moving on.
Appliqué Placement
- Center a flower on the front of each pocket, about 1.25 in (3.2 cm) up from the base ridge.
- Tuck 2 leaves under the outer petals, one on the left and one on the right. Angle each leaf slightly upward and outward so about 1.25 in (3.2 cm) of it shows.
- Sew each leaf down along its center line with the CC2 tail.
- Sew the flower around the base of the back tier with the CC1 tail. Leave the front petals free so they keep their depth.
Final Blocking
- Lightly mist each pocket with water.
- Put a roll in each pocket, or a folded towel cut to 5 × 4.5 in (12.7 × 11.4 cm), to square up the walls.
- Pinch each corner so it stands straight up from the base ridge.
- Lay the cords straight and pin them to the mat between the pockets.
- Cup the flower petals forward with your fingers.
- Let everything dry completely, usually 12 to 24 hours.
Final Quality-Control Checklist
- Every pocket has 76 sts in Rnds 1–12.
- Every pocket measures 5 × 4.5 × 3.5 in (12.7 × 11.4 × 8.9 cm).
- The round seams are hidden under the cords.
- The gaps between pockets are 2.5 in (6.4 cm).
- The total length is 23.5 in (59.7 cm).
- The flowers have 3 tiers of 5 petals and an open center eyelet.
- The leaves are mirrored on each side and point outward.
- All ends are woven in at least 2 in (5.1 cm).
Troubleshooting
The walls flare out. Your HBhdc tension is looser than your sc. Use a 4.5 mm hook from Rnd 3 onward.
The walls slump. Your fabric is too loose. Go down a hook size, or switch to cotton yarn.
The rim ruffles. You’ve added stitches. Recount Rnd 11, which should be exactly 76.
The rev sc looks messy. Keep your loops loose and work strictly from left to right.
The pocket twists on the cords. One corner was sewn higher than the other. Re-sew it so both corners start at the base ridge.
The flower is flat. Make sure Rnds 4 and 6 were worked behind the petals, around the posts of the sl sts.
The cord is too long. Your gauge is loose. Redo the cord with fewer chains, or fold the extra into the hanging loop.
Care
Hand wash in cool water, press out the extra water, and dry flat with the pockets reshaped. Don’t tumble dry, because it can soften the walls and fuzz the flowers.
Final Notes
The measurement chain runs like this: the 20 × 18-stitch base gives 5 × 4.5 in (12.7 × 11.4 cm). That base produces the 76-stitch perimeter of 19 in (48.3 cm), which carries unchanged through the walls and rim to a height of 3.5 in (8.9 cm). The pockets then sit on 25 in (63.5 cm) cords at fixed stitch positions, which gives a finished holder 23.5 in (59.7 cm) tall. If you check each link as you go, the three pockets will match and hang straight.
Happy crocheting!