

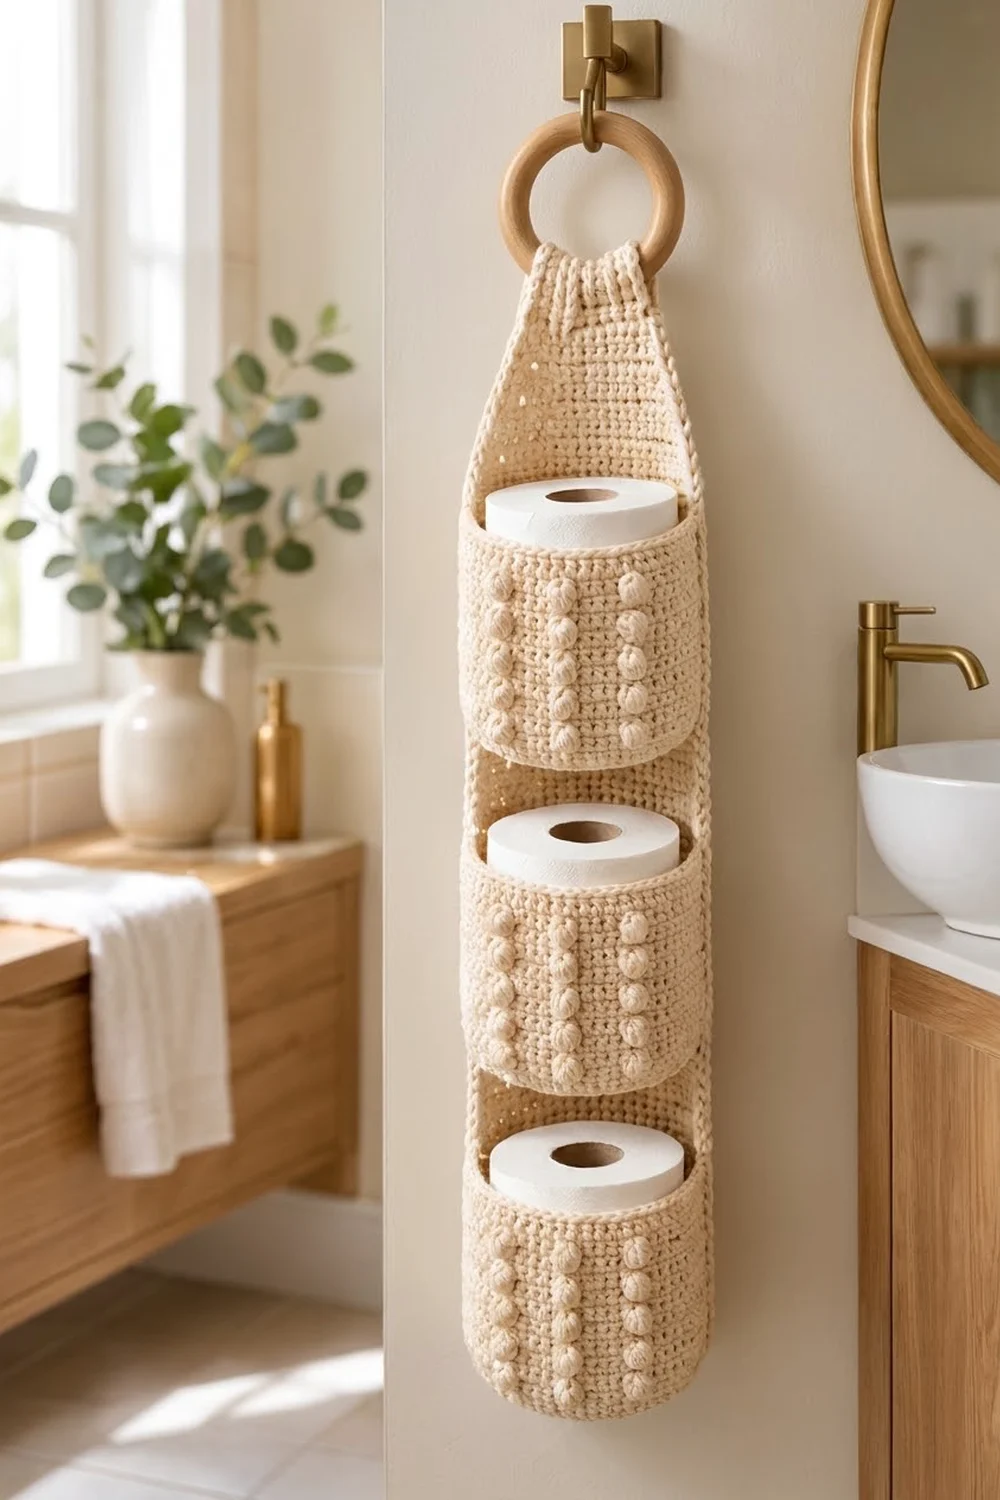
This hanging toilet paper holder is a long, narrow back panel with three round pockets stacked along it. Each pocket holds one standard roll. The holder hangs from a wooden ring, so it fits on a towel hook, a door hook, or a small wall knob.
It uses one soft cream color. The texture comes from columns of raised bobbles on the front of each pocket, with plain single crochet everywhere else and a twisted rope edge made with reverse single crochet. It’s a calm, natural look for a modern bathroom.
The pattern uses US crochet terms. The finished holder is 5 in (12.7 cm) wide and 21.25 in (54.0 cm) long from the ring fold to the bottom edge. Each pocket is about 4.75 in (12.1 cm) across and 3.75 in (9.5 cm) tall.
Here’s the order of work:
1. Crochet the back panel in rows, narrowing the top into a tab.
2. Make three pockets in joined rounds: a flat circle for the base, then walls with bobbles.
3. Sew the pockets to the panel.
4. Add a two-round border.
5. Fold the tab over the ring and sew it down.
Finished Size and Construction
- Finished size: 5 in (12.7 cm) wide × 21.25 in (54.0 cm) hanging length
- Skill level: Intermediate (bobbles, joined and turned rounds, seaming)
- Terminology: US crochet terms
- Yarn weight: #4 worsted, 100% cotton
- Hook: 4.5 mm (US 7)
- Number of pieces: 4 (1 back panel + 3 pockets)
- Layout: 1 column of 3 pockets, stacked vertically on the panel
- Piece size: panel 4.5 × 23 in (11.4 × 58.4 cm) flat; each pocket 4.75 in (12.1 cm) diameter × 3.75 in (9.5 cm) tall
- Size before border: panel 4.5 in (11.4 cm) wide
- Border depth: 0.25 in (0.6 cm) on each side, 2 rounds
Materials
Yarn: Use a smooth worsted-weight cotton or cotton blend. Cotton holds its shape, makes crisp bobbles, and handles bathroom humidity. Avoid fuzzy or very stretchy acrylic, because the pockets will sag under the rolls.
- Cream: 150 g (about 235 m / 257 yd)
This amount includes a margin of about 25% for your gauge swatch and sewing tails.
Tools:
- 4.5 mm (US 7) crochet hook
- 1 wooden ring, 2.75 in (7.0 cm) outer diameter
- Tapestry needle
- 4 locking stitch markers
- Rust-proof pins
- Measuring tape
- Scissors
Abbreviations (US Terms)
- ch – chain
- sc – single crochet
- sc2tog – single crochet 2 together
- sl st – slip stitch
- BLO – back loop only
- rev sc – reverse single crochet (crab stitch)
- st(s) – stitch(es)
- RS / WS – right side / wrong side
Bobble (special stitch): Work [yarn over, insert hook in st, yarn over and pull up a loop, yarn over and pull through 2 loops] 5 times in the same st, so you have 6 loops on the hook. Yarn over and pull through all 6 loops. A bobble counts as 1 st. Always work it on a WS round so it puffs out on the RS.
Reverse sc: Work from left to right (if you’re right-handed). Insert the hook in the next st to the right, pull up a loop, then yarn over and pull through both loops.
Gauge and Checkpoints
Gauge: 16 sc and 16 rows = 4 in (10.2 cm) square.
That’s 4 sts and 4 rows per inch. The seams and the border rely on this square gauge, so check it carefully.
Make one pocket first. It’s the best gauge test: a pocket that’s too small won’t fit a roll, and one that’s too big lets the roll flop forward.
Checkpoints:
- Pocket base after Round 10: 4.75 in (12.1 cm) across, lying flat
- Pocket wall (Rounds 11–24): 3.5 in (8.9 cm) tall
- Finished pocket: 3.75 in (9.5 cm) tall
- Panel after Row 64: 4.5 × 16 in (11.4 × 40.6 cm)
- Panel after Row 76: 19 in (48.3 cm) long
- Panel after Row 92: 23 in (58.4 cm) long
If your piece is too big, switch to a 4 mm hook. If it’s too small, switch to a 5 mm hook. Change the hook, not the stitch counts, because every seam is matched stitch for stitch.
Back Panel
Ch 19.
Row 1 (RS): Sc in 2nd ch from hook and in each ch across. (18 sts)
Rows 2–64: Ch 1, turn, sc in each st across. (18 sts)
Checkpoint: 4.5 × 16 in (11.4 × 40.6 cm).
Taper
Row 65: Ch 1, turn, sc2tog, sc in next 14 sts, sc2tog. (16 sts)
Row 66: Ch 1, turn, sc in each st across. (16 sts)
Row 67: Ch 1, turn, sc2tog, sc in next 12 sts, sc2tog. (14 sts)
Row 68: Ch 1, turn, sc across. (14 sts)
Row 69: Ch 1, turn, sc2tog, sc in next 10 sts, sc2tog. (12 sts)
Row 70: Ch 1, turn, sc across. (12 sts)
Row 71: Ch 1, turn, sc2tog, sc in next 8 sts, sc2tog. (10 sts)
Row 72: Ch 1, turn, sc across. (10 sts)
Row 73: Ch 1, turn, sc2tog, sc in next 6 sts, sc2tog. (8 sts)
Row 74: Ch 1, turn, sc across. (8 sts)
Row 75: Ch 1, turn, sc2tog, sc in next 4 sts, sc2tog. (6 sts)
Row 76: Ch 1, turn, sc across. (6 sts)
The taper is 12 rows, or 3 in (7.6 cm), long.
Tab
Rows 77–92: Ch 1, turn, sc in each st across. (6 sts)
The tab is 16 rows, or 4 in (10.2 cm), long. Fasten off and weave in the ends.
Checkpoint: 23 in (58.4 cm) long in total.
Pocket (make 3)
Base
Work the base in joined rounds without turning, with the RS facing you.
Round 1: Make a magic ring, ch 1, work 6 sc in the ring, sl st to first sc. (6 sts)
Round 2: Ch 1, 2 sc in each st around, join. (12 sts)
Round 3: Ch 1, [sc in next st, 2 sc in next st] 6 times, join. (18 sts)
Round 4: Ch 1, [sc in next 2 sts, 2 sc in next st] 6 times, join. (24 sts)
Round 5: Ch 1, [sc in next 3 sts, 2 sc in next st] 6 times, join. (30 sts)
Round 6: Ch 1, [sc in next 4 sts, 2 sc in next st] 6 times, join. (36 sts)
Round 7: Ch 1, [sc in next 5 sts, 2 sc in next st] 6 times, join. (42 sts)
Round 8: Ch 1, [sc in next 6 sts, 2 sc in next st] 6 times, join. (48 sts)
Round 9: Ch 1, [sc in next 7 sts, 2 sc in next st] 6 times, join. (54 sts)
Round 10: Ch 1, [sc in next 8 sts, 2 sc in next st] 6 times, join. (60 sts)
Checkpoint: the base lies flat and measures 4.75 in (12.1 cm) across.
Wall
From now on, turn at the end of every round so you work the bobble rounds with the WS facing. Join each round with a sl st to the first sc, then turn.
Round 11 (RS, conversion round): Ch 1, sc in BLO of each st around, join, turn. (60 sts: 60 worked 1-per-stitch + 0 added.) The unused front loops make a crisp fold where the base meets the wall.
Rounds 12–13: Ch 1, sc in each st around, join, turn. (60 sts)
Round 14 (WS, bobble round): Ch 1, sc in first 4 sts, [bobble in next st, sc in next 6 sts] 3 times, bobble in next st, sc in next 4 sts, sc in each of the remaining 30 sts, join, turn. (60 sts: 4 bobbles + 56 sc)
Put a marker in the 1st st and the 30th st of this round. The 30 sts with the bobbles are the front, and the 30 plain sts are the back.
Round 15 (RS): Ch 1, sc in each st around, join, turn. (60 sts)
Rounds 16, 18, 20, 22: Repeat Round 14. (60 sts each)
Rounds 17, 19, 21, 23: Repeat Round 15. (60 sts each)
Round 24 (WS): Ch 1, sc in each st around, join. (60 sts)
Fasten off, leaving a 30 in (76.2 cm) tail for sewing. Every WS round starts at the same join, so the bobbles line up in 4 straight columns of 5.
Checkpoint: the wall is 3.5 in (8.9 cm) tall and the pocket is 3.75 in (9.5 cm) tall overall. A roll should slide in snugly and stand about 0.5 in (1.3 cm) above the rim.
Make All Pieces
- Back panel: 1 in Cream
- Pockets: 3 in Cream
Panel rows are numbered from the bottom (Row 1) to the top (Row 92). This grid shows where each part goes:
Rows 77–92   Tab (folds over ring)
Rows 65–76   Taper
Rows 58–64   Plain space
Rows 43–57   POCKET 3 (base Row 43, rim Row 57)
Rows 37–42   Gap
Rows 22–36   POCKET 2 (base Row 22, rim Row 36)
Rows 16–21   Gap
Rows 1–15    POCKET 1 (base Row 1, rim Row 15)
Joining
Use whipstitch and the pocket’s sewing tail. Lay the panel flat with the RS facing up.
Which stitches to match: Take the 30 back sts of Round 24. Skip 7 sts at each end and use the 16 in the center (back sts 8–23). These 16 sts match panel sts 2–17, one to one. Panel sts 1 and 18 stay free so the border can go into the row ends later.
- Rim seam: Sew back sts 8–23 of Round 24 to sts 2–17 of the panel’s rim row (Row 15, 36, or 57), 1 st to 1 st.
- Side seams: Sew the column above back st 8 to panel st 2, matching 1 wall round to 1 panel row for all 14 wall rounds. Do the same on the other side, sewing back st 23 to panel st 17. Rounds and rows match because the gauge is square.
- Base seam: Tack the 16 center back sts at the Round 11 fold to sts 2–17 of the base row (Row 1, 22, or 43).
The 7 unsewn back sts on each side curve around the panel edges, which keeps each pocket round.
Tension: Pull each stitch just snug. If you pull too hard, the panel puckers. If you sew too loosely, the pocket tips forward.
Checkpoint: the panel is still 4.5 × 23 in (11.4 × 58.4 cm) and lies flat in the gaps between pockets.
Border
Border gauge: the same as the body, 4 sc per inch, so working 1 sc per row end keeps the edge flat.
With the RS facing, join the yarn in the first st of Row 92 (the top corner of the tab).
Round 1: Ch 1, then work around the panel:
- Top edge (Row 92, 6 sts): 3 sc in first st, sc in next 4 sts, 3 sc in last st. (10 sts)
- First long side: Sc in the row end of Rows 91 down to 2. (90 sts)
- Bottom edge (foundation ch, 18 ch): 3 sc in first ch, sc in next 16 ch, 3 sc in last ch. (22 sts)
- Second long side: Sc in the row end of Rows 2 up to 91. (90 sts)
Sl st to the first sc. Round total: 212 sts (10 + 90 + 22 + 90). The corner groups are counted in the top and bottom totals. Each long-side count of 90 is only the stitches between the corner groups.
Round 2: Ch 1, rev sc in each st around, sl st to first st. (212 sts)
Fasten off and weave in the ends.
Why the math works: The gauge is square, so one row end is the same width as one stitch, and the long sides stay flat. Each corner gets 3 sc in one spot: 1 to carry on along the edge and 2 extra to turn the corner, for 8 extra stitches in total. The edge itself has 6 + 90 + 18 + 90 = 204 sts, and 204 + 8 = 212. Round 2 works 1 rev sc in each stitch, so the count stays the same.
The border makes the panel 5 in (12.7 cm) wide and 23.5 in (59.7 cm) long when laid flat.
Attach the Ring
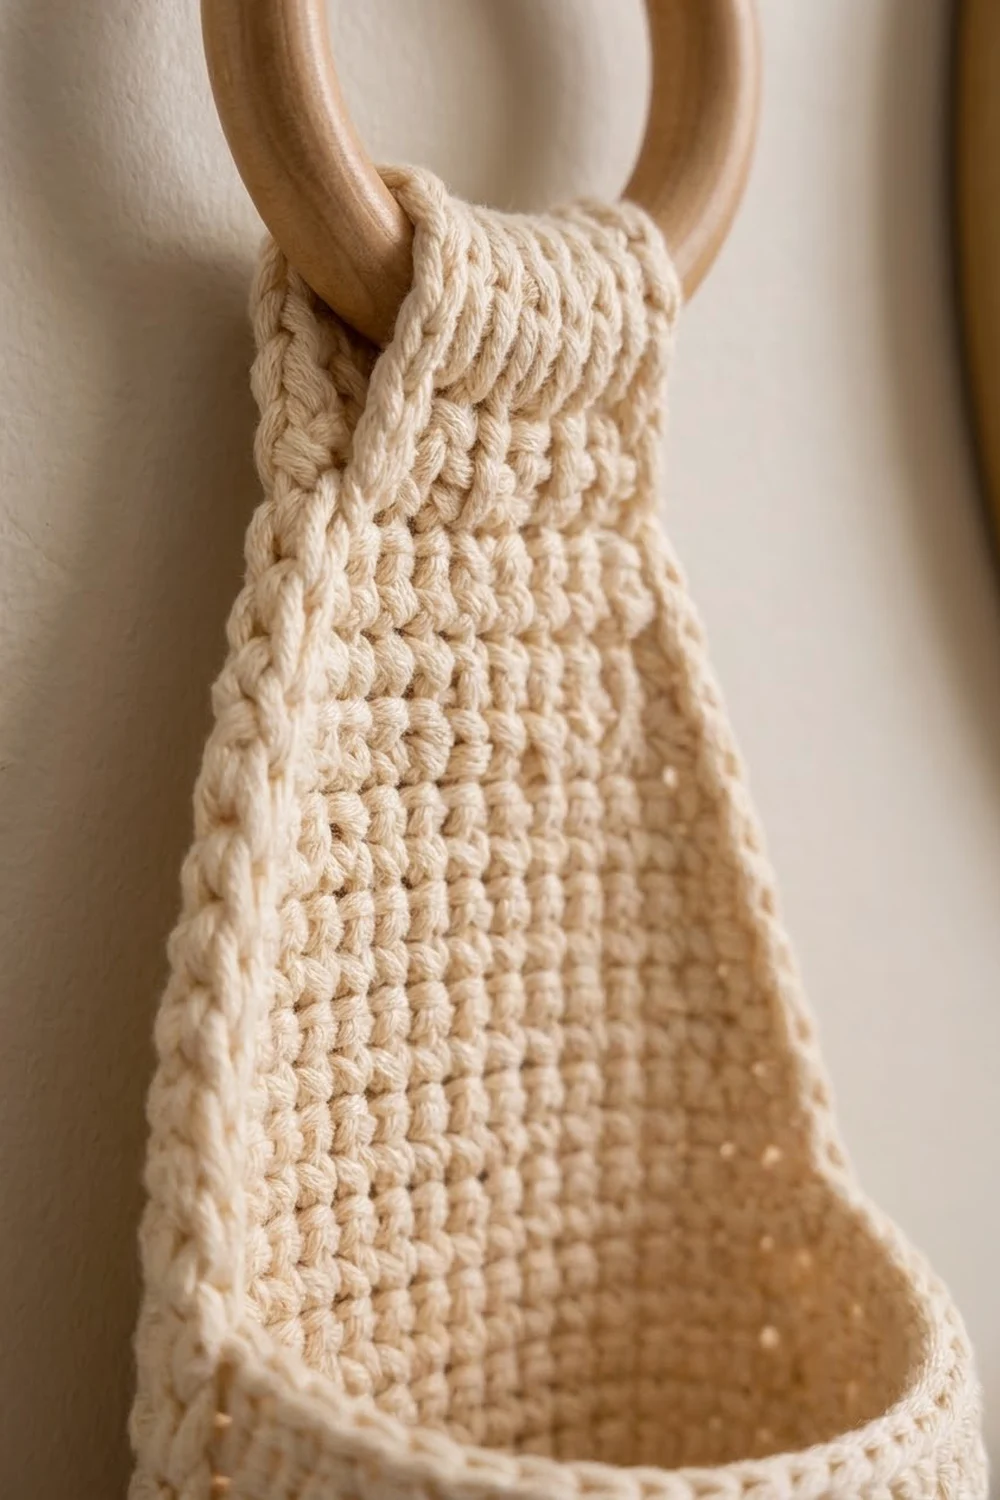
Fold the tab over the ring toward the back until the top border edge meets the back of Row 77, and whipstitch it in place. The folded tab is about 2 in (5.1 cm) long, which gives a hanging length of 21.25 in (54.0 cm).
Final Blocking
- Soak the holder in cool water and squeeze gently. Don’t wring it.
- Roll it in a towel to press out the extra water.
- Pin the panel flat at 5 in (12.7 cm) wide.
- Put a dry roll wrapped in a plastic bag into each pocket so it dries round.
- Pin the rope edges straight.
- Let it dry for at least 24 hours before hanging.
Final Quality-Control Checklist
- Panel is 5 in (12.7 cm) wide and both rope edges are straight
- Hanging length is 21.25 in (54.0 cm)
- Each pocket has 4 straight, centered columns of 5 bobbles
- Gaps between pockets are 1.5 in (3.8 cm), or 6 rows
- Each pocket rim lies along a single panel row
- Rolls slide in and out easily
- Ring seam is secure and all ends are woven in
Troubleshooting
Bobbles end up inside the pocket: You worked a bobble round with the RS facing. Make sure you turn after every round.
Bobble columns drift: You started a round in the wrong stitch. Always work the first sc into the stitch at the join.
Base cups instead of lying flat: Your tension is tight. Use a larger hook for Rounds 1–10.
Base ruffles: Count your stitches; you probably have an extra increase.
Panel edges wave: You worked more than 90 sts on a long side. Redo Round 1.
Pocket tips forward: Go over the rim seam a second time with whipstitch.
Care
Hand wash in cool water, reshape the pockets around a roll, and dry flat. Don’t tumble dry, because cotton may shrink.
Final Notes
Everything builds from the square gauge of 4 sts and 4 rows per inch:
– The 60-stitch pocket base is 4.75 in (12.1 cm) across.
– The 14-round wall is 3.5 in (8.9 cm) tall.
– The panel is 18 sts × 92 rows, or 4.5 × 23 in (11.4 × 58.4 cm).
– Each pocket is sewn on 16 sts to 16 sts, with wall rounds matched to panel rows.
– The 212-stitch border brings the panel to 5 in (12.7 cm) wide.
– Folding the tab over the ring sets the hanging length at 21.25 in (54.0 cm).
If you check each of these along the way, the holder will hang straight.
Happy crocheting!