

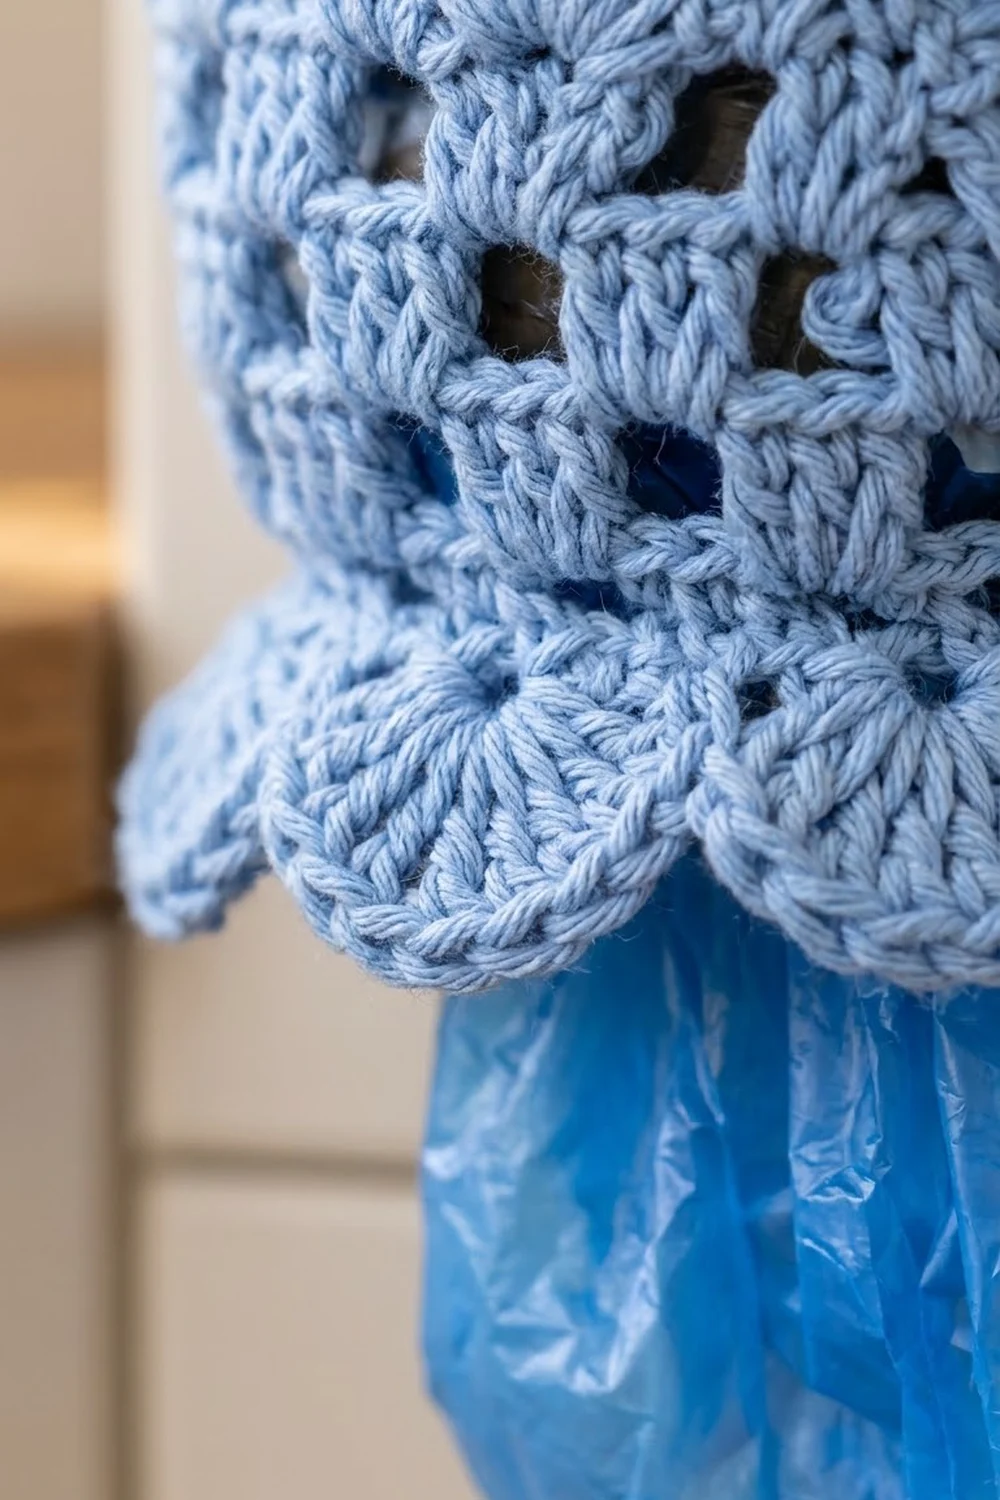
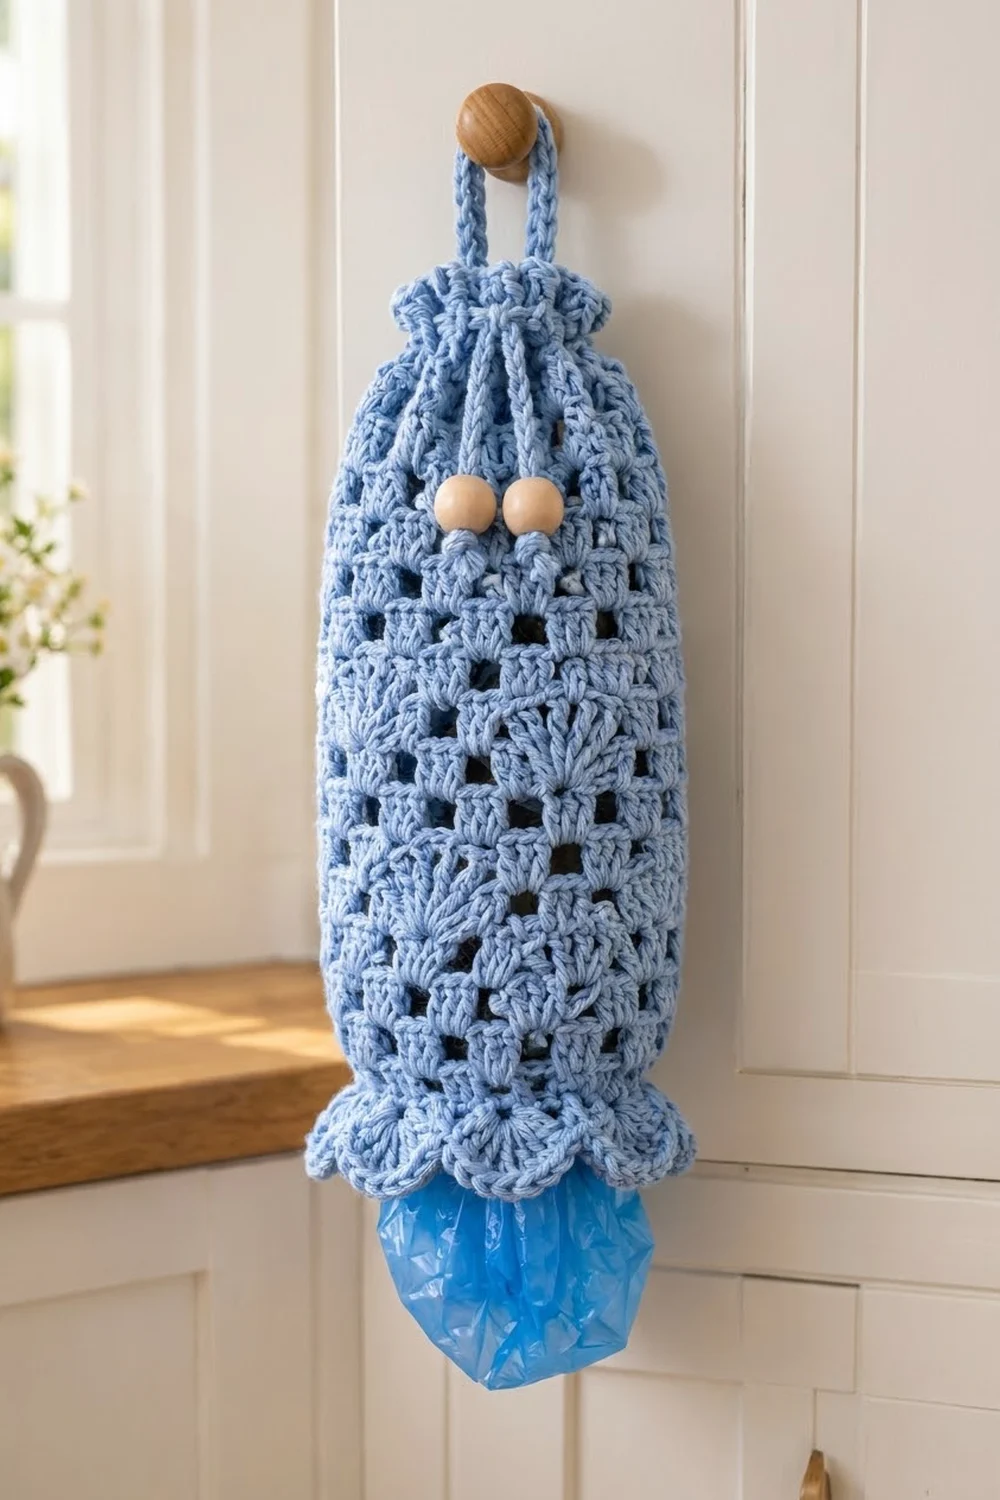
This bag holder brings a bit of order to the kitchen. It is a tall, soft tube in cornflower blue. Square mesh windows alternate with bands of open fans, a drawstring with two wooden beads gathers the top into a small ruffle, and a scalloped edge finishes the bottom opening where you pull the bags out.
The look is vintage farmhouse: simple, airy, and practical. It is shown in one color, light cornflower blue, with natural wooden beads. A soft cream version works just as well if you want a quieter neutral.
The pattern uses US crochet terms. The holder measures 6.25 in (15.9 cm) wide laid flat, which is 12.5 in (31.8 cm) around, and 17.75 in (45.1 cm) tall from the scallop tips to the top of the ruffle. The hanging loop adds about 4 in (10.2 cm) above that.
Construction is simple. You work one flat rectangle in rows from the bottom up, add the scalloped trim along the foundation edge, then seam the side edges into a tube. A slip-stitch drawstring and a slip-stitch hanging loop finish the top.
Finished Size and Construction
- Finished size: 6.25 in (15.9 cm) wide flat x 17.75 in (45.1 cm) tall; 12.5 in (31.8 cm) circumference
- Skill level: Easy to Intermediate
- Terminology: US
- Yarn weight: Worsted (#4), cotton or cotton blend
- Hook: 5.0 mm (H-8)
- Number of pieces: 1 body, plus 1 drawstring cord and 1 hanging loop cord
- Layout: one flat rectangle seamed into a single tube
- Piece size (flat rectangle, before seaming): 12.5 in (31.8 cm) wide x 17.75 in (45.1 cm) tall
- Size before border: 12.5 in (31.8 cm) wide x 16.75 in (42.5 cm) tall
- Border depth: 1 in (2.5 cm) scalloped bottom edge
Materials
Use a smooth worsted-weight cotton or cotton blend. Cotton holds the fan shapes crisply, does not stretch much under the weight of the bags, and washes well. Avoid fuzzy yarns, because they blur the mesh holes.
- Light cornflower blue: 120 g (205 m)
- Optional alternate color (cream): the same amount if you make it in cream instead
The quantities include a margin of about 15 percent for your gauge check and for weaving in ends.
Tools:
- 5.0 mm (H-8) crochet hook
- Tapestry needle
- Scissors
- 2 wooden beads, about 20 mm, with holes at least 5 mm wide
- 2 stitch markers
- Tape measure
- Blocking mat, rust-proof pins, and a spray bottle
Abbreviations (US Terms)
- ch – chain
- sl st – slip stitch
- sc – single crochet
- sc2tog – single crochet 2 together
- dc – double crochet
- tr – treble crochet
- sk – skip
- sp – space
- st(s) – stitch(es)
- rep – repeat
Special stitch – Picot: ch 3, sl st in the 3rd ch from the hook.
Note: At the start of a dc row, ch 3 counts as the first dc. At the end of a row, work the last dc into the top of the turning ch.
Gauge and Checkpoints
Gauge: 16 dc and 8 rows = 4 in (10.2 cm) in plain dc. In the pattern, 50 sts = 12.5 in (31.8 cm) wide, and one 4-row fan band = 2.25 in (5.7 cm) tall.
Test the first band. Work Rows 1–5, then stop and measure on a flat surface without stretching. These rows are your swatch, and you can keep going from them.
Checkpoints:
- After Row 1: 12.5 in (31.8 cm) wide
- After Row 5: 2.75 in (7.0 cm) tall
- After Row 25: 14 in (35.6 cm) tall
- After Row 29: 16 in (40.6 cm) tall
- After Row 31: 16.75 in (42.5 cm) tall
- After the bottom border: 17.75 in (45.1 cm) tall
If your piece is too big, go down a hook size, for example to 4.5 mm. If it is too small, go up to 5.5 mm. If Row 1 is off by 0.5 in (1.3 cm) or more, change hooks and start again. Height is more forgiving, because you can add or drop a row in the top section.
Body
The body is worked flat in rows. Turn at the end of every row.
Foundation: Ch 52.
Row 1 (solid): Dc in the 4th ch from hook (the skipped ch count as 1 dc) and in each ch across. (50 dc)
Row 2 (set-up mesh): Ch 3, dc in next st, *ch 2, sk 2 sts, dc in next 2 sts; rep from * across. (26 dc and 12 ch-2 sps = 50 sts)
Row 3 (mesh): Ch 3, dc in next dc, *ch 2, sk ch-2 sp, dc in next 2 dc; rep from * across. (26 dc and 12 ch-2 sps = 50 sts)
Row 4 (fan open): Ch 3, dc in next dc, *ch 1, sk next ch-2 sp and next 2 dc, 7 tr in next ch-2 sp, ch 1, dc in next 2 dc; rep from * 5 more times. (6 fans; 2 + 6 x 11 = 68 sts)
Each repeat has 1 ch, 7 tr, 1 ch, and 2 dc, for 11 sts. Each fan grows out of one mesh hole and spreads upward.
Row 5 (fan close): Ch 3, dc in next dc, *ch 2, sk ch-1 sp and next 3 tr, 2 dc in next tr (the center tr of the fan), ch 2, sk next 3 tr and ch-1 sp, dc in next 2 dc; rep from * 5 more times. (26 dc and 12 ch-2 sps; 2 + 6 x 8 = 50 sts)
This row caps each fan with a dc pair over its center and leaves a mesh hole on each side of it, so the rounded fan shape stands out against the grid. Row 5 now matches Row 3 exactly: pairs of dc separated by ch-2 spaces.
Rows 6–9: Work Row 3, Row 3, Row 4, Row 5. (50 sts after Row 9)
Rows 10–25: Rep Rows 6–9 four more times. (50 sts after Row 25)
You now have 6 fan bands. Checkpoint: 14 in (35.6 cm) tall.
Top Section
Row 26 (mesh): Work as Row 3. (50 sts)
Row 27 (solid): Ch 3, dc in next dc, *2 dc in next ch-2 sp, dc in next 2 dc; rep from * across. (26 dc worked into dc + 24 dc worked into the 12 ch-2 sps = 50 dc)
Row 28 (drawstring eyelets): Work as Row 2. (26 dc and 12 ch-2 sps = 50 sts)
These 12 spaces are the eyelets for the drawstring.
Row 29 (solid): Work as Row 27. (26 + 24 = 50 dc)
Checkpoint: 16 in (40.6 cm) tall.
Row 30 (ruffle): Ch 3, dc in same st, 2 dc in each st across. (50 dc worked 1 per st + 50 extra dc = 100 dc)
Row 31 (picot edge): Ch 1, sc in each of first 2 sts, *picot, sc in next 2 sts; rep from * across. (100 sc and 49 picots)
Fasten off, leaving a 20 in (50.8 cm) tail for seaming. Checkpoint: 16.75 in (42.5 cm) tall.
Because Row 30 doubles the stitch count, the top frills outward once you pull the drawstring.
Border: Scalloped Bottom Edge
Work the border flat along the bottom of the rectangle, before seaming. Only the bottom edge gets a border, so all the counts below are for that one edge.
Border gauge: 4 sc = 1 in (2.5 cm). Each scallop uses 6 sts, which is 1.5 in (3.8 cm).
With the right side facing, join yarn in the first foundation ch at the bottom right corner. Work into the free loops of the foundation chain.
Row A (taper): Ch 1, sc in first st, *sc in next 5 sts, sc2tog; rep from * 6 more times. (sts used: 1 + 7 x 7 = 50; sts made: 1 + 7 x 6 = 43 sc)
Row B (scallops): Ch 1, turn, sc in first st, *sk 2 sts, 7 dc in next st, sk 2 sts, sc in next st; rep from * 6 more times. (7 scallops: 49 dc + 8 sc)
Fasten off.
Why the math works: Row A uses all 50 foundation sts and makes 43 sc, so the bottom edge draws in to about 10.75 in (27.3 cm) around. That small taper helps keep the bags inside. Each scallop repeat uses 6 sts, and 43 = 1 + 7 x 6, so the seven scallops fit exactly with a sc at each end. After seaming, those two end sc meet at the seam. The 7-dc scallops then flare back out to give the bell-shaped bottom. Rows A and B add 1 in (2.5 cm), which brings the total height to 17.75 in (45.1 cm).
Seaming
Fold the rectangle in half with right sides together so the two side edges meet. Line up Row 1 with Row 1 and Row 31 with Row 31. Using the long tail and the tapestry needle, whipstitch the side edges together through the turning chains and end stitches. Work from the picot row down to the scallop row.
Take one stitch about every 0.25 in (0.6 cm), going around each end dc once. Keep your tension even and snug, but don’t pull so hard that the edge puckers. Turn the tube right side out. Checkpoint: the tube measures 6.25 in (15.9 cm) wide laid flat.
Drawstring and Hanging Loop
Drawstring: Ch 111. Sl st in the back bump of the 2nd ch from hook and in each ch across. (110 sl sts, about 27.5 in or 69.9 cm long) Fasten off.
Lay the tube flat with the seam centered at the back. Count the Row 28 eyelets from the seam: the front center falls between spaces 6 and 7. Weave the drawstring over and under through all 12 spaces so both ends come out at the front center. Thread one wooden bead onto each end, tie an overhand knot below each bead, and trim.
Hanging loop: Ch 41. Sl st in the back bump of the 2nd ch from hook and in each ch across. (40 sl sts, about 10 in or 25.4 cm long) Fasten off, leaving long tails.
Fold the cord in half. Sew 1 in (2.5 cm) of each end to the inside of the back seam over Rows 29–30. This leaves a loop about 4 in (10.2 cm) tall rising above the ruffle.
Final Blocking
- Weave in all ends along the seam or inside the solid rows.
- Spray the holder lightly until it is damp. Do not soak it.
- Stuff a rolled towel inside so the tube fills out to 6.25 in (15.9 cm) wide flat.
- Lay it flat and pat it to 17.75 in (45.1 cm) tall.
- Gently open each fan with your fingers and square up the mesh holes.
- Pin each of the 7 scallops into an even curve.
- Fluff the ruffle above the eyelet row. Don’t pin it flat.
- Let it dry completely, then take out the towel and pull the drawstring closed.
Final Quality-Control Checklist
- Every mesh row has 50 sts: 26 dc and 12 ch-2 sps
- Each fan-open row has 6 fans of 7 tr and 68 sts in total
- The body has 6 fan bands
- Row 28 has 12 open eyelets
- The ruffle row has 100 dc
- The bottom border has 7 even scallops
- The seam lies flat at the back center
- The beads sit at the front center, and both cord ends are the same length
- Flat size is 6.25 x 17.75 in (15.9 x 45.1 cm)
Troubleshooting
Fans lean to one side: Make sure you work the 7 tr into the ch-2 sp, not into a dc.
Row 5 count is wrong: Count 3 tr on each side of the center tr before you work the 2 dc.
Mesh holes look slanted: Work the ch-2 a little looser, and always work into the space rather than into the chains.
Piece is too wide: Switch to a hook 0.5 mm smaller and start again. Width can’t be fixed once you’re well into the piece.
Bottom flares too much: Work Row A more tightly, or make the dc in Row B a little tighter.
Ruffle is limp: Spray and fluff it again, or use a crisper mercerized cotton.
Bags fall out: Work Row A with a hook 0.5 mm smaller to pull the bottom in more.
Care
Hand wash, or machine wash cold on a gentle cycle in a mesh laundry bag. Take the wooden beads off first or wrap them to protect the wood, then reshape the holder while damp and dry it flat.
Final Notes
Every measurement builds on the one before it. 50 sts give 12.5 in (31.8 cm) around. Row 1 plus six bands of 2.25 in (5.7 cm) reaches 14 in (35.6 cm). The top section brings the height to 16.75 in (42.5 cm), and the scalloped border finishes it at 17.75 in (45.1 cm). If your gauge is right at Row 5, every later number should come out right too.
Happy crocheting!