

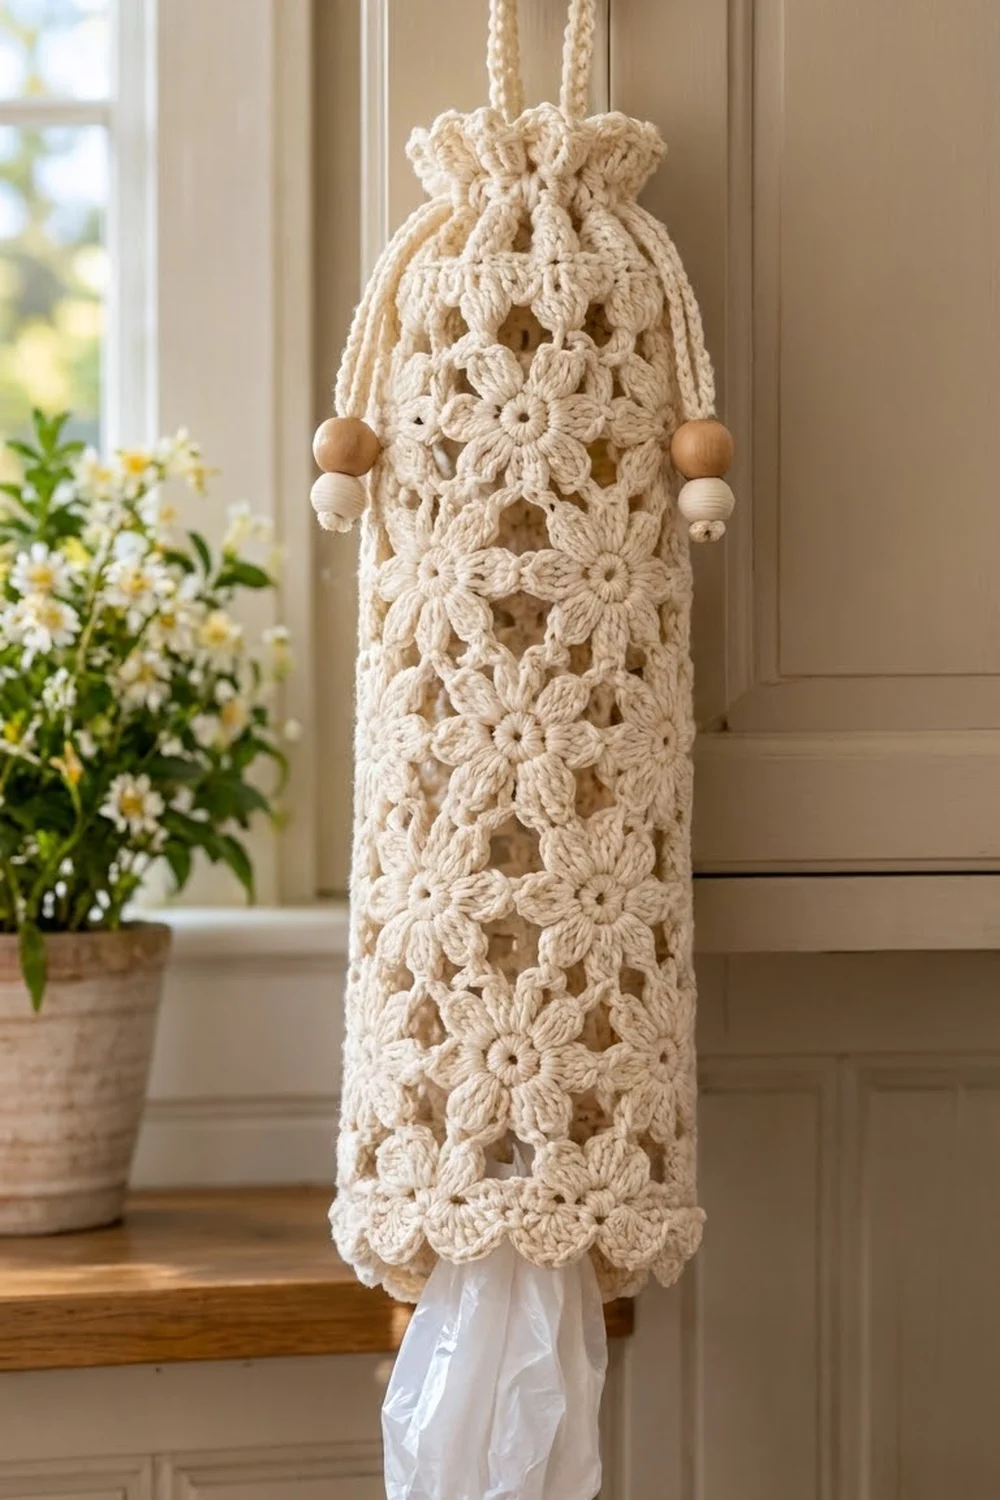
Plastic bags pile up fast. This lacy holder gives them a neat place to hang while still looking pretty in the kitchen. The Daisy Lattice Bag Holder is a tall cream tube covered in small six-petal flowers. You stuff bags in at the top and pull them out of the bottom one at a time.
The design uses one color of cotton, so the flower texture stands out. Wooden beads on the drawstring ends give it a warm farmhouse look. The scalloped bottom edge and the gathered top ruffle frame the lace panel neatly. This pattern uses US crochet terms throughout.
The finished holder is 16 in (40.6 cm) around and 21.25 in (54.0 cm) tall, not counting the hanging loop. Laid flat, it measures 8 in (20.3 cm) wide.
Construction is simple. You crochet one flat lace panel in rows, seam it into a tube, and then add the bottom scallop edge and the top ruffle in rounds. Last, you make two drawstring cords and a hanging loop and add the beads.
Finished Size and Construction
- Finished size: 16 in (40.6 cm) circumference x 21.25 in (54.0 cm) tall
- Skill level: Intermediate (clusters, working into chain spaces, seaming)
- Terminology: US crochet terms
- Yarn weight: Worsted (#4) cotton
- Hook: 5.0 mm (H-8)
- Number of pieces: 1 lace body panel, 2 drawstring cords, 1 hanging loop
- Layout: one flat panel seamed into a tube; flowers in 9 staggered bands
- Panel size before seaming: 16.25 in (41.3 cm) wide x 18.5 in (47.0 cm) tall
- Size before edgings: 16 in (40.6 cm) circumference x 18.5 in (47.0 cm) tall
- Edging depth: bottom scallop 1 in (2.5 cm); top eyelet and ruffle 1.75 in (4.4 cm)
Materials
Yarn: Use a smooth worsted-weight cotton or cotton blend. Cotton shows the flower clusters clearly, keeps its shape when stuffed with bags, and holds up to washing. Avoid fuzzy yarns, because they blur the lace.
- Cream: 200 g, about 340 m (372 yd)
This amount includes a margin of about 15% for your gauge swatch and any small differences in tension.
Tools and notions:
- 5.0 mm (H-8) crochet hook
- Tapestry needle
- 4 natural wooden beads, 16 mm, with holes large enough for the cord
- 4 cream wooden or ceramic beads, 10 mm
- Stitch markers
- Measuring tape
- Rust-proof pins and a blocking mat
- A rolled towel about 5 in (12.7 cm) across, for blocking
Abbreviations (US Terms)
- ch – chain
- sl st – slip stitch
- sc – single crochet
- sc2tog – single crochet 2 together
- dc – double crochet
- sp – space
- st(s) – stitch(es)
- RS / WS – right side / wrong side
- rep – repeat
Special stitch – Cluster (cl): *Yarn over, insert hook in the stitch, yarn over and pull up a loop, yarn over and draw through 2 loops; repeat from * 2 more times in the same stitch (4 loops on hook). Yarn over and draw through all 4 loops. One cl is one petal.
Flower group: (cl, ch 3, cl, ch 3, cl) all in the same stitch. This makes a fan of three petals.
Gauge and Checkpoints
Gauge: 16 sc = 4 in (10.2 cm). One 4-row flower band is 2 in (5.1 cm) tall. One flower repeat (8 sts) is 2 in (5.1 cm) wide.
Test swatch: Ch 18. Work Rows 1–2 below (17 sc), then one Type 1 band (Rows 3–6), which gives you 2 flowers. The swatch should be 4.25 in (10.8 cm) wide, and the band alone should be 2 in (5.1 cm) tall.
- Swatch too big: go down one hook size.
- Swatch too small: go up one hook size.
- Width right but bands too tall: pull each cluster snug before you close it.
Checkpoints on the panel:
- After Row 2: 16.25 in (41.3 cm) wide, 0.5 in (1.3 cm) tall
- After Row 10: 4.5 in (11.4 cm) tall
- After Row 22: 10.5 in (26.7 cm) tall
- After Row 38: 18.5 in (47.0 cm) tall
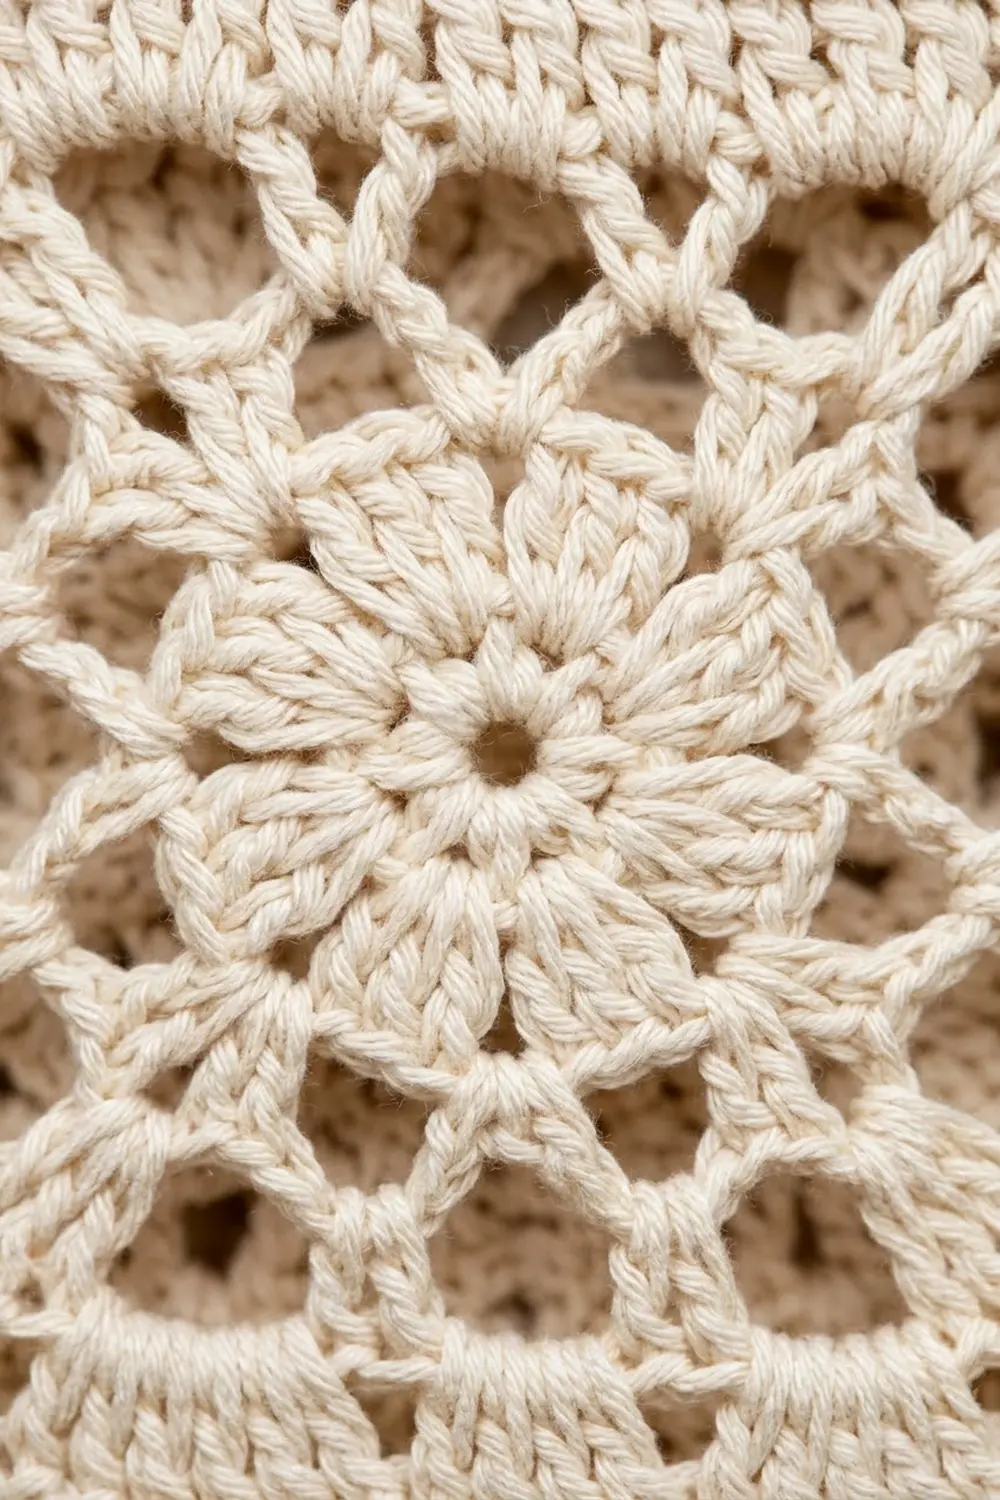
Body Panel
The panel is worked flat in rows across a multiple of 8 + 1 stitches. Every flower band has 4 rows:
- Row A: lower petals
- Row B: anchor row
- Row C: upper petals
- Row D: reset row
Row D always brings the count back to 65 sc. Bands alternate between Type 1 (8 flowers) and Type 2 (7 flowers, shifted half a repeat). This shift makes the staggered layout.
Foundation: Ch 66.
Row 1 (RS): Sc in 2nd ch from hook and in each ch across, turn. (65 sc)
Row 2 (WS): Ch 1, sc in each sc across, turn. (65 sc)
Type 1 Band (Rows 3–6)
Row 3 (RS, lower petals): Ch 1, sc in first sc, ch 3, skip 3 sc, flower group in next sc, ch 3, skip 3 sc, sc in next sc; rep from * 7 more times, turn. (8 flower groups = 24 cl; 9 sc)*
Row 4 (WS, anchor): Ch 1, sc in first sc, ch 4, sc in top of middle cl of next flower group, ch 4, sc in next sc; rep from * 7 more times, turn. (17 sc)* The two outer clusters of each group stay free and open out as petals.
Row 5 (RS, upper petals): Ch 1, sc in first sc, ch 3, flower group in next sc (the flower center), ch 3, sc in next sc; rep from * 7 more times, turn. (8 flower groups; 9 sc)* Each flower now has 3 petals below its center and 3 above.
Row 6 (WS, reset): Ch 1, sc in first sc, 2 sc in next ch-3 sp, skip cl, 1 sc in next ch-3 sp, sc in middle cl, 1 sc in next ch-3 sp, skip cl, 2 sc in next ch-3 sp, sc in next sc; rep from * 7 more times, turn. (65 sc)* Count: 1 + (8 repeats x 8 sts) = 65.
Type 2 Band (Rows 7–10, offset)
Row 7 (RS): Ch 1, sc in first sc, ch 3, skip 3 sc, sc in next sc, ch 3, skip 3 sc, flower group in next sc, ch 3, skip 3 sc, sc in next sc; rep from * 6 more times, ch 3, skip 3 sc, sc in last sc, turn. (7 flower groups; 10 sc)*
Row 8 (WS): Ch 1, sc in first sc, ch 3, sc in next sc, ch 4, sc in middle cl, ch 4, sc in next sc; rep from * 6 more times, ch 3, sc in last sc, turn. (17 sc)*
Row 9 (RS): Ch 1, sc in first sc, ch 3, sc in next sc, ch 3, flower group in next sc, ch 3, sc in next sc; rep from * 6 more times, ch 3, sc in last sc, turn. (7 flower groups; 10 sc)*
Row 10 (WS): Ch 1, sc in first sc, 3 sc in ch-3 sp, sc in next sc, work the Row 6 repeat (from * to end of bracket) 7 times, 3 sc in last ch-3 sp, sc in last sc, turn. (65 sc) Count: 5 + (7 x 8) + 4 = 65.
Continue the Panel
- Rows 11–14: Type 1 band.
- Rows 15–18: Type 2 band.
- Rows 19–34: Keep alternating, ending with a Type 2 band on Rows 31–34.
- Rows 35–38: Type 1 band.
You now have 9 bands: 5 of Type 1 and 4 of Type 2. Fasten off, leaving a 24 in (61.0 cm) tail for seaming. (65 sc on Row 38)
Panel check: 16.25 in (41.3 cm) wide x 18.5 in (47.0 cm) tall.
Seam the Tube
- Fold the panel in half with the RS together, so the two side edges meet.
- Using the long tail, whipstitch the edges together row by row, from Row 38 down to Row 1.
- Lay the first and last sc of each sc row directly on top of each other, so the two seam stitches act as one stitch.
- Turn the tube RS out.
Tube check: 64 stitches around, 16 in (40.6 cm) circumference, 8 in (20.3 cm) wide when flat.
Hanging Loop and Drawstrings
Hanging loop: Ch 41. Sc in 2nd ch from hook and in each ch across. (40 sc, 10 in / 25.4 cm long) Fasten off.
- Fold the strip in half.
- Sew both ends inside the tube, centered opposite the seam, overlapping the top 1 in (2.5 cm) of the panel.
- The loop then stands 4 in (10.2 cm) above the panel edge.
Drawstring cords (make 2): Ch 105. Sl st in the back bump of 2nd ch from hook and in each ch across. (104 sl st, about 26 in / 66.0 cm long) Fasten off and weave in the ends.
Edgings (Border)
Edging gauge: The edgings follow the panel gauge, 16 sts = 4 in (10.2 cm), so 64 stitches around equals 16 in (40.6 cm).
Bottom Scallop Edge
Hold the tube upside down and join the yarn at the seam in the free loops of the foundation chain.
Rnd 1: Ch 1, sc in each foundation loop around, treating the two seam loops as one. Sl st to the first sc. (64 sc)
Rnd 2: Ch 1, sc in next 2 sts, sc2tog; rep from * 15 more times, sl st to the first sc. (48 sts)* That is 64 – 16 decreases = 48. The opening is now 12 in (30.5 cm) around and 6 in (15.2 cm) wide when flat. This is snug enough to hold the bags in and loose enough to pull one out.
Rnd 3: Ch 1, sc in next st, skip 2 sts, 5 dc in next st, skip 2 sts; rep from * 7 more times, sl st to the first sc. (8 scallops: 8 sc + 40 dc = 48 sts)* Fasten off.
Why it works: each scallop uses exactly 6 stitches (1 sc + 2 skipped + 1 shell base + 2 skipped), and 48 ÷ 6 = 8 even scallops.
Top Eyelet and Ruffle
Join the yarn at the seam in Row 38.
Rnd 1 (eyelets): Ch 4 (counts as dc + ch 1), skip next st, dc in next st, ch 1, skip next st; rep from * 30 more times, sl st to the 3rd ch of beginning ch-4. (32 dc, 32 ch-1 sps)*
Rnd 2: Ch 1, sc in each dc and in each ch-1 sp around, sl st to the first sc. (64 sc)
Rnd 3: Ch 3 (counts as dc), dc in each st around, sl st to the top of ch-3. (64 dc)
Rnd 4: Ch 1, sc in next st, skip 1 st, 5 dc in next st, skip 1 st; rep from * 15 more times, sl st to the first sc. (16 shells)* Fasten off.
Why it works: each shell uses 4 stitches, and 64 ÷ 4 = 16. Because the ruffle keeps the full 64 stitches, it bunches into a frill when you pull the drawstrings closed.
Threading and Beads
- First cord: Start at the left side. Weave the first cord over and under each dc post of Rnd 1, all the way around, and bring it out next to where it went in. Both ends now hang on the left.
- Second cord: Start at the right side and thread it the same way. Both of its ends hang on the right.
- Beads: On each of the 4 cord ends, slide on one 16 mm wooden bead and then one 10 mm cream bead. Tie an overhand knot below the beads and trim the end 0.5 in (1.3 cm) below the knot.
Each side now has two hanging ends with 5 in (12.7 cm) tails, the same as the finished piece.
Final Blocking
- Weave in all remaining ends along sc rows so they don’t show through the lace.
- Soak the holder in cool water for 10 minutes, then press out the water gently. Don’t wring it.
- Roll it in a dry towel to remove extra moisture.
- Slide the 5 in (12.7 cm) rolled towel inside the tube.
- Lay it flat and smooth it to 8 in (20.3 cm) wide and 18.5 in (47.0 cm) tall from Row 1 to Row 38.
- Pin each bottom scallop into a rounded point. Fluff the top shells by hand.
- Let it dry completely, then remove the towel and pull the drawstrings closed.
Final Quality-Control Checklist
- 65 sc on every reset row (Rows 2, 6, 10, … 38)
- 9 bands of flowers that alternate 8 / 7 / 8, and so on, ending with 8
- Every flower has 3 lower and 3 upper petals
- Seam lies flat and the stitches line up row to row
- Bottom edge: 48 sts and 8 even scallops
- Top: 32 eyelets, 64 sc, 64 dc, and 16 shells
- Finished size is 16 in (40.6 cm) around and 21.25 in (54.0 cm) tall
- Loop is secure and centered opposite the seam
- Four beaded cord ends, two on each side, with tight knots
Troubleshooting
- Count is off on a reset row: Make sure you skipped both outer clusters and worked 2 / 1 / 1 / 1 / 2 sc into the four spaces.
- Flowers lean to one side: On Row A, check that you skip exactly 3 sc on each side of the flower group.
- Panel is narrower than the swatch: Your chain-3 spaces are too tight. Loosen your chain stitches, or chain with a hook one size larger.
- Bottom is too loose and bags fall out: Rework Rnd 2 as sc 1, sc2tog to get 43 sts. You’ll then need to adjust the scallops to 7 groups and add 1 extra sc.
- Top won’t close fully: Thread the cords through every dc, not every other one.
- Seam ripples: Keep stitching one edge stitch to one edge stitch. Don’t skip rows.
Care
Hand wash or machine wash on a gentle cycle in cool water, then reshape and dry flat over a rolled towel. Remove the wooden beads before washing, or keep them out of long soaks.
Final Notes
The measurements build on each other in a simple chain:
- 16 sc = 4 in (10.2 cm), so 65 sc make a panel 16.25 in (41.3 cm) wide.
- After seaming, the tube has 64 stitches around, or 16 in (40.6 cm).
- Nine 2 in (5.1 cm) bands plus 0.5 in (1.3 cm) of foundation rows give a body 18.5 in (47.0 cm) tall.
- The 1 in (2.5 cm) bottom scallop and 1.75 in (4.4 cm) top ruffle bring the total height to 21.25 in (54.0 cm).
Check your swatch, count each reset row, and the rest follows. Happy crocheting!