

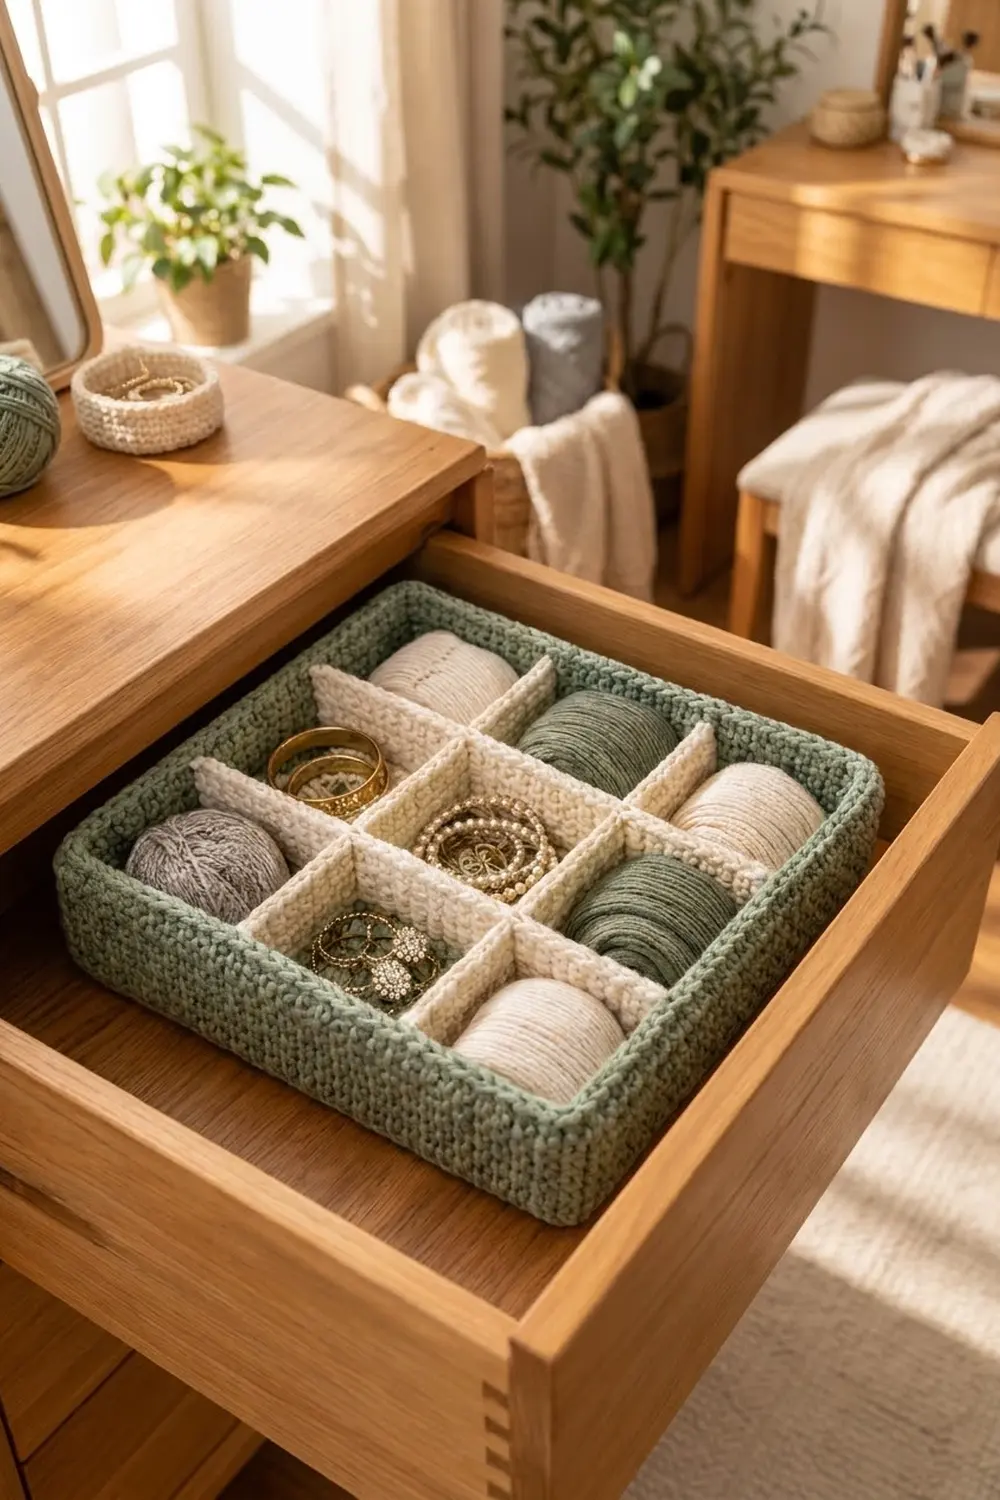
This sturdy drawer organizer pairs a soft sage-green tray with crisp cream divider walls. Nine neat compartments hold rolled socks, scarves, bangles and rings, and the whole piece slips into a standard dresser drawer.
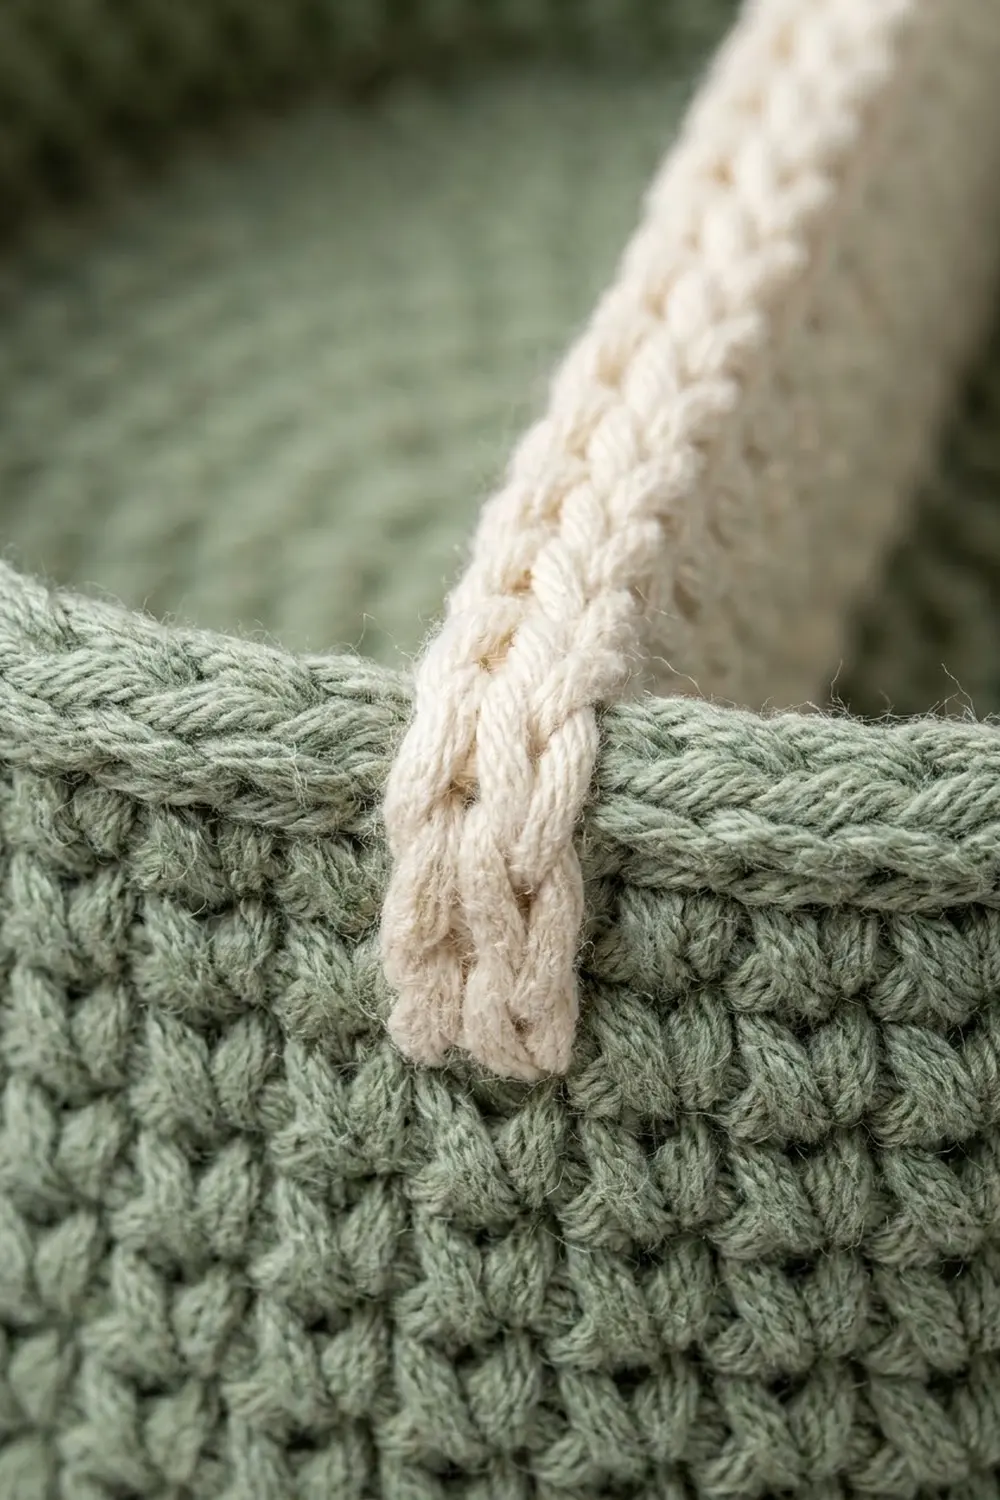
The look is calm and modern: dense single crochet, square corners, and a rope-like rim that frames the grid. Two colors keep it simple, and cotton yarn gives it enough body to stand on its own.
The pattern uses US crochet terms. The base of the finished tray measures 12 x 9 in (30.5 x 22.9 cm), and the walls are 3.4 in (8.6 cm) tall including the rim. The outer footprint is about 12.5 x 9.5 in (31.8 x 24.1 cm).
You will crochet a flat rectangular base in rows, turn the walls up with a back-loop round, and finish with a crab-stitch rim. The cream dividers are worked as flat strips, folded in half for stiffness, and sewn in place stitch by stitch.
Finished Size and Construction
- Finished size: base 12 x 9 in (30.5 x 22.9 cm); height 3.4 in (8.6 cm)
- Skill level: Intermediate
- Terminology: US crochet terms
- Yarn weight: Worsted (#4), cotton or cotton blend
- Hook: 4.5 mm (US 7)
- Number of pieces: 9 (1 tray, 2 long dividers, 6 short divider segments)
- Layout: 3 x 3 grid, 9 compartments, each about 4 x 3 in (10.2 x 7.6 cm)
- Long divider size: 12 x 2.8 in (30.5 x 7.1 cm), folded
- Short segment size: 2.75 x 2.8 in (7.0 x 7.1 cm), folded
- Size before border: 12 x 9 in base, walls 3 in (7.6 cm) tall
- Border depth: 0.4 in (1.0 cm), 2 rounds
Materials
Choose a smooth worsted cotton or cotton-acrylic blend with roughly 190 m per 100 g. Cotton holds its shape well and does not stretch under the weight of jewelry. Avoid fuzzy or very soft acrylics, because the walls will slump.
- Color A, sage green (tray): 350 g, approx. 665 m
- Color B, cream (dividers): 350 g, approx. 665 m
These quantities include a margin of about 15% for gauge differences, swatching and sewing.
Tools:
- 4.5 mm (US 7) crochet hook
- Tapestry needle
- 8–10 locking stitch markers
- Measuring tape
- Rustproof pins
- Spray bottle and blocking mat
Abbreviations (US Terms)
- ch – chain
- sc – single crochet
- sl st – slip stitch
- st(s) – stitch(es)
- BLO – back loop only
- rev sc – reverse single crochet (crab stitch)
- rnd – round
Special stitch – rev sc: Work from left to right (if you are right-handed). Insert the hook into the next st to the right, yarn over and pull up a loop, then yarn over and draw through both loops on the hook. This makes the twisted, rope-like rim.
Gauge and Checkpoints
Gauge: 16 sc and 20 rows = 4 in (10.2 cm) in sc worked in rows, firmly.
That works out to 4 sts per inch and 5 rows per inch. Tight gauge matters more than usual here, because it is what makes the walls stand up.
Test one piece first. Make one short divider segment (below) before anything else. Before folding, it should measure 2.75 in (7.0 cm) wide and 5.6 in (14.2 cm) tall. If it does, your gauge is right and you already have one finished piece.
Checkpoints:
- Base after Row 10: 12 in (30.5 cm) wide, 2 in (5.1 cm) tall
- Base complete: 12 x 9 in (30.5 x 22.9 cm)
- After Rnd 1: perimeter about 43 in (109.2 cm), lying flat
- After Rnd 16: walls 3 in (7.6 cm) tall
- After border: walls 3.4 in (8.6 cm) tall
If your piece is too big, go down to a 4.0 mm hook. If it is too small, go up to a 5.0 mm hook. Do not change the stitch counts, because the joining math depends on them.
Tray (Make 1, Color A)
Base
Ch 49.
Row 1: Sc in 2nd ch from hook and in each ch across, turn. (48 sc)
Rows 2–45: Ch 1 (does not count as a st), sc in each st across, turn. (48 sc)
Do not fasten off. The base should measure 12 x 9 in (30.5 x 22.9 cm).
Edge Round
This is a conversion round. It sets the stitch count for the walls and rim.
Rnd 1: Ch 1, do not turn. Working along Row 45, sc in each of 48 sts, then work 1 more sc in the last st (corner st). Rotate and work down the side: sc in row ends, working in 4 of every 5 row ends (36 sc across 45 rows). Work 1 sc in the first free loop of the foundation ch (corner st). Then sc in each of the 48 free loops along the foundation, working the first of these into that same loop. Work 1 more sc in the last free loop (corner st). Work up the second side as before (36 sc). Work 1 more sc in the first st of Row 45 (corner st). Join with sl st to first sc.
Count: (48 + 48 sts worked 1 per existing st) + (72 sc worked into row ends) + (4 corner sts) = 172 sc.
Each long side has 48 sts between corner sts, and each short side has 36. Place a marker in each of the 4 corner sts.
Walls
Rnd 2: Ch 1, sc in BLO of each st around, join. (172 sc)
This back-loop round creates a crisp fold line, so the walls turn up at a clean right angle.
Rnds 3–16: Ch 1, sc in each st around, join. (172 sc)
The walls measure 3 in (7.6 cm) from the fold line. Push the walls up from inside as you go so the corners stay square. Continue directly to the border.
Dividers (Color B)
All dividers use the same method. Each one is worked flat, folded in half lengthwise, and seamed along the bottom. The fold forms a smooth top edge, and the double layer gives stiffness.
Long Divider (Make 2)
Ch 49.
Row 1: Sc in 2nd ch from hook and in each ch across, turn. (48 sc)
Rows 2–28: Ch 1, sc in each st across, turn. (48 sc)
The piece measures 12 x 5.6 in (30.5 x 14.2 cm). Do not fasten off.
Seam: Fold the piece in half so the foundation edge meets Row 28. Ch 1, then sc across through both layers, working each st of Row 28 together with the matching free loop of the foundation ch. (48 sc)
End edging: Without turning, work down the short end through both layers, 1 sc per pair of row ends. (14 sc) Fasten off, join yarn to the other short end and repeat. (14 sc)
Folded size: 12 x 2.8 in (30.5 x 7.1 cm). Leave a 24 in (61.0 cm) tail for sewing.
Short Divider Segment (Make 6)
Ch 12.
Row 1: Sc in 2nd ch from hook and in each ch across, turn. (11 sc)
Rows 2–28: Ch 1, sc in each st across, turn. (11 sc)
Seam: Fold and seam as for the long divider. (11 sc)
End edging: 14 sc along each short end, through both layers.
Folded size: 2.75 x 2.8 in (7.0 x 7.1 cm). Leave a 24 in (61.0 cm) tail.
Make All Pieces
- Color A: 1 tray
- Color B: 2 long dividers, 6 short divider segments
Layout seen from above, with the long sides at top and bottom (L = long divider, S = short segment):
+------+------+------+
|      S      S      |
+--L---+--L---+--L---+
|      S      S      |
+--L---+--L---+--L---+
|      S      S      |
+------+------+------+
The two long dividers run the full 12 in (30.5 cm) length. Each of the three bands holds two short segments, placed in line so the cross lines look continuous.
Joining
Use whipstitch with the cream tails, catching one loop of the divider and one loop of the tray each time. Keep stitches snug but not puckered. Each divider should stand straight and upright without pulling the floor into a ridge.
Long dividers, stitch-to-stitch logic: Each long divider’s bottom seam has 48 sts, and each base row has 48 sts. Sew 1 divider st to 1 base st.
- Mark base Rows 15 and 30, counting from the foundation edge. This splits the base into bands of 14, 14 and 15 rows.
- Pin a long divider upright along Row 15 and sew its 48 seam sts to the 48 sts of that row.
- Sew each 14-st end edging to the short wall, matching 1 edging st to 1 wall rnd (Rnds 2–15).
- Repeat with the second long divider on Row 30.
Short segments, stitch-to-stitch logic: Each segment’s bottom has 11 sts and spans a 14- or 15-row band of the base. At 4 sts to 5 rows, 11 sts covers 13.75 rows, so ease the bottom in at roughly 4 sts per 5 rows. In the 15-row band, spread the one extra row over the whole length.
- On each long wall and each long divider, mark st 16 and st 32, counting from the same short end. This splits the 48 sts into groups of 15, 15 and 16.
- Place segments at both marked positions in each band: between the first long wall and the first divider, between the two dividers, and between the second divider and the other long wall.
- Sew the bottom to the base, then sew each 14-st end to the wall (Rnds 2–15) or to the face of the long divider.
Size checkpoint: The base should still measure 12 x 9 in (30.5 x 22.9 cm). If it has drawn in, your joining is too tight, so loosen those seams.
Border
Border gauge: same as the tray, 4 sts per inch. The rim adds 0.4 in (1.0 cm) of height.
Rejoin Color A if you fastened off; otherwise continue from Rnd 16.
Rnd 17: Ch 1, sc in each st around, join. (172 sc: 48 on each long side and 36 on each short side between corner sts, plus 4 corner sts)
Rnd 18: Ch 1, rev sc in each st around, working left to right, join. (172 rev sc: 48 on each long side and 36 on each short side, plus 4 corner sts) Fasten off and weave in ends.
Why the math works: The walls are never increased or decreased, so every round from Rnd 1 to Rnd 18 holds 172 sts. Each long side keeps 48 sts, matching the 48-st base and the 48-st long dividers. Each short side keeps 36 sts, which fits the 9 in (22.9 cm) depth at 4 sts per inch. The corner sts are counted separately, so nothing is added twice and the rim lies flat without ruffling.
Final Blocking
- Lightly mist the whole organizer with water until damp, not wet.
- Stand it on a blocking mat and push all walls straight up from inside.
- Pinch each corner square and pin the base flat to the mat.
- Straighten every divider so it stands vertical with its top fold level.
- Fill each compartment loosely with rolled towels or small cardboard boxes to hold the shape.
- Let it dry completely, for at least 24 hours.
- Remove the fillers and check the measurements: 12 x 9 in (30.5 x 22.9 cm) base, 3.4 in (8.6 cm) height.
Final Quality-Control Checklist
- Base measures 12 x 9 in (30.5 x 22.9 cm)
- All 172 sts present in Rnds 1–18
- Fold line from Rnd 2 is crisp on all four sides
- Walls stand 3.4 in (8.6 cm) tall without slumping
- Rev sc rim is even and rope-like all the way around
- Long dividers sit on Rows 15 and 30, parallel to the long walls
- Short segments line up at sts 16 and 32 on both sides
- Dividers sit about 0.6 in (1.5 cm) below the top of the rim
- All ends are woven in securely on the inside
Troubleshooting
Walls flare outward: Your gauge is too loose. Rework with a smaller hook, or block with fillers and let it dry fully.
Walls lean inward: Rnd 1 has too few sts. Recount for 172 and check that you worked 36 sc along each short side.
Base ruffles along the short edges: You worked into every row end. Rework Rnd 1, skipping 1 row end in every 5.
Dividers bow or wave: The bottom seam was sewn tighter than the divider. Unpick it and sew 1 st to 1 st.
Short segments don’t line up: Recount the markers at sts 16 and 32 on both the walls and the long dividers.
Rim looks flat, not twisted: Make sure you are working rev sc from left to right, not regular sc.
Care
Hand wash in cool water with mild soap, then reshape and dry flat with the compartments filled. Do not tumble dry.
Final Notes
The measurement chain is simple. A 48-st base with 45 rows gives 12 x 9 in (30.5 x 22.9 cm). Rnd 1 converts the edge to 172 sts, and that count stays fixed through the walls and rim. Fifteen wall rounds give 3 in (7.6 cm), and the two border rounds add 0.4 in (1.0 cm). The 48-st long dividers match the base rows exactly, and the 11-st short segments fit the 2.8 in (7.1 cm) bands between them.
Check your gauge on the first short segment and trust the counts. Your organizer will fit together square and firm.
Happy crocheting!