

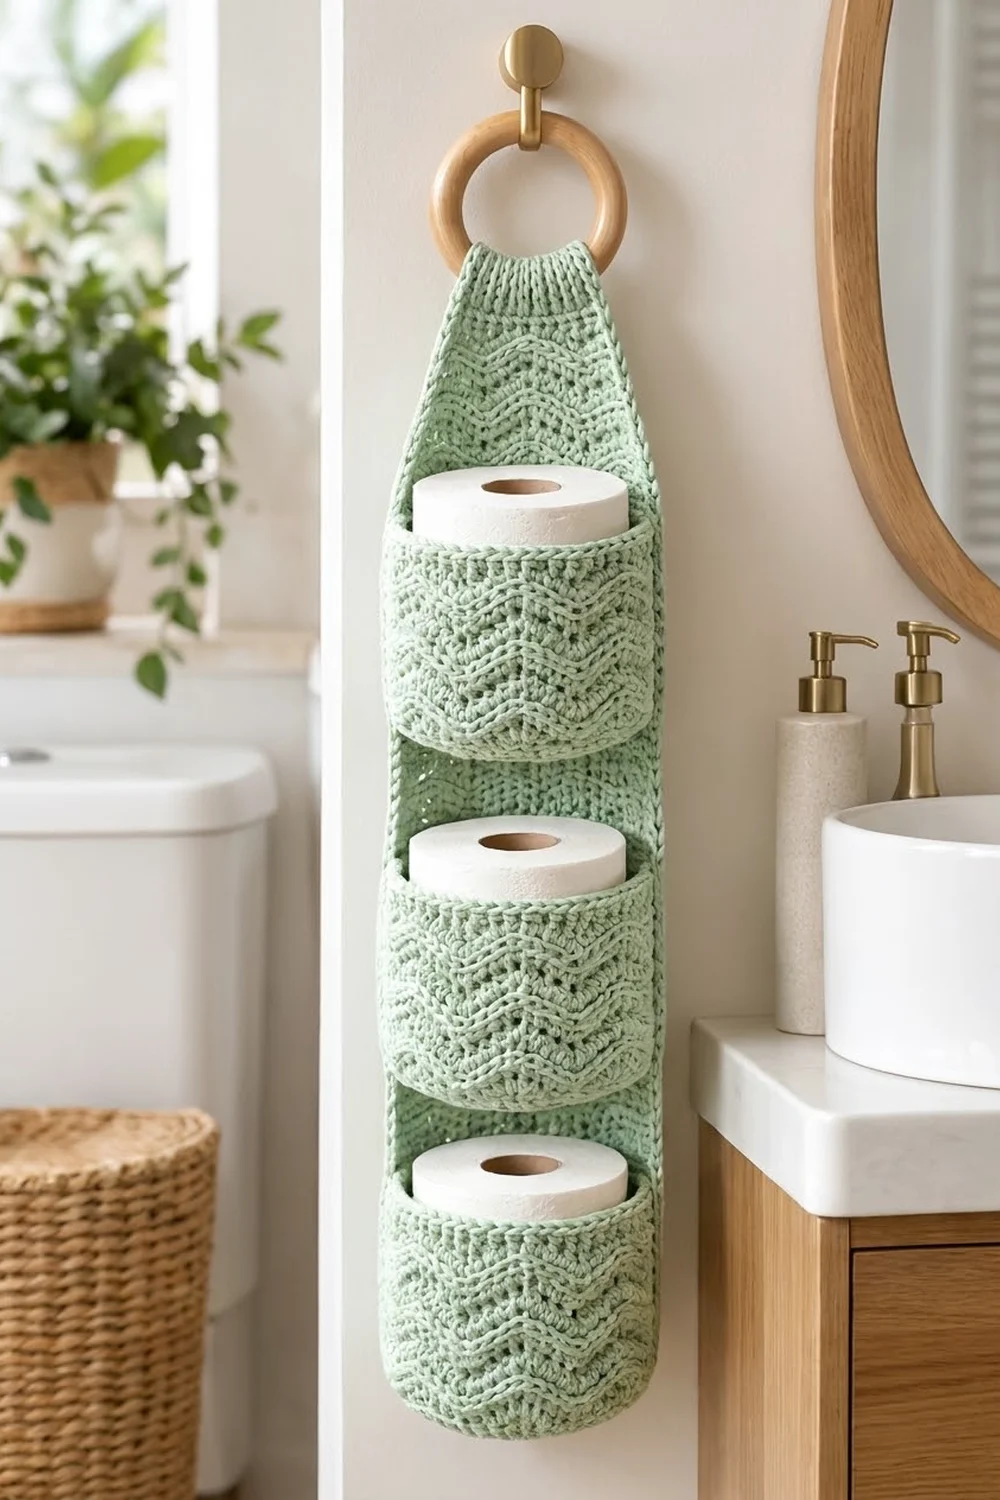
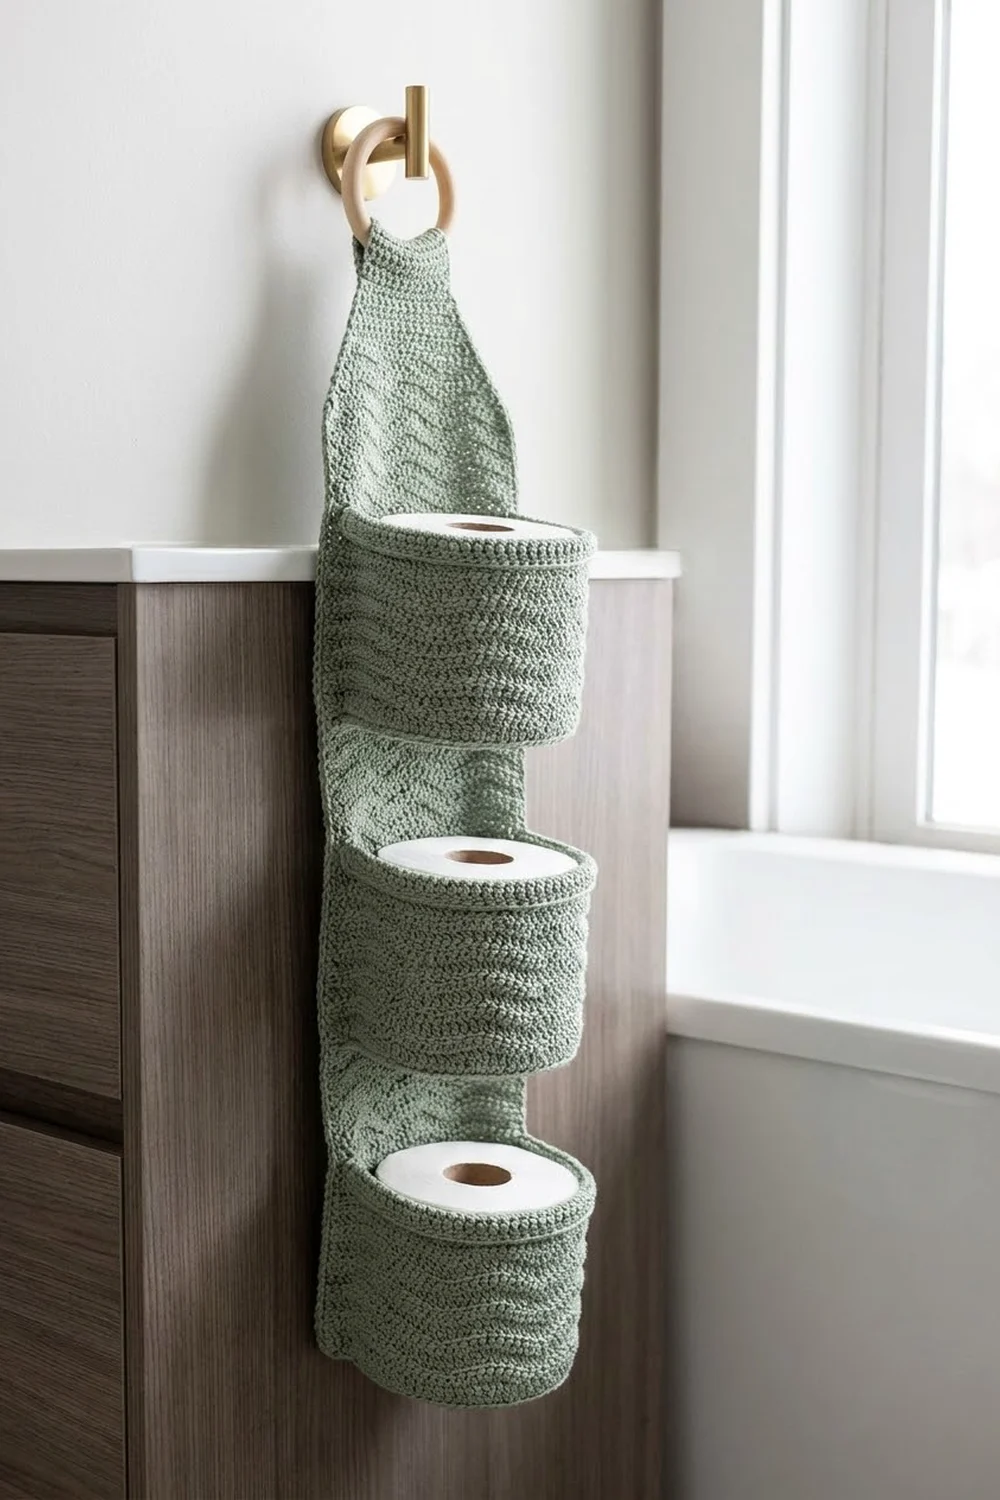
This hanging holder stores three spare toilet rolls in a soft column of sage-green ripple texture. It hangs from a wooden ring on a hook, so it suits a small bathroom where shelf space is tight.
The design uses one color throughout. Ripple rows of double crochet alternate with single crochet ripple rows, which gives the waves a ridged, knit-like look. The pockets have plain rims with a rolled reverse single crochet edge that frames each roll.
The pattern uses US crochet terms. The finished holder measures about 7 in (17.8 cm) wide including the border and 26.75 in (67.9 cm) long from the bottom of the ring. Each pocket is about 5.75 in (14.6 cm) across and 3.75 in (9.5 cm) tall.
Construction is simple. You work the back panel flat in rows: a straight ripple section first, then a tapered shoulder and a narrow neck band. You crochet three pockets in the round from the base up, sew them to the panel, add a border around the panel, and fold the neck over the ring.
Finished Size and Construction
- Finished size: 7 in (17.8 cm) wide x 26.75 in (67.9 cm) long, hanging
- Skill level: Intermediate
- Terminology: US crochet terms
- Yarn weight: Worsted (#4), cotton or cotton blend
- Hook: 5.0 mm (H-8)
- Number of pieces: 4 (1 back panel, 3 pockets)
- Layout: 3 pockets stacked vertically on one panel
- Pocket size: 5.75 in (14.6 cm) diameter x 3.75 in (9.5 cm) tall
- Panel size before border: 6.5 in (16.5 cm) wide x 25.5 in (64.8 cm) long, without the neck band
- Border depth: about 0.25 in (0.6 cm)
Materials
Yarn: Use a smooth worsted-weight cotton or cotton blend. Cotton holds its shape in a damp bathroom and shows the ripple ridges clearly. Avoid fuzzy or very stretchy yarn, because the pockets need to stay firm around the rolls.
- Sage green: 300 g / about 450 m total
- Back panel: about 100 g / 150 m
- Each pocket: about 50 g / 75 m (150 g / 225 m for all three)
- Margin: about 50 g / 75 m
These amounts include a margin of about 20% for gauge differences and sewing tails.
Tools:
– 5.0 mm (H-8) crochet hook
– Wooden ring, 3 in (7.6 cm) outer diameter
– Tapestry needle
– 4–6 locking stitch markers
– Rust-proof pins
– Tape measure
– Scissors
– 3 toilet rolls for fitting and blocking
Abbreviations (US Terms)
- ch – chain
- sl st – slip stitch
- sc – single crochet
- hdc – half double crochet
- dc – double crochet
- sc2tog – single crochet 2 together
- dc2tog – double crochet 2 together
- BLO – back loop only
- rev sc – reverse single crochet (crab stitch)
- st(s) – stitch(es)
- RS / WS – right side / wrong side
- rep – repeat
Special stitches:
- Ripple repeat (dc version), worked over 12 sts: 2 dc in next st, dc in next 3 sts, dc2tog twice, dc in next 3 sts, 2 dc in next st. This uses 12 sts and makes 12 sts.
- Ripple repeat (sc version), worked over 12 sts: 2 sc in next st, sc in next 3 sts, sc2tog twice, sc in next 3 sts, 2 sc in next st. This uses 12 sts and makes 12 sts.
- Rev sc: Work sc from left to right (right to left if you crochet left-handed). Insert the hook in the next st to the right, yarn over, pull up a loop, yarn over and pull through both loops.
The increases form the peaks of each wave and the decreases form the valleys. The repeat is symmetrical, so the waves stay lined up whether you turn rows or work in rounds.
Gauge and Checkpoints
Gauge in ripple pattern: 16 sts = 4 in (10.2 cm) measured flat. One 12-st repeat = 3 in (7.6 cm). One dc row plus one sc row = 0.75 in (1.9 cm).
Test one piece first. Make one pocket before you start the panel. It uses about 50 g, checks your stitch and round gauge, and tells you right away whether a roll fits.
Checkpoints:
– Pocket base after Round 6: 5.75 in (14.6 cm) across
– Pocket circumference after Round 7: 18 in (45.7 cm)
– Finished pocket height: 3.75 in (9.5 cm)
– Panel width after Row 4: 6.5 in (16.5 cm)
– Panel length after Row 20: 7.5 in (19.1 cm)
– Panel length after Row 60: 22.5 in (57.2 cm)
– Panel length after Row 68: 25.5 in (64.8 cm)
If your piece is too big, go down 0.5 mm in hook size. If it is too small, go up 0.5 mm. A pocket that is too tight will bunch the roll. A pocket that is too loose will sag away from the panel.
Back Panel
Work the panel flat in turned rows. The ch at the start of each row does not count as a stitch.
Foundation: Ch 28.
Row 1 (RS): Dc in 3rd ch from hook and in each ch across. Turn. (26 dc)
Row 2 (WS): Ch 1, sc in first st, work the sc ripple repeat twice, sc in last st. Turn. (26 sts)
Row 3 (RS): Ch 2, dc in first st, work the dc ripple repeat twice, dc in last st. Turn. (26 sts)
Rows 4–60: Repeat Rows 2 and 3 alternately, ending with a Row 2 (sc) row on Row 60. (26 sts in every row)
You now have 30 dc rows and 30 sc rows. Checkpoint: 6.5 in (16.5 cm) wide x 22.5 in (57.2 cm) long.
Tapered Shoulder
The shoulder uses straight rows with no ripple, so the waves end in a calm, textured section. Each row decreases 1 st at each end.
Row 61 (RS): Ch 2, dc2tog, dc in next 20 sts, dc2tog. Turn. (22 sts)
Correction check: Row 60 has 26 sts. A dc2tog at each end uses 4 sts and leaves 22 in the middle. Row 61 is therefore: ch 2, dc2tog, dc in next 22 sts, dc2tog. (24 sts)
Row 62 (WS): Ch 1, sc2tog, sc in next 20 sts, sc2tog. Turn. (22 sts)
Row 63: Ch 2, dc2tog, dc in next 18 sts, dc2tog. Turn. (20 sts)
Row 64: Ch 1, sc2tog, sc in next 16 sts, sc2tog. Turn. (18 sts)
Row 65: Ch 2, dc2tog, dc in next 14 sts, dc2tog. Turn. (16 sts)
Row 66: Ch 1, sc2tog, sc in next 12 sts, sc2tog. Turn. (14 sts)
Row 67: Ch 2, dc2tog, dc in next 10 sts, dc2tog. Turn. (12 sts)
Row 68: Ch 1, sc2tog, sc in next 8 sts, sc2tog. Turn. (10 sts)
Checkpoint: the shoulder is 3 in (7.6 cm) tall, and the panel is 25.5 in (64.8 cm) long.
Neck Band
Rows 69–80: Ch 1, sc BLO in each st across. Turn. (10 sts)
The neck band is 2.5 in (6.4 cm) wide and 3 in (7.6 cm) long. Fasten off and leave a 20 in (50.8 cm) tail for wrapping the ring.
Pockets (Make 3)
Work each pocket in joined rounds with the RS facing; do not turn. The ch at the start of each round does not count as a stitch. Work the first st of each round into the same st as the join.
Base
Round 1: Make a magic ring. Ch 2, 12 dc in ring. Join with sl st to first dc. (12 sts)
Round 2: Ch 2, 2 dc in each st around. Join. (24 sts)
Round 3: Ch 2, [dc in next st, 2 dc in next st] 12 times. Join. (36 sts)
Round 4: Ch 2, [dc in next 2 sts, 2 dc in next st] 12 times. Join. (48 sts)
Round 5: Ch 2, [dc in next 3 sts, 2 dc in next st] 12 times. Join. (60 sts)
Round 6: Ch 2, [dc in next 4 sts, 2 dc in next st] 12 times. Join. (72 sts)
Checkpoint: the base lies flat and measures 5.75 in (14.6 cm) across.
Round 7: Ch 1, sc BLO in each st around. Join. (72 sts)
This round makes the crisp fold between the base and the sides. Checkpoint: the circumference is 18 in (45.7 cm).
Rippled Sides
Round 8: Ch 2, work the dc ripple repeat 6 times. Join. (72 sts)
Round 9: Ch 1, work the sc ripple repeat 6 times. Join. (72 sts)
Rounds 10–13: Repeat Rounds 8 and 9 twice. (72 sts in each round)
Leveling Round and Rim
Round 14: Ch 1, [sc in next 3 sts, hdc in next 2 sts, dc in next 2 sts, hdc in next 2 sts, sc in next 3 sts] 6 times. Join. (72 sts)
This round fills the wave valleys with taller stitches, so the rim comes out straight.
Rounds 15–16: Ch 1, sc in each st around. Join. (72 sts)
Round 17: Ch 1, rev sc in each st around. Join. (72 sts)
Fasten off and leave a 36 in (91.4 cm) tail for sewing. Checkpoint: the pocket is 3.75 in (9.5 cm) tall, and a standard roll stands about 0.5 in (1.3 cm) above the rim.
Make All Pieces
- Back panel: 1, sage green
- Pockets: 3, sage green
Layout (front view, top to bottom):
        [ wooden ring ]
        [ neck band, Rows 69–80 ]
        [ tapered shoulder, Rows 61–68 ]
        [ open panel, Rows 51–60 ]
        [ POCKET 3, on Rows 41–50 ]
        [ open panel, Rows 31–40 ]
        [ POCKET 2, on Rows 21–30 ]
        [ open panel, Rows 11–20 ]
        [ POCKET 1, on Rows 1–10 ]
Each pocket covers 10 rows, which is 3.75 in (9.5 cm). Each open gap is also 10 rows, 3.75 in (9.5 cm), which leaves room to lift a roll out.
Joining
Method: Whipstitch with the pocket tail through both loops of the pocket stitches and one strand of the panel stitches.
Stitch-to-stitch logic: The pockets and the panel are both 4 sts per inch, so you sew 1 pocket st to 1 panel st.
- Lay the panel flat with the RS facing up. Place a marker on the 5th st and the 22nd st of Row 1. This marks the center 18 sts and leaves 4 sts free at each side.
- On the pocket, mark the 18 sts at the back of Round 7. This is one quarter of the 72 sts, or 4.5 in (11.4 cm).
- Sew those 18 base sts to the 18 marked panel sts at Row 1, one to one.
- Mark the matching 18 back sts of Round 16, directly above. Pin them across the center 18 sts of Row 10 and sew them one to one. Leave the rev sc round free so it rolls forward.
- Whipstitch a vertical line at each end of the sewn arc, from Round 7 to Round 16. This keeps the sides of the pocket from pulling away.
- Attach Pocket 2 on Rows 21–30 and Pocket 3 on Rows 41–50 in the same way.
Tension: Pull each stitch snug enough to close the gap, but not tight enough to pucker the panel. The panel should stay 6.5 in (16.5 cm) wide behind each pocket.
Size checkpoint: After joining, the pockets are evenly spaced and the panel still measures 25.5 in (64.8 cm).
Border
The border is worked around the panel only: down one long side, across the bottom and up the other side. The neck band has no border.
Border gauge: 4 sc per inch along every edge.
Round 1 (RS): Join the yarn at the right-hand side of the panel, at the base of the neck (top of Row 68), and work down the side:
- Side 1: 2 sc in each dc row end and 1 sc in each sc row end.
- Shoulder: 4 dc rows and 4 sc rows give (4 x 2) + (4 x 1) = 12 sc.
- Straight section: 30 dc rows and 30 sc rows give (30 x 2) + (30 x 1) = 90 sc.
- Side total: 102 sc.
- Bottom: Work 1 sc in each of the 26 foundation chains, but put 3 sc in the first and last chains to turn the corners. That is 26 + 4 extra = 30 sc on the bottom, including both corners.
- Side 2: Work as Side 1, going up the other side. 102 sc
- Do not join into a ring. Total: 102 + 30 + 102 = 234 sc. Turn.
Round 2: Ch 1, rev sc in each sc back across. (234 sts) Fasten off.
Why the math works: A dc row is 0.5 in (1.3 cm) tall, so 2 sc fit along it. An sc row is 0.25 in (0.6 cm) tall, so 1 sc fits. Along the straight section, 90 sc over 22.5 in (57.2 cm) is 4 sc per inch. Along the bottom, 26 sc over 6.5 in (16.5 cm) is also 4 sc per inch. Because the border matches the panel gauge, the edges stay flat. The border adds about 0.25 in (0.6 cm) to each side, so the finished width is 7 in (17.8 cm).
Attach the Ring
Fold the neck band over the wooden ring toward the WS. Whipstitch the 10 sts of Row 80 to the back of Row 68, one to one. After folding, about 1.5 in (3.8 cm) of the band wraps the ring and about 1 in (2.5 cm) shows below it. Weave in all ends.
Final Blocking
- Wet the whole holder and gently squeeze out the water in a towel. Do not wring it.
- Lay it flat with the RS facing up and pockets facing upward.
- Pin the panel to 7 in (17.8 cm) wide and 25.5 in (64.8 cm) long, plus the border at the bottom.
- Push a toilet roll into each pocket to round out the sides and set the rims.
- Use your fingers to straighten the wave lines so each peak sits directly above the one below.
- Let it dry completely, then take out the rolls and remove the pins.
Final Quality-Control Checklist
- The panel has 26 sts in every row from Row 1 to Row 60.
- The shoulder steps down evenly from 24 sts to 10 sts.
- Each pocket has 72 sts in every round from Round 6 to Round 17.
- The wave peaks line up vertically on the panel and on every pocket.
- The pocket rims are level, with no dips over the wave valleys.
- The pockets sit on Rows 1–10, 21–30 and 41–50, centered across the panel.
- The border has 102 / 30 / 102 sts and lies flat.
- The ring is firmly enclosed and the neck seam doesn’t show from the front.
- All ends are woven in securely.
Troubleshooting
- The waves slant or drift: You are probably miscounting the edge stitches. Check that each row starts and ends with one plain st outside the repeats.
- The pocket base cups or ruffles: If it cups, your stitches are too tight, so loosen up or go up a hook size. If it ruffles, check your increase counts.
- The rim is wavy: Check that Round 14 has the dc stitches over the valleys (the dc2tog stitches) and the sc stitches over the peaks.
- A roll won’t fit: The pocket circumference is too small. Remake it on a larger hook, or add one more base round of 84 sts and work the ripple repeat 7 times.
- The panel sags under the pockets: Add a second vertical whipstitch line at each side of the pocket.
- The border ruffles: You have too many stitches. Recheck the 2-and-1 row-end spacing.
Care
Hand wash in cool water, reshape and dry flat. Don’t hang it to dry with rolls inside, because the weight can stretch the panel.
Final Notes
Each step builds on the last measurement. A gauge of 16 sts = 4 in (10.2 cm) gives a 26-st panel 6.5 in (16.5 cm) wide and a 72-st pocket 18 in (45.7 cm) around and 5.75 in (14.6 cm) across. Sixty rows give 22.5 in (57.2 cm) of straight panel, and the shoulder brings it to 25.5 in (64.8 cm). With the border and neck band, the holder hangs at 7 in (17.8 cm) wide and 26.75 in (67.9 cm) long. Check each number as you reach it, and the three pockets will hold your rolls neatly.
Happy crocheting!