

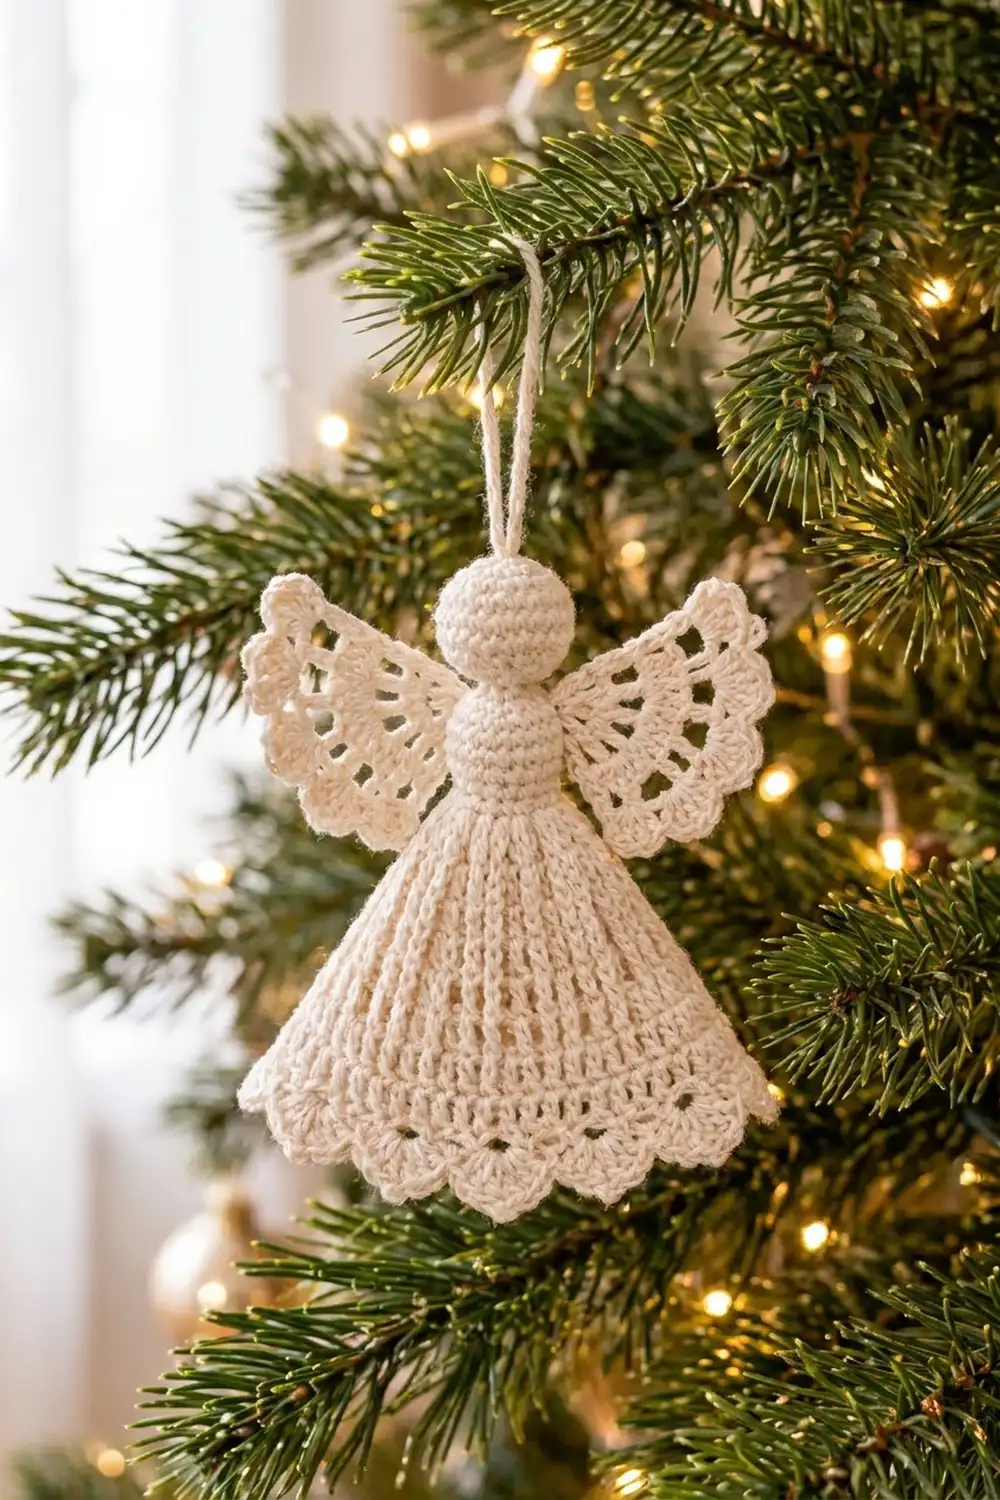
The Winter Grace Angel is a small, lacy Christmas ornament worked in cream cotton thread. She has a round, stuffed head and a short single crochet bodice. Below that, a fan-shaped skirt of open double crochet ribs ends in shells and a picot scallop. Two openwork fan wings sit behind her shoulders, and a chain loop at the top of the head lets her hang from a branch.
The whole angel is one color, a soft cream or ivory, so the texture does all the work. The style is classic heirloom lace: open spaces, crisp scallops, and a flat, starched finish that holds its shape on the tree.
This pattern uses US crochet terms. The finished angel is about 3.75 in (9.5 cm) tall from the top of the head to the hem. She measures about 4.5 in (11.4 cm) across the wingtips and about 4 in (10.2 cm) across the skirt hem. The hanging loop adds another 2 in (5.1 cm).
Construction is simple. You crochet a stuffed ball for the head, a flat skirt worked top-down in rows, and two small flat wings. The scalloped border is worked straight onto the skirt hem. Then you sew the head to the neck, sew the wings to the back of the bodice, add the loop, and block with starch.
Finished Size and Construction
- Finished size: 3.75 in (9.5 cm) tall without the loop; 4.5 in (11.4 cm) wingspan
- Skill level: Intermediate
- Terminology: US crochet terms
- Yarn weight: Lace (0), size 3 crochet cotton thread
- Hook: 2.25 mm (US B-1)
- Number of pieces: 1 ornament, made from 4 crocheted components (head, skirt, 2 wings) plus a chain loop
- Layout: Head on top, wings behind the bodice, skirt below
- Piece sizes: head 0.75 in (1.9 cm) in diameter; each wing 1.6 in (4.1 cm) long and 1.75 in (4.4 cm) wide across the scallops
- Skirt before border: 3.75 in (9.5 cm) wide at the hem, 2.4 in (6.1 cm) tall
- Border depth: 0.6 in (1.5 cm)
Materials
Choose a mercerized cotton thread in size 3. Mercerized cotton gives crisp stitch definition, takes starch well, and won’t fuzz on the tree. Avoid acrylic: it won’t block flat, and the lace will look soft and wavy.
- Cream cotton thread, size 3: about 8 g (approximately 30 m) per angel
Tools:
- 2.25 mm (US B-1) crochet hook
- Tapestry needle with a small eye
- 1 stitch marker
- A small pinch of polyester fiberfill
- Scissors
- Fabric stiffener or spray starch
- Blocking board or foam mat, rustproof pins, and plastic wrap
The quantity above includes a margin of about 20% for your gauge check, sewing tails, and any ripping back. If you plan to make a set, one 50 g ball makes about six angels.
Abbreviations (US Terms)
- ch – chain
- sl st – slip stitch
- sc – single crochet
- dc – double crochet
- inc – 2 sc in the same stitch
- dec – single crochet 2 together
- sp(s) – space(s)
- st(s) – stitch(es)
- MR – magic ring
- RS – right side
Special stitches
- V-st: (dc, ch 1, dc) in the same stitch.
- Shell: (2 dc, ch 1, 2 dc) in the same space.
- Picot: ch 3, sl st in the 3rd ch from the hook.
Gauge and Checkpoints
Gauge: 10 sc and 10 sc rows = 1 in (2.5 cm). Double crochet rows are about 0.4 in (1.0 cm) tall each, so 5 dc rows = 2 in (5.1 cm).
Make the head first. It is the quickest component and works as your gauge test. If it doesn’t match its checkpoint, change your hook before you start the skirt.
Checkpoints:
- Head (stuffed): 0.75 in (1.9 cm) in diameter
- Skirt after Row 4 (bodice): 0.9 in (2.3 cm) wide, 0.4 in (1.0 cm) tall
- Skirt after Row 7: about 2.5 in (6.4 cm) wide at the bottom edge
- Skirt after Row 9: 3.75 in (9.5 cm) wide, 2.4 in (6.1 cm) tall
- Skirt after border: 4 in (10.2 cm) wide, 3 in (7.6 cm) tall
- Each wing: 1.6 in (4.1 cm) long, 1.75 in (4.4 cm) wide
If your pieces are too big, go down to a 2 mm hook. If they are too small, go up to a 2.5 mm hook. The lace rows are forgiving in width because blocking opens them up. The bodice and head should be close to the numbers above, though, so the proportions stay right.
Head
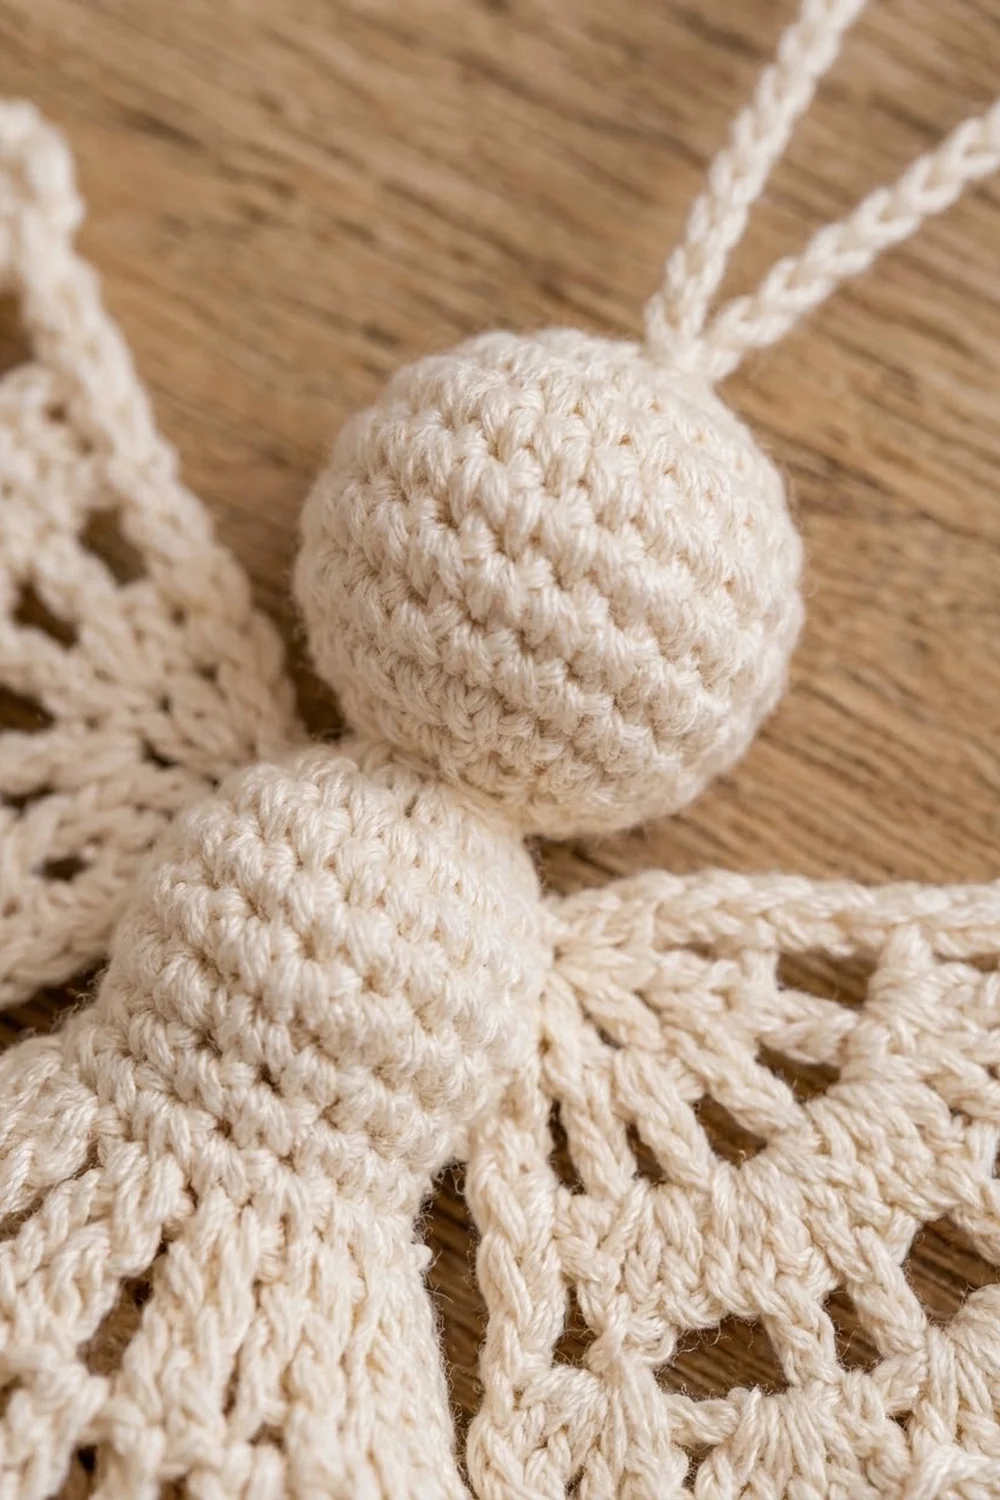
Work in continuous rounds without joining. Place a marker in the first stitch of each round and move it up as you go.
Rnd 1: 6 sc in MR. (6 sts)
Rnd 2: Inc in each st around. (12 sts)
Rnd 3: (Sc, inc) 6 times. (18 sts)
Rnd 4: (2 sc, inc) 6 times. (24 sts)
Rnds 5–8: Sc in each st around. (24 sts each round)
Rnd 9: (2 sc, dec) 6 times. (18 sts)
Rnd 10: (Sc, dec) 6 times. (12 sts)
Stuff the head firmly with a small pinch of fiberfill. Add it in tiny tufts so the ball stays round, not lumpy, and pull the fiberfill apart first so no white shows through the stitches.
Rnd 11: Dec 6 times. (6 sts)
Fasten off, leaving an 8 in (20.3 cm) tail. Weave the tail through the front loops of the last 6 sts and pull tight to close. Leave the tail hanging; you will use it to sew the head to the neck.
Checkpoint: 0.75 in (1.9 cm) in diameter.
Skirt
The skirt is worked flat, top-down, in turned rows. The foundation chain is the neck edge. The first four rows form a solid sc bodice, and Rows 5–9 open into a flat fan. A repeat written as “(…) 7 times” means 7 times in total.
Row 1: Ch 8, sc in 2nd ch from hook and in each ch across. (7 sc)
Row 2: Ch 1, turn. 2 sc in first st, sc in next 5 sts, 2 sc in last st. (9 sc)
Rows 3–4: Ch 1, turn. Sc in each st across. (9 sc each row)
Checkpoint: 0.9 in (2.3 cm) wide, 0.4 in (1.0 cm) tall.
Row 5: Ch 4 (counts as dc and ch 1), turn. Dc in next st, (ch 1, dc in next st) 7 times. (9 dc, 8 ch-1 sps)
Row 6: Ch 5 (counts as dc and ch 2), turn. Dc in next dc, (ch 2, dc in next dc) 6 times, ch 2, dc in 3rd ch of turning ch. (9 dc, 8 ch-2 sps)
Row 7: Ch 6 (counts as dc and ch 3), turn. Dc in next dc, (ch 3, dc in next dc) 6 times, ch 3, dc in 3rd ch of turning ch. (9 dc, 8 ch-3 sps)
Rows 5–7 create the long vertical ribs. Each row keeps the same 9 dc and only lengthens the chain spaces, so the fabric fans out without ruffling.
Checkpoint: about 2.5 in (6.4 cm) wide at the bottom edge.
Row 8: Ch 4 (counts as dc and ch 1), turn. Dc in the same st (first V-st made). (Ch 2, skip ch-3 sp, V-st in next dc) 7 times, ch 2, V-st in 3rd ch of turning ch. (9 V-sts, 8 ch-2 sps)
Row 9: Turn. Sl st in first dc and in next ch-1 sp. Ch 3 (counts as dc), then (dc, ch 1, 2 dc) in the same sp (first shell made). (Ch 1, skip ch-2 sp, shell in ch-1 sp of next V-st) 8 times. (9 shells, 8 ch-1 sps between shells)
Checkpoint: 3.75 in (9.5 cm) wide, 2.4 in (6.1 cm) tall. Don’t fasten off; the border continues from here.
Wings (Make 2)
Each wing is a small flat fan worked from the shoulder point outward.
Row 1: Ch 5. Dc in 5th ch from hook (the skipped chs count as dc and ch 1). (Ch 1, dc in same ch) 3 times. (5 dc, 4 ch-1 sps)
Row 2: Ch 5 (counts as dc and ch 2), turn. Dc in next dc, (ch 2, dc in next dc) 2 times, ch 2, dc in top of beginning ch. (5 dc, 4 ch-2 sps)
Row 3: Ch 3 (counts as dc), turn. Shell in each of the 4 ch-2 sps, dc in 3rd ch of turning ch. (4 shells and 2 edge dc; 18 dc total)
Row 4 (wing edge): Ch 1, turn. Sc in first dc, (5 dc in ch-1 sp of next shell, sc in the space between this shell and the next) 3 times, 5 dc in ch-1 sp of last shell, sc in top of turning ch. (4 scallops of 5 dc = 20 dc, 5 sc)
Fasten off, leaving an 8 in (20.3 cm) tail for sewing.
Checkpoint: 1.6 in (4.1 cm) from the point to the scallop edge, 1.75 in (4.4 cm) across the scallops.
Assembly
Head: Center the closed end of the head on the skirt’s foundation chain (the neck). Using the head tail, sew through the neck chains and the head’s last round, going around twice. The head should sit straight and touch the bodice with no gap.
Wings: Lay the skirt RS down. Place the two wing points (the Row 1 foundation ch) together at the center back of the bodice, on Row 3. Angle each wing up and out so the scallop edges extend past the sides of the bodice. Whipstitch the point and the first 0.25 in (0.6 cm) of each wing’s straight edge to the bodice. Keep the stitches on the back so they don’t show on the front. Before sewing, pin both wings in place and check from the front that they sit at the same angle.
Hanging loop: Ch 40, about 4 in (10.2 cm) long, and fasten off. Thread both tails through the top center of the head, down into the stuffing, and knot them together inside. The finished loop stands 2 in (5.1 cm) above the head. Bury the tails.
Border
The border is worked across the skirt hem only, continuing directly from Row 9. The side edges of the skirt stay plain.
Border gauge: one 7-dc scallop is about 0.45 in (1.1 cm) across after blocking, so nine scallops give about 4 in (10.2 cm). The border adds 0.6 in (1.5 cm) of depth.
Row 10 (Border Row 1): Turn. Sl st in first 2 dc and in the shell ch-1 sp. Ch 3 (counts as dc), 6 dc in the same sp. (Sc in next ch-1 sp between shells, 7 dc in ch-1 sp of next shell) 8 times. (9 scallops of 7 dc = 63 dc, 8 sc)
The last 2 dc of the final shell stay unworked, mirroring the 2 dc you slipped over at the start. This keeps both skirt corners matched.
Row 11 (Border Row 2): Ch 1, turn. (Sc in next 3 dc, sc in next dc, picot, sc in next 3 dc, sl st in next sc) 8 times. Then sc in next 3 dc, sc in next dc, picot, sc in next 2 dc, sc in top of turning ch. (63 sc, 9 picots, 8 sl sts)
Fasten off and weave in the end.
Why the math works: Row 9 has exactly 9 shells and 8 gaps. Row 10 puts one scallop in each shell and one anchoring sc in each gap, so the scallops line up under the shells with no extra stitches. Row 11 works 1 sc into each of the 63 dc (9 x 7 = 63). Because seven is an odd number, the picot lands on the 4th stitch, centered on each scallop with 3 sc on either side.
Final Blocking
- Mix fabric stiffener according to the label, or prepare spray starch.
- Dip or spray the skirt and wings (not the head) until they are evenly damp. Blot with a towel.
- Cover the foam board with plastic wrap and lay the angel face up.
- Pin the skirt into a clean triangle: neck 0.9 in (2.3 cm), hem 4 in (10.2 cm), height 3 in (7.6 cm).
- Pin each picot so the scallops form even arches.
- Open each wing into a fan, pinning between the scallops, and set the wingspan at 4.5 in (11.4 cm).
- Let the angel dry completely, at least 12 hours, before removing the pins.
Final Quality-Control Checklist
- Head is round, firm, and 0.75 in (1.9 cm) across.
- Bodice has 9 sc across and sits flat under the head.
- Skirt shows 9 straight ribs and 9 shells.
- Hem has 9 scallops, each with a centered picot.
- Both wings have 4 scallops and match in size.
- Wings are level and sit behind the shoulders.
- Loop is centered and 2 in (5.1 cm) tall.
- All tails are hidden, and no sewing stitches show on the front.
- Total height is 3.75 in (9.5 cm) and the wingspan is 4.5 in (11.4 cm).
Troubleshooting
Skirt cups or curls: Your chain spaces are too tight. Chain more loosely, or go up a hook size for Rows 5–9 only.
Skirt ruffles: Your chains are too loose. Go down a hook size for Rows 6–8.
Scallops look flat: Make sure all 7 dc go into the single shell ch-1 sp, not into neighboring stitches.
Picots are off-center: Recount. There should be exactly 3 sc before and 3 sc after each picot stitch.
Wings are uneven: Block them side by side, pinned to the same measurements.
Head wobbles: Sew around the neck twice and pull the tail snug.
Lace goes soft over time: Re-block with fresh starch.
Care
Store the angel flat in tissue paper. If she gets dusty, hand wash her gently in cool water and re-block with starch.
Final Notes
The measurement chain is short and easy to follow:
- a 0.75 in (1.9 cm) head
- a 0.9 in (2.3 cm) bodice that fans out to 3.75 in (9.5 cm) by Row 9
- a 9-scallop border that brings the hem to 4 in (10.2 cm) and the skirt height to 3 in (7.6 cm)
- two 1.6 in (4.1 cm) wings that set the 4.5 in (11.4 cm) wingspan
Check each stage, and your angel will hang straight and keep her shape season after season.
Happy crocheting!