

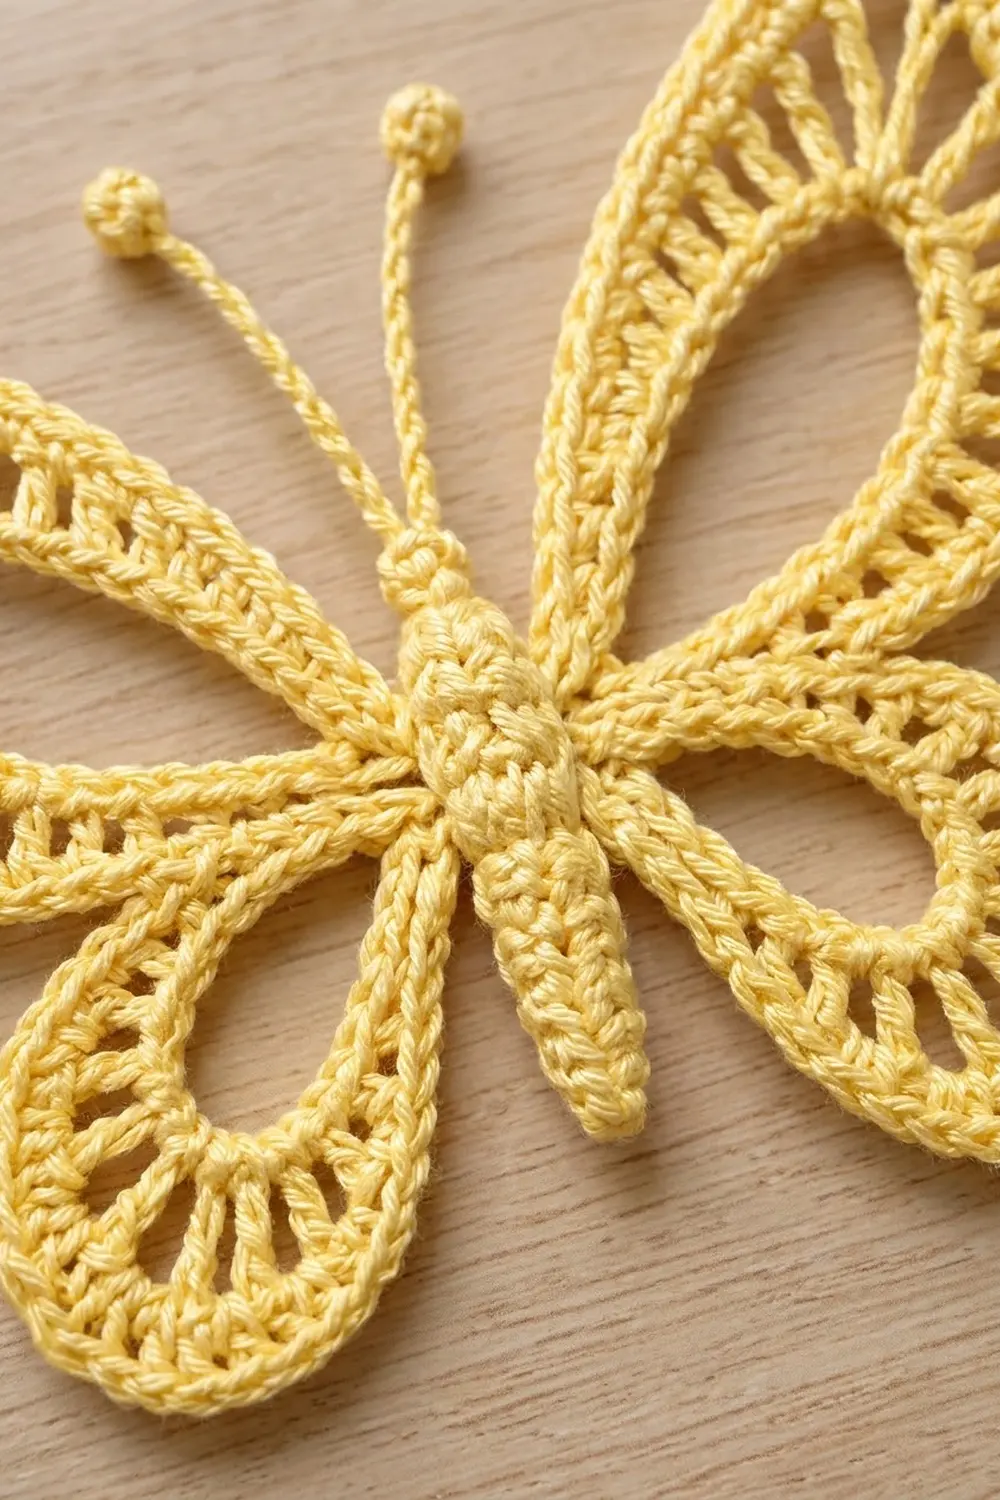
The Buttercup Lace Butterfly is a light, airy appliqué worked in soft butter-yellow cotton thread. Each wing has a large open window surrounded by radiating spokes, so light shines through the motif and it looks like delicate lace.
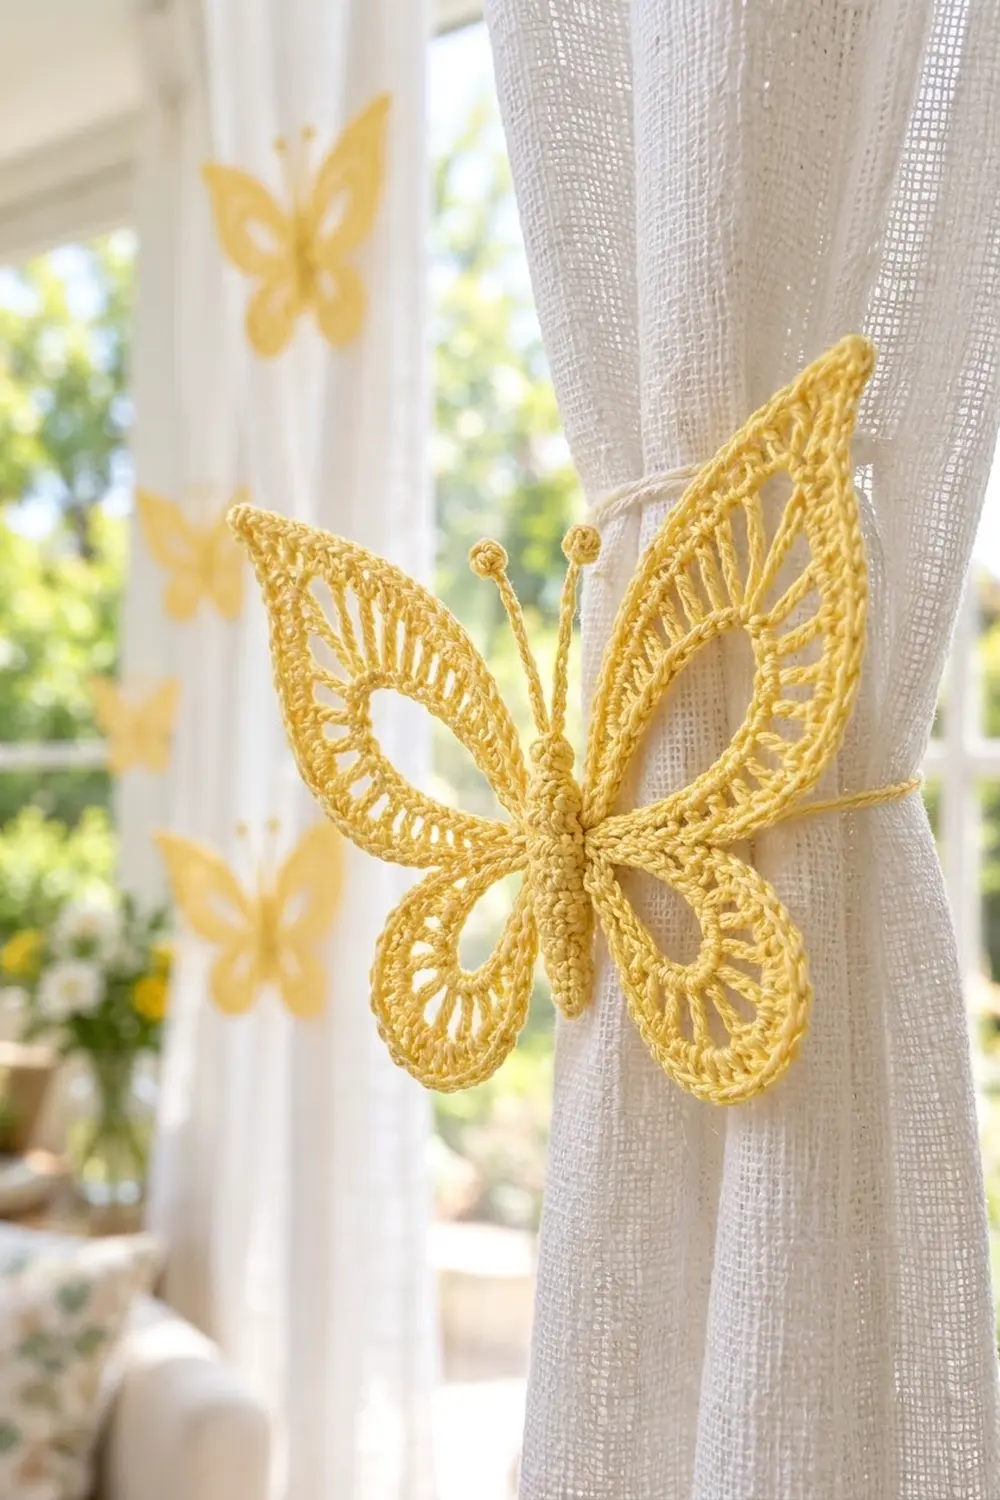
The upper wings come to a sharp, elegant point, and the lower wings curve into rounded teardrops. A rope-like reverse single crochet edge outlines every wing. The ridged, lightly stuffed body and the knobbed antennae give the butterfly some dimension. Use it as a curtain tieback, a hanging ornament, a gift topper, or an appliqué on a bag or cushion.
This pattern uses US crochet terms. The finished butterfly measures about 6 in (15.2 cm) wide and 4.5 in (11.4 cm) tall from upper wing tip to lower wing tip.
Each wing starts as a chain ring that becomes the open window. You work a single crochet round into the ring, then a spoke round with graduated stitch heights, then a two-round border. The body is worked in a spiral, the antennae are added at the head, and the four wings are sewn to the body’s sides.
Finished Size and Construction
- Finished size: 6 in (15.2 cm) wide x 4.5 in (11.4 cm) tall
- Skill level: Intermediate
- Terminology: US crochet terms
- Yarn weight: Size 3 cotton crochet thread (CYC 0, Lace)
- Hook: 2.25 mm (US B-1)
- Number of pieces: 1 butterfly, made from 5 components (2 upper wings, 2 lower wings, 1 body with antennae)
- Layout: Upper wings angle up and out from the thorax. Lower wings angle down and out from the waist.
- Upper wing size: 3 in (7.6 cm) long x 1.75 in (4.4 cm) wide
- Lower wing size: 2 in (5.1 cm) long x 1.5 in (3.8 cm) wide
- Body: 2.5 in (6.4 cm) long x 0.5 in (1.3 cm) diameter; antennae 1.5 in (3.8 cm)
- Size before border: upper wing 2.5 in (6.4 cm) x 1.25 in (3.2 cm); lower wing 1.5 in (3.8 cm) x 1 in (2.5 cm)
- Border depth: 0.25 in (0.6 cm), 2 rounds
Materials
Use a mercerized cotton thread in size 3. Mercerized cotton keeps the spokes crisp, holds a starched shape well, and has the slight sheen seen on the finished piece. Avoid fuzzy or very stretchy threads, because the windows will close up.
- Butter yellow, size 3 cotton thread: 15 g / about 60 m (66 yd)
Tools:
- 2.25 mm (US B-1) crochet hook
- Tapestry needle with an eye small enough for thread
- Sharp scissors
- 1 locking stitch marker
- A small pinch of fiberfill, or thread scraps for stuffing
- Rustproof pins and a foam blocking mat
- Spray starch or fabric stiffener (optional, but recommended)
The thread quantity includes a margin of about 50% for your gauge swatch, sewing tails, and any re-working. One butterfly uses about 10 g (40 m).
Abbreviations (US Terms)
- ch – chain
- sl st – slip stitch
- sc – single crochet
- hdc – half double crochet
- dc – double crochet
- tr – treble crochet (yarn over twice)
- rev sc – reverse single crochet (crab stitch)
- inc – 2 sc in the same stitch
- dec – sc2tog (single crochet 2 together)
- FLO – front loop only
- MR – magic ring
- sp – space
- st(s) – stitch(es)
Special stitch: Reverse single crochet (rev sc). Work from left to right (right-handed). Insert the hook in the next stitch to the right, yarn over, and pull up a loop. Yarn over and pull through both loops on the hook. The result is a twisted, rope-like edge.
Special stitch: Popcorn knob. Work 5 dc in the indicated chain. Drop the loop from the hook, insert the hook from front to back in the first dc of the group, pick up the dropped loop, and pull it through.
Gauge and Checkpoints
Gauge: 7 sc and 8 sc rounds = 1 in (2.5 cm). One tr spoke stands about 0.375 in (1.0 cm) tall.
Make one upper wing first and treat it as your swatch. Measure each wing flat after every round. Pinch the window lightly into a teardrop shape before you measure.
Upper wing checkpoints:
- After Rnd 1: window ring about 1.25 in (3.2 cm) long
- After Rnd 2: 2.5 in (6.4 cm) x 1.25 in (3.2 cm)
- After Rnd 3: 2.75 in (7.0 cm) x 1.5 in (3.8 cm)
- After Rnd 4: 3 in (7.6 cm) x 1.75 in (4.4 cm)
Lower wing checkpoints:
- After Rnd 1: window ring about 1 in (2.5 cm) long
- After Rnd 2: 1.5 in (3.8 cm) x 1 in (2.5 cm)
- After Rnd 3: 1.75 in (4.4 cm) x 1.25 in (3.2 cm)
- After Rnd 4: 2 in (5.1 cm) x 1.5 in (3.8 cm)
If your wing comes out more than 0.25 in (0.6 cm) too large, go down to a 2.0 mm hook. If it is more than 0.25 in (0.6 cm) too small, go up to a 2.5 mm hook. If only the spokes look short or long, adjust your tr height, not your hook.
Upper Wing (make 2)
Foundation: Ch 24, sl st in the first ch to form a ring. Do not twist the chain.
Rnd 1 (window ring): Ch 1 (does not count as a st). Work 36 sc into the ring, covering the chain completely. Sl st in the first sc to join. (36 sc)
The sl st join marks the base of the wing, which is the end that will sit against the body.
Rnd 2 (spokes): Ch 1 (does not count). Then work:
- Sc in the same st as the join and in the next 2 sts (3 sc)
- Hdc in each of the next 3 sts (3 hdc)
- (Dc, ch 1) in each of the next 6 sts (6 dc, 6 ch-1 sps)
- (Tr, ch 1) in each of the next 12 sts (12 tr, 12 ch-1 sps)
- (Dc, ch 1) in each of the next 6 sts (6 dc, 6 ch-1 sps)
- Hdc in each of the next 3 sts (3 hdc)
- Sc in each of the last 3 sts (3 sc)
Sl st in the first sc to join. (36 stitches + 24 ch-1 sps = 60 sts)
The short sc and hdc stitches keep the window close to the body edge. The tall tr spokes push the far end outward into the long point.
Rnd 3 (border, sc band – conversion round): Ch 1 (does not count). Count every stitch and every ch-1 sp as one st. Sc in each of the first 29 sts, which ends in the 6th tr. Work (sc, ch 2, sc) in the next ch-1 sp; this is the wing tip. Sc in each of the last 30 sts. Sl st in the first sc to join. (60 sc worked 1-per-st + 1 extra sc = 61 sc, plus 1 ch-2 tip sp)
Rnd 4 (border, rope edge): Ch 1 (does not count). Work rev sc in each sc around, with 3 rev sc in the ch-2 tip sp. Sl st in the first st to join. (61 rev sc + 3 rev sc in tip = 64 rev sc)
Fasten off. Leave an 8 in (20.3 cm) tail for sewing.
Lower Wing (make 2)
Foundation: Ch 18, sl st in the first ch to form a ring.
Rnd 1 (window ring): Ch 1. Work 28 sc into the ring. Sl st in the first sc to join. (28 sc)
Rnd 2 (spokes): Ch 1. Then work:
- Sc in the same st as the join and in the next st (2 sc)
- Hdc in each of the next 2 sts (2 hdc)
- (Dc, ch 1) in each of the next 4 sts (4 dc, 4 ch-1 sps)
- (Tr, ch 1) in each of the next 12 sts (12 tr, 12 ch-1 sps)
- (Dc, ch 1) in each of the next 4 sts (4 dc, 4 ch-1 sps)
- Hdc in each of the next 2 sts (2 hdc)
- Sc in each of the last 2 sts (2 sc)
Sl st to join. (28 stitches + 20 ch-1 sps = 48 sts)
Rnd 3 (border, sc band – conversion round): Ch 1. Sc in each of the first 21 sts. 2 sc in the next ch-1 sp, sc in the next tr; repeat from * to * 2 more times. Work 2 sc in the next ch-1 sp. Sc in each of the last 20 sts. Sl st to join. (48 sc worked 1-per-st + 4 extra sc = 52 sc)
The 4 extra stitches sit across the middle of the tr section, which rounds the outer curve instead of making a point.
Rnd 4 (border, rope edge): Ch 1. Work rev sc in each sc around. Sl st to join. (52 rev sc)
Fasten off. Leave an 8 in (20.3 cm) tail.
Body and Antennae
Work in a continuous spiral and move the marker up each round. Add a little stuffing as you go.
- Rnd 1: 6 sc in MR. (6)
- Rnd 2: (Sc, inc) 3 times. (9)
- Rnd 3: Sc around. (9) This is the head.
- Rnd 4: (Sc, dec) 3 times. (6) This is the neck.
- Rnd 5: Inc in each st. (12)
- Rnds 6–8: Sc around. (12) Rounds 5–8 form the thorax.
- Rnd 9: (2 sc, dec) 3 times. (9) This is the waist.
- Rnd 10: (2 sc, inc) 3 times. (12)
- Rnds 11–16: Alternate rounds. Odd rounds: sc around. Even rounds: sc in FLO around. (12 each round) The 3 FLO rounds make the abdomen ridges.
- Rnd 17: (2 sc, dec) 3 times. (9)
- Rnd 18: Sc around. (9)
- Rnd 19: (Sc, dec) 3 times. (6)
- Rnd 20: Dec 3 times. (3)
Fasten off and close the tip. The body should measure 2.5 in (6.4 cm) long (20 rounds at 8 rounds per inch) and about 0.5 in (1.3 cm) across.
Antennae (make 2): Join the thread at the top of the head, slightly off center. Ch 14. Work a popcorn knob in the 4th ch from the hook. Sl st in each of the remaining 10 ch, then sl st into the head. (3 skipped ch + 1 knob ch + 10 sl st = 14 ch used) Repeat for the second antenna about 0.125 in (0.3 cm) away, and fasten off. Each antenna is about 1.5 in (3.8 cm) long.
Assembly
- Lay the body face up. The base of each wing is the short sc and hdc section at the joining seam.
- Pin an upper wing to each side of the thorax (Rnds 5–8), angled up and out at about 45 degrees. Its point should reach about the same height as the antenna knobs.
- Pin a lower wing to each side of the waist and upper abdomen (Rnds 9–13), angled down and out.
- Let the lower wings tuck very slightly under the upper wings, overlapping by about 0.125 in (0.3 cm).
- With the wing tails, whipstitch about 0.5 in (1.3 cm) of each wing base to the body, through the back loops of the rope edge only. Weave in all ends.
Checkpoint: the assembled butterfly measures 6 in (15.2 cm) across and 4.5 in (11.4 cm) tall.
Border Notes and Why the Math Works
The border is Rnds 3–4 on each wing. Border gauge matches the main gauge: 7 sc = 1 in (2.5 cm), and the two border rounds add about 0.25 in (0.6 cm) on every side.
Rnd 3 works exactly one sc into every stitch and every ch-1 sp of Rnd 2. Upper wing: 24 spokes plus 24 ch-1 sps plus 12 short sts = 60. Lower wing: 20 + 20 + 8 = 48. Matching the count keeps the edge flat around the outer curve, where the ch-1 sps spread the spokes apart.
Increases happen only where the shape needs them. The upper wing gets 1 extra sc plus a ch-2 at the tip, which makes the point. The lower wing gets 4 extra sc spread over the curve, which rounds it. Rnd 4 adds no stitches except the 3 rev sc that wrap the upper tip. That keeps the rope edge from rippling.
Final Blocking
- Wash the butterfly gently in cool water, or mist it until it is evenly damp.
- Roll it in a towel to remove the extra water.
- Pin it to the blocking mat at 6 in (15.2 cm) x 4.5 in (11.4 cm).
- Pin each window open into a clean teardrop, putting one pin inside each window.
- Pin each upper wing tip to a sharp point, and pin around each lower wing curve.
- Straighten every spoke so it radiates evenly from the window.
- Spray with starch or brush on stiffener. Let it dry completely, which takes about 12 hours.
- Unpin it and shape the antennae with your fingers.
Final Quality-Control Checklist
- Upper wings measure 3 in (7.6 cm) x 1.75 in (4.4 cm) and match each other.
- Lower wings measure 2 in (5.1 cm) x 1.5 in (3.8 cm) and match each other.
- Stitch counts are correct: upper Rnd 2 = 60 sts, Rnd 3 = 61 sc, Rnd 4 = 64 rev sc. Lower Rnd 2 = 48 sts, Rnd 3 = 52 sc, Rnd 4 = 52 rev sc.
- All four windows are open, and the spokes are evenly spaced.
- The rope edge lies flat with no ruffling.
- The body is firm, the ridges show clearly, and the antennae stand evenly.
- All ends are woven in invisibly.
Troubleshooting
- Window closes up: You packed the Rnd 1 sc too tightly. Slide the stitches evenly around the chain before joining.
- Upper tip is rounded: Check that the ch-2 falls in the 30th st of Rnd 3, and block it firmly to a point.
- Edge ruffles: Your rev sc is too loose. Go down 0.25 mm for Rnd 4 only.
- Edge cups: Rnd 3 is too tight. Recount it to 61 or 52 sc and loosen your tension.
- Spokes lean sideways: Block each spoke straight while the piece is damp.
- Body too floppy: Add a little more stuffing before Rnd 19.
Care
Hand wash in cool water with mild soap and lay flat to dry. Reapply starch after washing so the windows and tips keep their crisp shape.
Final Notes
The measurement chain is simple. Gauge of 7 sc = 1 in (2.5 cm) gives an upper wing of 2.5 in (6.4 cm) before the border and 3 in (7.6 cm) after it. The lower wing is 1.5 in (3.8 cm) before the border and 2 in (5.1 cm) after it. The body is 2.5 in (6.4 cm) long. Together they give a butterfly 6 in (15.2 cm) wide and 4.5 in (11.4 cm) tall. Check each stage, block firmly, and your butterfly will be ready to perch on curtains, gifts, or bags.
Happy crocheting!