

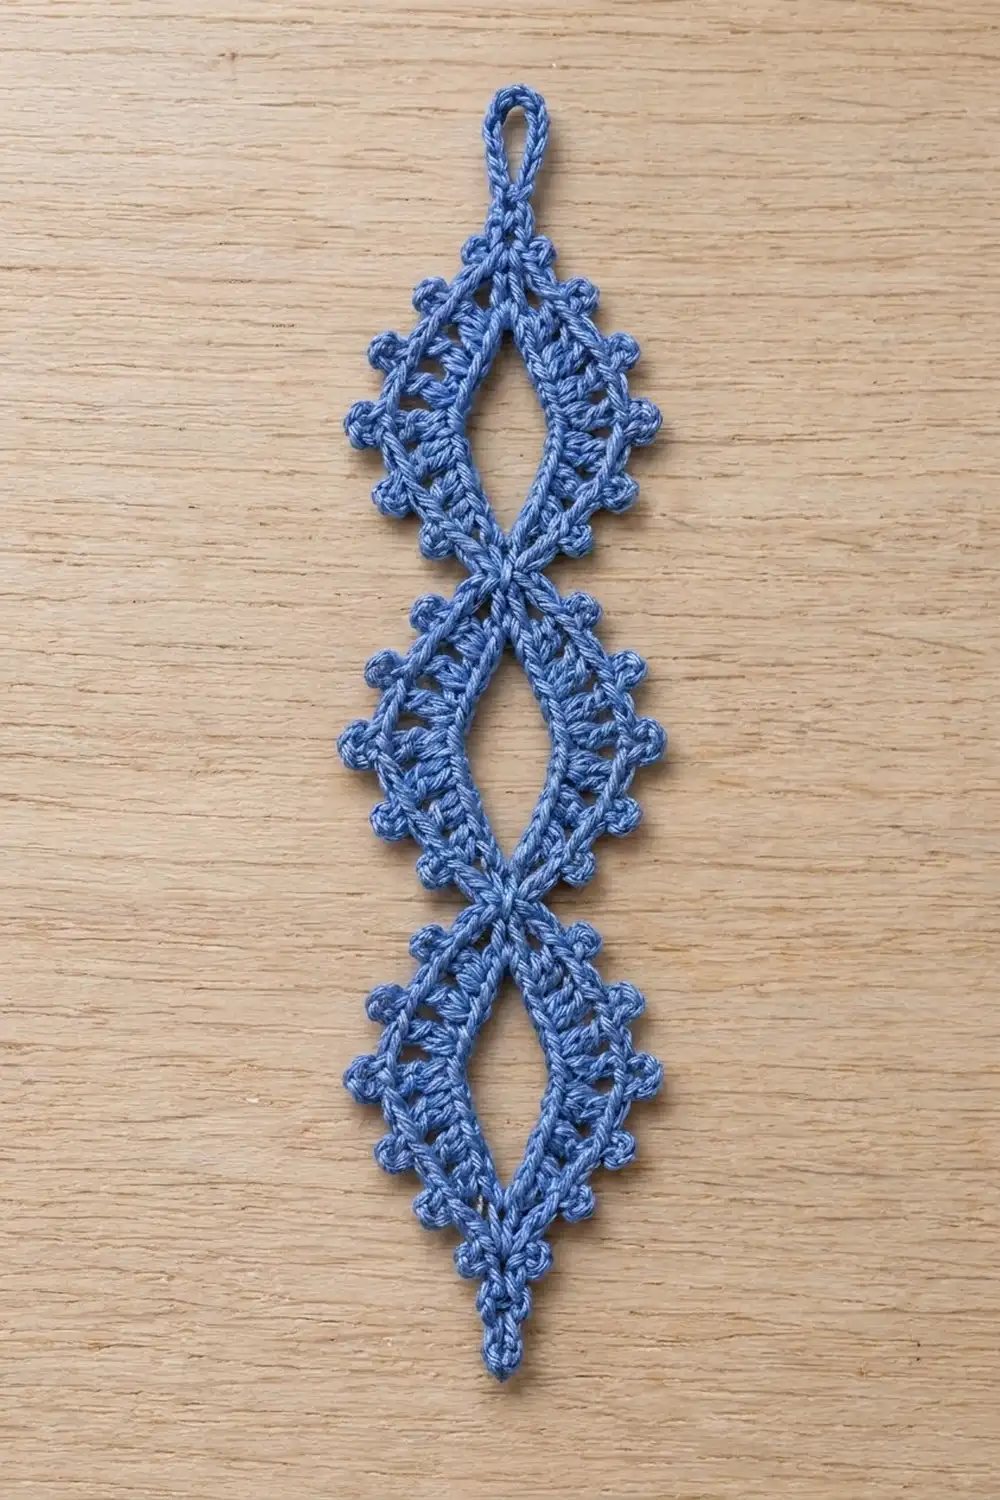
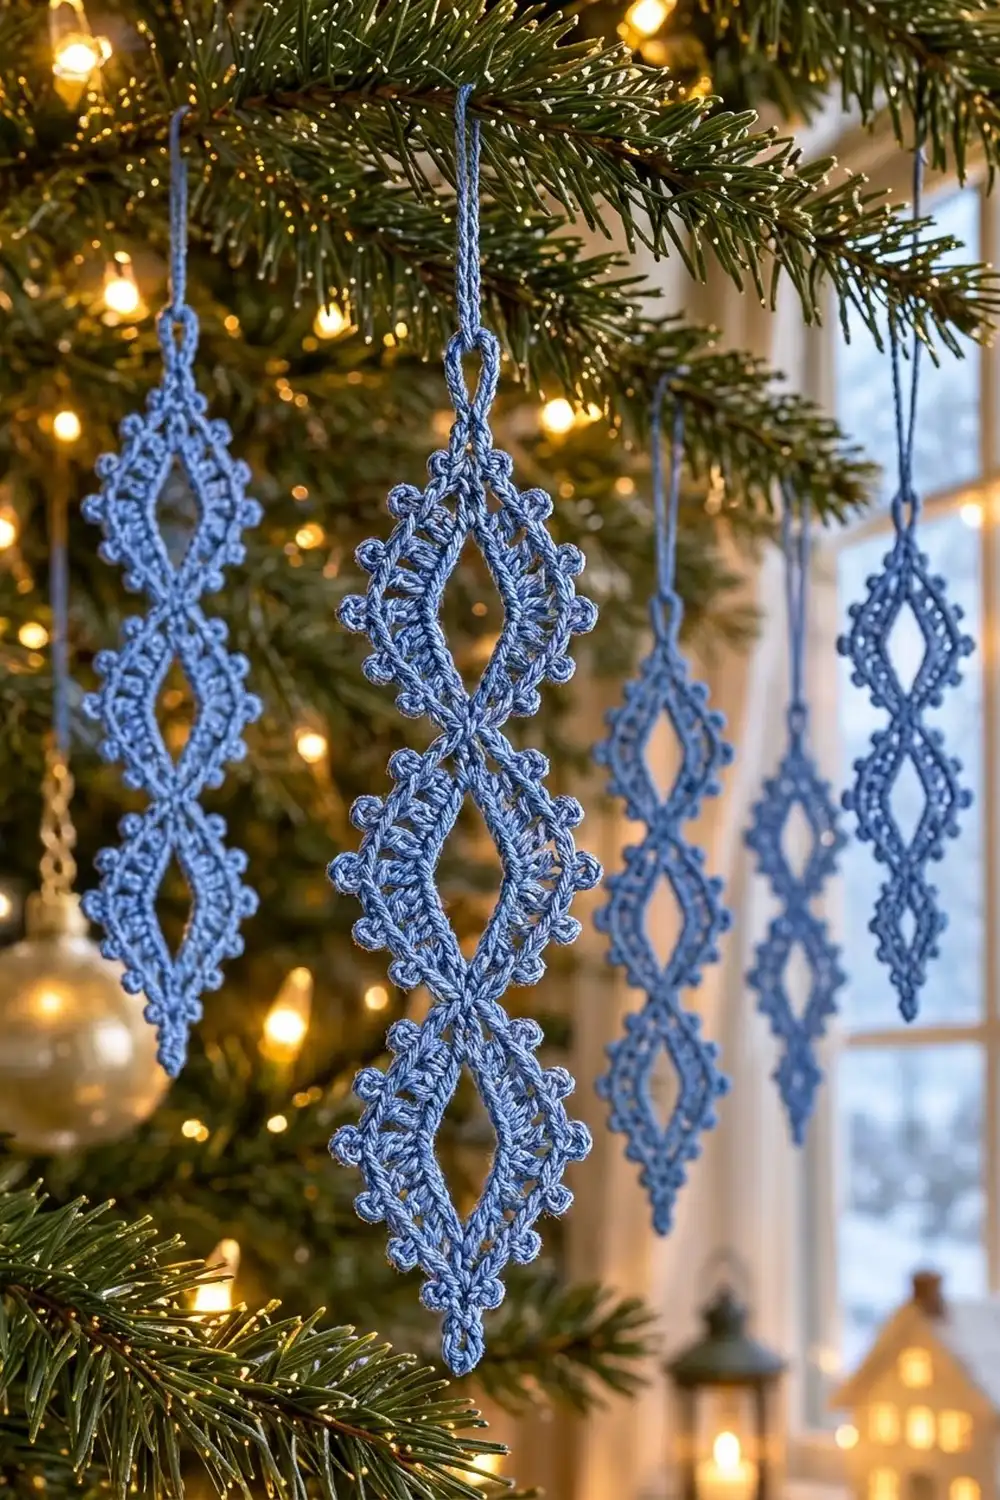
The Frost Lattice Icicle is a slim, lacy ornament with three open diamond cells stacked in a column. Each cell has a clear lens-shaped window in the middle, ringed by a band of graded stitches and finished with a row of tiny picots. Together they look like a frosty icicle catching the light.
The sample is in a single cornflower-blue cotton thread, which gives it a crisp, wintry, Scandinavian feel. It also looks lovely in white, silver-gray or pale ice blue. Because it is flat and lightweight, it hangs straight and doesn’t twist much on the branch.
This pattern uses US crochet terms. The finished ornament measures 6.5 in (16.5 cm) from tip to tip and 1.75 in (4.4 cm) across at its widest point. The hanging loop adds about 1 in (2.5 cm), for an overall length of 7.5 in (19.1 cm).
Construction is simple and continuous. First you chain a “framework”: one long chain down the right side and a return chain up the left side, joined at each waist. Round 1 works graded stitches into that framework to make the lattice band. Round 2 adds the picot edge and ends with the hanging loop. There is nothing to sew or join.
Finished Size and Construction
- Finished size: 6.5 in (16.5 cm) long x 1.75 in (4.4 cm) wide, not counting the loop
- Overall length with loop: 7.5 in (19.1 cm)
- Skill level: Intermediate (working into chain framework, picots)
- Terminology: US crochet terms
- Yarn weight: Size 3 mercerized cotton crochet thread
- Hook: 2.25 mm (US B-1)
- Number of pieces: 1
- Layout: One vertical strip of 3 stacked cells
- Cell size: 1.9 in (4.8 cm) tall, framework only
- Size before border: 6 in (15.2 cm) x 1.25 in (3.2 cm), after Round 1
- Border depth: 0.25 in (0.6 cm) on each side (Round 2 picot edge)
Materials
Yarn: Use a smooth, tightly plied mercerized cotton in size 3. The sheen helps the openwork read clearly, and cotton holds a blocked shape well. Avoid fuzzy or very stretchy fibers, because they blur the lens openings.
- Cornflower blue: 6 g, about 16 m (17.5 yd) per ornament
The quantity includes a margin of about 20% for your swatch, the tail and weaving in. For a set of six ornaments, plan on 36 g, about 96 m (105 yd).
Tools:
- 2.25 mm (US B-1) crochet hook
- 4 locking stitch markers
- Tapestry needle
- Rust-proof pins and a foam blocking mat
- Spray starch or fabric stiffener (optional)
- Ruler or tape measure
Abbreviations (US Terms)
- ch – chain
- sl st – slip stitch
- sc – single crochet
- hdc – half double crochet
- dc – double crochet
- st(s) – stitch(es)
- sp – space
- rnd – round
Special stitches:
- Picot (p): Ch 3, then sl st into the front loop and left vertical leg of the sc you just made.
- sc-p: Sc in the next st, then work 1 picot.
- Graded side (GS): Worked over 15 chains or sts: sc in next 2, hdc in next 2, dc in next 7, hdc in next 2, sc in next 2. That is 15 sts.
Gauge and Checkpoints
Gauge is measured on the ornament itself, so make one ornament first and check it at each stage.
- Chain gauge: 15 ch = 2 in (5.1 cm), measured relaxed and unstretched
- Dc height: 1 dc = about 3/8 in (1.0 cm)
Checkpoint 1 (framework): Lay the framework flat and gently open the cells. Each cell should be about 1.9 in (4.8 cm) tall, and the whole framework about 5.7 in (14.5 cm) from T to B.
Checkpoint 2 (after Rnd 1): 6 in (15.2 cm) long x 1.25 in (3.2 cm) wide at the middle of a cell. Each lens opening should be about 0.5 in (1.3 cm) wide.
Checkpoint 3 (after Rnd 2, blocked): 6.5 in (16.5 cm) x 1.75 in (4.4 cm).
If the piece is too big by more than 0.25 in (0.6 cm), go down to a 2.0 mm hook, or tighten your chains. Loose chains are the most common cause.
If the piece is too small, go up to a 2.5 mm hook. If only the cell height is short, make your framework chains a little looser rather than adding chains. Adding chains would change every stitch count below.
Pattern
Foundation Framework
The framework is one continuous chain. Mark these four points as you go: T (top point), W1 (waist 1), W2 (waist 2) and B (bottom point).
Right side (working downward):
Ch 49 loosely. Counting from the slip knot end:
- Ch 1 = T (place marker)
- Ch 2–16 = right side of Cell 1 (15 ch)
- Ch 17 = W1 (place marker)
- Ch 18–32 = right side of Cell 2 (15 ch)
- Ch 33 = W2 (place marker)
- Ch 34–48 = right side of Cell 3 (15 ch)
- Ch 49 = B (place marker; this is the chain on your hook end)
Left side (working upward):
- Ch 15, then sl st in the W2 chain (ch 33). This closes Cell 3.
- Ch 15, then sl st in the W1 chain (ch 17). This closes Cell 2.
- Ch 15, then sl st in the T chain (ch 1). This closes Cell 1.
Do not fasten off.
Framework count: 94 ch (49 right + 45 left) and 3 sl st joins. Each cell is a closed lens of 15 right chains plus 15 left chains, meeting at its two points.
Before you continue, check that the left chains are not twisted around the right chain. Each cell should lie flat as an open loop.
Round 1: Lattice Band
In this round the stitches fan outward from the framework chain. Keep the cell openings toward the center and let the stitch tops form the outer edge. When you work into a chain, work into its back bump, or under one loop, and keep that choice consistent.
- Top point: Ch 1 (does not count as a st). Sc in the T chain.
- Right side, Cell 1: Work GS across ch 2–16.
- W1: Sl st in the W1 chain.
- Right side, Cell 2: Work GS across ch 18–32.
- W2: Sl st in the W2 chain.
- Right side, Cell 3: Work GS across ch 34–48.
- Bottom point: In the B chain, work (sc, ch 3, sc).
- Left side, Cell 3: Work GS across the next 15 left chains.
- W2: Sl st into the W2 sl st join.
- Left side, Cell 2: Work GS across the next 15 left chains.
- W1: Sl st into the W1 sl st join.
- Left side, Cell 1: Work GS across the last 15 left chains.
- Top point: Sc in the T chain.
- Join with a sl st to the first sc.
Round 1 count: 98 sts and 1 ch-3 sp. That breaks down as:
- 6 graded sides x 15 sts = 90
- 4 waist sl sts (2 on each side)
- 2 sc at T
- 2 sc at B, plus the ch-3 sp
The graded stitches shape each cell. The sc at each end keep the points and waists narrow. The 7 dc in the middle of each side make the cell widest at its center, which turns each opening into a pointed lozenge.
Checkpoint 2: 6 in (15.2 cm) x 1.25 in (3.2 cm).
Border
Border Gauge
The border is Round 2, a picot edge about 0.25 in (0.6 cm) deep. Each finished picot is a small bead about 1/8 in (0.3 cm) across.
Round 2: Picot Edge
Ch 1 (does not count as a st).
- Top point: Sc in the first sc.
- Each of the 3 right sides, worked over that side’s 15 sts:
- Sl st in the next 2 sc.
- Sc in the next hdc, sc-p in the next hdc.
- Sc in the next dc, sc-p in the next dc.
- Sc in the next dc, sc-p in the next dc (this is the center dc).
- Sc in the next dc, sc-p in the next dc.
- Sc in the next dc, sc-p in the next hdc.
- Sc in the next hdc.
- Sl st in the next 2 sc.
That is 15 sts: 4 sl st and 11 sc, with 5 picots.
3. At W1 and W2 (right side): Sl st in the waist sl st. Then work the next side as in step 2.
4. Bottom point: Sc in the sc. Work (2 sc, p, 2 sc) in the ch-3 sp. Sc in the next sc.
5. Each of the 3 left sides: Work the same 15-st sequence as step 2, with a sl st in each waist sl st between sides.
6. Top point: Sc in the last sc.
7. Hanging loop: Ch 14, then sl st in the first sc of the round. Fasten off, leaving a 6 in (15.2 cm) tail.
Round 2 count: 102 sts and 31 picots. That is 98 sts worked one into each existing st, plus 4 extra sc added into the ch-3 sp at B.
Per cell side the count is 15 sts with 5 picots. Over all 6 sides that gives 90 sts and 30 picots. Add the 4 waist sl sts, 6 sc at B and 2 sc at T, and you get 102 sts. The B picot makes 31 picots in total.
Why the Math Works
Round 2 works exactly 1 stitch into each Round 1 stitch, so each side stays at 15 sts and the edge lies flat without ruffling or cupping. Extra stitches go in only at the bottom tip, where the ch-3 space needs them to stay sharp.
The picots sit on positions 4, 6, 8, 10 and 12 of each side. That spacing is symmetrical around the center dc (position 8), so every cell carries its widest picot at its widest point. The sl sts at positions 1–2 and 14–15 add almost no height, which keeps the waists narrow so the three cells still read as separate diamonds.
Checkpoint 3: 6.5 in (16.5 cm) x 1.75 in (4.4 cm) once blocked.
Final Blocking
- Weave in the starting tail and the ending tail. Run each one along the back of the sc stitches, not through the openings.
- Soak the ornament in cool water for 10 minutes. Press out the water gently in a towel; don’t wring it.
- Pin the top and bottom points 6.5 in (16.5 cm) apart on the blocking mat.
- Pin each waist on the center line. Space them evenly, about 2.1 in (5.3 cm) apart.
- Pin the widest point of each cell out to 1.75 in (4.4 cm) across, measured picot tip to picot tip.
- Open each lens to about 0.5 in (1.3 cm) wide. A pin through the center of each window helps.
- Pin every picot outward so it sits round and upright.
- If you want a crisper ornament, spray it with starch or brush on diluted stiffener.
- Let it dry completely, at least 8 hours, before you unpin it.
Final Quality-Control Checklist
- Framework has 94 ch and 3 sl st joins, with no twisted cells
- Round 1 has 98 sts plus 1 ch-3 sp, and each side has 15 sts in the correct graded order
- Round 2 has 102 sts and 31 picots, with 5 picots on every cell side
- All three cells are the same height, 1.9 in (4.8 cm) in the framework
- Blocked size is 6.5 in (16.5 cm) x 1.75 in (4.4 cm), within 0.25 in (0.6 cm)
- Lens openings are even and centered
- Hanging loop is secure and about 1 in (2.5 cm) long
- No tails show through the openings
Troubleshooting
Cells twist around each other. The left chain was twisted before its sl st join. Undo back to that join, untwist the chain and rejoin.
Stitches point into the openings. You turned the work partway through. Keep the same side facing you for the whole round.
Edge ruffles. Your picots are too loose, or extra sts slipped in. Count each side; it should be 15 sts. Tighten the ch 3 of each picot.
Edge cups or puckers. Your framework chains are too tight. Remake the framework with a hook one size larger, then switch back to your usual hook for the rounds.
Waists look blunt or wide. You probably used sc instead of sl st at the waists in Round 2. Use sl st only at those points.
Bottom tip is rounded. Pin the bottom picot to a sharp point when blocking, and starch it lightly.
Cells have different sizes. Your chain tension changed along the framework. Block firmly to even them out, or remake the framework in one sitting.
Care
Hand wash in cool water with mild soap, press out the water in a towel and reblock flat to dry. Store the ornaments flat between sheets of tissue paper so the picots don’t get crushed.
Final Notes
Every measurement depends on the framework. Fifteen chains measure 2 in (5.1 cm), which makes each cell 1.9 in (4.8 cm) tall and the framework 5.7 in (14.5 cm) long. Round 1 builds the lattice band, bringing the piece to 6 in (15.2 cm) x 1.25 in (3.2 cm) with 98 sts. Round 2 adds a 0.25 in (0.6 cm) picot edge, for a total of 102 sts and 31 picots. After blocking, the ornament measures 6.5 in (16.5 cm) x 1.75 in (4.4 cm), plus a 1 in (2.5 cm) hanging loop.
Get your first ornament right at each checkpoint, and every one after it will match. That makes it easy to crochet a whole set for the tree or to tie onto gifts.
Happy crocheting!