

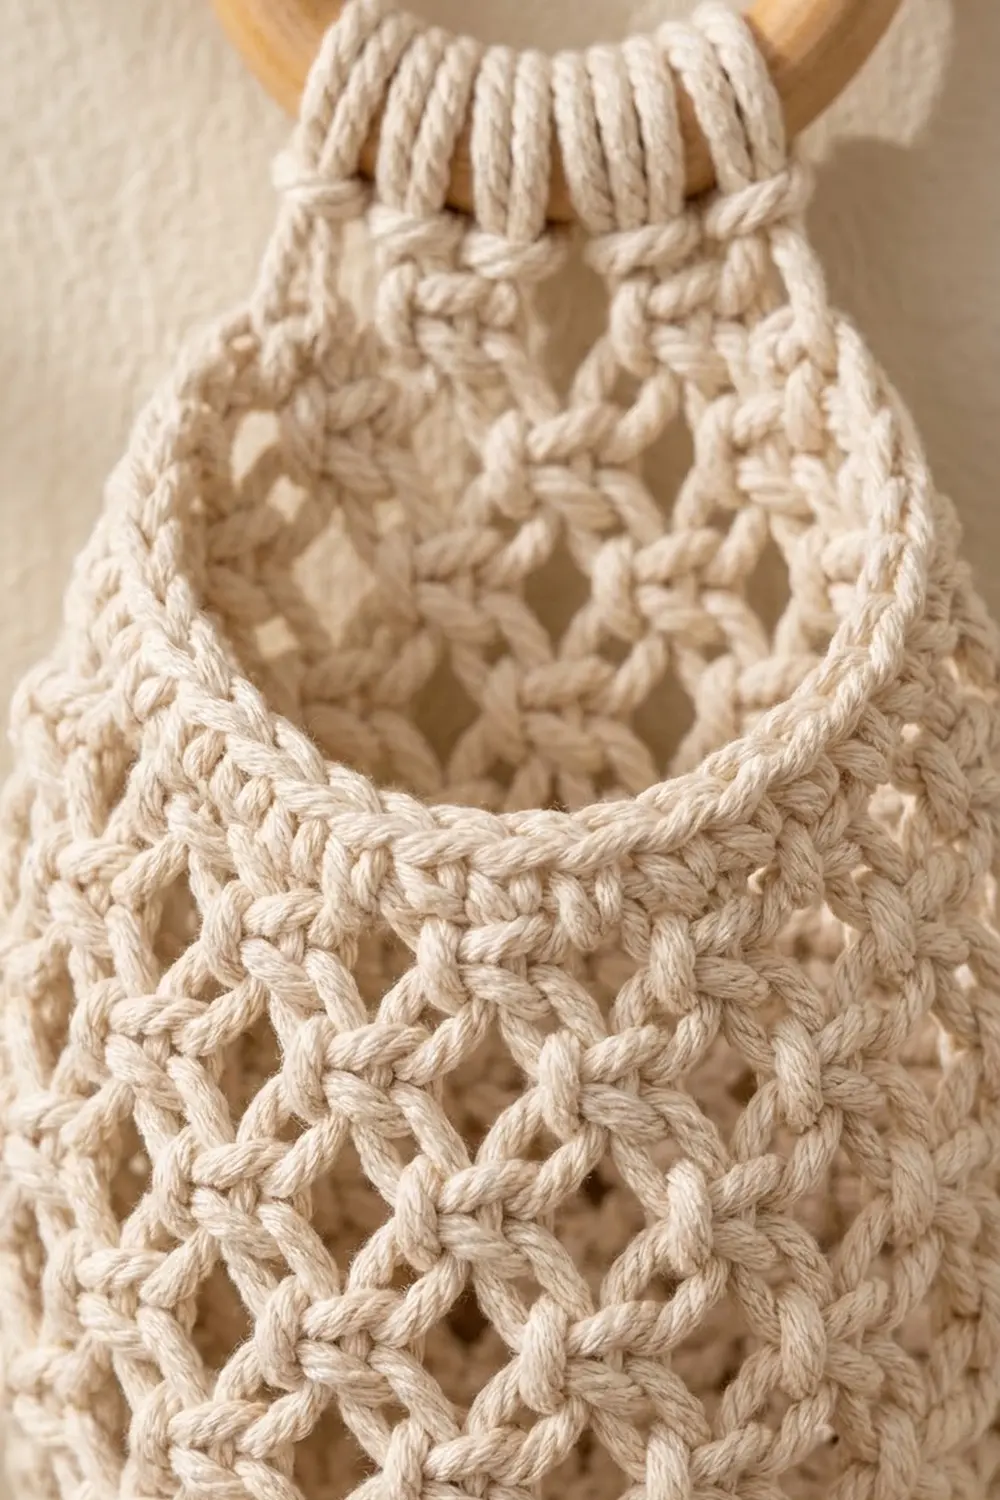
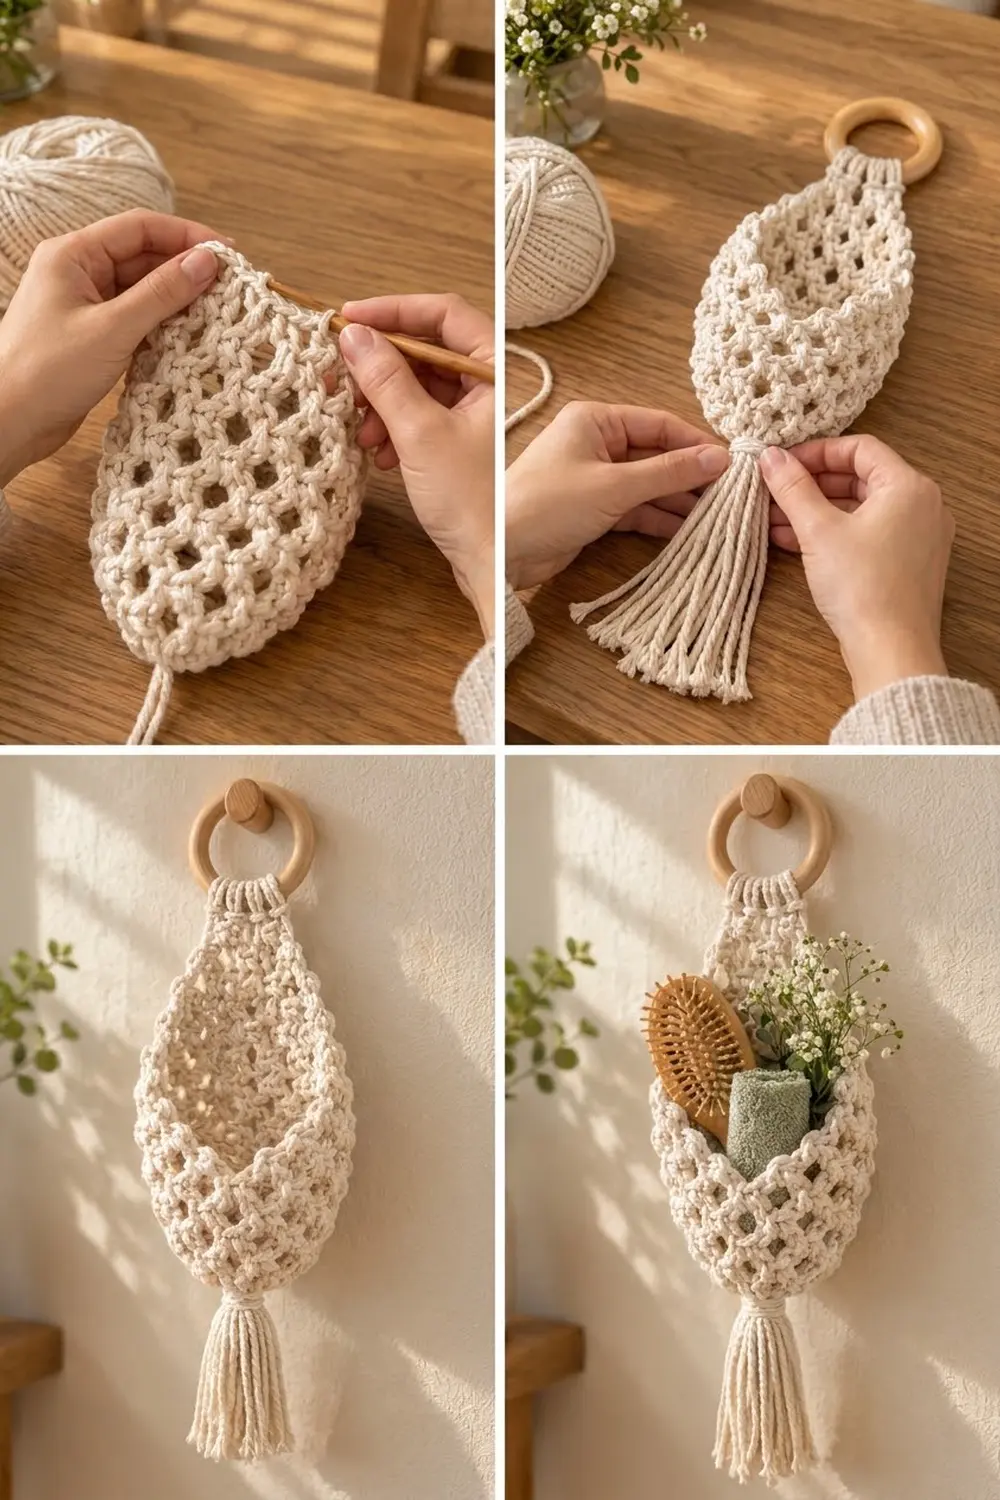
The Willow Drop is a teardrop-shaped wall pocket made in chunky cream cotton cord. It hangs from a natural wooden ring. Its open diamond mesh lets light and shadow through, a cord tassel finishes the point at the bottom, and the front scoops down so you can reach in easily. It’s a calm boho piece for a bathroom, entryway or plant shelf.
The pocket is one color, natural cream. Plain cord shows off the mesh texture and goes with wood, greenery and neutral linens. It holds rolled washcloths, a hairbrush, dried stems or a small trailing plant in a lightweight pot.
The pattern uses US crochet terms. The finished body is 7.2 in (18.3 cm) wide and 13.2 in (33.5 cm) tall, and the tassel adds 6 in (15.2 cm) below the point.
The pocket is one piece. You work a solid cone-shaped base in rounds, then mesh rounds for the pocket. The back half continues in rows that narrow into the teardrop top, ending in a solid tab that folds over the ring. A single sc edging firms up the opening, and the tassel goes on last.
Finished Size and Construction
- Finished size: 7.2 in (18.3 cm) wide × 13.2 in (33.5 cm) tall (body), plus 6 in (15.2 cm) tassel
- Overall length (body + tassel): 19.2 in (48.8 cm), not counting the ring
- Skill level: Easy / advanced beginner
- Terminology: US
- Yarn weight: 3 mm (1/8 in) cotton macramé cord, bulky (#5) equivalent
- Hook: 6 mm (US J-10)
- Number of pieces: 1 (worked in one continuous piece)
- Layout: single hanging pocket
- Piece size before edging: 7.2 in (18.3 cm) wide; pocket depth 8 in (20.3 cm)
- Border: 1 row of sc edging around the opening and back taper, 0.4 in (1.0 cm) deep. Pocket depth after edging is 8.4 in (21.3 cm).
Materials
Yarn: Use soft 3 mm cotton macramé cord, single-twist or braided. Braided cord holds the mesh shape best. Single-twist cord gives a fluffier tassel. Avoid stiff 3-ply rope, because it fights the hook in sc rounds.
- Cream / natural: about 180 g, 35 m (38.3 yd)
Quantities include a margin of about 25% for gauge differences and tassel trimming.
Tools:
– 6 mm (US J-10) crochet hook
– Wooden ring, 3 in (7.6 cm) outer diameter
– Stitch marker
– Large-eye tapestry needle (or a small latch tool for cord)
– Sharp scissors
– Measuring tape
– Spray bottle and rust-proof pins for blocking
Abbreviations (US Terms)
- ch: chain
- sc: single crochet
- sl st: slip stitch
- sk: skip
- st(s): stitch(es)
- sp: space
- rnd: round
- RS / WS: right side / wrong side
Special stitch: Mesh unit. One mesh unit is 1 sc plus the ch-3 loop after it. In the mesh section, each sc goes into the center of a ch-3 loop from the round or row below. This shifts each layer half a unit, which makes the diamond holes.
Gauge and Checkpoints
Solid gauge: 10 sc and 10 rnds = 4 in (10.2 cm), so 1 sc is 0.4 in (1.0 cm) wide and tall.
Mesh gauge: 1 mesh unit = 1.2 in (3.0 cm) wide. 1 mesh rnd or row = 0.8 in (2.0 cm) tall.
Use the base as your gauge swatch. Work Rnds 1–10, then measure before going on.
Checkpoints:
– After Rnd 10 (base): cone 4 in (10.2 cm) tall, 7.2 in (18.3 cm) across when flattened, 14.4 in (36.6 cm) around
– After Mesh Rnd 5: 8 in (20.3 cm) tall in total, still 7.2 in (18.3 cm) wide
– After Back Row 5: 12 in (30.5 cm) tall in total
– After the tab: 14.4 in (36.6 cm) unfolded, 13.2 in (33.5 cm) once folded over the ring
If your base is too big: go down to a 5.5 mm hook, or pull each sc snug.
If it’s too small: go up to a 6.5 mm hook.
Don’t add stitches to correct the size. The mesh needs exactly 36 sts so it divides into 12 units.
Base (Solid Cone)
Rounds are joined with a sl st. The beginning ch 1 never counts as a stitch. Place a marker in the first st of each rnd.
The base alternates increase rounds with plain rounds. That makes a gently pointed cone instead of a flat disc, which gives the rounded teardrop bottom.
Rnd 1: Make a magic ring. Ch 1, 6 sc in ring, join. (6 sts)
Rnd 2: Ch 1, 2 sc in each st around, join. (12 sts)
Rnd 3: Ch 1, sc in each st around, join. (12 sts)
Rnd 4: Ch 1, (sc in next st, 2 sc in next st) 6 times, join. (18 sts)
Rnd 5: Ch 1, sc in each st around, join. (18 sts)
Rnd 6: Ch 1, (sc in next 2 sts, 2 sc in next st) 6 times, join. (24 sts)
Rnd 7: Ch 1, sc in each st around, join. (24 sts)
Rnd 8: Ch 1, (sc in next 3 sts, 2 sc in next st) 6 times, join. (30 sts)
Rnd 9: Ch 1, sc in each st around, join. (30 sts)
Rnd 10: Ch 1, (sc in next 4 sts, 2 sc in next st) 6 times, join. (36 sts)
Pull the magic ring closed tightly and weave the tail up into the base. You’ll anchor the tassel there later.
Checkpoint: 4 in (10.2 cm) tall, 7.2 in (18.3 cm) across flat.
Pocket Body (Mesh Rounds)
Mesh Rnd 1 (conversion round): Ch 1, sc in first st, ch 3, sk next 2 sts, (sc in next st, ch 3, sk next 2 sts); repeat from * 10 more times. Join with sl st to first sc.
(12 sc + 12 ch-3 loops = 12 mesh units)
Each unit covers 3 base sts: 12 × 3 = 36.
Mesh Rnd 2: Sl st into first ch-3 sp, ch 1, sc in same sp, ch 3, (sc in next ch-3 sp, ch 3); repeat from * 10 more times. Join with sl st to first sc. (12 sc, 12 ch-3 loops)
Mesh Rnds 3–5: Repeat Mesh Rnd 2. (12 sc, 12 ch-3 loops each round)
The diamond holes appear from Rnd 2 on. Keep the ch-3 loops even. Uneven loops make lopsided diamonds.
Checkpoint: 8 in (20.3 cm) total height, 7.2 in (18.3 cm) wide flat (12 units ÷ 2 sides × 1.2 in = 7.2 in).
Lay the piece flat with the join at one side fold. The 6 loops on the side facing away from you become the back. The 6 loops facing you become the front opening.
Back Panel (Teardrop Taper in Rows)
Now work back and forth over the back 6 loops only. Each row works 1 sc into every loop of the row below, with ch 3 between them. So each row naturally has 1 fewer loop than the row before. That steady narrowing makes the teardrop curve.
Back Row 1 (RS): Sl st into next ch-3 sp, ch 1, sc in same sp, (ch 3, sc in next ch-3 sp) 5 times. Turn. (6 sc, 5 ch-3 loops)
This covers back loops 1–6. Front loops 7–12 stay unworked.
Back Row 2: Ch 1, sc in first ch-3 sp, (ch 3, sc in next ch-3 sp) 4 times. Turn. (5 sc, 4 loops)
Back Row 3: Ch 1, sc in first ch-3 sp, (ch 3, sc in next ch-3 sp) 3 times. Turn. (4 sc, 3 loops)
Back Row 4: Ch 1, sc in first ch-3 sp, (ch 3, sc in next ch-3 sp) 2 times. Turn. (3 sc, 2 loops)
Back Row 5: Ch 1, sc in first ch-3 sp, ch 3, sc in next ch-3 sp. Turn. (2 sc, 1 loop)
Checkpoint: 12 in (30.5 cm) total height. The top of Row 5 is about 1.2 in (3.0 cm) wide.
Hanging Tab
Tab Row 1: Ch 1, 4 sc in the single ch-3 sp. Turn. (4 sts)
Tab Rows 2–6: Ch 1, sc in each st across. Turn. (4 sts each row)
The tab is 1.6 in (4.1 cm) wide and 2.4 in (6.1 cm) long. Don’t fasten off yet. Leave about a 12 in (30.5 cm) tail when you finish.
Border (Opening Edging)
Border gauge: same as the solid gauge, 10 sc = 4 in (10.2 cm), or 0.4 in (1.0 cm) per sc.
Do the edging before folding the tab. Join new cord with a sl st at the base of the tab on the left side, where Tab Row 1 meets Back Row 5. Work one continuous edging row, RS facing:
- Left taper side: Work into the end sc of each back row, from Row 5 down to Row 1: 3 sc in the Row 5 end, 2 sc in each of the Row 4, 3 and 2 ends, and 3 sc in the Row 1 end. (12 sc)
- Front opening: 3 sc in each of the 6 unworked front ch-3 loops. (18 sc)
- Right taper side: Work up the row ends from Row 1 to Row 5: 3 sc in Row 1, 2 sc in each of Rows 2, 3 and 4, 3 sc in Row 5. (12 sc)
Sl st to the base of the tab and fasten off. Total: 12 + 18 + 12 = 42 sc.
Why the math works: The front has 6 mesh units × 1.2 in = 7.2 in (18.3 cm). At 0.4 in per sc, 18 sc = 7.2 in, which matches exactly, so the opening lies flat with no ruffling or puckering. Each taper row climbs 0.8 in (2.0 cm) and steps in 0.6 in (1.5 cm) per side, so each slanted row end is about 1 in (2.5 cm) long. Five rows make about 5 in (12.7 cm) of slant. The 12 sc measure 4.8 in (12.2 cm). That 0.2 in (0.5 cm) of ease firms the curve so the back stays upright.
Attaching the Ring
Fold the tab over the wooden ring toward the WS, so the tab’s last row lies against the base of Tab Row 1. Using the tail you left, whipstitch the 4 sts of the last row to the base of the tab. The folded tab is 1.2 in (3.0 cm) of doubled solid fabric. Weave in the end.
Checkpoint: 13.2 in (33.5 cm) from the bottom point to the top of the folded tab.
Tassel
- Cut 20 strands of cord, each 14 in (35.6 cm) long.
- Cut one more 12 in (30.5 cm) strand and tie it tightly around the middle of the bundle.
- Thread both ends of the tie up through the center of Rnd 1 at the bottom point into the inside of the pocket. Knot them securely around a stitch of Rnd 2 and trim.
- Let the strands drop down. You now have 40 tassel ends.
- Cut a 20 in (50.8 cm) wrapping strand. Wrap it tightly 6 times around the tassel, 1 in (2.5 cm) below the point, to make the collar. Tuck the ends up under the wraps with a needle.
- Comb the strands straight and trim them evenly to 6 in (15.2 cm) below the bottom point.
Final Blocking
- Mist the whole pocket lightly with water until it is damp, not soaked.
- Lay it flat on a blocking mat with the front facing up.
- Pin the width to 7.2 in (18.3 cm) across the mesh section.
- Pin the back taper into a smooth, even teardrop curve.
- Open each diamond gently with your fingertips so the holes match.
- Spray the tassel and comb it straight. Let it hang off the edge of the mat.
- Let it dry completely, then unpin. Hang it and let it settle for an hour before filling it.
Final Quality-Control Checklist
- Base is 36 sts around, with a smooth, centered point
- Every mesh round has exactly 12 sc and 12 ch-3 loops
- Back rows step down 5 → 4 → 3 → 2 → 1 loops
- Tab has 4 sts and is whipstitched securely around the ring
- Edging totals 42 sc (12 / 18 / 12) and lies flat
- Body measures 7.2 in (18.3 cm) × 13.2 in (33.5 cm)
- Tassel is 6 in (15.2 cm) long with a neat 6-wrap collar
- All ends are woven inside the pocket
Troubleshooting
Mesh is twisting around the tube: Make sure each round starts with a sl st into the first loop, not into the sc.
Diamonds look like slits: Your ch-3 loops are too tight. Loosen the chains slightly or go up half a hook size for the mesh only.
Front opening ruffles: You worked more than 3 sc per loop. Count 18 sc across the front.
Back flops forward: Recheck the taper-side edging counts (12 per side), and block the curve firmly.
Tassel pulls out: Re-anchor the tie through Rnd 1 and knot it around a Rnd 2 stitch on the inside.
Ring slides around in the tab: Fold the tab tighter and whipstitch through both layers.
Care
Spot clean, or hand wash in cool water, then reshape and dry flat. Comb the tassel straight while it’s damp.
Final Notes
The measurement chain is short and easy to check:
– The 36-st base is 4 in (10.2 cm) tall and 7.2 in (18.3 cm) wide.
– The 12 mesh units keep that width while five mesh rounds bring the pocket to 8 in (20.3 cm).
– Five tapering back rows add 4 in (10.2 cm), for 12 in (30.5 cm).
– The folded tab brings the body to 13.2 in (33.5 cm).
– The 42-sc edging matches the mesh width exactly, and the 6 in (15.2 cm) tassel makes a total of 19.2 in (48.8 cm).
Check each measurement as you reach it and the finished pocket will hang straight and even.
Happy crocheting!