

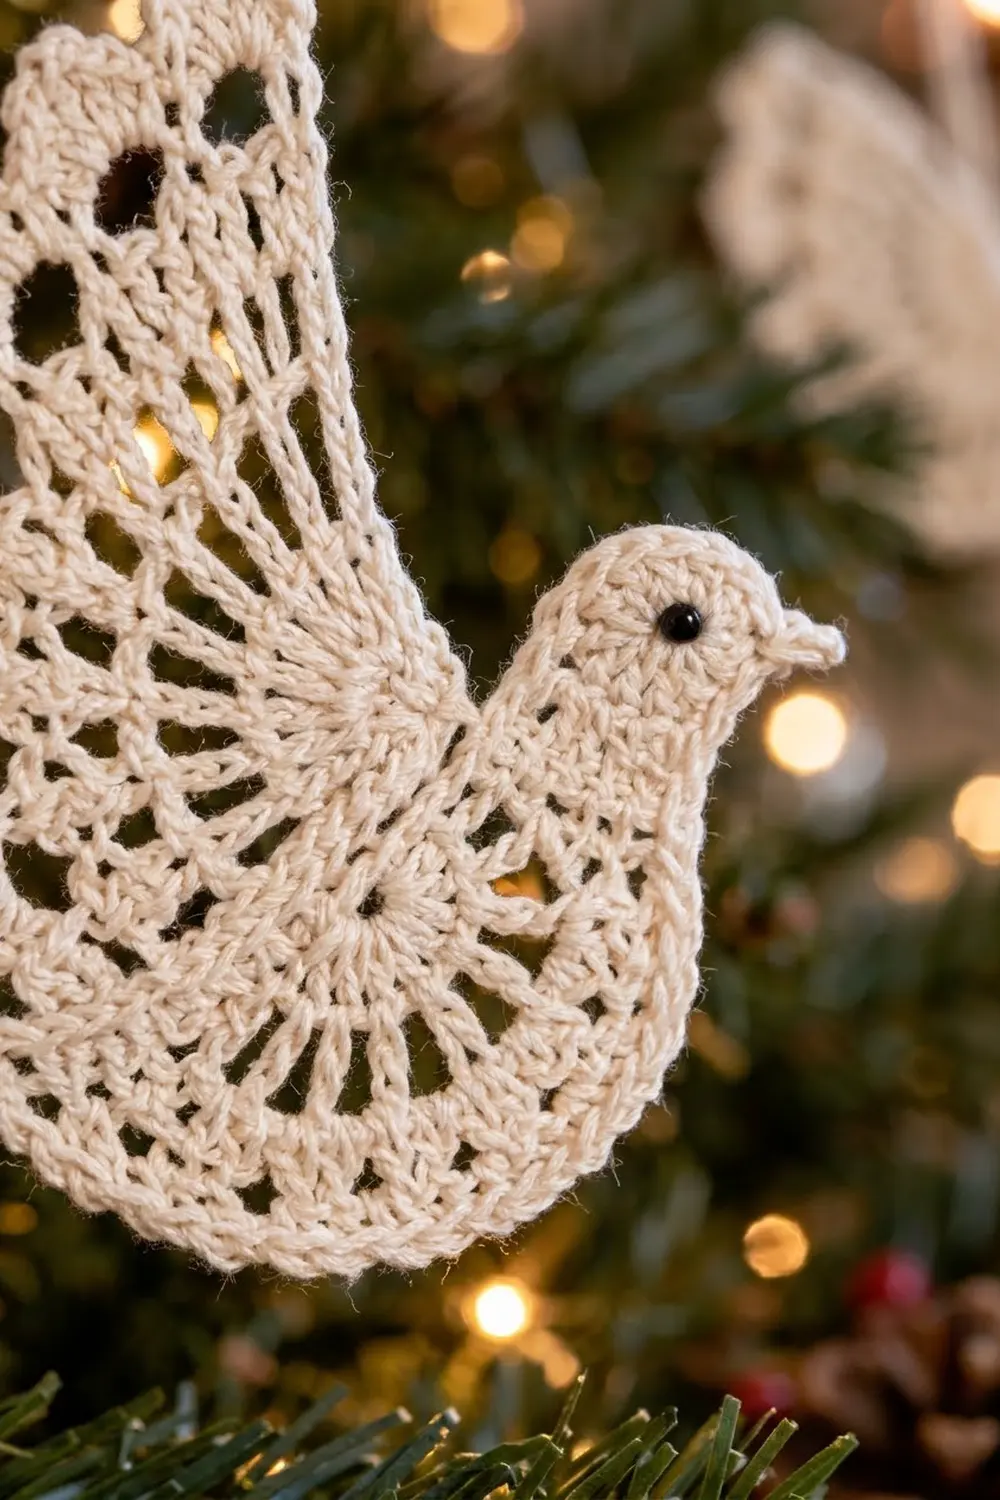
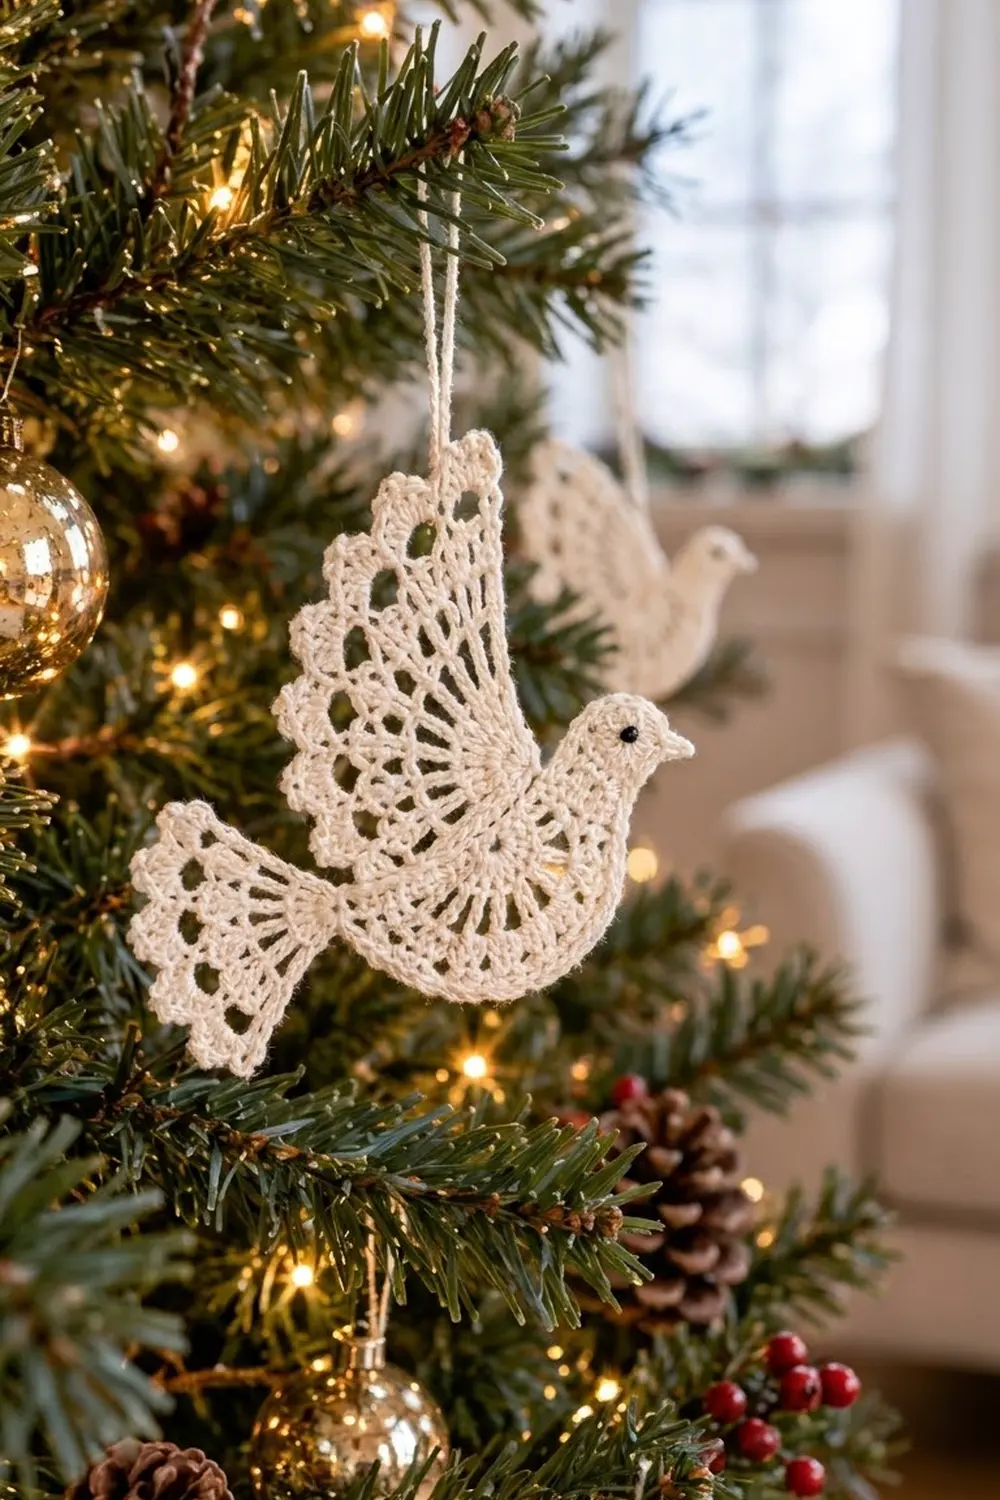
This lacy dove is a classic heirloom-style Christmas ornament worked in fine cotton thread. It has a fan-shaped body with a neat little head, an upright wing that spreads like an open fan, and a short scalloped tail. Every edge has small picot scallops, so the dove looks delicate on the tree and catches the light.
The whole dove uses one color: soft cream or ivory size 10 crochet thread. A French knot in black embroidery floss makes the eye. Plain cream looks calm and traditional, but white, pale gold, or silver metallic thread work just as well.
The pattern uses US crochet terms. The finished, blocked dove measures about 4.5 in (11.4 cm) from beak to tail tip and 3.25 in (8.3 cm) from the bottom of the body to the top of the wing.
You make three pieces in rows: a body (with the head worked straight onto it), a wing, and a tail. Each piece starts from a small ring and fans outward, then gets a scalloped border. You sew the pieces together, add a hanging loop, and stiffen the dove while blocking it.
Finished Size and Construction
- Finished size: 4.5 in (11.4 cm) wide x 3.25 in (8.3 cm) tall
- Skill level: Intermediate (fine thread, simple stitches)
- Terminology: US crochet terms
- Yarn weight: Size 10 crochet thread (Lace, weight 0)
- Hook: 1.75 mm steel hook
- Number of pieces: 3 (body with head, wing, tail)
- Layout: Wing on the front of the body, tail behind the back end of the body
- Piece sizes (after border): body 3 in (7.6 cm) wide x 1.5 in (3.8 cm) deep; wing 1.75 in (4.4 cm) long x 2 in (5.1 cm) wide; tail 1.25 in (3.2 cm) long x 1.5 in (3.8 cm) wide
- Size before border: body 2.5 in (6.4 cm) wide; wing 1.5 in (3.8 cm) long; tail 1 in (2.5 cm) long
- Border depth: 0.25 in (0.6 cm) on every piece
Materials
Use a mercerized cotton thread in size 10. Mercerized cotton gives crisp stitch definition, takes starch well, and doesn’t fuzz. Avoid acrylic thread, because it won’t hold a stiffened shape.
- Cream size 10 thread: 5 g, about 16 m (17.5 yd)
- Black embroidery floss: 1 g, about 0.3 m (12 in) for the eye
Tools:
- 1.75 mm steel crochet hook
- Fine tapestry needle (size 24 or 26)
- Small sharp scissors
- Fabric stiffener, or a starch solution
- Foam blocking board and rustproof pins
- Plastic wrap to cover the board
All quantities include a margin of about 20%, so there’s thread for a test piece or for taking out rows.
Abbreviations (US Terms)
- ch – chain
- sl st – slip stitch
- sc – single crochet
- sc2tog – single crochet 2 together
- hdc – half double crochet
- dc – double crochet
- sp – space
- st(s) – stitch(es)
Special stitch – picot: Ch 3, sl st in the 3rd ch from the hook.
Turning chains: A beginning ch-3 counts as 1 dc. A beginning ch-4 counts as 1 dc + ch 1, a ch-5 counts as 1 dc + ch 2, and a ch-6 counts as 1 dc + ch 3. A ch-1 at the start of a sc row doesn’t count as a stitch.
Gauge and Checkpoints
With fine thread, gauge controls the final size, so make the body first as your test piece.
Gauge: After Body Row 2, the straight edge measures 1 in (2.5 cm) across.
Checkpoints (laid flat, before blocking):
- Body after Row 2: 1 in (2.5 cm) across the straight edge
- Body after Row 4: 2 in (5.1 cm) across
- Body after Row 5: 2.5 in (6.4 cm) across
- Body after border: 3 in (7.6 cm) across, 1.5 in (3.8 cm) deep
- Wing after Row 6: 1.5 in (3.8 cm) from ring to arch tops
- Tail after Row 5: 1 in (2.5 cm) from ring to arch tops
Too big? Use a 1.5 mm hook, or tighten your dc by pulling the first loop down snugly.
Too small? Use a 2 mm hook. If you’re within 0.125 in (0.3 cm), keep going. Blocking will close a small gap.
Body
The body is a half circle. Its straight edge becomes the dove’s back line, and the curved edge is the belly.
Ch 4, sl st in the first ch to form a ring.
Row 1: Ch 3, 10 dc in the ring. Turn. (11 dc)
Row 2: Ch 3, dc in the same st, 2 dc in each of the next 9 dc, 2 dc in the top of the beginning ch-3. Turn. (22 dc)
Row 3: Ch 4, dc in the next dc, ch 1, dc in the next dc; repeat from * to the end. Turn. (22 dc, 21 ch-1 sps)
Row 4: Ch 5, dc in the next dc, ch 2, dc in the next dc; repeat from * to the end. Turn. (22 dc, 21 ch-2 sps)
These are the radiating spokes that give the body its fan look.
Row 5 (arches): Ch 1, sc in the first dc, ch 7, skip the next 2 dc, sc in the next dc; repeat from * 6 more times. The last sc lands in the last dc. Turn. (8 sc, 7 ch-7 loops)
Don’t fasten off. Work the Body Border now (see Border), then come back for the head.
Head
The head is worked straight onto one end of the body’s straight edge. That end becomes the front of the dove.
Hold the body with the straight edge on top. Join the thread at the row-end of Row 2, at the end you chose.
Row H1: Ch 1, 2 sc in the row-end of Row 2, 2 sc in the row-end of Row 3, 2 sc in the row-end of Row 4. Turn. (6 sc)
Row H2: Ch 1, 2 sc in the first st, sc in the next 4 sts, 2 sc in the last st. Turn. (8 sc)
Row H3: Ch 1, sc in each st across. Turn. (8 sc)
Row H4: Ch 1, sc2tog, sc in the next 4 sts, sc2tog. Turn. (6 sc)
Row H5: Ch 1, sc2tog, sc in the next 2 sts, sc2tog. (4 sc)
Row H5 ends at the outer end of the head, away from the body’s center.
Beak and head edge: Ch 4, sl st in the 2nd ch from the hook, sc in the next ch, hdc in the next ch, sl st in the same st as the last sc of Row H5. This makes a pointed beak. Then work 1 sc in each row-end of Rows H4, H3, H2, and H1 down the outer side (4 sc), and sl st into the body edge. Fasten off.
Eye: With black floss, make a French knot with 2 wraps on Row H3, 2 sts in from the beak side. Work the same knot on the back so the dove looks finished from both sides.
Wing
The wing is a narrower fan with one more row, so it looks long and upright.
Ch 4, sl st in the first ch to form a ring.
Row 1: Ch 3, 6 dc in the ring. Turn. (7 dc)
Row 2: Ch 3, dc in the same st, 2 dc in each of the next 5 dc, dc in the top of the beginning ch-3. Turn. (13 dc)
Row 3: Ch 4, dc in the next dc, ch 1, dc in the next dc; repeat from * to the end. Turn. (13 dc, 12 ch-1 sps)
Row 4: Ch 5, dc in the next dc, ch 2, dc in the next dc; repeat from * to the end. Turn. (13 dc, 12 ch-2 sps)
Row 5: Ch 6, dc in the next dc, ch 3, dc in the next dc; repeat from * to the end. Turn. (13 dc, 12 ch-3 sps)
Row 6 (arches): Ch 1, sc in the first dc, ch 7, skip the next dc, sc in the next dc; repeat from * 5 more times. Turn. (7 sc, 6 ch-7 loops)
Don’t fasten off. Work the Wing Border.
Tail
Ch 4, sl st in the first ch to form a ring.
Row 1: Ch 3, 4 dc in the ring. Turn. (5 dc)
Row 2: Ch 3, dc in the same st, 2 dc in each of the next 3 dc, dc in the top of the beginning ch-3. Turn. (9 dc)
Row 3: Ch 4, dc in the next dc, ch 1, dc in the next dc; repeat from * to the end. Turn. (9 dc, 8 ch-1 sps)
Row 4: Ch 5, dc in the next dc, ch 2, dc in the next dc; repeat from * to the end. Turn. (9 dc, 8 ch-2 sps)
Row 5 (arches): Ch 1, sc in the first dc, ch 5, skip the next dc, sc in the next dc; repeat from * 3 more times. Turn. (5 sc, 4 ch-5 loops)
Don’t fasten off. Work the Tail Border.
Make All Pieces
Each dove needs one of each piece, all in cream:
- Body with head: 1 piece, about 2.5 g / 8 m
- Wing: 1 piece, about 1.5 g / 5 m
- Tail: 1 piece, about 1 g / 3 m
Layout (front view):
              [  WING  ]
               \  fan /
[HEAD+BEAK]----[ BODY ]----[TAIL]
               \_____/
The wing’s ring sits over the body’s ring at the middle of the straight edge. The tail’s ring sits behind the body’s back end.
Joining
Use the leftover thread tails and a tapestry needle to whip stitch the pieces together, working through one layer only so the stitches don’t show on the front.
Wing to body: Place the wing on the front of the body, with the wing’s ring right over the body’s ring. Tilt the wing about 20 degrees toward the tail. The lower 0.5 in (1.3 cm) of the wing overlaps the body. Sew around the wing ring and up the row-ends of Rows 1 and 2 on both sides, making 1 whip stitch per row-end into the body stitch directly below it. That’s about 8 stitches in all.
Tail to body: Place the tail behind the body’s back end. The tail’s ring and Rows 1 and 2 overlap the back of the body’s Rows 4 and 5 by 0.25 in (0.6 cm). Point the fan outward and slightly down. Make 1 whip stitch per tail row-end into the matching body stitch, about 6 stitches.
Tension: Pull each stitch just snug enough to close the gap. If you pull harder, the lace will pucker.
Hanging loop: Cut 8 in (20.3 cm) of cream thread. Thread it through the picot at the wing’s back top corner, knot the ends together, and trim.
Size checkpoint: The assembled dove should measure about 4.5 in (11.4 cm) x 3.25 in (8.3 cm) before blocking.
Border
Work the border on the curved edge of each piece, right after that piece’s arch row. The straight edges stay plain, because they get covered or sewn when you join.
Border gauge: One scallop adds 0.25 in (0.6 cm) of depth. Each scallop is about 0.4 in (1 cm) wide.
Body Border: Ch 1, sl st in the first sc. In the next ch-7 loop work (sc, hdc, 3 dc, picot, 3 dc, hdc, sc), sl st in the next sc; repeat from * 6 more times. Fasten off. (7 scallops: 70 sts + 7 picots)
Wing Border: Ch 1, sl st in the first sc. In the next ch-7 loop work (sc, hdc, 3 dc, picot, 3 dc, hdc, sc), sl st in the next sc; repeat from * 5 more times. Fasten off, leaving a 10 in (25.4 cm) tail for sewing. (6 scallops: 60 sts + 6 picots)
Tail Border: Ch 1, sl st in the first sc. In the next ch-5 loop work (sc, hdc, 2 dc, picot, 2 dc, hdc, sc), sl st in the next sc; repeat from * 3 more times. Fasten off, leaving a 10 in (25.4 cm) tail. (4 scallops: 32 sts + 4 picots)
Why the math works: Each ch-7 loop holds 10 stitches, and each ch-5 loop holds 8, about 1.4 to 1.6 stitches per chain. That’s enough to round each loop into a full scallop without making it ruffle. The arches line up with the spokes: the body’s arches each skip 2 dc, and the wing’s and tail’s arches each skip 1 dc. So each scallop count equals (dc count − 1) ÷ the arch step: (22 − 1) ÷ 3 = 7, (13 − 1) ÷ 2 = 6, and (9 − 1) ÷ 2 = 4.
Final Blocking
- Weave in all the thread tails except the hanging loop.
- Soak the dove in fabric stiffener, or in a starch solution for a softer finish.
- Squeeze out the extra liquid in a towel. Don’t wring the dove.
- Cover the blocking board with plastic wrap and lay the dove flat, front side up.
- Pin the body to 3 in (7.6 cm) across, with the curve smooth.
- Pin the wing so it’s 1.75 in (4.4 cm) long and fanned to 2 in (5.1 cm) across the top.
- Pin the tail out to 1.5 in (3.8 cm) across.
- Pin every picot point and open each chain space with a pin tip.
- Check the full size: 4.5 in (11.4 cm) x 3.25 in (8.3 cm).
- Let it dry completely, 12 to 24 hours, before you unpin it.
Final Quality-Control Checklist
- Body has 7 scallops, wing has 6, tail has 4
- Every scallop has one centered picot
- Spokes are evenly spaced and the fans lie flat
- Beak is pointed and the eye is visible from both sides
- Wing sits over the body center, tilted toward the tail
- Tail is tucked behind and doesn’t show any seam from the front
- No visible thread ends
- Hanging loop is secure and the dove hangs level
- Finished size is 4.5 in (11.4 cm) x 3.25 in (8.3 cm)
Troubleshooting
The fan cups or curls: Your dc are tighter than your chains. Loosen your chain stitches, or go up a hook size for the spoke rows.
The fan ruffles: Your chains are too loose. Tighten them, or use ch 6 instead of ch 7 for the arches.
The arch count comes out wrong: Recount the dc in the last spoke row. The turning chain counts as the first dc.
The head leans: Make sure Row H1 has exactly 2 sc in each of the 3 row-ends.
The dove tilts when hung: Move the hanging loop one picot forward or back until the dove hangs level.
Care
Dust the dove gently, or spot clean it with a damp cloth. If it softens, re-stiffen it and re-block it. Store it flat between tissue paper.
Final Notes
The measurement chain is simple. If Body Row 2 measures 1 in (2.5 cm), the body grows to 2.5 in (6.4 cm), then to 3 in (7.6 cm) with its border. The wing reaches 1.75 in (4.4 cm) and the tail 1.25 in (3.2 cm). Joined and blocked, the dove measures 4.5 in (11.4 cm) x 3.25 in (8.3 cm). Check that first row, and every piece after it will fit.
Happy crocheting!