

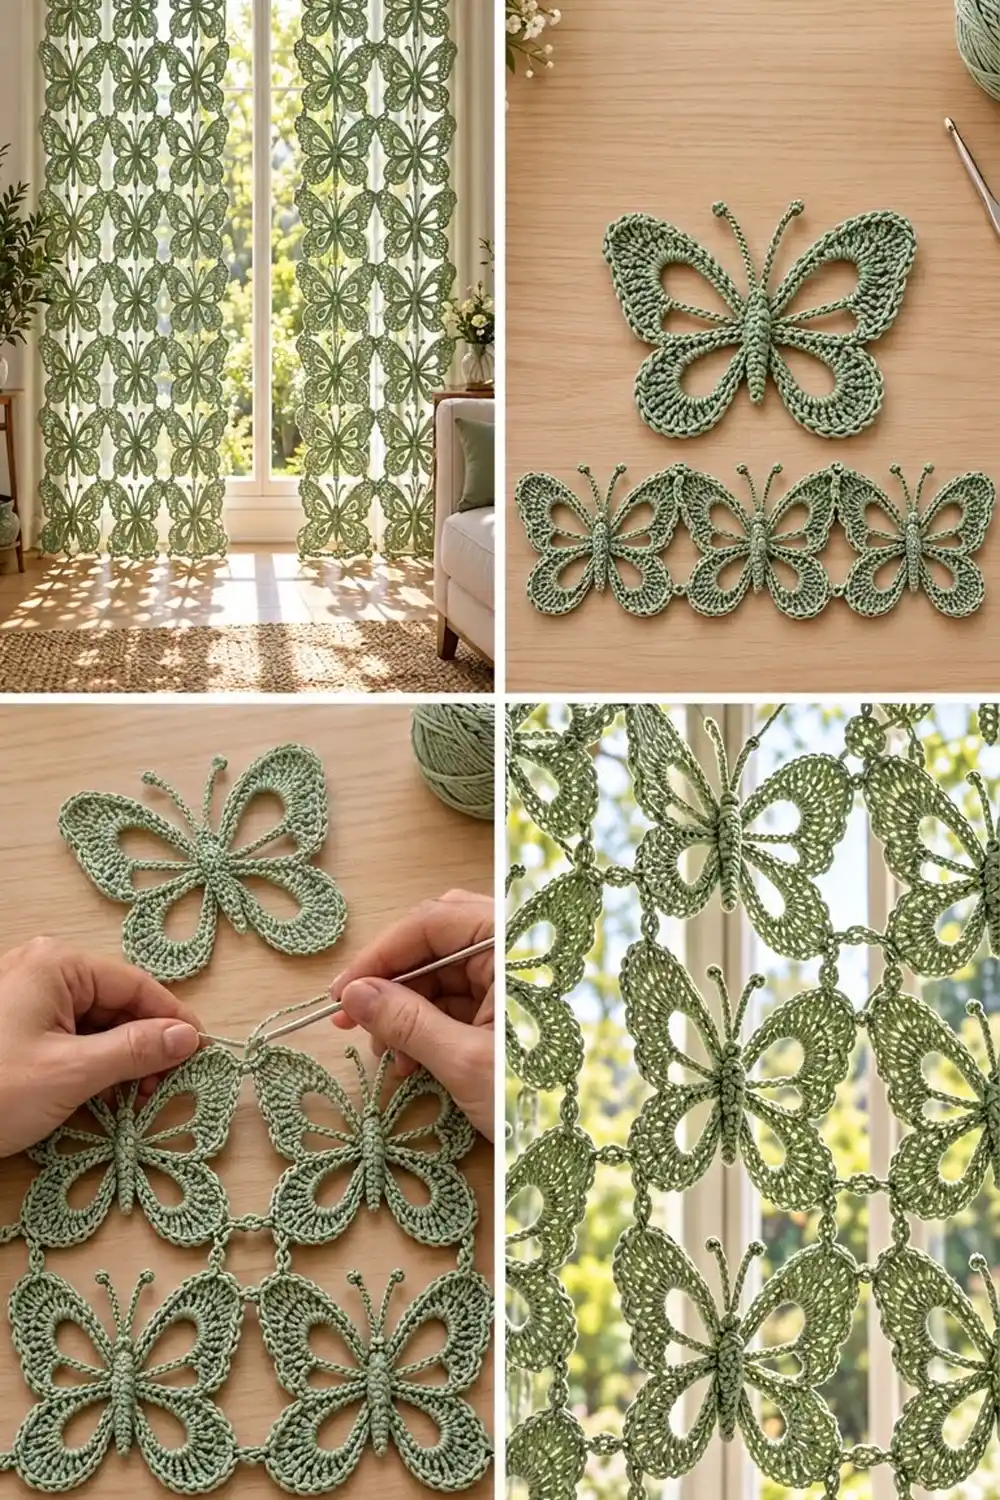
This curtain is made from rows of open-winged butterflies in one soft sage green. Each butterfly has four wings with open windows, a raised body down the center, and two curled antennae with tiny knotted tips. Hung in a window, the open wings let light through and throw butterfly shadows across the floor.
The look is airy and botanical. It’s a calm cottage style that suits a bright living room, sunroom, or bedroom window. Everything is worked in a single color, so the stitch texture does the work.
The pattern uses US crochet terms. Each finished panel measures 22 in (55.9 cm) wide and 54.5 in (138.4 cm) long to the top of the heading, plus 1.75 in (4.4 cm) rod tabs. The pattern makes two panels, 44 in (111.8 cm) wide combined.
Construction is join-as-you-go. For each butterfly, you work a wing frame from a center ring and fill the four chain loops with graduated stitches. Then you add a single crochet edging with joining picots that link each motif to its neighbors. A separate raised body and two antennae are sewn on. A short heading with tab loops finishes the top edge.
Finished Size and Construction
- Finished panel size: 22 in (55.9 cm) wide x 54.5 in (138.4 cm) long, plus 1.75 in (4.4 cm) tabs
- Skill level: Intermediate
- Terminology: US
- Yarn weight: DK (3), cotton or cotton blend
- Hook: 4.0 mm (G-6)
- Number of pieces: 54 butterflies (27 per panel), plus 54 bodies
- Layout: each panel is 3 butterflies wide x 9 butterflies tall
- Single butterfly: 7 in (17.8 cm) wide x 5.5 in (14.0 cm) tall
- Connector gap: 0.5 in (1.3 cm) between motifs
- Panel size before heading: 22 in (55.9 cm) x 53.5 in (135.9 cm)
- Heading depth: 1 in (2.5 cm), plus 1.75 in (4.4 cm) tabs
Materials
Choose a smooth mercerized or combed cotton in DK weight. Cotton holds the wing shapes, blocks crisply, and doesn’t stretch much when hanging. Avoid fuzzy yarns, which blur the open windows.
- Sage green: 400 g, about 904 m (989 yd), based on 50 g / 113 m (124 yd) balls (8 balls)
Each butterfly uses about 5 g. The heading uses about 15 g per panel. These quantities include a generous margin for your gauge swatch and dye-lot safety, so buy all your yarn at once.
Tools:
- 4.0 mm (G-6) crochet hook
- Tapestry needle
- Locking stitch markers
- Scissors and tape measure
- Blocking mats, rust-proof pins, and a spray bottle
- Curtain rod up to 1 in (2.5 cm) in diameter
Abbreviations (US Terms)
- ch – chain
- sl st – slip stitch
- sc – single crochet
- hdc – half double crochet
- dc – double crochet
- tr – treble crochet
- yo – yarn over
- sp – space
- st(s) – stitch(es)
- rep – repeat
- FLO – front loop only
- RS – right side
Special stitches:
- Joining picot (jp), free: ch 5, sl st in last sc made.
- Joining picot (jp), when joining: ch 2, sl st in the matching ch-5 picot of the finished neighbor, ch 2, sl st in last sc made.
- Hdc cluster (hdc-cl): [yo, insert hook, yo, pull up a loop] 3 times in same st, yo, pull through all 7 loops on hook.
Gauge and Checkpoints
Gauge: 18 sc = 4 in (10.2 cm) with a 4.0 mm hook.
Make one complete butterfly before you start the curtain. Block it lightly and measure.
- After Rnd 3: about 6.5 in (16.5 cm) wide and 5 in (12.7 cm) tall
- After Rnd 4: 7 in (17.8 cm) wide and 5.5 in (14.0 cm) tall, not counting picots
- Body: about 2.25 in (5.7 cm) long and 0.6 in (1.5 cm) wide
If your butterfly is larger than 7 in (17.8 cm), go down a hook size. If it’s smaller, go up a hook size. If the wing edges ruffle, your edging is too loose, so use a smaller hook for Rnd 4 only. If the wings cup, your chain loops are too tight, so chain more loosely in Rnd 2.
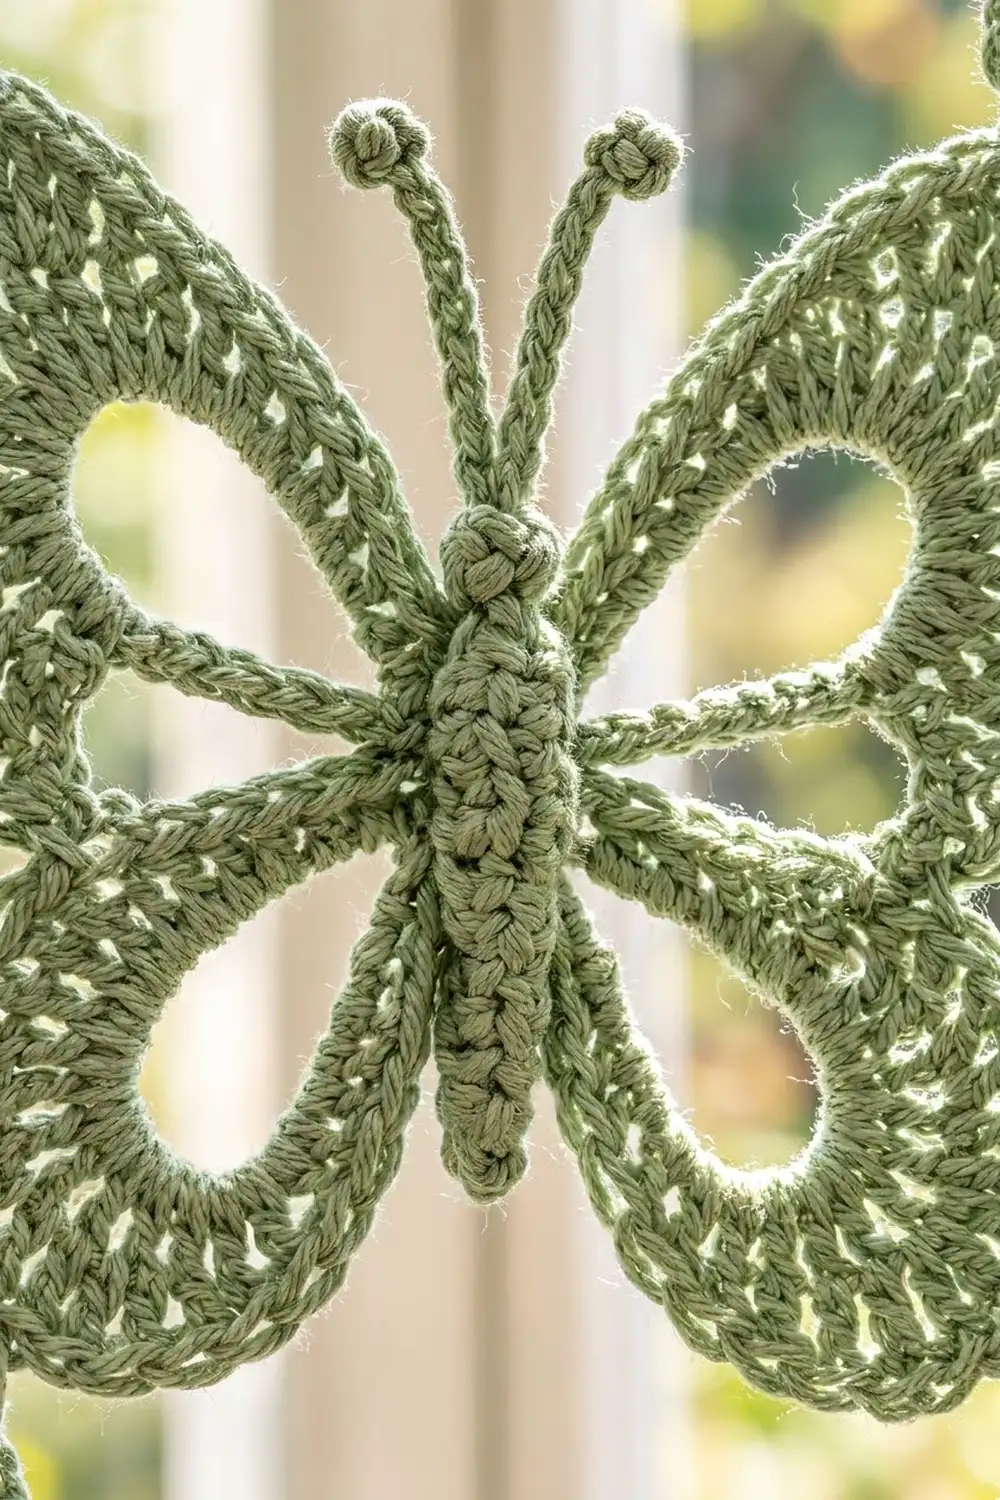
Butterfly Motif
The wing frame starts from a center ring, and four chain loops become the wing windows.
Rnd 1: Ch 6, sl st in first ch to form a ring.
Rnd 2 (wing loops): Ch 1, 2 sc in ring (top spacer), ch 26 (upper-right loop), 2 sc in ring (right spacer), ch 20 (lower-right loop), 2 sc in ring (bottom spacer), ch 20 (lower-left loop), 2 sc in ring (left spacer), ch 26 (upper-left loop), sl st in first sc to join. (8 sc and 4 loops)
Keep the loops untwisted and flat as you go.
Rnd 3 (wing fill): Sl st in next sc.
- Upper-right wing, in ch-26 loop: 2 sc, 3 hdc, 5 dc, 12 tr, 5 dc, 3 hdc, 2 sc. (32 sts)
- Sl st in each of next 2 sc.
- Lower-right wing, in ch-20 loop: 2 sc, 3 hdc, 14 dc, 3 hdc, 2 sc. (24 sts)
- Sl st in each of next 2 sc.
- Lower-left wing: work as lower-right wing. (24 sts)
- Sl st in each of next 2 sc.
- Upper-left wing: work as upper-right wing. (32 sts)
- Sl st in first sc of Rnd 2 to join.
Round total: 112 wing sts (32 + 24 + 24 + 32), plus 8 spacer sl sts. Every stitch is worked around the chain, so the chain stays as the inner outline. Each wing keeps an open window, and the tall stitches fan outward.
Rnd 4 (edging with joining picots): Sl st in next sl st, ch 1.
- Upper-right wing: sc in next 10 sts, [sc in next tr, 2 sc in next tr] 6 times, working a jp after the 2nd and 4th repeats, sc in next 10 sts. (38 sc, 2 jp)
- Sl st in each of next 2 sl sts.
- Lower-right wing: sc in next 5 sts, [sc in next dc, 2 sc in next dc] 7 times, working a jp after the 2nd and 5th repeats, sc in next 5 sts. (31 sc, 2 jp)
- Sl st in each of next 2 sl sts.
- Lower-left wing: work as lower-right wing. (31 sc, 2 jp)
- Sl st in each of next 2 sl sts.
- Upper-left wing: work as upper-right wing. (38 sc, 2 jp)
- Sl st in next sl st to join. Fasten off.
Round total: 138 sc (38 + 31 + 31 + 38) and 8 joining picots.
Picot names (used for joining):
- Upper-right wing: the first jp is the top picot and the second is the side picot.
- Lower-right wing: the first jp is the side picot and the second is the bottom picot.
- Left wings: the order is mirrored. On the lower-left wing it’s bottom, then side. On the upper-left wing it’s side, then top.
Body and Antennae
Body: Ch 11.
Rnd 1: Sc in 2nd ch from hook (head end), sc in next 8 ch, 3 sc in last ch (tail end). Working along the other side of the chain, sc in next 8 ch, 2 sc in same ch as first sc, sl st in first sc. (22 sc: 1 + 8 + 3 + 8 + 2)
Rnd 2: Sl st loosely in FLO of each st around. (22 sl sts) Fasten off, leaving a 20 in (50.8 cm) tail.
Wrap the tail firmly around the body 4 times, evenly spaced, to make the segmented look. Keep the rest of the tail for sewing.
Antennae (make 2 directly on the body): Join yarn at the head end. Ch 14, hdc-cl in 3rd ch from hook, sl st in each of the remaining 11 ch, sl st in the head. Rep once for the second antenna, then fasten off. Each antenna is about 1.25 in (3.2 cm) long. Curl them gently outward with your fingers.
Attach: Center the body vertically over the ring, with the head between the upper wings. Sew around the edge with the tail so the body sits raised over the ring.
Make All Pieces
- Butterflies: 54 in sage green (27 per panel)
- Bodies with antennae: 54 in sage green
Make the bodies in batches, and sew each one on as its butterfly is joined. Each panel uses this layout, worked from the top row down, left to right:
Row 1:  B1  - B2  - B3
Row 2:  B4  - B5  - B6
Row 3:  B7  - B8  - B9
 ...
Row 9:  B25 - B26 - B27
Joining
All joins happen in Rnd 4 using the joining picot. Rnds 1 to 3 are the same for every butterfly.
Stitch-to-stitch logic:
- Side by side: the upper-left side picot joins to the left neighbor’s upper-right side picot. The lower-left side picot joins to that neighbor’s lower-right side picot. (2 connections)
- Above and below: the upper-right top picot joins to the lower-right bottom picot of the butterfly directly above. The upper-left top picot joins to that butterfly’s lower-left bottom picot. (2 connections)
- Free picots: any picot with no neighbor is worked as a plain ch-5 picot.
B1 has no joins. B2 and B3 each join on one side only. B4 joins above only. Interior butterflies join 4 picots to finished neighbors as they’re made.
Tension: keep the ch-2 sections the same size every time. Each finished connector should span 0.5 in (1.3 cm). Tighter connectors pull the panel narrow, and looser ones make it sag.
Checkpoint: after Row 1, the strip measures 22 in (55.9 cm): 3 x 7 in (17.8 cm) plus 2 gaps of 0.5 in (1.3 cm). Before the heading, the finished panel measures 53.5 in (135.9 cm) tall: 9 x 5.5 in (14.0 cm) plus 8 gaps.
Border (Heading and Rod Tabs)
The heading goes along the top edge only. The sides and bottom stay as open butterfly scallops, which keeps the panel airy.
Heading gauge: 18 sts = 4 in (10.2 cm), the same as the motif gauge.
Row 1 (RS): With RS facing, join yarn with sc in the upper-left side picot of B1. Work this unit across B1:
- Ch 7, sc in upper-left top picot, ch 14, sc in upper-right top picot, ch 7, sc in upper-right side picot.
Each unit is 32 sts (1 + 7 + 1 + 14 + 1 + 7 + 1). Ch 2 to bridge the connector gap, then sc in the upper-left side picot of B2. Work the unit across B2, ch 2, then work the unit across B3. Row total: 3 x 32 = 96, plus 2 bridges of 2 ch = 4, for 100 sts.
Row 2: Ch 2 (doesn’t count as a st), turn, hdc in each sc and each ch across. (100 hdc)
Row 3: Ch 1, turn, sc in each st across. (100 sc)
Row 4 (tabs): Ch 1, turn, sc in first 2 sts, *ch 16, sl st in last sc made (tab made), sc in next 16 sts; rep from * 5 more times, ch 16, sl st in last sc made, sc in last 2 sts. Fasten off. (100 sc and 7 tabs)
Why the math works: each butterfly gives exactly 32 sts, and the only extras are the 2 seam bridges, which are already in the count. At 4.5 sts per inch, 100 sts measures 22.2 in (56.4 cm). That’s within a few stitches of the 22 in (55.9 cm) panel, so the heading sits flat without pulling on the wings. In Row 4, the tabs sit 2 sts from each end with 16 sts between them: 2 + (6 x 16) + 2 = 100. That puts a tab every 3.6 in (9.1 cm).
Final Blocking
- Weave in all ends along the back of the wing edging, never across the open windows.
- Soak the panel in cool water for 15 minutes. Press out the water gently in a towel; don’t wring it.
- Lay the panel flat on blocking mats. Pin the heading straight first, at 22 in (55.9 cm) wide.
- Pin down each column, keeping every connector open to 0.5 in (1.3 cm).
- Pin the outer curve of each wing, opening each window into a smooth teardrop.
- Shape the antennae into outward curls.
- Let the panel dry completely, at least 24 hours, before unpinning.
If your mats are smaller than the panel, block it in sections and let each section dry before moving on.
Final Quality-Control Checklist
- Each butterfly measures 7 in (17.8 cm) x 5.5 in (14.0 cm).
- Every wing has a clear, open window.
- All interior picots are joined, and no connector is missing or twisted.
- Every body is centered, with the antennae pointing up.
- The panel measures 22 in (55.9 cm) x 54.5 in (138.4 cm) to the top of the heading.
- Row 4 has 7 evenly spaced tabs.
- All ends are woven in securely.
Troubleshooting
- Wings ruffle: the edging is too loose. Use a smaller hook for Rnd 4.
- Wings cup or curl: the Rnd 2 chains are too tight. Chain more loosely, or go up a hook size for Rnd 2 only.
- Windows close up: the stitches are crowded on the loop. Spread them evenly along the chain before moving on.
- Panel leans to one side: connector tension is uneven. Check that every ch-2 section is the same size.
- Heading ripples: the Row 1 chains are too long for your gauge. Change the ch-14 spans to ch-13.
- Body slides off center: sew it to the ring at both ends before stitching the sides.
Care
Hand wash in cool water with a mild detergent and dry flat. If the wings lose their shape after washing, block them again lightly.
Final Notes
The measurement chain is simple. An 18-sc gauge gives a 7 in (17.8 cm) x 5.5 in (14.0 cm) butterfly. Three butterflies plus two 0.5 in (1.3 cm) connectors make the 22 in (55.9 cm) width. Nine rows give 53.5 in (135.9 cm), and the heading brings each panel to 54.5 in (138.4 cm). Check each stage before moving on, and your panels will hang straight and even.
Happy crocheting!